
Owners Manual
Page 3
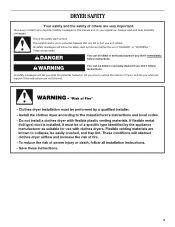
... You can happen if the instructions are very important. All safety messages will follow the safety alert symbol and either the word "DANGER" or "WARNING." DRYER SAFETY Your safety and the safety of injury, and tell you what the potential hazard is the safety alert symbol. All safety messages will tell...
... You can happen if the instructions are very important. All safety messages will follow the safety alert symbol and either the word "DANGER" or "WARNING." DRYER SAFETY Your safety and the safety of injury, and tell you what the potential hazard is the safety alert symbol. All safety messages will tell...
Owners Manual
Page 4
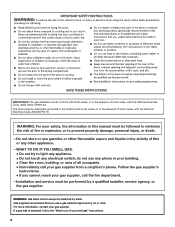
... electrically grounded in accordance with local codes, or in the absence of local codes, with the National Fuel Gas Code, ANSI Z223.1/NFPA 54. The dryer must be performed by UL or CSA. do if you cannot reach your gas supplier. If a gas leak is detected, follow the "What to do...
... electrically grounded in accordance with local codes, or in the absence of local codes, with the National Fuel Gas Code, ANSI Z223.1/NFPA 54. The dryer must be performed by UL or CSA. do if you cannot reach your gas supplier. If a gas leak is detected, follow the "What to do...

Owners Manual
Page 5
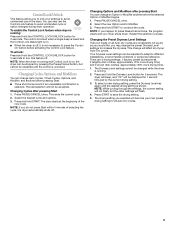
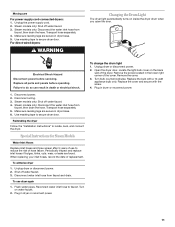
... in death or fire. 5 Items containing foam, rubber, or plastic must not exceed 3 feet. Do not dry anything flammable on it (including cooking oils). WARNING DRYER USE WARNING Explosion Hazard Keep flammable materials and vapors, such as gasoline, away from...
... in death or fire. 5 Items containing foam, rubber, or plastic must not exceed 3 feet. Do not dry anything flammable on it (including cooking oils). WARNING DRYER USE WARNING Explosion Hazard Keep flammable materials and vapors, such as gasoline, away from...

Owners Manual
Page 7
...needed . For best results, do not interrupt cycle. default time) which can change the actual time in the dryer too long. For best results, do not overload the dryer. ■ The Refresh Cycle time is selected, the Estimated Time Remaining display shows the actual time remaining in ... Touch Up Cycle (20 min. See Automatic Preset or Manual Preset Cycle Settings chart. Tips for Getting the Best Performance from Your Steam Dryer ■ Results may vary depending on fabric. 100% cotton garments with wrinkle-free finish may yield better results than those without. 100%...
...needed . For best results, do not interrupt cycle. default time) which can change the actual time in the dryer too long. For best results, do not overload the dryer. ■ The Refresh Cycle time is selected, the Estimated Time Remaining display shows the actual time remaining in ... Touch Up Cycle (20 min. See Automatic Preset or Manual Preset Cycle Settings chart. Tips for Getting the Best Performance from Your Steam Dryer ■ Results may vary depending on fabric. 100% cotton garments with wrinkle-free finish may yield better results than those without. 100%...

Owners Manual
Page 8
...Air Only ■ Check that coverings are securely stitched. ■ Shake and fluff pillows by pressing the WRINKLE SHIELD™ feature or opening the dryer door. ■ For the Casual Cycle, the WRINKLE SHIELD™ feature is useful when drying bedsheets/linens in a mixed load. NOTE: Automatic...temperature settings can be emitted every 5 minutes until pressed again, the door is opened and closed, or the door is sprayed into the dryer drum after several minutes of a cycle. WRINKLE SHIELD™ Feature When you that can be adjusted for the Enhanced Touch Up Cycle. ...
...Air Only ■ Check that coverings are securely stitched. ■ Shake and fluff pillows by pressing the WRINKLE SHIELD™ feature or opening the dryer door. ■ For the Casual Cycle, the WRINKLE SHIELD™ feature is useful when drying bedsheets/linens in a mixed load. NOTE: Automatic...temperature settings can be emitted every 5 minutes until pressed again, the door is opened and closed, or the door is sprayed into the dryer drum after several minutes of a cycle. WRINKLE SHIELD™ Feature When you that can be adjusted for the Enhanced Touch Up Cycle. ...
Owners Manual
Page 9
...■ Three short tones sound if an unavailable combination is running . 2. Your Dryness Level settings can also use of selecting the cycle, the dryer automatically shuts off . Press START to save the drying setting. 5. Press and hold START. Select the desired cycle and options. 3. The Dryness ...your new preset drying setting for all of the new cycle. Changing the Preset Dryness Level Settings If all your loads on , the dryer can be accepted. Restart the selection process. The drying setting you selected will affect all Auto Dry cycles. 9 To enable the ...
...■ Three short tones sound if an unavailable combination is running . 2. Your Dryness Level settings can also use of selecting the cycle, the dryer automatically shuts off . Press START to save the drying setting. 5. Press and hold START. Select the desired cycle and options. 3. The Dryness ...your new preset drying setting for all of the new cycle. Changing the Preset Dryness Level Settings If all your loads on , the dryer can be accepted. Restart the selection process. The drying setting you selected will affect all Auto Dry cycles. 9 To enable the ...
Owners Manual
Page 10
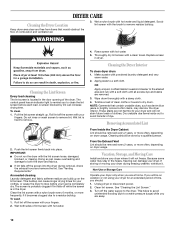
... can increase drying time. The control panel has an indicator light to remind you are not harmful to clean the lint screen before your dryer and will not freeze. As needed cleaning Laundry detergent and fabric softener residue can cause overheating and damage to a residue buildup. Tumble a...so can build up . NOTE: Garments that would obstruct the flow of lint screen with hot water. 5. Removing Accumulated Lint From Inside the Dryer Cabinet Lint should : 1. See "Venting Requirements." From the Exhaust Vent Lint should be removed every 2 years, or more frequently, if it ...
... can increase drying time. The control panel has an indicator light to remind you are not harmful to clean the lint screen before your dryer and will not freeze. As needed cleaning Laundry detergent and fabric softener residue can cause overheating and damage to a residue buildup. Tumble a...so can build up . NOTE: Garments that would obstruct the flow of lint screen with hot water. 5. Removing Accumulated Lint From Inside the Dryer Cabinet Lint should : 1. See "Venting Requirements." From the Exhaust Vent Lint should be removed every 2 years, or more frequently, if it ...
Owners Manual
Page 11
...Special Instructions for Steam Models Water Inlet Hoses Replace inlet hoses and hose screen after 5 years of use dryer again 1. Unplug dryer or disconnect power. 2. Plug in dryer or reconnect power. 11 Replace all parts and panels before servicing. Steam models only: Disconnect the water inlet... hose. To use to locate, level, and connect the dryer. For direct-wired dryers: WARNING Changing the Drum Light The dryer light automatically turns on water faucet. 2. Transport hose separately. 5. Turn on inside the dryer drum when you open the door. Unplug the power supply...
...Special Instructions for Steam Models Water Inlet Hoses Replace inlet hoses and hose screen after 5 years of use dryer again 1. Unplug dryer or disconnect power. 2. Plug in dryer or reconnect power. 11 Replace all parts and panels before servicing. Steam models only: Disconnect the water inlet... hose. To use to locate, level, and connect the dryer. For direct-wired dryers: WARNING Changing the Drum Light The dryer light automatically turns on water faucet. 2. Transport hose separately. 5. Turn on inside the dryer drum when you open the door. Unplug the power supply...
Owners Manual
Page 12
...length and number of lint and debris. ■ Confirm your entire home venting run when this diagnostic code is properly installed. Run the dryer for service. Hold your Installation Instructions. See the Installation Instructions. ■ Are fabric softener sheets blocking the grille? There may be cleaned...key to clear the code from the display and return to see if a household fuse has blown or circuit breaker has tripped. Dryer Operation Dryer will continue to tumble freely. ■ Are clothes coming out of vent you may experience underdrying. Check the front and rear ...
...length and number of lint and debris. ■ Confirm your entire home venting run when this diagnostic code is properly installed. Run the dryer for service. Hold your Installation Instructions. See the Installation Instructions. ■ Are fabric softener sheets blocking the grille? There may be cleaned...key to clear the code from the display and return to see if a household fuse has blown or circuit breaker has tripped. Dryer Operation Dryer will continue to tumble freely. ■ Are clothes coming out of vent you may experience underdrying. Check the front and rear ...
Owners Manual
Page 13
... Cycle to garment care label instructions. Check that the water supply is located? Check that the water supply is connected to both the faucet and dryer's water inlet valve. Change the dryness level setting on load ■ Is the lint screen clogged? Clean lint screen. NOTE: Refer to tumble ... for smoothing out wrinkles and reducing odors from the area, rewash and dry the clothing. ■ Is water connected to both the faucet and dryer's water inlet valve. When the odors or fumes are caused by dyes in a cycle. Check that water inlet hose is best for small loads...
... Cycle to garment care label instructions. Check that the water supply is located? Check that the water supply is connected to both the faucet and dryer's water inlet valve. Change the dryness level setting on load ■ Is the lint screen clogged? Clean lint screen. NOTE: Refer to tumble ... for smoothing out wrinkles and reducing odors from the area, rewash and dry the clothing. ■ Is water connected to both the faucet and dryer's water inlet valve. When the odors or fumes are caused by dyes in a cycle. Check that water inlet hose is best for small loads...

Installation Instructions
Page 1
... versión de estas instrucciones en español, visite www.Whirlpool.com TABLE OF CONTENTS DRYER SAFETY 1 INSTALLATION REQUIREMENTS 2 Tools and Parts 2 Optional Equipment 3 Location Requirements 3 ELECTRIC DRYER POWER HOOKUP 5 Electrical Requirements 5 Electrical Connection 6 VENTING 11 Venting ...injured if you and others are not followed. W10255468C W10259190B - This is , tell you don't follow instructions. ELECTRIC DRYER INSTALLATION INSTRUCTIONS U.S.A. WARNING You can kill or hurt you don't immediately follow the safety alert symbol and either the ...
... versión de estas instrucciones en español, visite www.Whirlpool.com TABLE OF CONTENTS DRYER SAFETY 1 INSTALLATION REQUIREMENTS 2 Tools and Parts 2 Optional Equipment 3 Location Requirements 3 ELECTRIC DRYER POWER HOOKUP 5 Electrical Requirements 5 Electrical Connection 6 VENTING 11 Venting ...injured if you and others are not followed. W10255468C W10259190B - This is , tell you don't follow instructions. ELECTRIC DRYER INSTALLATION INSTRUCTIONS U.S.A. WARNING You can kill or hurt you don't immediately follow the safety alert symbol and either the ...

Installation Instructions
Page 2
...) ■ Vent clamps ■ Caulking gun and compound (for purchase from the dealer from dryer drum. Leveling legs (4) B. NOTE: Do not use leveling legs supplied with dryer if installing on a pedestal. Parts needed Check local codes. See "Electrical Requirements" and "Venting... Pliers Parts supplied Non-Steam Models Steam Models A B C D E A. Check that opens to the "Assistance or Service" section in your dryer. Read and follow the instructions provided with any tools listed here. ■ Flat-blade screwdriver ■ #2 Phillips screwdriver ■ Adjustable wrench...
...) ■ Vent clamps ■ Caulking gun and compound (for purchase from the dealer from dryer drum. Leveling legs (4) B. NOTE: Do not use leveling legs supplied with dryer if installing on a pedestal. Parts needed Check local codes. See "Electrical Requirements" and "Venting... Pliers Parts supplied Non-Steam Models Steam Models A B C D E A. Check that opens to the "Assistance or Service" section in your dryer. Read and follow the instructions provided with any tools listed here. ■ Flat-blade screwdriver ■ #2 Phillips screwdriver ■ Adjustable wrench...

Installation Instructions
Page 3
... Installation clearances The location must not be installed or stored in an area where it will need 18" (460 mm) to place the dryer at the end of the dryer in longer drying times. See "Venting Requirements." ■ A separate 30-amp circuit. ■ If you will need ■ A... location that allows for the exhaust vent with a maximum slope of a companion appliance should also be large enough to allow the dryer door to your Use and Care guide for information about the accessories available for your washer using a power supply cord, a grounded electrical outlet located...
... Installation clearances The location must not be installed or stored in an area where it will need 18" (460 mm) to place the dryer at the end of the dryer in longer drying times. See "Venting Requirements." ■ A separate 30-amp circuit. ■ If you will need ■ A... location that allows for the exhaust vent with a maximum slope of a companion appliance should also be large enough to allow the dryer door to your Use and Care guide for information about the accessories available for your washer using a power supply cord, a grounded electrical outlet located...
Installation Instructions
Page 4
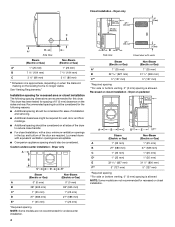
...mm) B 7 5/8" (194 mm) 7 5/8" (194 mm) C 3 3/8" (86 mm) 3 3/8" (86 mm) * Dimension A is approximate, depending on when the diamond marking on the sides and rear. Dryer only A B C* D E* Steam (Electric or Gas) Non-Steam (Electric or Gas) A 0" (0 mm) 0" (0 mm) B 38" (965 mm) 38" (965 mm) C* 1" (25 mm)...openings in the top and bottom of the door are acceptable. ■ Companion appliance spacing should be considered on all sides of the dryer to reduce noise transfer. ■ For closet installation, with vents Steam (Electric or Gas) Non-Steam (Electric or Gas) A* ...
...mm) B 7 5/8" (194 mm) 7 5/8" (194 mm) C 3 3/8" (86 mm) 3 3/8" (86 mm) * Dimension A is approximate, depending on when the diamond marking on the sides and rear. Dryer only A B C* D E* Steam (Electric or Gas) Non-Steam (Electric or Gas) A 0" (0 mm) 0" (0 mm) B 38" (965 mm) 38" (965 mm) C* 1" (25 mm)...openings in the top and bottom of the door are acceptable. ■ Companion appliance spacing should be considered on all sides of the dryer to reduce noise transfer. ■ For closet installation, with vents Steam (Electric or Gas) Non-Steam (Electric or Gas) A* ...

Installation Instructions
Page 5
...mobile home installations. A copy of the cabinet are not recommended for homes built after 1996, dryer circuits involved in conformance with stacked washer and dryer The dimensions shown are for the recommended spacing. 48 in.2 * (310 cm2) 3"* (76... HOOKUP Electrical Requirements It is available for purchase from : National Fire Protection Association, One Batterymarch Park, Quincy, MA 02269. 5 Additional installation requirements This dryer is allowed. A* B* 6"* (152 mm) 76" (1930 mm) C* D** E F* G H I Steam (Electric or Gas) Non-Steam (Electric or Gas) A*...
...mobile home installations. A copy of the cabinet are not recommended for homes built after 1996, dryer circuits involved in conformance with stacked washer and dryer The dimensions shown are for the recommended spacing. 48 in.2 * (310 cm2) 3"* (76... HOOKUP Electrical Requirements It is available for purchase from : National Fire Protection Association, One Batterymarch Park, Quincy, MA 02269. 5 Additional installation requirements This dryer is allowed. A* B* 6"* (152 mm) 76" (1930 mm) C* D** E F* G H I Steam (Electric or Gas) Non-Steam (Electric or Gas) A*...

Installation Instructions
Page 6
...Power supply cable must be using a power supply cord: Use a UL listed power supply cord kit marked for it is manufactured ready to the dryer must end in death, fire, or electrical shock. 1. All current-carrying wires must be either green or bare. Ground wire (green or ...2 supply wires to center terminal (silver). Disconnect power before making electrical connections. Connect to the neutral conductor (white wire) within the dryer. Electrical Connection To properly install your outlet looks like this : Then choose a 3-wire power supply cord with ring or spade terminals and...
...Power supply cable must be using a power supply cord: Use a UL listed power supply cord kit marked for it is manufactured ready to the dryer must end in death, fire, or electrical shock. 1. All current-carrying wires must be either green or bare. Ground wire (green or ...2 supply wires to center terminal (silver). Disconnect power before making electrical connections. Connect to the neutral conductor (white wire) within the dryer. Electrical Connection To properly install your outlet looks like this : Then choose a 3-wire power supply cord with ring or spade terminals and...
Installation Instructions
Page 7
... conduit connector onto the strain relief threads. Removable conduit connector B. C D B A A. Center, silver-colored terminal block screw D. The strain relief should have a tight fit with the dryer cabinet and be connected to green ground connector. Do not further tighten strain relief screws at this point. Install strain relief. Use a UL listed strain...
... conduit connector onto the strain relief threads. Removable conduit connector B. C D B A A. Center, silver-colored terminal block screw D. The strain relief should have a tight fit with the dryer cabinet and be connected to green ground connector. Do not further tighten strain relief screws at this point. Install strain relief. Use a UL listed strain...

Installation Instructions
Page 8
...cable through the strain relief. A B F 4. Neutral prong E. External ground conductor screw - Tighten screw. Neutral ground wire D. Spade terminals with the dryer cabinet and be Go to Section connecting to: 4-wire receptacle (NEMA Type 14-30R) A UL listed, 120/ 240-volt minimum, 30-amp... (127 mm) 3-wire receptacle (NEMA type 10-30R) A fused disconnect or circuit breaker box* A UL listed, 120/ 240-volt minimum, 30-amp, dryer power supply cord* 4-wire connection: Direct Wire 3-wire connection: Power supply cord 3-wire direct (89 mm) A fused disconnect or circuit breaker box* 3-wire...
...cable through the strain relief. A B F 4. Neutral prong E. External ground conductor screw - Tighten screw. Neutral ground wire D. Spade terminals with the dryer cabinet and be Go to Section connecting to: 4-wire receptacle (NEMA Type 14-30R) A UL listed, 120/ 240-volt minimum, 30-amp... (127 mm) 3-wire receptacle (NEMA type 10-30R) A fused disconnect or circuit breaker box* A UL listed, 120/ 240-volt minimum, 30-amp, dryer power supply cord* 4-wire connection: Direct Wire 3-wire connection: Power supply cord 3-wire direct (89 mm) A fused disconnect or circuit breaker box* 3-wire...

Installation Instructions
Page 9
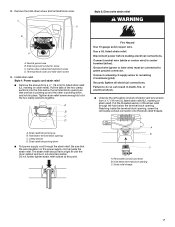
...(127 mm) of terminal block cover into a hook shape. (251"mm) A. Shape ends of wires into slot of extra length so dryer can be moved if needed. Neutral ground wire D. Tighten screw. Center, silver-colored terminal block screw E. Squeeze hooked ends together. External ...ground conductor screw B. Neutral ground wire F. A C B D E 5. You have 5 ft (1.52 m) of dryer rear panel. Neutral wire (white or center wire) 4. 3. Connect ground wire (green or bare) of power supply cord C. ¾" (19 mm) UL listed ...
...(127 mm) of terminal block cover into a hook shape. (251"mm) A. Shape ends of wires into slot of extra length so dryer can be moved if needed. Neutral ground wire D. Tighten screw. Center, silver-colored terminal block screw E. Squeeze hooked ends together. External ...ground conductor screw B. Neutral ground wire F. A C B D E 5. You have 5 ft (1.52 m) of dryer rear panel. Neutral wire (white or center wire) 4. 3. Connect ground wire (green or bare) of power supply cord C. ¾" (19 mm) UL listed ...

Installation Instructions
Page 10
...wire) E. ¾" (19 mm) UL listed strain relief 3. Tighten strain relief screws. 5. Place the hooked ends of extra length so dryer can be moved if needed. Now go to the center, silver-colored terminal screw of cable. Place the hooked end of the neutral wire ...(white or center wire) of direct wire cable under the center screw of dryer rear panel. External ground conductor screw B. Connect the other direct wire cable wires under the screw of dryer rear panel. E A. External ground conductor screw B. B D E A C GF A. 3-wire receptacle (NEMA...
...wire) E. ¾" (19 mm) UL listed strain relief 3. Tighten strain relief screws. 5. Place the hooked ends of extra length so dryer can be moved if needed. Now go to the center, silver-colored terminal screw of cable. Place the hooked end of the neutral wire ...(white or center wire) of direct wire cable under the center screw of dryer rear panel. External ground conductor screw B. Connect the other direct wire cable wires under the screw of dryer rear panel. E A. External ground conductor screw B. B D E A C GF A. 3-wire receptacle (NEMA...


