
Installation Instructions
Page 2
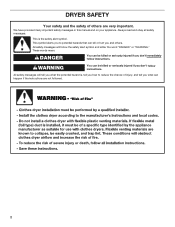
... to potential hazards that can be killed or seriously injured if you don't immediately follow instructions. We have provided many important safety messages in this manual and on your appliance. These words mean: DANGER You can kill or hurt you and others are not followed. 2 All safety messages will follow instructions...
... to potential hazards that can be killed or seriously injured if you don't immediately follow instructions. We have provided many important safety messages in this manual and on your appliance. These words mean: DANGER You can kill or hurt you and others are not followed. 2 All safety messages will follow instructions...

Use & Care Guide
Page 5
... every 20 minutes until DRUM LIGHT is pressed again, or the door is opened and closed, or the door is left open for models with Manual Cycles only) Press MORE or LESS to remove a load of cycles. 3 START/PAUSE BUTTON Press to start a cycle, or press once while a cycle is in... models with two choices, 90 minutes for 30 minutes. Promptly removing clothes at the end of the temperature to select dryness levels for use with Manual Cycles only) Select a drying temperature based on the cycles and options used. MORE or LESS (for the Automatic Cycles only. This is useful when you...
... every 20 minutes until DRUM LIGHT is pressed again, or the door is opened and closed, or the door is left open for models with Manual Cycles only) Press MORE or LESS to remove a load of cycles. 3 START/PAUSE BUTTON Press to start a cycle, or press once while a cycle is in... models with two choices, 90 minutes for 30 minutes. Promptly removing clothes at the end of the temperature to select dryness levels for use with Manual Cycles only) Select a drying temperature based on the cycles and options used. MORE or LESS (for the Automatic Cycles only. This is useful when you...

Use & Care Guide
Page 6
... to select for a load, select the lower setting rather than the higher setting. If you dry a similar load. Any timed dry cycle/ manual cycle does not sense the load. Setting the Drying Temperature Select a drying temperature based on the fabrics in bold are unsure of the temperature to... to Normal Dryness Level to select for foam, rubber, plastic, or heat-sensitive fabrics. Depending on cycle knob or be a separate control. MANUAL CYCLES Not all cycles and settings are available on the fabrics in bold are drier than the higher setting. Use a no heat (air dry...
... to select for a load, select the lower setting rather than the higher setting. If you dry a similar load. Any timed dry cycle/ manual cycle does not sense the load. Setting the Drying Temperature Select a drying temperature based on the fabrics in bold are unsure of the temperature to... to Normal Dryness Level to select for foam, rubber, plastic, or heat-sensitive fabrics. Depending on cycle knob or be a separate control. MANUAL CYCLES Not all cycles and settings are available on the fabrics in bold are drier than the higher setting. Use a no heat (air dry...

Use & Care Guide
Page 8
... WRINKLE SHIELD™ button to reduce wrinkling. Once a dryness level is used for 30 minutes. Time adjusts for use with Manual Cycles only) Press the TEMP button to "OFF." Temp (for Manual Cycles only. Dryness Level (for use with Automatic Cycles only) You can select a different dryness level, depending on until DRUM...
... WRINKLE SHIELD™ button to reduce wrinkling. Once a dryness level is used for 30 minutes. Time adjusts for use with Manual Cycles only) Press the TEMP button to "OFF." Temp (for Manual Cycles only. Dryness Level (for use with Automatic Cycles only) You can select a different dryness level, depending on until DRUM...


