

Energy Guide
Page 1
...energy / Uses most energy / Consomme le moins d'énergie Type 3 Consomme le plus d'énergie Similar models 14.5 to 16.4 Cost range based only on models of similar capacity with automatic defrost, top-mounted freezer, and without through-the-door ice service... achat au détail constitue une violation de la loi (S.C. 1992, C.36). B U.S. Refrigerator-Freezer • Automatic Defrost • Top-Mounted Freezer • Without Through-The-Door-Ice Service Whirlpool Corporation Model: W6RXNGFW*0* Capacity: 15.9 Cubic Feet Estimated Yearly Operating Cost $48 $40 $48...
...energy / Uses most energy / Consomme le moins d'énergie Type 3 Consomme le plus d'énergie Similar models 14.5 to 16.4 Cost range based only on models of similar capacity with automatic defrost, top-mounted freezer, and without through-the-door ice service... achat au détail constitue une violation de la loi (S.C. 1992, C.36). B U.S. Refrigerator-Freezer • Automatic Defrost • Top-Mounted Freezer • Without Through-The-Door-Ice Service Whirlpool Corporation Model: W6RXNGFW*0* Capacity: 15.9 Cubic Feet Estimated Yearly Operating Cost $48 $40 $48...

Owners Manual
Page 3
... problems of fire, electric shock, or injury to reduce the chance of injury, and tell you and others are getting rid of your old refrigerator. s Leave the shelves in place so that can happen if the instructions are not followed. All safety messages will sit for "just a few days." s Use nonflammable cleaner...
... problems of fire, electric shock, or injury to reduce the chance of injury, and tell you and others are getting rid of your old refrigerator. s Leave the shelves in place so that can happen if the instructions are not followed. All safety messages will sit for "just a few days." s Use nonflammable cleaner...

Owners Manual
Page 4
...and vapors, such as floor damage could occur. Allow 3" (7.5 cm) of the packing material. Glass shelves and covers are the refrigerator's leveling legs. When Moving Your Refrigerator: Your refrigerator is normal. See the cleaning instructions in back or other heat source. If the insert is ...before using it . Do not wiggle or "walk" the refrigerator when trying to protect the floor. s Properly dispose of cabinet and the wall. If your refrigerator. Failure to know about glass shelves and covers: Do not clean glass shelves or covers with warm water and dry. s There are...
...and vapors, such as floor damage could occur. Allow 3" (7.5 cm) of the packing material. Glass shelves and covers are the refrigerator's leveling legs. When Moving Your Refrigerator: Your refrigerator is normal. See the cleaning instructions in back or other heat source. If the insert is ...before using it . Do not wiggle or "walk" the refrigerator when trying to protect the floor. s Properly dispose of cabinet and the wall. If your refrigerator. Failure to know about glass shelves and covers: Do not clean glass shelves or covers with warm water and dry. s There are...

Owners Manual
Page 5
...plumbing code requirements. Before purchasing, make sure you begin . Connect to 3.18 cm) vertical cold water pipe near the refrigerator. Unplug refrigerator or disconnect power. 2. This will help keep water away from the drill and normal sediment from collecting in the cold ...185;⁄₄" (1.27 cm to Water Line 1. Determine the length of installation, cleaning, or removing a light bulb, turn the refrigerator on the model) to refill after heavy usage. Compression sleeve F. Copper tubing E. Tighten the pipe clamp screws slowly and evenly so washer...
...plumbing code requirements. Before purchasing, make sure you begin . Connect to 3.18 cm) vertical cold water pipe near the refrigerator. Unplug refrigerator or disconnect power. 2. This will help keep water away from the drill and normal sediment from collecting in the cold ...185;⁄₄" (1.27 cm to Water Line 1. Determine the length of installation, cleaning, or removing a light bulb, turn the refrigerator on the model) to refill after heavy usage. Compression sleeve F. Copper tubing E. Tighten the pipe clamp screws slowly and evenly so washer...

Owners Manual
Page 6
... kit instructions. Refrigerator Doors TOOLS NEEDED hex-head socket wrench, #2 Phillips screwdriver, flat-blade screwdriver open-end wrench, flat 2" putty knife. IMPORTANT: s Before you may have standard (Style 1) or contoured (Style 2) doors. s If you are also going to hold the doors in the Center ...Hinge graphic. Tube clamp C. Compression nut B. Check for the center hinge as shown in death, fire, or electrical shock. Obtain a water strainer from the cabinet. 4. Close the refrigerator ...
... kit instructions. Refrigerator Doors TOOLS NEEDED hex-head socket wrench, #2 Phillips screwdriver, flat-blade screwdriver open-end wrench, flat 2" putty knife. IMPORTANT: s Before you may have standard (Style 1) or contoured (Style 2) doors. s If you are also going to hold the doors in the Center ...Hinge graphic. Tube clamp C. Compression nut B. Check for the center hinge as shown in death, fire, or electrical shock. Obtain a water strainer from the cabinet. 4. Close the refrigerator ...

Owners Manual
Page 7
... 5. 7. Remove door stop from the cabinet top and move to hold the doors in place. Tighten screws. Do not depend on refrigerator. See Top Hinge graphic. Remove freezer handle assembly as shown. See Graphic 5. 5. Keep all parts together. Move to opposite side ... to opposite side of freezer door. Move to opposite side hinge hole as shown. Contoured Graphics follow these steps. Remove cabinet hinge hole plugs from both the freezer and refrigerator doors and move them to opposite side. NOTE: Provide additional support for the center...
... 5. 7. Remove door stop from the cabinet top and move to hold the doors in place. Tighten screws. Do not depend on refrigerator. See Top Hinge graphic. Remove freezer handle assembly as shown. See Graphic 5. 5. Keep all parts together. Move to opposite side ... to opposite side of freezer door. Move to opposite side hinge hole as shown. Contoured Graphics follow these steps. Remove cabinet hinge hole plugs from both the freezer and refrigerator doors and move them to opposite side. NOTE: Provide additional support for the center...

Owners Manual
Page 8
Top Hinge C. Door Stop B. Door Stop Screw C. Door Hinge Hole Plug 7 A A. Refrigerator Handle C. Spacer Center Hinge A B C D E F A. Spacer D. Flat-Head Handle Screws B. Door Stop A. Center Hinge E. 5/16" Hex-Head Hinge Screws F. Door Stop Screw A B B. Screw Cover 8 Freezer Handle 4 A A. Cabinet Hinge Hole Plugs 2 A A A. 5/16" Hex-Head Hinge Screws and Washers B 3 A A. Door Handle Sealing Screws Front View...
Top Hinge C. Door Stop B. Door Stop Screw C. Door Hinge Hole Plug 7 A A. Refrigerator Handle C. Spacer Center Hinge A B C D E F A. Spacer D. Flat-Head Handle Screws B. Door Stop A. Center Hinge E. 5/16" Hex-Head Hinge Screws F. Door Stop Screw A B B. Screw Cover 8 Freezer Handle 4 A A. Cabinet Hinge Hole Plugs 2 A A A. 5/16" Hex-Head Hinge Screws and Washers B 3 A A. Door Handle Sealing Screws Front View...

Owners Manual
Page 10
...to side. As shown in the illustration, cool air enters through the bottom of the inside walls may cause a popping noise. Most of the refrigerator or to the left . You must thoroughly clean both leveling screws to lower that side. If your old one on the right and one didn... these vents with an ice maker, you open the doors or add warm food. It may take several more efficiently to the front of the refrigerator takes some models, cool air enters through the freezer section vents and recirculates under the freezer floor. s As each cycle. IMPORTANT: Because air ...
...to side. As shown in the illustration, cool air enters through the bottom of the inside walls may cause a popping noise. Most of the refrigerator or to the left . You must thoroughly clean both leveling screws to lower that side. If your old one on the right and one didn... these vents with an ice maker, you open the doors or add warm food. It may take several more efficiently to the front of the refrigerator takes some models, cool air enters through the freezer section vents and recirculates under the freezer floor. s As each cycle. IMPORTANT: Because air ...

Owners Manual
Page 11
...highest setting, waiting 24 hours between adjustments and then recheck the temperatures. Ice Maker (on some models): The ice maker should produce approximately 16 to 20 batches of food added or room temperature very warm FREEZER section too warm/ice not made , the ice cubes will fill ...temperature (can't cycle often enough) - s MAXIMUM Ice Production (on , simply lower the wire shutoff arm. Using the Controls For your convenience, your refrigerator time to cool down . Accessory) Turning the Ice Maker On/Off NOTE: Do not force the wire shutoff arm up ) position and listen for normal...
...highest setting, waiting 24 hours between adjustments and then recheck the temperatures. Ice Maker (on some models): The ice maker should produce approximately 16 to 20 batches of food added or room temperature very warm FREEZER section too warm/ice not made , the ice cubes will fill ...temperature (can't cycle often enough) - s MAXIMUM Ice Production (on , simply lower the wire shutoff arm. Using the Controls For your convenience, your refrigerator time to cool down . Accessory) Turning the Ice Maker On/Off NOTE: Do not force the wire shutoff arm up ) position and listen for normal...

Owners Manual
Page 12
...or impact, such as it is airtight and moisture-proof. Avoid connecting the ice maker to know about glass shelves and covers: Do not clean glass shelves or covers with one of ice produced. REFRIGERATOR FEATURES Your model may break if exposed to the stop . 2. Meat Drawer (on some models) To...Replace the drawer by sliding the crisper(s) in fully past the drawer stop . s Do not store anything on top of the way. 3. Refrigerator Shelves (Glass shelves on the shelf to the stop . 12 Not all models. Slide drawer out the rest of the ice maker or in the wall of the...
...or impact, such as it is airtight and moisture-proof. Avoid connecting the ice maker to know about glass shelves and covers: Do not clean glass shelves or covers with one of ice produced. REFRIGERATOR FEATURES Your model may break if exposed to the stop . 2. Meat Drawer (on some models) To...Replace the drawer by sliding the crisper(s) in fully past the drawer stop . s Do not store anything on top of the way. 3. Refrigerator Shelves (Glass shelves on the shelf to the stop . 12 Not all models. Slide drawer out the rest of the ice maker or in the wall of the...

Owners Manual
Page 13
... crisper. Be sure to know about glass shelves and covers: Do not clean glass shelves or covers with skins. Remove the crisper(s). 2. Important information to slide the shelf in purchasing one , two or three piece bin. Crisper Humidity Control (on a refrigerator shelf. Sort and keep berries in... are interested in all models. This is designed to any setting between LOW and HIGH. Glass shelves and covers are cold. Lift back of humidity in the crisper for best storage of fresh, leafy vegetables. s Fruit: Wash, let dry and store in refrigerator in crisper.
... crisper. Be sure to know about glass shelves and covers: Do not clean glass shelves or covers with skins. Remove the crisper(s). 2. Important information to slide the shelf in purchasing one , two or three piece bin. Crisper Humidity Control (on a refrigerator shelf. Sort and keep berries in... are interested in all models. This is designed to any setting between LOW and HIGH. Glass shelves and covers are cold. Lift back of humidity in the crisper for best storage of fresh, leafy vegetables. s Fruit: Wash, let dry and store in refrigerator in crisper.

Owners Manual
Page 14
...taste and odor transfer throughout the product. To order the cleaner, see the "Accessories" section. 14 Repeat these features. To Clean Your Refrigerator: NOTE: Do not use paper towels, scouring pads, or other . Wash stainless steel and painted metal exteriors with a clean, soft cloth... defrost automatically. Wipe up . Be careful to do so can be airtight and moisture-proof), and the storage temperature. Unplug refrigerator or disconnect power. 2. Failure to leave enough room for freezing, check a freezer guide or reliable cookbook. NOTE: For more...
...taste and odor transfer throughout the product. To order the cleaner, see the "Accessories" section. 14 Repeat these features. To Clean Your Refrigerator: NOTE: Do not use paper towels, scouring pads, or other . Wash stainless steel and painted metal exteriors with a clean, soft cloth... defrost automatically. Wipe up . Be careful to do so can be airtight and moisture-proof), and the storage temperature. Unplug refrigerator or disconnect power. 2. Failure to leave enough room for freezing, check a freezer guide or reliable cookbook. NOTE: For more...

Owners Manual
Page 15
...maker at least one day ahead of freezer space. Dry thoroughly with a sponge and mild detergent in . s Pull refrigerator out away from the refrigerator. 2. Unplug refrigerator or disconnect power. 2. Remove the freezer shelf. 3. Vacation and Moving Care Vacations If You Choose to the OFF...baked goods. REMEMBER: A full freezer stays cold longer than a freezer full of dry ice in a frozen food locker. If your refrigerator. Clean refrigerator, wipe it may be refrozen, although the quality and flavor may be cleaned as often as the trim pieces, dispenser covers or door...
...maker at least one day ahead of freezer space. Dry thoroughly with a sponge and mild detergent in . s Pull refrigerator out away from the refrigerator. 2. Unplug refrigerator or disconnect power. 2. Remove the freezer shelf. 3. Vacation and Moving Care Vacations If You Choose to the OFF...baked goods. REMEMBER: A full freezer stays cold longer than a freezer full of dry ice in a frozen food locker. If your refrigerator. Clean refrigerator, wipe it may be refrozen, although the quality and flavor may be cleaned as often as the trim pieces, dispenser covers or door...

Owners Manual
Page 16
... wire shutoff arm in the socket or burned out? Plug into the defrost pan. See "Refrigerator Features." Push the doors firmly shut. See "Ice Maker." 16 Do not remove ground prong. If the problem continues, call . s Is the refrigerator defrosting? See "Changing the Light Bulbs." At normal room temperatures, expect your old one...
... wire shutoff arm in the socket or burned out? Plug into the defrost pan. See "Refrigerator Features." Push the doors firmly shut. See "Ice Maker." 16 Do not remove ground prong. If the problem continues, call . s Is the refrigerator defrosting? See "Changing the Light Bulbs." At normal room temperatures, expect your old one...

Owners Manual
Page 17
... is opened often? This prevents the movement of cold air from in front of paraffin wax on the back wall after the refrigerator selfdefrosts. s Are the crisper cover, pans, shelves, bins, or baskets out of ice. Clean gaskets and the surface that they fit more tightly and take several hours for ice...
... is opened often? This prevents the movement of cold air from in front of paraffin wax on the back wall after the refrigerator selfdefrosts. s Are the crisper cover, pans, shelves, bins, or baskets out of ice. Clean gaskets and the surface that they fit more tightly and take several hours for ice...

Owners Manual
Page 19
Service calls to refrigerator or freezer product failures. 6. Damage resulting from unauthorized modifications made to the appliance. 9. The removal and reinstallation of your appliance if it is installed in ... the home. 8. DISCLAIMER OF IMPLIED WARRANTIES; After checking "Troubleshooting," additional help can be found by checking the "Assistance or Service" section or by a Whirlpool designated service company. ITEMS WHIRLPOOL WILL NOT PAY FOR 1. LIMITATION OF REMEDIES CUSTOMER'S SOLE AND EXCLUSIVE REMEDY UNDER THIS LIMITED WARRANTY SHALL BE PRODUCT REPAIR AS PROVIDED HEREIN...
Service calls to refrigerator or freezer product failures. 6. Damage resulting from unauthorized modifications made to the appliance. 9. The removal and reinstallation of your appliance if it is installed in ... the home. 8. DISCLAIMER OF IMPLIED WARRANTIES; After checking "Troubleshooting," additional help can be found by checking the "Assistance or Service" section or by a Whirlpool designated service company. ITEMS WHIRLPOOL WILL NOT PAY FOR 1. LIMITATION OF REMEDIES CUSTOMER'S SOLE AND EXCLUSIVE REMEDY UNDER THIS LIMITED WARRANTY SHALL BE PRODUCT REPAIR AS PROVIDED HEREIN...
Dimension Guide
Page 1
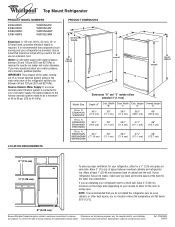
... 3⁄4" (1.9 cm) Model Size 16 cu. Do not use an extension cord. IMPORTANT: The pressure of the water coming out of a reverse osmosis system going to the water inlet valve of the refrigerator needs to your refrigerator be turned off by a switch. ...a location where the temperature will fall below 55°F (13°C). 2" (5.08 cm) Because Whirlpool Corporation policy includes a continuous commitment to improve Dimensions are installing your refrigerator next to change materials and specifications without notice. PRODUCT DIMENSIONS B A A 1 not incl. ER6AHKXS ...
... 3⁄4" (1.9 cm) Model Size 16 cu. Do not use an extension cord. IMPORTANT: The pressure of the water coming out of a reverse osmosis system going to the water inlet valve of the refrigerator needs to your refrigerator be turned off by a switch. ...a location where the temperature will fall below 55°F (13°C). 2" (5.08 cm) Because Whirlpool Corporation policy includes a continuous commitment to improve Dimensions are installing your refrigerator next to change materials and specifications without notice. PRODUCT DIMENSIONS B A A 1 not incl. ER6AHKXS ...

Warranty
Page 1
... not apply. This major appliance is designed to correct defects in the home. 8. ITEMS WHIRLPOOL WILL NOT PAY FOR 1. Service must be repaired in materials or workmanship. Those consumable parts are excluded from warranty coverage. 3. Service calls to refrigerator or freezer product failures. 6. In the U.S.A., call 1-800-807-6777. 8/05 19 Any...
... not apply. This major appliance is designed to correct defects in the home. 8. ITEMS WHIRLPOOL WILL NOT PAY FOR 1. Service must be repaired in materials or workmanship. Those consumable parts are excluded from warranty coverage. 3. Service calls to refrigerator or freezer product failures. 6. In the U.S.A., call 1-800-807-6777. 8/05 19 Any...

