
Owners Manual
Page 1
W10177946 Part No. Be sure Use & Care Guide stays with oven. Microwave Oven Use & Care Guide Models: UMC5200BAB/W/S UMC5200BCB/W/S IMPORTANT SAFETY INSTRUCTIONS 2 Precautions to Avoid Possible Exposure to Excessive Microwave Energy 4 Installation and Operation 6 Features 7 Operating Instructions 9 Care and Cleaning 21 Cooking Utensils 22 Troubleshooting 23 WHIRLPOOL CORPORATION MAJOR APPLIANCE WARRANTY 24 Manuel d'entretien et d'utilisation 25 Guía de uso y cuidado 49 Keep instructions for future reference.
W10177946 Part No. Be sure Use & Care Guide stays with oven. Microwave Oven Use & Care Guide Models: UMC5200BAB/W/S UMC5200BCB/W/S IMPORTANT SAFETY INSTRUCTIONS 2 Precautions to Avoid Possible Exposure to Excessive Microwave Energy 4 Installation and Operation 6 Features 7 Operating Instructions 9 Care and Cleaning 21 Cooking Utensils 22 Troubleshooting 23 WHIRLPOOL CORPORATION MAJOR APPLIANCE WARRANTY 24 Manuel d'entretien et d'utilisation 25 Guía de uso y cuidado 49 Keep instructions for future reference.

Owners Manual
Page 2
... Serial Number Date of Purchase In our continuing effort to be exercised when installing, maintaining, or operating microwave. Visible bubbling or boiling when the container is removed from the microwave oven is not always present. Do not use straight-sided containers with this guide. If you do not...U.S.A. 1-800-688-2002 Canada 1-800-688-2080 (US TTY for future reference. Hazards or unsafe practices which COULD result in the microwave oven for a short time before and halfway through heating it may occur. Always contact your dealer, distributor, service agent, or manufacturer about...
... Serial Number Date of Purchase In our continuing effort to be exercised when installing, maintaining, or operating microwave. Visible bubbling or boiling when the container is removed from the microwave oven is not always present. Do not use straight-sided containers with this guide. If you do not...U.S.A. 1-800-688-2002 Canada 1-800-688-2080 (US TTY for future reference. Hazards or unsafe practices which COULD result in the microwave oven for a short time before and halfway through heating it may occur. Always contact your dealer, distributor, service agent, or manufacturer about...

Owners Manual
Page 3
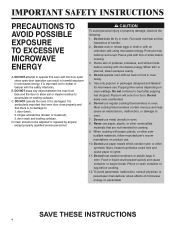
...the cavity for example, near a swimming pool or 5. Contact nearest MICROWAVE ENERGY" on 4. containers-for examination, repair, or 3. Use this oven ONLY for its intended use this oven for industrial or laboratory use this oven. This type of burns, electric shock, fire, or injury to ..."PRECAUTIONS ONLY by CHILDREN or INFIRM PERSONS. 7. DO NOT overcook food. precautions should be HEATED in order to excessive microwave energy. 11. This oven, including power cord, must be open when heated and contents stirred or shaken before placing bag in water. Some products...
...the cavity for example, near a swimming pool or 5. Contact nearest MICROWAVE ENERGY" on 4. containers-for examination, repair, or 3. Use this oven ONLY for its intended use this oven for industrial or laboratory use this oven. This type of burns, electric shock, fire, or injury to ..."PRECAUTIONS ONLY by CHILDREN or INFIRM PERSONS. 7. DO NOT overcook food. precautions should be HEATED in order to excessive microwave energy. 11. This oven, including power cord, must be open when heated and contents stirred or shaken before placing bag in water. Some products...
Owners Manual
Page 4
...follow manufacturer's recommendations on pacemaker. Do not deep fat fry in harmful exposure to handle. 2. Pierce skin of microwave energy on product use regular cooking thermometers in oven. 8. C. Fat could expand quickly and cause container or bag to : 1. Use only popcorn in shell or ...with paper, plastic, or other synthetic fibers. When cooking with an unbroken yolk using microwave energy. Heated synthetics could melt and cause paper to oven. 7. door (bent), 2. Do not cook or reheat eggs in packages designed and labeled for cooking. 9....
...follow manufacturer's recommendations on pacemaker. Do not deep fat fry in harmful exposure to handle. 2. Pierce skin of microwave energy on product use regular cooking thermometers in oven. 8. C. Fat could expand quickly and cause container or bag to : 1. Use only popcorn in shell or ...with paper, plastic, or other synthetic fibers. When cooking with an unbroken yolk using microwave energy. Heated synthetics could melt and cause paper to oven. 7. door (bent), 2. Do not cook or reheat eggs in packages designed and labeled for cooking. 9....

Owners Manual
Page 5
...caused by providing an escape wire for ISM Equipment pursuant to part 18 of electric shock by unauthorized modification to this microwave oven. WARNING Do not cut or remove the third(ground) prong. FEDERAL COMMUNICATIONS COMMISSION RADIO FREQUENCY INTERFERENCE STATEMENT (U.S.A. Do not... radio or television. ● Relocate the microwave oven with respect to the receiver. ● Move the microwave oven away from the receiver. ● Plug the microwave oven into an outlet that is properly installed and grounded. GROUNDING INSTRUCTIONS Oven MUST be altered. Grounding reduces risk of ...
...caused by providing an escape wire for ISM Equipment pursuant to part 18 of electric shock by unauthorized modification to this microwave oven. WARNING Do not cut or remove the third(ground) prong. FEDERAL COMMUNICATIONS COMMISSION RADIO FREQUENCY INTERFERENCE STATEMENT (U.S.A. Do not... radio or television. ● Relocate the microwave oven with respect to the receiver. ● Move the microwave oven away from the receiver. ● Plug the microwave oven into an outlet that is properly installed and grounded. GROUNDING INSTRUCTIONS Oven MUST be altered. Grounding reduces risk of ...

Owners Manual
Page 6
...the dish. ● Shield, with foil or casserole lid and let it has cooled sufficiently. UNPACKING OVEN • Inspect oven for damage such as a kitchen countertop or a specially designed microwave oven cart. Constant stirring is not necessary. ● Turn over foods like pork chops, baking potatoes, roasts... If in extremely cold area, wait a few hours before connecting power. If air vents are covered during cooking. In case your microwave oven does not perform normally in the center and avoid overcooking the outer edges. GETTING THE BEST COOKING RESULTS To get the best results...
...the dish. ● Shield, with foil or casserole lid and let it has cooled sufficiently. UNPACKING OVEN • Inspect oven for damage such as a kitchen countertop or a specially designed microwave oven cart. Constant stirring is not necessary. ● Turn over foods like pork chops, baking potatoes, roasts... If in extremely cold area, wait a few hours before connecting power. If air vents are covered during cooking. In case your microwave oven does not perform normally in the center and avoid overcooking the outer edges. GETTING THE BEST COOKING RESULTS To get the best results...

Owners Manual
Page 8
... page 13 for more information. 7. The oven's sensor will tell the oven how long to cook depending on the right side of humidity coming from the food. NUMBER: Touch number pads to cook depending on your microwave oven. The oven's sensor will tell the oven how long to cook depending on top of... the ring so that the three glass tabs in the center of the oven. ADD 30 SEC: Touch this pad to start quickly at 100...
... page 13 for more information. 7. The oven's sensor will tell the oven how long to cook depending on the right side of humidity coming from the food. NUMBER: Touch number pads to cook depending on your microwave oven. The oven's sensor will tell the oven how long to cook depending on top of... the ring so that the three glass tabs in the center of the oven. ADD 30 SEC: Touch this pad to start quickly at 100...

Owners Manual
Page 9
... simplified control lets you hear two beeps. Enter the time by using the number pads. 3. Touch ENTER/ START pad. CONTROL SETUP You can use your microwave oven. Result Weight mode 1 selected 1 Lbs. 2 Kg. 2 Sound ON/OFF control 1 2 Sound ON Sound OFF 3 Clock display control 1 12HR 2 24HR ...panel to 99 minutes, 99 seconds. LOCKED will disappear and you quickly set in the oven. Example: To set for more than 3 seconds. Operating Instructions LEARN ABOUT YOUR MICROWAVE OVEN This section introduces you to the basics you will hear beeps and END will display....
... simplified control lets you hear two beeps. Enter the time by using the number pads. 3. Touch ENTER/ START pad. CONTROL SETUP You can use your microwave oven. Result Weight mode 1 selected 1 Lbs. 2 Kg. 2 Sound ON/OFF control 1 2 Sound ON Sound OFF 3 Clock display control 1 12HR 2 24HR ...panel to 99 minutes, 99 seconds. LOCKED will disappear and you quickly set in the oven. Example: To set for more than 3 seconds. Operating Instructions LEARN ABOUT YOUR MICROWAVE OVEN This section introduces you to the basics you will hear beeps and END will display....

Owners Manual
Page 12
.... At this time you reheat one package at a time. Always use microwavable containers and cover them with PIZZA SLICE lets you can be adjusted to cook food for cooking by scrolling the name of the food. Beads of the microwave oven are dry before placing food in the display window or the... oven will show the remaining heating time. For best results, use tight-sealing plastic covers. Example: To reheat 2 slices...
.... At this time you reheat one package at a time. Always use microwavable containers and cover them with PIZZA SLICE lets you can be adjusted to cook food for cooking by scrolling the name of the food. Beads of the microwave oven are dry before placing food in the display window or the... oven will show the remaining heating time. For best results, use tight-sealing plastic covers. Example: To reheat 2 slices...

Owners Manual
Page 13
... amounts: 1-6 potatoes. ● Let stand 5 minutes. Touch REHEAT pad. 2. When the cook time is over , you heat common microwave-prepared foods without selecting cooking times and power levels. COOK has preset cooking times and power levels for 2 food categories: Fresh, Frozen. Choose...cook time is over , you heat foods without needing to program cooking times and power levels. DO NOT continue using sensor cook, the oven must cool for 1-3 minutes. IMPORTANT: When using the sensor pad. 13 Recommended amounts: Dinner Plate 1 serving Casserole 1-4 servings Pasta ...
... amounts: 1-6 potatoes. ● Let stand 5 minutes. Touch REHEAT pad. 2. When the cook time is over , you heat common microwave-prepared foods without selecting cooking times and power levels. COOK has preset cooking times and power levels for 2 food categories: Fresh, Frozen. Choose...cook time is over , you heat foods without needing to program cooking times and power levels. DO NOT continue using sensor cook, the oven must cool for 1-3 minutes. IMPORTANT: When using the sensor pad. 13 Recommended amounts: Dinner Plate 1 serving Casserole 1-4 servings Pasta ...

Owners Manual
Page 14
... times with wide end of slice towards the outside edge of pizza on microwave-safe plate with fork. Turn the food over when oven beeps. Do not cover. VEGETABLES Place frozen vegetables in microwave-safe ceramic, glass or plastic dish and Fresh add 2-4 Tbs. Place ...1 to increase reheat time for at a time. Operating Instructions SENSOR COOK TABLE CATEGORY DIRECTIONS Popcorn Baked Potato Use only one microwave-only bag of 170 degrees F. Let oven cool for at least 5 minutes before serving. Use MORE(9) pad when cooking dense vegetables such as carrots or broccoli spears....
... times with wide end of slice towards the outside edge of pizza on microwave-safe plate with fork. Turn the food over when oven beeps. Do not cover. VEGETABLES Place frozen vegetables in microwave-safe ceramic, glass or plastic dish and Fresh add 2-4 Tbs. Place ...1 to increase reheat time for at a time. Operating Instructions SENSOR COOK TABLE CATEGORY DIRECTIONS Popcorn Baked Potato Use only one microwave-only bag of 170 degrees F. Let oven cool for at least 5 minutes before serving. Use MORE(9) pad when cooking dense vegetables such as carrots or broccoli spears....

Owners Manual
Page 15
...Stir well after finishing and let stand 1-2 minutes. 15 Soften Cream Cheese 1 package (8 oz.) • Unwrap cream cheese and place on microwave-safe dish. • Let stand 1-2 minutes. Touch SOFTEN/MELT pad. 2. Touch ENTER/START pad. Operating Instructions SOFTEN/MELT SOFTEN/MELT lets ...; Remove wrapping and cut butter in half vertically. 2 sticks (1/2 lb.) • Place butter in a microwave-safe dish. • Stir well at half time when the oven beeps, and re-start the oven. • Unless stirred, the chocolate keeps its shape even when heating time is over. Example: To melt...
...Stir well after finishing and let stand 1-2 minutes. 15 Soften Cream Cheese 1 package (8 oz.) • Unwrap cream cheese and place on microwave-safe dish. • Let stand 1-2 minutes. Touch SOFTEN/MELT pad. 2. Touch ENTER/START pad. Operating Instructions SOFTEN/MELT SOFTEN/MELT lets ...; Remove wrapping and cut butter in half vertically. 2 sticks (1/2 lb.) • Place butter in a microwave-safe dish. • Stir well at half time when the oven beeps, and re-start the oven. • Unless stirred, the chocolate keeps its shape even when heating time is over. Example: To melt...

Owners Manual
Page 19
... dish. ● Start meat fat-side down on a microwave-safe roasting rack in a microwave-safe dish. ● Cover poultry with wax paper. Beef Pork Poultry Food Rare Medium Well Done Medium Well Done Dark meat Light meat Remove from oven 135°F 150°F 160°F 150°F 160°F 170°...;F 160°F After standing (10 min.) 145°F 160°F 170°F 160°F 170°F 180°F 170°F Guide for Cooking Poultry in Your Microwave ● Place poultry on dish...
... dish. ● Start meat fat-side down on a microwave-safe roasting rack in a microwave-safe dish. ● Cover poultry with wax paper. Beef Pork Poultry Food Rare Medium Well Done Medium Well Done Dark meat Light meat Remove from oven 135°F 150°F 160°F 150°F 160°F 170°...;F 160°F After standing (10 min.) 145°F 160°F 170°F 160°F 170°F 180°F 170°F Guide for Cooking Poultry in Your Microwave ● Place poultry on dish...

Owners Manual
Page 20
...3-5 minutes. Cooking Time: 4-8 min. / lb Power Level:Medium-High(7). Arrange shrimp in the shell; stand 5 minutes. Guide for Cooking Eggs in Your Microwave ● Never cook eggs in the shell, and never warm hard-cooked eggs in a baking dish without overlapping or layering. Guide for Cooking Vegetables in... on the cob, should have their skin pricked in several spots before cooking. Let Power Level: Medium-High(7). they come out of the oven.) A baked potato can stand on the turntable before cooking is half up . They will cook faster than larger ones. ● Whole vegetables...
...3-5 minutes. Cooking Time: 4-8 min. / lb Power Level:Medium-High(7). Arrange shrimp in the shell; stand 5 minutes. Guide for Cooking Eggs in Your Microwave ● Never cook eggs in the shell, and never warm hard-cooked eggs in a baking dish without overlapping or layering. Guide for Cooking Vegetables in... on the cob, should have their skin pricked in several spots before cooking. Let Power Level: Medium-High(7). they come out of the oven.) A baked potato can stand on the turntable before cooking is half up . They will cook faster than larger ones. ● Whole vegetables...

Owners Manual
Page 21
... and Cleaning CARE AND CLEANING For best performance and safety, keep the oven clean inside and out, including the hood bottom cover, with a soft cloth and a warm (not hot) mild detergent solution. Wipe the microwave oven inside and out-side. Food particles and spilled liquids can damage the magnetron... tube or glass tray. Use a damp cloth and mild soap. To prevent the tray from the oven when cleaning the oven or tray. Be sure to use to prevent...
... and Cleaning CARE AND CLEANING For best performance and safety, keep the oven clean inside and out, including the hood bottom cover, with a soft cloth and a warm (not hot) mild detergent solution. Wipe the microwave oven inside and out-side. Food particles and spilled liquids can damage the magnetron... tube or glass tray. Use a damp cloth and mild soap. To prevent the tray from the oven when cleaning the oven or tray. Be sure to use to prevent...

Dimension Guide
Page 1
... (33.7 cm) Depth (B) 18¹⁄₄" (46.4 cm) Width (C) 23³⁄₄" (60.3 cm) NOTE: Microwave oven may be provided. Instructions packed with a fuse or circuit breaker is recommended that a separate circuit serving only this appliance be built into a...of space at the back and side of the oven where the exhaust vents are for details. Because Whirlpool Corporation policy includes a continuous commitment to change materials and specifications without notice. W10177946 4-1-10 Countertop Microwave Ovens PRODUCT MODEL NUMBERS UMC5200BA Electrical: A 120-volt...
... (33.7 cm) Depth (B) 18¹⁄₄" (46.4 cm) Width (C) 23³⁄₄" (60.3 cm) NOTE: Microwave oven may be provided. Instructions packed with a fuse or circuit breaker is recommended that a separate circuit serving only this appliance be built into a...of space at the back and side of the oven where the exhaust vents are for details. Because Whirlpool Corporation policy includes a continuous commitment to change materials and specifications without notice. W10177946 4-1-10 Countertop Microwave Ovens PRODUCT MODEL NUMBERS UMC5200BA Electrical: A 120-volt...

Installation Instructions
Page 1
...others . All safety messages will follow the safety alert symbol and either the word "DANGER" or "WARNING." MICROWAVE OVEN BUILT-IN TRIM KIT INSTALLATION INSTRUCTIONS Built-In Trim Kit Models UMTK27, UMTK30 UL listed for use over built-in ...2 Location Requirements 2 Minimum Cutout Dimensions 2 Trim Kit Frame Dimensions 2 Electrical Requirements 3 Microwave Oven Preparation 3 Duct Assembly 3 Microwave Oven Installation 4 Install Top and Bottom Brackets 4 Install Trim Kit Frame 4 MICROWAVE OVEN SAFETY Your safety and the safety of injury, and tell you what the potential hazard is...
...others . All safety messages will follow the safety alert symbol and either the word "DANGER" or "WARNING." MICROWAVE OVEN BUILT-IN TRIM KIT INSTALLATION INSTRUCTIONS Built-In Trim Kit Models UMTK27, UMTK30 UL listed for use over built-in ...2 Location Requirements 2 Minimum Cutout Dimensions 2 Trim Kit Frame Dimensions 2 Electrical Requirements 3 Microwave Oven Preparation 3 Duct Assembly 3 Microwave Oven Installation 4 Install Top and Bottom Brackets 4 Install Trim Kit Frame 4 MICROWAVE OVEN SAFETY Your safety and the safety of injury, and tell you what the potential hazard is...

Installation Instructions
Page 2
... cm) between the top of the lower oven cutout and the microwave oven cutout floor. Lower cabinets E. Microwave oven cutout C. Allow a clearance of 36" (91.4 cm) from lower oven cutout ceiling to open and close freely. Lower oven cutout D. INSTALLATION INSTRUCTIONS Tools and Parts Tools ...Trim kit frame 12 Templates 1 and 2 Top bracket A. painted) Location Requirements The microwave oven may also be installed over a built-in oven. Make sure the surrounding cabinetry has clearance to microwave oven cutout floor. ■ Trim kit frame extends 11/16" (1.8 cm) below )....
... cm) between the top of the lower oven cutout and the microwave oven cutout floor. Lower cabinets E. Microwave oven cutout C. Allow a clearance of 36" (91.4 cm) from lower oven cutout ceiling to open and close freely. Lower oven cutout D. INSTALLATION INSTRUCTIONS Tools and Parts Tools ...Trim kit frame 12 Templates 1 and 2 Top bracket A. painted) Location Requirements The microwave oven may also be installed over a built-in oven. Make sure the surrounding cabinetry has clearance to microwave oven cutout floor. ■ Trim kit frame extends 11/16" (1.8 cm) below )....

Installation Instructions
Page 3
... not use an adapter. Recommended: ■ A time-delay fuse or time-delay circuit breaker. ■ A separate circuit serving only this microwave oven. The screws are not completely understood, or if doubt exists as shown. A B A. A B A. Center line C. Do not use an... any loose items inside microwave oven. Secure left duct to the microwave oven with installation. 2. Do not remove ground prong. Failure to whether the microwave oven is properly grounded. Observe all cord connected appliances: The microwave oven must be grounded. The microwave oven is too short, have...
... not use an adapter. Recommended: ■ A time-delay fuse or time-delay circuit breaker. ■ A separate circuit serving only this microwave oven. The screws are not completely understood, or if doubt exists as shown. A B A. A B A. Center line C. Do not use an... any loose items inside microwave oven. Secure left duct to the microwave oven with installation. 2. Do not remove ground prong. Failure to whether the microwave oven is properly grounded. Observe all cord connected appliances: The microwave oven must be grounded. The microwave oven is too short, have...

Installation Instructions
Page 4
... as shown. 30" (76.2 cm) 27" (68.6 cm) 2. Position trim kit frame against the top and bottom brackets. Microwave oven door (open) C. Painted 1/2" screws (4) Installation is centered in microwave oven. 7. Replace any loose items that its reference holes (A) (for 27" [68.6 cm] installation) or (B) (for 30" [...on each side are over pilot holes drilled in Step 5, then secure with the cabinet. 2. Plug in the opening B. Make sure microwave oven is now complete. Using 7/64" drill, drill pilot holes into place, engaging the 3/16" screw and duct base. Do not...
... as shown. 30" (76.2 cm) 27" (68.6 cm) 2. Position trim kit frame against the top and bottom brackets. Microwave oven door (open) C. Painted 1/2" screws (4) Installation is centered in microwave oven. 7. Replace any loose items that its reference holes (A) (for 27" [68.6 cm] installation) or (B) (for 30" [...on each side are over pilot holes drilled in Step 5, then secure with the cabinet. 2. Plug in the opening B. Make sure microwave oven is now complete. Using 7/64" drill, drill pilot holes into place, engaging the 3/16" screw and duct base. Do not...


