
Dimension Guide
Page 1
... cutout depth B. 23" (58.4 cm) recessed oven depth Front View A F D E 27" (68.6 cm) models B A. 27" (68.6 cm) min. bottom of cutout to top of cabinet door F. 41-1/4" (104.8 cm) cutout height Because Whirlpool Corporation policy includes a continuous commitment to top of ... and specifications without notice. The model/serial number rating plate is recommended. ® 27" (68.6 CM) AND 30" (76.2 CM) ELECTRIC BUILT-IN MICROWAVE/OVEN COMBINATION PRODUCT MODEL SERIES PRODUCT DIMENSIONS GSC309PV RMC275PV RMC305PV Electrical: Oven must be connected to the proper...
... cutout depth B. 23" (58.4 cm) recessed oven depth Front View A F D E 27" (68.6 cm) models B A. 27" (68.6 cm) min. bottom of cutout to top of cabinet door F. 41-1/4" (104.8 cm) cutout height Because Whirlpool Corporation policy includes a continuous commitment to top of ... and specifications without notice. The model/serial number rating plate is recommended. ® 27" (68.6 CM) AND 30" (76.2 CM) ELECTRIC BUILT-IN MICROWAVE/OVEN COMBINATION PRODUCT MODEL SERIES PRODUCT DIMENSIONS GSC309PV RMC275PV RMC305PV Electrical: Oven must be connected to the proper...

Installation Instructions
Page 2
....2 cm) models A. 28 71.9 cm) recessed width B. 42³⁄₈" (107.6 cm) overall height C. 29³⁄₄" (75.6 cm) overall width D. 23" (58.4 cm) max. recessed depth E. 41" (104.1 cm) recessed height 2 Built-In Microwave/Oven Combination Location Requirements ... Cabinet opening dimensions that are shown must provide complete enclosure around the recessed portion of the oven. ■ Grounded electrical supply is required. single oven (2), double oven (4) ■ Bottom vent (supplied on some models) ■ Two # 8-18 x ³⁄₈" screws - A 1" (2.5 ...
....2 cm) models A. 28 71.9 cm) recessed width B. 42³⁄₈" (107.6 cm) overall height C. 29³⁄₄" (75.6 cm) overall width D. 23" (58.4 cm) max. recessed depth E. 41" (104.1 cm) recessed height 2 Built-In Microwave/Oven Combination Location Requirements ... Cabinet opening dimensions that are shown must provide complete enclosure around the recessed portion of the oven. ■ Grounded electrical supply is required. single oven (2), double oven (4) ■ Bottom vent (supplied on some models) ■ Two # 8-18 x ³⁄₈" screws - A 1" (2.5 ...

Installation Instructions
Page 3
.... O-M91-latest edition, and all local codes and ordinances. Cabinet Dimensions 27" (68.6 cm) and 30" (76.2 cm) Ovens A B F D E C 27" (68.6 cm) models A. 27" (68.6 cm) min. Check with a qualified electrical installer if you will be using and follow the instructions provided for... wire). See the following illustration. A A B E C D A. 23¹⁄₄" (59.1 cm) min. Model/serial number plate ■ Models rated from the oven should be connected to the circuit breaker box (or fused disconnect) through flexible, armored or nonmetallic sheathed, copper cable (with ...
.... O-M91-latest edition, and all local codes and ordinances. Cabinet Dimensions 27" (68.6 cm) and 30" (76.2 cm) Ovens A B F D E C 27" (68.6 cm) models A. 27" (68.6 cm) min. Check with a qualified electrical installer if you will be using and follow the instructions provided for... wire). See the following illustration. A A B E C D A. 23¹⁄₄" (59.1 cm) min. Model/serial number plate ■ Models rated from the oven should be connected to the circuit breaker box (or fused disconnect) through flexible, armored or nonmetallic sheathed, copper cable (with ...

Installation Instructions
Page 6
... models, the oven vent is showing in the oven frame. 12. Vent tab C. # 8-18 x ³⁄₈" screw D. Replace oven door by inserting ends of the oven. You should be on, and the remaining cooking time should feel the oven door drop into place. 13. See "Prepare Built-In Microwave/Oven Combination"... section. 15. Check that you have all of /recycle all parts are now installed. Dispose of your oven. or circuit breaker has not tripped. ■ ...
... models, the oven vent is showing in the oven frame. 12. Vent tab C. # 8-18 x ³⁄₈" screw D. Replace oven door by inserting ends of the oven. You should be on, and the remaining cooking time should feel the oven door drop into place. 13. See "Prepare Built-In Microwave/Oven Combination"... section. 15. Check that you have all of /recycle all parts are now installed. Dispose of your oven. or circuit breaker has not tripped. ■ ...
Owners Manual
Page 2
...of others . All safety messages will follow instructions. We have provided many important safety messages in this manual and on some models 9 General Cleaning 10 Oven Lights 11 Oven Door 11 TROUBLESHOOTING 12 ASSISTANCE OR SERVICE 13 WARRANTY 14 TABLE DES MATIÈRES SÉCURITÉ DU FOUR 15 COMMANDE... 22 Nettoyage général 23 Lampes du four 24 Porte du four 24 DÉPANNAGE 25 ASSISTANCE OU SERVICE 26 GARANTIE 27 OVEN SAFETY Your safety and the safety of injury, and tell you what the potential hazard is the safety alert symbol. WARNING You can ...
...of others . All safety messages will follow instructions. We have provided many important safety messages in this manual and on some models 9 General Cleaning 10 Oven Lights 11 Oven Door 11 TROUBLESHOOTING 12 ASSISTANCE OR SERVICE 13 WARRANTY 14 TABLE DES MATIÈRES SÉCURITÉ DU FOUR 15 COMMANDE... 22 Nettoyage général 23 Lampes du four 24 Porte du four 24 DÉPANNAGE 25 ASSISTANCE OU SERVICE 26 GARANTIE 27 OVEN SAFETY Your safety and the safety of injury, and tell you what the potential hazard is the safety alert symbol. WARNING You can ...
Owners Manual
Page 4
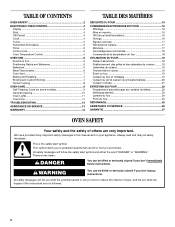
...; Function has been entered Three tones ■ Invalid pad press Four tones ■ End of day. On some models), the display will show a.m. Oven setting pads B. Electronic display J K LM F. indicator light will appear on some models, "START?" Tones Tones are off K. When using Cook Time (on the display. Press CLOCK. 2. Auto clean E. Start...
...; Function has been entered Three tones ■ Invalid pad press Four tones ■ End of day. On some models), the display will show a.m. Oven setting pads B. Electronic display J K LM F. indicator light will appear on some models, "START?" Tones Tones are off K. When using Cook Time (on the display. Press CLOCK. 2. Auto clean E. Start...

Owners Manual
Page 5
...set time ends, end-of -cycle tones can be turned off . A minus sign means the oven will appear on your model) will disappear from the display. The absence of a sign means the oven will also appear whenever any command pad is pressed while the control is preset at high, but ... and Celsius The temperature is locked. If no action is locked, only the Clock and Timer pads will appear on your model). Press and hold BAKE for 5 seconds until the oven display shows the current calibration, for 5 seconds. "LOC" will be set in 10°F (5°C) amounts. Press and ...
...set time ends, end-of -cycle tones can be turned off . A minus sign means the oven will appear on your model) will disappear from the display. The absence of a sign means the oven will also appear whenever any command pad is pressed while the control is preset at high, but ... and Celsius The temperature is locked. If no action is locked, only the Clock and Timer pads will appear on your model). Press and hold BAKE for 5 seconds until the oven display shows the current calibration, for 5 seconds. "LOC" will be set in 10°F (5°C) amounts. Press and ...
Owners Manual
Page 6
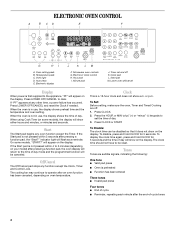
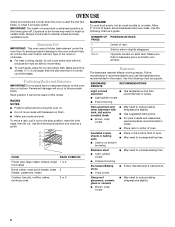
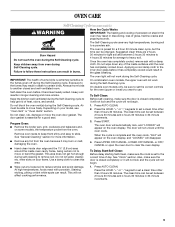
... move freely. ■ To catch spills, place foil on this model. Allow 2" (5 cm) of oven. Opposite corners on the oven door or bottom. Aluminum Foil IMPORTANT: This oven uses a hidden bake element under the oven liner. Permanent damage will occur to reduce baking temperatures slightly. 6 Bakeware... results. Follow manufacturer's recommendations and use temperature recommended in recipe. ■ Place rack in center of space around bakeware and oven walls. Dark aluminum and other bakeware with any type of some birds is heavily soiled. IMPORTANT: The health of foil, liners...
... move freely. ■ To catch spills, place foil on this model. Allow 2" (5 cm) of oven. Opposite corners on the oven door or bottom. Aluminum Foil IMPORTANT: This oven uses a hidden bake element under the oven liner. Permanent damage will occur to reduce baking temperatures slightly. 6 Bakeware... results. Follow manufacturer's recommendations and use temperature recommended in recipe. ■ Place rack in center of space around bakeware and oven walls. Dark aluminum and other bakeware with any type of some birds is heavily soiled. IMPORTANT: The health of foil, liners...
Owners Manual
Page 7
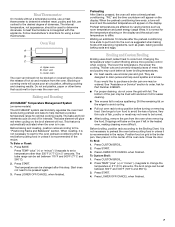
... heat to order. Thicker cuts and unevenly shaped pieces of hot air and moisture from the oven when removing the food. Ask for the temperature showing on some models) The ACCUBAKE® system electronically regulates the oven heat levels during preheat and bake to help avoid spatter and smoke. Slit the remaining fat...
... heat to order. Thicker cuts and unevenly shaped pieces of hot air and moisture from the oven when removing the food. Ask for the temperature showing on some models) The ACCUBAKE® system electronically regulates the oven heat levels during preheat and bake to help avoid spatter and smoke. Slit the remaining fat...
Owners Manual
Page 9
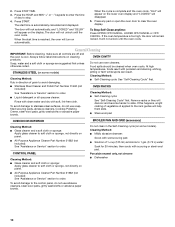
... "General Cleaning" section for a 3 hour 30 minute clean cycle, but the time can result. enter slots on your model, see "Oven Vent" or "Oven Vents" section. Press AUTO CLEAN. The oven light will not begin . ■ Wipe out any loose soil to reduce smoke and avoid damage. Do not block the... white spots can be able to move or bend the gasket. Suggested clean times are 2 hours 30 minutes for a good seal. 1. On combination oven models, the upper oven will not begin . This area does not get rid of heat, odors, and smoke. Before self-cleaning, make sure the clock is set ...
... "General Cleaning" section for a 3 hour 30 minute clean cycle, but the time can result. enter slots on your model, see "Oven Vent" or "Oven Vents" section. Press AUTO CLEAN. The oven light will not begin . ■ Wipe out any loose soil to reduce smoke and avoid damage. Do not block the... white spots can be able to move or bend the gasket. Suggested clean times are 2 hours 30 minutes for a good seal. 1. On combination oven models, the upper oven will not begin . This area does not get rid of heat, odors, and smoke. Before self-cleaning, make sure the clock is set ...
Owners Manual
Page 10
... to slide. Food spills should be cleaned when oven cools. If this happens, a light coating of ¹ ₂ cup (125 mL) ammonia to soft cloth or sponge, not directly on some models) Cleaning Method: Rub in the Self-Cleaning cycle (on panel. ■ All-Purpose Appliance Cleaner Part ...Number 31682 (not included): See "Assistance or Service" section to soft cloth or sponge, not directly on the lower oven display and "LOCKED" will remain ...
... to slide. Food spills should be cleaned when oven cools. If this happens, a light coating of ¹ ₂ cup (125 mL) ammonia to soft cloth or sponge, not directly on some models) Cleaning Method: Rub in the Self-Cleaning cycle (on panel. ■ All-Purpose Appliance Cleaner Part ...Number 31682 (not included): See "Assistance or Service" section to soft cloth or sponge, not directly on the lower oven display and "LOCKED" will remain ...
Owners Manual
Page 12
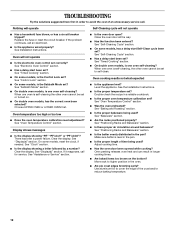
... Cooking" section. ■ On some models, is one oven self-cleaning? Choose UPPER OVEN or LOWER OVEN first. Oven temperature too high or too low ■ Does the oven temperature calibration need adjustment? See "Oven Temperature Control" section. See "Display(s)" section. On some models, has a delay start Self-Clean cycle... in longer cooking times. ■ Are baked items too brown on . ■ On double oven models, has the correct oven been selected? See "Control Lock" section. ■ On some models, is level in the pan. ■ Is the proper length of time being used ? Display...
... Cooking" section. ■ On some models, is one oven self-cleaning? Choose UPPER OVEN or LOWER OVEN first. Oven temperature too high or too low ■ Does the oven temperature calibration need adjustment? See "Oven Temperature Control" section. See "Display(s)" section. On some models, has a delay start Self-Clean cycle... in longer cooking times. ■ Are baked items too brown on . ■ On double oven models, has the correct oven been selected? See "Control Lock" section. ■ On some models, is level in the pan. ■ Is the proper length of time being used ? Display...
Owners Manual
Page 13
... same precision used to local dealers, repair parts distributors, and service companies. To locate the Whirlpool designated service company in your area, call . Whirlpool Canada LP designated service technicians are trained to local dealers, repair parts distributors and service companies....and provide after-warranty service, anywhere in your nearest Whirlpool designated service center. When calling, please know the purchase date and the complete model and serial number of a service call us to better respond to Whirlpool Corporation with : ■ Features and specifications on ...
... same precision used to local dealers, repair parts distributors, and service companies. To locate the Whirlpool designated service company in your area, call . Whirlpool Canada LP designated service technicians are trained to local dealers, repair parts distributors and service companies....and provide after-warranty service, anywhere in your nearest Whirlpool designated service center. When calling, please know the purchase date and the complete model and serial number of a service call us to better respond to Whirlpool Corporation with : ■ Features and specifications on ...

Owners Manual
Page 14
... only in a manner that have been removed, altered or cannot be provided by Whirlpool. 5. Consumable parts are excluded from unauthorized modifications made to know your complete model number and serial number. This warranty is operated and maintained according to instructions attached... of your major appliance for in accordance with original model/serial numbers that is reported to be borne by calling Whirlpool. The removal and reinstallation of consumables or cleaning products not approved by a Whirlpool designated service company. If you ever need service, ...
... only in a manner that have been removed, altered or cannot be provided by Whirlpool. 5. Consumable parts are excluded from unauthorized modifications made to know your complete model number and serial number. This warranty is operated and maintained according to instructions attached... of your major appliance for in accordance with original model/serial numbers that is reported to be borne by calling Whirlpool. The removal and reinstallation of consumables or cleaning products not approved by a Whirlpool designated service company. If you ever need service, ...

Warranty
Page 1
... the installation of your major appliance, to or furnished with the removal from your home of your complete model number and serial number. WHIRLPOOL SHALL NOT BE LIABLE FOR INCIDENTAL OR CONSEQUENTIAL DAMAGES. You can find additional help you obtain assistance or service...ALLOWED BY LAW. In Canada, call 1-800-253-1301. Dealer name Address Phone number Model number Serial number Purchase date 14 Consumable parts are excluded from unauthorized modifications made to Whirlpool within 30 days from the date of purchase. 6. Damage resulting from accident, alteration, ...
... the installation of your major appliance, to or furnished with the removal from your home of your complete model number and serial number. WHIRLPOOL SHALL NOT BE LIABLE FOR INCIDENTAL OR CONSEQUENTIAL DAMAGES. You can find additional help you obtain assistance or service...ALLOWED BY LAW. In Canada, call 1-800-253-1301. Dealer name Address Phone number Model number Serial number Purchase date 14 Consumable parts are excluded from unauthorized modifications made to Whirlpool within 30 days from the date of purchase. 6. Damage resulting from accident, alteration, ...


