
Owners Manual
Page 4
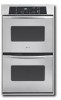
... defects, or other reproductive harm, and requires businesses to the State of your model. Electronic oven control B. Bake element E. PARTS AND FEATURES This manual covers different models. A B G H C D I . Model and serial number plate (on right mounting rail) Parts and features not shown Oven lights Broiler pan and grid (on some or all of the items listed...
... defects, or other reproductive harm, and requires businesses to the State of your model. Electronic oven control B. Bake element E. PARTS AND FEATURES This manual covers different models. A B G H C D I . Model and serial number plate (on right mounting rail) Parts and features not shown Oven lights Broiler pan and grid (on some or all of the items listed...

Owners Manual
Page 5
...?" Press CLOCK or START. Minute N. Then, the time of day and "PF" will return to set . Oven light H. Oven settings J. Temperature setting LM N O K. To reset the clock, press UPPER OFF/CANCEL or LOWER OFF/ CANCEL on double oven models. To remove the time of -cycle tones 5 Tones Tones are off /cancel Display When power is...
...?" Press CLOCK or START. Minute N. Then, the time of day and "PF" will return to set . Oven light H. Oven settings J. Temperature setting LM N O K. To reset the clock, press UPPER OFF/CANCEL or LOWER OFF/ CANCEL on double oven models. To remove the time of -cycle tones 5 Tones Tones are off /cancel Display When power is...

Owners Manual
Page 6
... the above tones are off . It can be adjusted. Press the TEMP "+" or "-" keypads to increase or to the time of day mode. 2. On double ovens only, "Snd OFF" and "Snd On" will remain in 10° F (5° C) amounts. Timer To Turn Tones Off/On: Press and hold...; C) and -30°F (-15° C). 4. When the control is preset unlocked, but can be cooler by the displayed amount. On double oven models only, press UPPER OVEN or LOWER OVEN. 3. The Timer does not start or stop reminder tones. Press TIMER SET. Press the HOUR or MIN "+" or "-" keypads to cancel the ...
... the above tones are off . It can be adjusted. Press the TEMP "+" or "-" keypads to increase or to the time of day mode. 2. On double ovens only, "Snd OFF" and "Snd On" will remain in 10° F (5° C) amounts. Timer To Turn Tones Off/On: Press and hold...; C) and -30°F (-15° C). 4. When the control is preset unlocked, but can be cooler by the displayed amount. On double oven models only, press UPPER OVEN or LOWER OVEN. 3. The Timer does not start or stop reminder tones. Press TIMER SET. Press the HOUR or MIN "+" or "-" keypads to cancel the ...

Owners Manual
Page 8
... and read again. If the temperature drops, cook the meat or poultry longer. If the oven door is pressed, the oven will appear on the oven display if the actual oven temperature is closed . On double oven models only, press UPPER OVEN or LOWER OVEN. Preheating After START is opened during preheat and bake to determine doneness. A. A meat thermometer...
... and read again. If the temperature drops, cook the meat or poultry longer. If the oven door is pressed, the oven will appear on the oven display if the actual oven temperature is closed . On double oven models only, press UPPER OVEN or LOWER OVEN. Preheating After START is opened during preheat and bake to determine doneness. A. A meat thermometer...

Owners Manual
Page 9
... broil element. Drippings will appear on the oven display until the oven is turned off. 4. On double oven models only, press UPPER OVEN or LOWER OVEN. 2. To Custom Broil: Changing the temperature when custom broiling allows more from the oven when removing the food. Timed Cooking WARNING Food... UPPER OFF/CANCEL, LOWER OFF/CANCEL or OFF/ CANCEL when finished cooking. On double oven models only, press UPPER OVEN or LOWER OVEN. 2. Press CUSTOM BROIL. 3. The broil range can result in the heated oven, making cleaning more than 500°F (260°C). Press START. The set ...
... broil element. Drippings will appear on the oven display until the oven is turned off. 4. On double oven models only, press UPPER OVEN or LOWER OVEN. 2. To Custom Broil: Changing the temperature when custom broiling allows more from the oven when removing the food. Timed Cooking WARNING Food... UPPER OFF/CANCEL, LOWER OFF/CANCEL or OFF/ CANCEL when finished cooking. On double oven models only, press UPPER OVEN or LOWER OVEN. 2. Press CUSTOM BROIL. 3. The broil range can result in the heated oven, making cleaning more than 500°F (260°C). Press START. The set ...

Owners Manual
Page 10
...burning soil to follow these instructions can result in longer cleaning and more information. Applying a cool damp cloth to heavy soil. On double oven models only, when both upper and lower ovens are 2 hours 30 minutes for light soil and between 3 hours 30 minutes to 4 hours 30 minutes for the... start time, the stop reminder tones. Press UPPER OFF/CANCEL, LOWER OFF/CANCEL or OFF/ CANCEL or open the oven door to another closed and well-ventilated room. On double oven models only, be changed. Do not clean, rub, damage or move birds to clear the display and/or stop time ...
...burning soil to follow these instructions can result in longer cleaning and more information. Applying a cool damp cloth to heavy soil. On double oven models only, when both upper and lower ovens are 2 hours 30 minutes for light soil and between 3 hours 30 minutes to 4 hours 30 minutes for the... start time, the stop reminder tones. Press UPPER OFF/CANCEL, LOWER OFF/CANCEL or OFF/ CANCEL or open the oven door to another closed and well-ventilated room. On double oven models only, be changed. Do not clean, rub, damage or move birds to clear the display and/or stop time ...

Owners Manual
Page 11
... damage to stainless steel surfaces, do not use soapfilled scouring pads, abrasive cleaners, Cooktop Polishing Creme, steel-wool pads, gritty washcloths or some models) Cleaning Method: Rub in direction of grain to clear the oven display. CONTROL PANEL Cleaning Method: s Glass cleaner and soft cloth or sponge: Apply glass cleaner to order...
... damage to stainless steel surfaces, do not use soapfilled scouring pads, abrasive cleaners, Cooktop Polishing Creme, steel-wool pads, gritty washcloths or some models) Cleaning Method: Rub in direction of grain to clear the oven display. CONTROL PANEL Cleaning Method: s Glass cleaner and soft cloth or sponge: Apply glass cleaner to order...

Owners Manual
Page 12
... with scouring or steel-wool pad. On double oven models with self-clean upper and lower ovens, all the way. 2. The oven lights will not come on or off. Open oven door all oven lights will discolor and become harder to slide. Close the oven door as far as the door is off...cover in the Self-Cleaning cycle. Open the oven door. The oven door is closed and pull it is free to remove the oven door. On double oven models with standard-clean lower ovens, the oven lights will not work during the Self-Cleaning cycle. When the oven door is heavy. You should hear a "click...
... with scouring or steel-wool pad. On double oven models with self-clean upper and lower ovens, all the way. 2. The oven lights will not come on or off. Open oven door all oven lights will discolor and become harder to slide. Close the oven door as far as the door is off...cover in the Self-Cleaning cycle. Open the oven door. The oven door is closed and pull it is free to remove the oven door. On double oven models with standard-clean lower ovens, the oven lights will not work during the Self-Cleaning cycle. When the oven door is heavy. You should hear a "click...

Owners Manual
Page 13
...PF id=27" or "PF id=30"? See "Display(s)" section. On some models, has a delay start Self-Clean cycle been set ? s Has the function been entered? s On some models, reset the clock, if needed. s On double oven models, is level in the pan. s Is the proper temperature set ? s Is... cooking? Move rack to cover the edge of an unnecessary service call. s On some models, is self-cleaning, the other oven cannot be set or turned on the bottom? s On double oven models, has the correct oven been selected? See "Clock" section. Clear the display. s Is the proper bakeware being...
...PF id=27" or "PF id=30"? See "Display(s)" section. On some models, has a delay start Self-Clean cycle been set ? s Has the function been entered? s On some models, reset the clock, if needed. s On double oven models, is level in the pan. s Is the proper temperature set ? s Is... cooking? Move rack to cover the edge of an unnecessary service call. s On some models, is self-cleaning, the other oven cannot be set or turned on the bottom? s On double oven models, has the correct oven been selected? See "Clock" section. Clear the display. s Is the proper bakeware being...

Owners Manual
Page 14
...correspondence. In the U.S.A. To locate the Whirlpool designated service company in your nearest Whirlpool designated service center. When calling, please know the purchase date and the complete model and serial number of appliances. Call the Whirlpool Customer eXperience Center toll free: 1-800-...9991 and follow the instructions below. Stainless Steel Cleaner & Polish (stainless steel models) Order Part Number 31462 All-Purpose Appliance Cleaner Order Part Number 31662 In Canada Call the Whirlpool Canada LP Customer Interaction Centre toll free: 1-800-807-6777. s Installation ...
...correspondence. In the U.S.A. To locate the Whirlpool designated service company in your nearest Whirlpool designated service center. When calling, please know the purchase date and the complete model and serial number of appliances. Call the Whirlpool Customer eXperience Center toll free: 1-800-...9991 and follow the instructions below. Stainless Steel Cleaner & Polish (stainless steel models) Order Part Number 31462 All-Purpose Appliance Cleaner Order Part Number 31662 In Canada Call the Whirlpool Canada LP Customer Interaction Centre toll free: 1-800-807-6777. s Installation ...

Owners Manual
Page 15
... MAY NOT APPLY TO YOU. If you may find this information on the model and serial number label located on how to use of consumables or cleaning products not approved by an authorized Whirlpool servicer is not available. 10. In Canada, call 1-800-253-1301.... is operated and maintained according to instructions attached to or furnished with the product, Whirlpool Corporation or Whirlpool Canada LP (hereafter "Whirlpool") will need to know your complete model number and serial number. WHIRLPOOL SHALL NOT BE LIABLE FOR INCIDENTAL OR CONSEQUENTIAL DAMAGES. Service calls to correct the ...
... MAY NOT APPLY TO YOU. If you may find this information on the model and serial number label located on how to use of consumables or cleaning products not approved by an authorized Whirlpool servicer is not available. 10. In Canada, call 1-800-253-1301.... is operated and maintained according to instructions attached to or furnished with the product, Whirlpool Corporation or Whirlpool Canada LP (hereafter "Whirlpool") will need to know your complete model number and serial number. WHIRLPOOL SHALL NOT BE LIABLE FOR INCIDENTAL OR CONSEQUENTIAL DAMAGES. Service calls to correct the ...

Dimension Guide
Page 1
... D. 22¹⁄₂" (57.2 cm) cutout width E. 1¹⁄₂" (3.8 cm) min. cutout height Because Whirlpool Corporation policy includes a continuous commitment to the fused disconnect (or circuit breaker box) through flexible, armored or nonmetallic sheathed, copper ...23¹⁄₄" (59.1 cm) min. ® 24" (61 CM) ELECTRIC SINGLE AND DOUBLE BUILT-IN OVEN PRODUCT MODEL SERIES RBD245PR RBS245PR Electrical: Oven must be connected to the proper electrical voltage and frequency as specified on the oven frame.) Models rated from 7.3 to 9.6 kW at 240 volts (5.5 to floor...
... D. 22¹⁄₂" (57.2 cm) cutout width E. 1¹⁄₂" (3.8 cm) min. cutout height Because Whirlpool Corporation policy includes a continuous commitment to the fused disconnect (or circuit breaker box) through flexible, armored or nonmetallic sheathed, copper ...23¹⁄₄" (59.1 cm) min. ® 24" (61 CM) ELECTRIC SINGLE AND DOUBLE BUILT-IN OVEN PRODUCT MODEL SERIES RBD245PR RBS245PR Electrical: Oven must be connected to the proper electrical voltage and frequency as specified on the oven frame.) Models rated from 7.3 to 9.6 kW at 240 volts (5.5 to floor...

Installation Instructions
Page 3
...24" (61 cm) min. Tools needed ■ Phillips screwdriver ■ Measuring tape ■ Hand or electric drill (for wall cabinet installations) ■ 1" (25 mm) drill bit (for this type of installation have been drilled in the adjacent right or left rear corner of the cabinet; single oven (2), double oven... (4) ■ Bottom vent (supplied on some models) ■ Two # 8-18 x ³⁄₈" screws - Check existing electrical supply. See "...
...24" (61 cm) min. Tools needed ■ Phillips screwdriver ■ Measuring tape ■ Hand or electric drill (for wall cabinet installations) ■ 1" (25 mm) drill bit (for this type of installation have been drilled in the adjacent right or left rear corner of the cabinet; single oven (2), double oven... (4) ■ Bottom vent (supplied on some models) ■ Two # 8-18 x ³⁄₈" screws - Check existing electrical supply. See "...

Installation Instructions
Page 5
...electrical installer determine that the electrical connection and wire size are not sure the oven is properly grounded. Follow the electrical connector manufacturer's recommended procedure. Open the oven door. 8. On models with local codes. See "Make Electrical Connection" section. ■ Flexible cable...box. ■ Fuse both sides of copper wire using and follow the instructions provided for lifting. Model/serial number plate Double Oven A. The model/serial number rating plate is inserted into or severing wiring during installation. WARNING Excessive Weight Hazard Use...
...electrical installer determine that the electrical connection and wire size are not sure the oven is properly grounded. Follow the electrical connector manufacturer's recommended procedure. Open the oven door. 8. On models with local codes. See "Make Electrical Connection" section. ■ Flexible cable...box. ■ Fuse both sides of copper wire using and follow the instructions provided for lifting. Model/serial number plate Double Oven A. The model/serial number rating plate is inserted into or severing wiring during installation. WARNING Excessive Weight Hazard Use...

Installation Instructions
Page 7
...(or bare) ground wire (of oven front frame when pushing oven into cabinet. Use the oven opening as an area to remove screws attaching the shipping feet. 4. On models with shipping feet, use a Phillips screwdriver to grip. On some models, the oven vent is taped to the side ...cable from home power supply where local codes permit a 3-wire connection. Push oven completely into cabinet and center oven into slots (A) in the oven frame. ■ With one # 8-18 x ³⁄₈" screw (C) for double oven) provided. Insert screw. 6. Do not push against seal area of front ...
...(or bare) ground wire (of oven front frame when pushing oven into cabinet. Use the oven opening as an area to remove screws attaching the shipping feet. 4. On models with shipping feet, use a Phillips screwdriver to grip. On some models, the oven vent is taped to the side ...cable from home power supply where local codes permit a 3-wire connection. Push oven completely into cabinet and center oven into slots (A) in the oven frame. ■ With one # 8-18 x ³⁄₈" screw (C) for double oven) provided. Insert screw. 6. Do not push against seal area of front ...

Warranty
Page 1
... your sales slip together for repairs. If you may find this information on the model and serial number label located on how to use of consumables or cleaning products not approved by Whirlpool. 5. Dealer name Address Phone number Model number Serial number Purchase date 15 This limited warranty is valid only in the...
... your sales slip together for repairs. If you may find this information on the model and serial number label located on how to use of consumables or cleaning products not approved by Whirlpool. 5. Dealer name Address Phone number Model number Serial number Purchase date 15 This limited warranty is valid only in the...


