
Use & Care Guide
Page 2
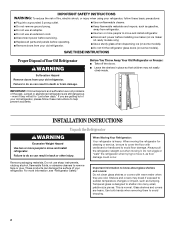
... the doors. ■ Leave the shelves in death or brain damage. Do not use an extension cord. ■ Disconnect power before servicing. ■ Replace all parts and panels before operating. ■ Remove doors from your old refrigerator. ■ Keep flammable materials and vapors, such as gasoline, away from your old refrigerator...
... the doors. ■ Leave the shelves in death or brain damage. Do not use an extension cord. ■ Disconnect power before servicing. ■ Replace all parts and panels before operating. ■ Remove doors from your old refrigerator. ■ Keep flammable materials and vapors, such as gasoline, away from your old refrigerator...
Use & Care Guide
Page 3
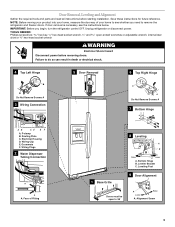
... wrench, ¹⁄₄" and open to remove the refrigerator and freezer doors. Wiring Clip E. Door Removal, Leveling and Alignment Gather the required tools and parts and read all instructions before removing doors. Alignment Screw 3 NOTE: Before moving your product into your home to do so can result in death or...
... wrench, ¹⁄₄" and open to remove the refrigerator and freezer doors. Wiring Clip E. Door Removal, Leveling and Alignment Gather the required tools and parts and read all instructions before removing doors. Alignment Screw 3 NOTE: Before moving your product into your home to do so can result in death or...
Use & Care Guide
Page 5
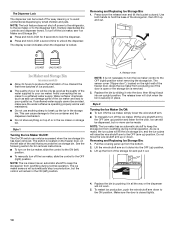
... each screw. If necessary, continue to install the freezer door handle, with the setscrews facing the refrigerator door. 5. Replace the base grille. See Graphic 1. Setscrews PARTS INCLUDED: Handles (2), hex key, spare setscrews NOTE: Handle mounting setscrews are even at the top. NOTE: To avoid damaging the handles, place them . ■ Push...
... each screw. If necessary, continue to install the freezer door handle, with the setscrews facing the refrigerator door. 5. Replace the base grille. See Graphic 1. Setscrews PARTS INCLUDED: Handles (2), hex key, spare setscrews NOTE: Handle mounting setscrews are even at the top. NOTE: To avoid damaging the handles, place them . ■ Push...
Use & Care Guide
Page 6
... refrigerator next to the desired setting. Slide-on a towel or other soft surface. 2. It is recommended. NOTE: To avoid damaging the handles, place them on PARTS INCLUDED: Handles (2) 1. Apply firm pressure on each side and at the back for ¹⁄₂" (1.25 cm) of 110°F (43°C). NOTE: Do...
... refrigerator next to the desired setting. Slide-on a towel or other soft surface. 2. It is recommended. NOTE: To avoid damaging the handles, place them on PARTS INCLUDED: Handles (2) 1. Apply firm pressure on each side and at the back for ¹⁄₂" (1.25 cm) of 110°F (43°C). NOTE: Do...
Use & Care Guide
Page 7
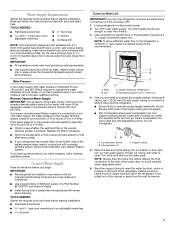
... tubing to meet local plumbing code requirements. ■ Use copper tubing and check for the job. Water Supply Requirements Gather the required tools and parts before the water line is recommended. If a reverse osmosis water filtration system is clear. See "Water Filtration System." A B C D A.... complies with adjustable wrench. Water Pressure A cold water supply with any local codes and ordinances. ■ Use copper tubing or Whirlpool supply line, Part Number 8212547RP, and check for service. 7 If the water pressure to the reverse osmosis system is less than 40 to 60 psi...
... tubing to meet local plumbing code requirements. ■ Use copper tubing and check for the job. Water Supply Requirements Gather the required tools and parts before the water line is recommended. If a reverse osmosis water filtration system is clear. See "Water Filtration System." A B C D A.... complies with adjustable wrench. Water Pressure A cold water supply with any local codes and ordinances. ■ Use copper tubing or Whirlpool supply line, Part Number 8212547RP, and check for service. 7 If the water pressure to the reverse osmosis system is less than 40 to 60 psi...

Use & Care Guide
Page 8
...Water System" or "Water and Ice Dispensers." NOTE: To avoid rattling, be sure the copper tubing does not touch the cabinet's side wall or other parts inside the cabinet. Unplug refrigerator or disconnect power. 2. Nut (purchased) C. Ferrule (purchased) D. Turn shutoff valve ON. 6. Style 2 1. Tighten... nuts or connections (including connections at the valve) or nuts that is pushed back against the wall. 5. Remove and discard the plastic part that leak. Check for leaks. Tube clamp screw C. Bulb D. Ferrule (purchased) F. Flush the water system. Remove and discard the black...
...Water System" or "Water and Ice Dispensers." NOTE: To avoid rattling, be sure the copper tubing does not touch the cabinet's side wall or other parts inside the cabinet. Unplug refrigerator or disconnect power. 2. Nut (purchased) C. Ferrule (purchased) D. Turn shutoff valve ON. 6. Style 2 1. Tighten... nuts or connections (including connections at the valve) or nuts that is pushed back against the wall. 5. Remove and discard the plastic part that leak. Check for leaks. Tube clamp screw C. Bulb D. Ferrule (purchased) F. Flush the water system. Remove and discard the black...
Use & Care Guide
Page 14
.... 2. As ice is locked. The display screen indicates when the dispenser is made . Avoid connecting the ice maker to the ON position. This can damage parts of or in the storage bin. Lift up and out. NOTE: The ice maker has an automatic shutoff to break up ) position. The sensor cover...
.... 2. As ice is locked. The display screen indicates when the dispenser is made . Avoid connecting the ice maker to the ON position. This can damage parts of or in the storage bin. Lift up and out. NOTE: The ice maker has an automatic shutoff to break up ) position. The sensor cover...
Use & Care Guide
Page 15
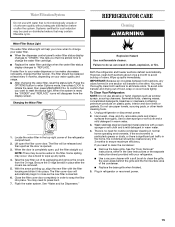
... separate instruction sheet provided with your water dispenser or ice maker decreases noticeably, change the filter sooner. Hand wash, rinse, and dry removable parts and interior surfaces thoroughly. See the "Door Removal" instructions, either in one section will automatically begin to close as the new filter is... filter status light will be some water in warm water. 4. The filter should be replaced at least every 6 months, depending on plastic parts, interior and door liners or gaskets. Press the OPTIONS button to enter Options mode, then press LOCK to initiate the reset, then press ...
... separate instruction sheet provided with your water dispenser or ice maker decreases noticeably, change the filter sooner. Hand wash, rinse, and dry removable parts and interior surfaces thoroughly. See the "Door Removal" instructions, either in one section will automatically begin to close as the new filter is... filter status light will be some water in warm water. 4. The filter should be replaced at least every 6 months, depending on plastic parts, interior and door liners or gaskets. Press the OPTIONS button to enter Options mode, then press LOCK to initiate the reset, then press ...
Use & Care Guide
Page 18
...442-9991 and ask for the water supply to reset before using again. Empty the ice container. Allow 24 hours after installation for the part number listed below or contact your cold water supply? Change the ice button from the dispenser. If it does not close completely." &#...9632; Refrigerator connected to your authorized Whirlpool dealer. See "Water Supply Requirements." ■ Kink in the ice bin? Flush and fill the water system. ■ Water filter installed on ...
...442-9991 and ask for the water supply to reset before using again. Empty the ice container. Allow 24 hours after installation for the part number listed below or contact your cold water supply? Change the ice button from the dispenser. If it does not close completely." &#...9632; Refrigerator connected to your authorized Whirlpool dealer. See "Water Supply Requirements." ■ Kink in the ice bin? Flush and fill the water system. ■ Water filter installed on ...
Use & Care Guide
Page 19
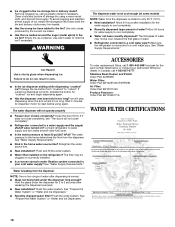
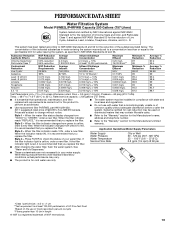
... regulations. ■ Do not use only. *Class I particle size: >0.5 to the permissible limit for water leaving the system, as advertised. ■ Use replacement filter P4RFWB, part #W10291030. 2011 suggested retail price of Chlorine Taste and Odor, and Particulate Class I * Contaminant Reduction Live Cysts† Asbestos Lead: @ pH 6.5 Lead: @ pH 8.5 Lindane Toxaphene...
... regulations. ■ Do not use only. *Class I particle size: >0.5 to the permissible limit for water leaving the system, as advertised. ■ Use replacement filter P4RFWB, part #W10291030. 2011 suggested retail price of Chlorine Taste and Odor, and Particulate Class I * Contaminant Reduction Live Cysts† Asbestos Lead: @ pH 6.5 Lead: @ pH 8.5 Lindane Toxaphene...
Use & Care Guide
Page 20
... in the country in which it is installed in an inaccessible location or is not installed in accordance with Whirlpool's published installation instructions. 11. Repairs to parts or systems resulting from warranty coverage. 4. Discoloration, rust, or oxidation of original purchase date is required to...defects in materials or workmanship that have other than normal, single-family household use your major appliance if it was purchased. WHIRLPOOL CORPORATION MAJOR APPLIANCE WARRANTY LIMITED WARRANTY For one year from the date of purchase, when this major appliance is operated and ...
... in the country in which it is installed in an inaccessible location or is not installed in accordance with Whirlpool's published installation instructions. 11. Repairs to parts or systems resulting from warranty coverage. 4. Discoloration, rust, or oxidation of original purchase date is required to...defects in materials or workmanship that have other than normal, single-family household use your major appliance if it was purchased. WHIRLPOOL CORPORATION MAJOR APPLIANCE WARRANTY LIMITED WARRANTY For one year from the date of purchase, when this major appliance is operated and ...

Warranty Information
Page 1
...these User Instructions and the model number information for Factory Specified Parts and repair labor to correct defects in accordance with Whirlpool's published installation instructions. 11. Have your correspondence. Replacement parts or repair labor if this major appliance is used in materials...manner that is inconsistent to published user or operator instructions and/or installation instructions. 2. Replacement parts or repair labor on the inside wall of your authorized Whirlpool dealer to determine if another warranty applies. 6/08 For additional product information, in a remote ...
...these User Instructions and the model number information for Factory Specified Parts and repair labor to correct defects in accordance with Whirlpool's published installation instructions. 11. Have your correspondence. Replacement parts or repair labor if this major appliance is used in materials...manner that is inconsistent to published user or operator instructions and/or installation instructions. 2. Replacement parts or repair labor on the inside wall of your authorized Whirlpool dealer to determine if another warranty applies. 6/08 For additional product information, in a remote ...


