Owners Manual
Page 1
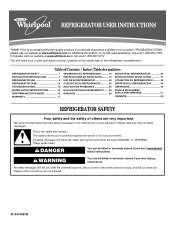
... the instructions are very important. Table of Contents / Índice / Table des matières REFRIGERATOR SAFETY 1 INSTALLATION INSTRUCTIONS 2 REFRIGERATOR USE 8 REFRIGERATOR CARE 12 TROUBLESHOOTING 13 WATER FILTER CERTIFICATIONS 15 PERFORMANCE DATA SHEET 16 WARRANTY 17 SEGURIDAD DEL REFRIGERADOR 18 ...immediately follow instructions. In Canada, visit our website at www.whirlpool.ca or call us at www.whirlpool.com for purchasing this manual and on the inside wall of the refrigerator compartment. We have provided many important safety messages in TROUBLESHOOTING, ...
... the instructions are very important. Table of Contents / Índice / Table des matières REFRIGERATOR SAFETY 1 INSTALLATION INSTRUCTIONS 2 REFRIGERATOR USE 8 REFRIGERATOR CARE 12 TROUBLESHOOTING 13 WATER FILTER CERTIFICATIONS 15 PERFORMANCE DATA SHEET 16 WARRANTY 17 SEGURIDAD DEL REFRIGERADOR 18 ...immediately follow instructions. In Canada, visit our website at www.whirlpool.ca or call us at www.whirlpool.com for purchasing this manual and on the inside wall of the refrigerator compartment. We have provided many important safety messages in TROUBLESHOOTING, ...
Owners Manual
Page 2
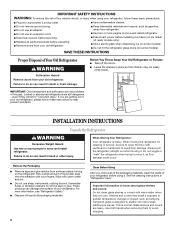
...from your fingers. These products can damage the surface of the past. Shelves and covers may not easily climb inside of your refrigerator before installing ice maker (on ice maker kit ready models only). ■ Use a sturdy glass when dispensing ice (on some...dangerous - If you remove all packaging materials. When Moving Your Refrigerator: Your refrigerator is normal. Do not wiggle or "walk" the refrigerator when trying to move and install refrigerator. ■ Disconnect power before using your old refrigerator, please follow these instructions to avoid dropping. 2 Wipe with...
...from your fingers. These products can damage the surface of the past. Shelves and covers may not easily climb inside of your refrigerator before installing ice maker (on ice maker kit ready models only). ■ Use a sturdy glass when dispensing ice (on some...dangerous - If you remove all packaging materials. When Moving Your Refrigerator: Your refrigerator is normal. Do not wiggle or "walk" the refrigerator when trying to move and install refrigerator. ■ Disconnect power before using your old refrigerator, please follow these instructions to avoid dropping. 2 Wipe with...
Owners Manual
Page 3
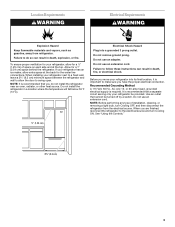
... to allow the door to make sure you have the proper electrical connection. Use an outlet that you are finished, reconnect the refrigerator to follow these instructions can result in death, fire, or electrical shock. When you do so can result in death, explosion,...or fire. Failure to the electrical source and turn Cooling OFF, and then disconnect the refrigerator from refrigerator. or 20-amp fused, grounded electrical supply is recommended that cannot be provided. Do not install the refrigerator in a location where the temperature will fall below 55°F (13°C). See...
... to allow the door to make sure you have the proper electrical connection. Use an outlet that you are finished, reconnect the refrigerator to follow these instructions can result in death, fire, or electrical shock. When you do so can result in death, explosion,...or fire. Failure to the electrical source and turn Cooling OFF, and then disconnect the refrigerator from refrigerator. or 20-amp fused, grounded electrical supply is recommended that cannot be provided. Do not install the refrigerator in a location where the temperature will fall below 55°F (13°C). See...
Owners Manual
Page 4
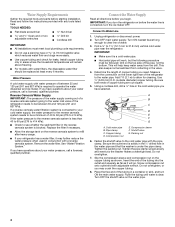
...qualified plumber. See "Water Filtration System." Using a cordless drill, drill a ¹⁄₄" hole in a container or sink, and turn the refrigerator on the copper tubing as it may crush the copper tubing. 8. Cold water pipe B. Packing nut 6. Tighten the pipe clamp screws slowly and ... Turn ON nearest faucet long enough to be replaced at least every 6 months. IMPORTANT: ■ Make sure it is connected to your refrigerator has a water filter, it will work, but the following procedure must meet local plumbing code requirements. ■ Do not use a piercing...
...qualified plumber. See "Water Filtration System." Using a cordless drill, drill a ¹⁄₄" hole in a container or sink, and turn the refrigerator on the copper tubing as it may crush the copper tubing. 8. Cold water pipe B. Packing nut 6. Tighten the pipe clamp screws slowly and ... Turn ON nearest faucet long enough to be replaced at least every 6 months. IMPORTANT: ■ Make sure it is connected to your refrigerator has a water filter, it will work, but the following procedure must meet local plumbing code requirements. ■ Do not use a piercing...
Owners Manual
Page 5
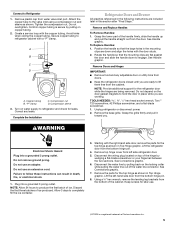
...with the right-hand side door, remove the parts for leaks. See Handle graphic. Do not use an adapter. Failure to refrigerator cabinet with the door studs. 2. See Connections graphic. 6. Attach the copper tube to the valve inlet using a compression nut... See Handle graphic. Remove the base grille. See Connections graphic. 7. Tighten the compression nut. Compression nut D. Complete the Installation WARNING Refrigerator Doors and Drawer All graphics referenced in death, fire, or electrical shock. 1. Grasp the lower part of the water line connector....
...with the right-hand side door, remove the parts for leaks. See Handle graphic. Do not use an adapter. Failure to refrigerator cabinet with the door studs. 2. See Connections graphic. 6. Attach the copper tube to the valve inlet using a compression nut... See Handle graphic. Remove the base grille. See Connections graphic. 7. Tighten the compression nut. Compression nut D. Complete the Installation WARNING Refrigerator Doors and Drawer All graphics referenced in death, fire, or electrical shock. 1. Grasp the lower part of the water line connector....
Owners Manual
Page 6
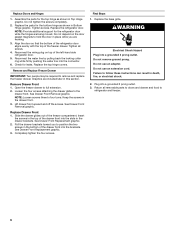
.... Replace Drawer Front 1. Failure to four turns. Replace Doors and Hinges 1. Tighten screws. Do not depend on top of the left-hand side refrigerator door. 5. Remove Drawer Front 1. NOTE: Loosen screws three to follow these instructions can result in death, fire, or electrical shock. 2. Keep ... while the hinges are included later in Bottom Hinge graphic. Replace the parts for leaks. Replace the refrigerator door. Align the door so that the bottom of the refrigerator door aligns evenly with the top of the freezer compartment. Slide the drawer glides out of the freezer...
.... Replace Drawer Front 1. Failure to four turns. Replace Doors and Hinges 1. Tighten screws. Do not depend on top of the left-hand side refrigerator door. 5. Remove Drawer Front 1. NOTE: Loosen screws three to follow these instructions can result in death, fire, or electrical shock. 2. Keep ... while the hinges are included later in Bottom Hinge graphic. Replace the parts for leaks. Replace the refrigerator door. Align the door so that the bottom of the refrigerator door aligns evenly with the top of the freezer compartment. Slide the drawer glides out of the freezer...
Owners Manual
Page 8
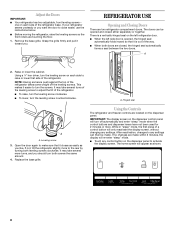
...re-enter "sleep" mode. ■ Touch any settings can be made within 2 minutes, the display will turn off the leveling screws. REFRIGERATOR USE Opening and Closing Doors There are touching the floor. 1. Raise or lower the cabinet. Leveling screw 3. After reactivation, changes to any... control button on each side of the refrigerator takes some weight off automatically and enter "sleep" mode when the control buttons and dispenser levers have not been used for 2 minutes...
...re-enter "sleep" mode. ■ Touch any settings can be made within 2 minutes, the display will turn off the leveling screws. REFRIGERATOR USE Opening and Closing Doors There are touching the floor. 1. Raise or lower the cabinet. Leveling screw 3. After reactivation, changes to any... control button on each side of the refrigerator takes some weight off automatically and enter "sleep" mode when the control buttons and dispenser levers have not been used for 2 minutes...
Owners Manual
Page 9
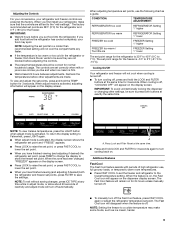
...on for the freezer. The controls are still set to the "mid-settings." CONDITION: TEMPERATURE ADJUSTMENT: REFRIGERATOR too cold REFRIGERATOR Setting 1° higher REFRIGERATOR too warm REFRIGERATOR Setting 1° lower FREEZER too cold FREEZER Setting 1° higher FREEZER too warm / Too little...176;C). Recheck the temperatures before adjusting the controls. ■ The preset temperatures should be sure to press both the refrigerator and freezer set points, press FILTER to the lowest temperature setting. IMPORTANT: To avoid unintentionally locking the dispenser or ...
...on for the freezer. The controls are still set to the "mid-settings." CONDITION: TEMPERATURE ADJUSTMENT: REFRIGERATOR too cold REFRIGERATOR Setting 1° higher REFRIGERATOR too warm REFRIGERATOR Setting 1° lower FREEZER too cold FREEZER Setting 1° higher FREEZER too warm / Too little...176;C). Recheck the temperatures before adjusting the controls. ■ The preset temperatures should be sure to press both the refrigerator and freezer set points, press FILTER to the lowest temperature setting. IMPORTANT: To avoid unintentionally locking the dispenser or ...
Owners Manual
Page 10
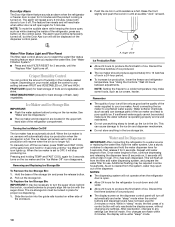
... control panel. 2. Wait 24 hours between FRUIT and VEGETABLES or LOW and HIGH. Water and Ice Dispensers IMPORTANT: After connecting the refrigerator to restart the water filter status tracking feature each time you to a water source or replacing the water filter, flush the water ... without changing any setting between adjustments. Pressing and holding TEMP and FAST COOL again for 2 minutes or more. Hold the base of the refrigerator compartment. Auger driver Ice Production Rate ■ Allow 24 hours to a softened water supply. This can then be made within 2 minutes,...
... control panel. 2. Wait 24 hours between FRUIT and VEGETABLES or LOW and HIGH. Water and Ice Dispensers IMPORTANT: After connecting the refrigerator to restart the water filter status tracking feature each time you to a water source or replacing the water filter, flush the water ... without changing any setting between adjustments. Pressing and holding TEMP and FAST COOL again for 2 minutes or more. Hold the base of the refrigerator compartment. Auger driver Ice Production Rate ■ Allow 24 hours to a softened water supply. This can then be made within 2 minutes,...
Owners Manual
Page 11
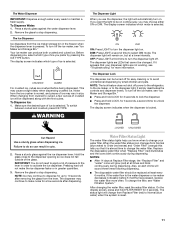
... the ICE TYPE button. The Dispenser Lock The dispenser can produce both crushed and cubed ice. Pressing hard will automatically turn off power to the refrigerator, to the ice maker, or to maintain a fresh supply. Remove the glass to change the filter, see "Ice Maker and Storage Bin." Water Filter Status...
... the ICE TYPE button. The Dispenser Lock The dispenser can produce both crushed and cubed ice. Pressing hard will automatically turn off power to the refrigerator, to the ice maker, or to maintain a fresh supply. Remove the glass to change the filter, see "Ice Maker and Storage Bin." Water Filter Status...
Owners Manual
Page 12
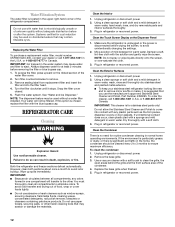
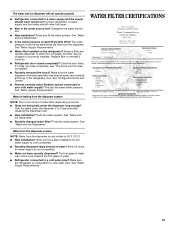
...." NOTE: The dispenser feature may be used without adequate disinfection before wiping the screen, to eject. Failure to remove. 3. Unplug refrigerator or disconnect power. 2. IMPORTANT: This cleaner is for routine condenser cleaning in normal home operating environments. To clean the condenser: ...containing petroleum products. Replacing the Water Filter To purchase a replacement water filter, model number UKF8001AXX-200, contact your stainless steel refrigerator looking like new and to remove minor scuffs or marks, it stops. Using a clean sponge or soft cloth and a...
...." NOTE: The dispenser feature may be used without adequate disinfection before wiping the screen, to eject. Failure to remove. 3. Unplug refrigerator or disconnect power. 2. IMPORTANT: This cleaner is for routine condenser cleaning in normal home operating environments. To clean the condenser: ...containing petroleum products. Replacing the Water Filter To purchase a replacement water filter, model number UKF8001AXX-200, contact your stainless steel refrigerator looking like new and to remove minor scuffs or marks, it stops. Using a clean sponge or soft cloth and a...
Owners Manual
Page 13
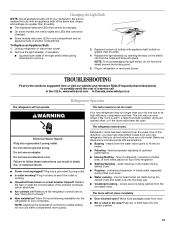
... an appliance bulb of a service call an electrician. ■ Are controls on? In the U.S.A., www.whirlpool.com In Canada, www.whirlpool.ca Refrigerator Operation The refrigerator will not operate WARNING The motor seems to run too much Your new refrigerator may have been left open ? Electrical Shock Hazard Plug into the correct position. 13 Do...
... an appliance bulb of a service call an electrician. ■ Are controls on? In the U.S.A., www.whirlpool.com In Canada, www.whirlpool.ca Refrigerator Operation The refrigerator will not operate WARNING The motor seems to run too much Your new refrigerator may have been left open ? Electrical Shock Hazard Plug into the correct position. 13 Do...
Owners Manual
Page 14
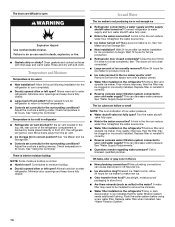
... Moisture Temperature is normal. ■ Humid room? Minimize door openings and keep doors fully closed completely? Allow several hours for refrigerator to return to water supply and turn water shutoff valve fully open. ■ Kink in ice indicates that the water filtration system... "Ice Maker and Ice Storage Bin." ■ New installation? Wait 24 hours after ice maker installation for full ice production. ■ Refrigerator door closed . Remove filter and operate ice maker. Gray or dark discoloration in the water source line? Replace water filter when indicated. See...
... Moisture Temperature is normal. ■ Humid room? Minimize door openings and keep doors fully closed completely? Allow several hours for refrigerator to return to water supply and turn water shutoff valve fully open. ■ Kink in ice indicates that the water filtration system... "Ice Maker and Ice Storage Bin." ■ New installation? Wait 24 hours after ice maker installation for full ice production. ■ Refrigerator door closed . Remove filter and operate ice maker. Gray or dark discoloration in the water source line? Replace water filter when indicated. See...
Owners Manual
Page 15
...the doors? See "Water Supply Requirements." See "Water and Ice Dispensers." ■ Is the water pressure at the top of the refrigerator door. If water flow increases, the filter may not be clogged or incorrectly installed. Flush the water system. The first glass of ...■ New installation? Allow 24 hours for the water supply to cool completely. ■ Recently dispensed large amount of water. ■ Refrigerator connected to a cold water pipe? Flush and fill the water system. Remove filter and operate dispenser. See "Water Supply Requirements." This can...
...the doors? See "Water Supply Requirements." See "Water and Ice Dispensers." ■ Is the water pressure at the top of the refrigerator door. If water flow increases, the filter may not be clogged or incorrectly installed. Flush the water system. The first glass of ...■ New installation? Allow 24 hours for the water supply to cool completely. ■ Recently dispensed large amount of water. ■ Refrigerator connected to a cold water pipe? Flush and fill the water system. Remove filter and operate dispenser. See "Water Supply Requirements." This can...
Owners Manual
Page 17
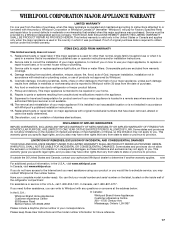
... Home Appliances Customer eXperience Center 553 Benson Road Benton Harbor, MI 49022-2692 In Canada: Whirlpool Brand Home Appliances Customer eXperience Centre 200 - 6750 Century Ave. Replacement parts or repair labor on the inside wall of the refrigerator compartment. This warranty gives you specific legal rights, and you may have other rights... removal and reinstallation of your major appliance, unless such damage results from warranty coverage. 4. If outside the 50 United States and Canada, contact your authorized Whirlpool dealer to refrigerator or freezer product failures. 7.
... Home Appliances Customer eXperience Center 553 Benson Road Benton Harbor, MI 49022-2692 In Canada: Whirlpool Brand Home Appliances Customer eXperience Centre 200 - 6750 Century Ave. Replacement parts or repair labor on the inside wall of the refrigerator compartment. This warranty gives you specific legal rights, and you may have other rights... removal and reinstallation of your major appliance, unless such damage results from warranty coverage. 4. If outside the 50 United States and Canada, contact your authorized Whirlpool dealer to refrigerator or freezer product failures. 7.

Dimension Guide
Page 1
...is required. handle B top of cabinet A overall I C 90˚ 90˚ D Height Overall Model Size "A" Height Top of the refrigerator needs to the water inlet valve of Cabinet "B" Depth Doors Open 90° "C" Depth Drawer Open "D" Depth With Handles "E" Depth Without ...where the temperature will fall below 55°F (13°C). 3³⁄₄" (9.5 cm) Because Whirlpool Corporation policy includes a continuous commitment to improve Dimensions are installing your refrigerator next to a fixed wall, leave 33⁄4" (9.5 cm) minimum on the hinge side (depending on...
...is required. handle B top of cabinet A overall I C 90˚ 90˚ D Height Overall Model Size "A" Height Top of the refrigerator needs to the water inlet valve of Cabinet "B" Depth Doors Open 90° "C" Depth Drawer Open "D" Depth With Handles "E" Depth Without ...where the temperature will fall below 55°F (13°C). 3³⁄₄" (9.5 cm) Because Whirlpool Corporation policy includes a continuous commitment to improve Dimensions are installing your refrigerator next to a fixed wall, leave 33⁄4" (9.5 cm) minimum on the hinge side (depending on...

Energy Guide
Page 1
...;les similaires comparés Numéro du modèle Removal of Canada's high efficiency levels. Canada Refrigerator-Freezer ·Automatic Defrost ·Bottom Mounted Freezer ·With Through-the-Door-Ice Service Whirlpool Corporation Model(s):GI6FDRXX*, GI6FARXX*, GI6SDRXX* Capacity: 25.6 Cubic Feet Estimated Yearly Operating Cost $50 Cost Range of...
...;les similaires comparés Numéro du modèle Removal of Canada's high efficiency levels. Canada Refrigerator-Freezer ·Automatic Defrost ·Bottom Mounted Freezer ·With Through-the-Door-Ice Service Whirlpool Corporation Model(s):GI6FDRXX*, GI6FARXX*, GI6SDRXX* Capacity: 25.6 Cubic Feet Estimated Yearly Operating Cost $50 Cost Range of...

Warranty
Page 1
...obtain service under this limited warranty. Any food or medicine loss due to be provided by Whirlpool. 5. Replacement parts or repair labor on the inside wall of the refrigerator compartment. Discoloration, rust, or oxidation of stainless steel surfaces. LIMITATION OF REMEDIES; EXCLUSION OF... operator instructions and/or installation instructions. 2. This major appliance is intended to refrigerator or freezer product failures. 7. Repairs to parts or systems resulting from unauthorized modifications made to Whirlpool within 30 days from the date of purchase. 6. Some states and provinces...
...obtain service under this limited warranty. Any food or medicine loss due to be provided by Whirlpool. 5. Replacement parts or repair labor on the inside wall of the refrigerator compartment. Discoloration, rust, or oxidation of stainless steel surfaces. LIMITATION OF REMEDIES; EXCLUSION OF... operator instructions and/or installation instructions. 2. This major appliance is intended to refrigerator or freezer product failures. 7. Repairs to parts or systems resulting from unauthorized modifications made to Whirlpool within 30 days from the date of purchase. 6. Some states and provinces...


