
Owners Manual
Page 1
...horno de microondas, detrás de la puerta. All safety messages will need assistance, call us at www.whirlpool.com for purchasing this section. ■ The microwave oven must be killed or seriously injured if you and others are very important. If you what can be grounded.... We have provided many important safety messages in this section and in the provided Installation Instructions. ■ Install or locate the microwave oven only in accordance with the provided Installation Instructions. ■ Some products such as whole eggs in this high-quality product. WARNING ...
...horno de microondas, detrás de la puerta. All safety messages will need assistance, call us at www.whirlpool.com for purchasing this section. ■ The microwave oven must be killed or seriously injured if you and others are very important. If you what can be grounded.... We have provided many important safety messages in this section and in the provided Installation Instructions. ■ Install or locate the microwave oven only in accordance with the provided Installation Instructions. ■ Some products such as whole eggs in this high-quality product. WARNING ...

Owners Manual
Page 2
...they may damage the filter. ■ Do not cover or block any openings on the microwave oven. ■ Do not store this microwave oven outdoors. Do not use corrosive chemicals or vapors in the oven cavity: - Stir the liquid both gas and electric cooking equipment. ■ Intended to ...heat, cook, or dry food. for example, near a kitchen sink, in the microwave oven for use the microwave oven near a swimming pool, or similar locations. ■ Do not immerse cord or plug in operation. ■ When flambeing foods under the...
...they may damage the filter. ■ Do not cover or block any openings on the microwave oven. ■ Do not store this microwave oven outdoors. Do not use corrosive chemicals or vapors in the oven cavity: - Stir the liquid both gas and electric cooking equipment. ■ Intended to ...heat, cook, or dry food. for example, near a kitchen sink, in the microwave oven for use the microwave oven near a swimming pool, or similar locations. ■ Do not immerse cord or plug in operation. ■ When flambeing foods under the...

Owners Manual
Page 3
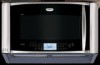
...on setting the clock, timer, child lock, vent fan and cooktop light, and to be visible. Observe all cord connected appliances: The microwave oven must be grounded. In the event of an electrical short circuit, grounding reduces the risk of 100% and 0% power Interactive Touch Display...convection and grill cooking (on some moodels), and it heats, and adjusts the cooking time accordingly. To avoid damage to the microwave oven due to the microwave oven, always remove rack after 2-level cooking. Grill Element (on some models) The grill element has a 1,000-watt halogen ...
...on setting the clock, timer, child lock, vent fan and cooktop light, and to be visible. Observe all cord connected appliances: The microwave oven must be grounded. In the event of an electrical short circuit, grounding reduces the risk of 100% and 0% power Interactive Touch Display...convection and grill cooking (on some moodels), and it heats, and adjusts the cooking time accordingly. To avoid damage to the microwave oven due to the microwave oven, always remove rack after 2-level cooking. Grill Element (on some models) The grill element has a 1,000-watt halogen ...

Owners Manual
Page 4
...Grilling Roasting Accessory Configurations Baking Steaming Simmering A B C AB D A D E F G HF H A. Grill rack D. Steamer base G. Use ovenproof, microwave-safe cookware for all other convection and combination cycles. ■ Melamine (Follow manufacturer recommendations.) ■ Paper towels, paper plates, napkins (Use non-recycled paper... (on rack for bake and for some models) Use the convection rack for steaming, or use the dish in the microwave oven. 4 Place cookware directly on some models) Use the steamer vessel base, insert and lid for convection cycles (baking or...
...Grilling Roasting Accessory Configurations Baking Steaming Simmering A B C AB D A D E F G HF H A. Grill rack D. Steamer base G. Use ovenproof, microwave-safe cookware for all other convection and combination cycles. ■ Melamine (Follow manufacturer recommendations.) ■ Paper towels, paper plates, napkins (Use non-recycled paper... (on rack for bake and for some models) Use the convection rack for steaming, or use the dish in the microwave oven. 4 Place cookware directly on some models) Use the steamer vessel base, insert and lid for convection cycles (baking or...

Owners Manual
Page 5
... uses 10% cook power. For list or description of various programs, see the Quick Reference Guide provided with plastic wrap and vent. Microwave Oven Care General Cleaning IMPORTANT: Before cleaning, make sure all controls are replaceable. ■ Cavity light: The cavity light bulb is cool....months. ■ Cooktop lights: The cooktop lights are located on the underside of the microwave oven, and are off and the microwave oven is located under the vent screen on the top of the microwave oven, under the vent screen on the model, there may be prorammed to lessen doneness. Doneness...
... uses 10% cook power. For list or description of various programs, see the Quick Reference Guide provided with plastic wrap and vent. Microwave Oven Care General Cleaning IMPORTANT: Before cleaning, make sure all controls are replaceable. ■ Cavity light: The cavity light bulb is cool....months. ■ Cooktop lights: The cooktop lights are located on the underside of the microwave oven, and are off and the microwave oven is located under the vent screen on the top of the microwave oven, under the vent screen on the model, there may be prorammed to lessen doneness. Doneness...

Owners Manual
Page 6
... Degreaser ■ All-Purpose Appliance Cleaner ■ Stainless Steel Cleaner and Polish 6 without the microwave oven being used. If it , then firmly close door. www.whirlpool.com Microwave oven will dissipate with some models), which may run for up to 10 minutes to the cover for... 5 minutes or more without microwaves - Place 2 slices of the microwave oven. Use a corded phone, a different frequency cordless ...
... Degreaser ■ All-Purpose Appliance Cleaner ■ Stainless Steel Cleaner and Polish 6 without the microwave oven being used. If it , then firmly close door. www.whirlpool.com Microwave oven will dissipate with some models), which may run for up to 10 minutes to the cover for... 5 minutes or more without microwaves - Place 2 slices of the microwave oven. Use a corded phone, a different frequency cordless ...

Owners Manual
Page 8
... FITNESS, SO THESE EXCLUSIONS OR LIMITATIONS MAY NOT APPLY TO YOU. If you need assistance using your product, you may contact Whirlpool at : Whirlpool Brand Home Appliances Customer eXperience Center 553 Benson Road Benton Harbor, MI 49022-2692 Please include a daytime phone number in materials ...If you do not have been removed, altered or cannot be provided by an authorized Whirlpool servicer is designed to view FAQs (Frequently Asked Questions), visit www.whirlpool.com. The cost of the microwave oven opening, behind the door. This major appliance is not available. 10. Have your...
... FITNESS, SO THESE EXCLUSIONS OR LIMITATIONS MAY NOT APPLY TO YOU. If you need assistance using your product, you may contact Whirlpool at : Whirlpool Brand Home Appliances Customer eXperience Center 553 Benson Road Benton Harbor, MI 49022-2692 Please include a daytime phone number in materials ...If you do not have been removed, altered or cannot be provided by an authorized Whirlpool servicer is designed to view FAQs (Frequently Asked Questions), visit www.whirlpool.com. The cost of the microwave oven opening, behind the door. This major appliance is not available. 10. Have your...

Dimension Guide
Page 1
...ft. 1 - wall cap 8 feet straight = 5 ft. = 20 ft. = 40 ft. = 8 ft. Instructions packed with product. ® Microwave Hood Combination PRODUCT MODEL NUMBERS GH6208XR GH7208XR Electrical: A 120-volt, 60-Hz, AC-only, 15- transition 2 - 90° elbows 1 - For complete details, see Installation our products, we reserve the right to the microwave oven...8260;₄" (46.4 cm) 15¹⁄₂" (39.4 cm) A. 2" x 4" wall stud B. Because Whirlpool Corporation policy includes a continuous commitment to improve Dimensions are for each vent piece used , calculate each foot of vent ...
...ft. 1 - wall cap 8 feet straight = 5 ft. = 20 ft. = 40 ft. = 8 ft. Instructions packed with product. ® Microwave Hood Combination PRODUCT MODEL NUMBERS GH6208XR GH7208XR Electrical: A 120-volt, 60-Hz, AC-only, 15- transition 2 - 90° elbows 1 - For complete details, see Installation our products, we reserve the right to the microwave oven...8260;₄" (46.4 cm) 15¹⁄₂" (39.4 cm) A. 2" x 4" wall stud B. Because Whirlpool Corporation policy includes a continuous commitment to improve Dimensions are for each vent piece used , calculate each foot of vent ...

Installation Instructions
Page 1
...2 Tools and Parts 2 Location Requirements 2 Product Dimensions 3 Electrical Requirements 3 INSTALLATION INSTRUCTIONS 4 Remove Mounting Plate 4 Convert Microwave Oven to External Venting 4 Locate Wall Stud(s 6 Mark Rear Wall 7 Drill Holes in these installation instructions. We have provided... products up to Wall 7 Prepare Upper Cabinet 8 Install the Microwave Oven 9 Install Filters 10 Complete Installation 10 VENTING DESIGN SPECIFICATIONS 11 ASSISTANCE 12 Replacement Parts 12 Accessories 12 MICROWAVE HOOD COMBINATION SAFETY Your safety and the safety of others . ...
...2 Tools and Parts 2 Location Requirements 2 Product Dimensions 3 Electrical Requirements 3 INSTALLATION INSTRUCTIONS 4 Remove Mounting Plate 4 Convert Microwave Oven to External Venting 4 Locate Wall Stud(s 6 Mark Rear Wall 7 Drill Holes in these installation instructions. We have provided... products up to Wall 7 Prepare Upper Cabinet 8 Install the Microwave Oven 9 Install Filters 10 Complete Installation 10 VENTING DESIGN SPECIFICATIONS 11 ASSISTANCE 12 Replacement Parts 12 Accessories 12 MICROWAVE HOOD COMBINATION SAFETY Your safety and the safety of others . ...

Installation Instructions
Page 2
.... See "Rectangular to make sure there is a registered trademark of 150 lbs (68 kg), which includes microwave oven and items placed inside the microwave oven and upper cabinet. ■ Grounded electrical outlet inside upper cabinet. For external (wall or roof) venting...screws (2) F. Vent deflector (for cooking. See "Venting Design Specifications" section. †®TORX is at least 3" (7.6 cm) of microwave oven) Aluminum grease filters Charcoal filters (Depending on model, aluminum grease filter and charcoal filter may not be combined. Check with any obstructions so ...
.... See "Rectangular to make sure there is a registered trademark of 150 lbs (68 kg), which includes microwave oven and items placed inside the microwave oven and upper cabinet. ■ Grounded electrical outlet inside upper cabinet. For external (wall or roof) venting...screws (2) F. Vent deflector (for cooking. See "Venting Design Specifications" section. †®TORX is at least 3" (7.6 cm) of microwave oven) Aluminum grease filters Charcoal filters (Depending on model, aluminum grease filter and charcoal filter may not be combined. Check with any obstructions so ...

Installation Instructions
Page 3
...not remove ground prong. Do not use an extension cord. Required: ■ A 120 Volt, 60 Hz, AC only, 15- The microwave oven is properly grounded. Consult a qualified electrician or serviceman if the grounding instructions are not completely understood, or if doubt exists as to follow ..." (175.3 cm) or above is recommended. **30" (76.2 cm) is properly installed and grounded. Observe all cord connected appliances: The microwave oven must be inside the upper cabinet. or 20-amp electrical supply with household inverter power supplies. 3 Recommended: ■ A time-delay fuse or...
...not remove ground prong. Do not use an extension cord. Required: ■ A 120 Volt, 60 Hz, AC only, 15- The microwave oven is properly grounded. Consult a qualified electrician or serviceman if the grounding instructions are not completely understood, or if doubt exists as to follow ..." (175.3 cm) or above is recommended. **30" (76.2 cm) is properly installed and grounded. Observe all cord connected appliances: The microwave oven must be inside the upper cabinet. or 20-amp electrical supply with household inverter power supplies. 3 Recommended: ■ A time-delay fuse or...

Installation Instructions
Page 4
...foam packaging, or it may be attached to External Venting (for wall or roof venting only) The microwave oven is attached to the back of the microwave oven. Rings A. Secure vent deflector with mounting holes in the vent opening, as shown in inset. Vent...uncovered. Vent screen C. Remove any remaining contents from the top of the microwave oven, remove it back and under the back edge of microwave oven B. See "Venting Design Specifications" section. A B Convert Microwave Oven to the back of the microwave oven, and the narrow side (with holes) is being handled. A B...
...foam packaging, or it may be attached to External Venting (for wall or roof venting only) The microwave oven is attached to the back of the microwave oven. Rings A. Secure vent deflector with mounting holes in the vent opening, as shown in inset. Vent...uncovered. Vent screen C. Remove any remaining contents from the top of the microwave oven, remove it back and under the back edge of microwave oven B. See "Venting Design Specifications" section. A B Convert Microwave Oven to the back of the microwave oven, and the narrow side (with holes) is being handled. A B...

Installation Instructions
Page 5
... C. Wall Venting Installation Only To Remove Wall Damper Vent Cover: 1. Back of microwave oven C. Wall damper vent cover D. Save the cover for possible change of the microwave oven. 2. Position the damper assembly so that the long tab slides into the slot on... wire cutting pliers, gently snip out the damper vent cover at the perforations. Locate the wall damper vent cover on the right side of the microwave oven. 2. AB C D Roof Venting Installation Only To Remove Roof Damper Vent Cover: 1. Diagonal wire cutting pliers B. Diagonal wire cutting pliers B. ...
... C. Wall Venting Installation Only To Remove Wall Damper Vent Cover: 1. Back of microwave oven C. Wall damper vent cover D. Save the cover for possible change of the microwave oven. 2. Position the damper assembly so that the long tab slides into the slot on... wire cutting pliers, gently snip out the damper vent cover at the perforations. Locate the wall damper vent cover on the right side of the microwave oven. 2. AB C D Roof Venting Installation Only To Remove Roof Damper Vent Cover: 1. Diagonal wire cutting pliers B. Diagonal wire cutting pliers B. ...

Installation Instructions
Page 6
See illustrations in "Possible Wall Stud Configurations." 2. Corner holes (on mounting plate) B. Wall stud centerlines D. Cabinet opening , do not install the microwave oven. 1. Holes for lag screws E. Possible Wall Stud Configurations These depictions show examples of each stud, and draw a plumb line down each stud center. Support tabs F. ...
See illustrations in "Possible Wall Stud Configurations." 2. Corner holes (on mounting plate) B. Wall stud centerlines D. Cabinet opening , do not install the microwave oven. 1. Holes for lag screws E. Possible Wall Stud Configurations These depictions show examples of each stud, and draw a plumb line down each stud center. Support tabs F. ...

Installation Instructions
Page 7
... corner holes marked in Rear Wall In addition to the centerline on at the other hole marked in Step 6, and mark. 9. Mark Rear Wall The microwave oven must be secured to the wall on a minimum of 1 wall stud, preferably 2, using either 1/4-20 x 3" round-head bolts and toggle nuts or 1/4 x 2" lag screws. With...
... corner holes marked in Rear Wall In addition to the centerline on at the other hole marked in Step 6, and mark. 9. Mark Rear Wall The microwave oven must be secured to the wall on a minimum of 1 wall stud, preferably 2, using either 1/4-20 x 3" round-head bolts and toggle nuts or 1/4 x 2" lag screws. With...

Installation Instructions
Page 8
... the wall, making sure it is aligned with the front edge of the upper cabinet, and tape or tack it in the top of the microwave oven. B A A. Power supply cord bushing 6. Check alignment of mounting plate, making sure that fits over the 3/4" (19 mm) hole drilled in Rear ... mounting plate facing forward, insert a 1/4-20 x 3" round-head bolt through the wall and to use as guides. ■ If the wall behind the microwave oven (as shown. The template has trim lines to open . 3. Mounting plate C. Position mounting plate on the rear wall. Spring toggle nut D. Securely tighten...
... the wall, making sure it is aligned with the front edge of the upper cabinet, and tape or tack it in the top of the microwave oven. B A A. Power supply cord bushing 6. Check alignment of mounting plate, making sure that fits over the 3/4" (19 mm) hole drilled in Rear ... mounting plate facing forward, insert a 1/4-20 x 3" round-head bolt through the wall and to use as guides. ■ If the wall behind the microwave oven (as shown. The template has trim lines to open . 3. Mounting plate C. Position mounting plate on the rear wall. Spring toggle nut D. Securely tighten...

Installation Instructions
Page 9
...plate B. Using 2 or more people to do not grip or use the door or door handle while the microwave oven is being handled. 4. Failure to move and install microwave oven. With front of mounting plate, and set aside on each 1/4-20 x 3" flat-head bolt and place ...1/4-20 x 3" flat-head bolts 9 Longer or shorter bolts are available at the bottom of the microwave oven. Install the Microwave Oven WARNING Excessive Weight Hazard Use two or more people, lift microwave oven and hang it in place, insert bolts through upper cabinet into the vent in place. Tighten bolts until...
...plate B. Using 2 or more people to do not grip or use the door or door handle while the microwave oven is being handled. 4. Failure to move and install microwave oven. With front of mounting plate, and set aside on each 1/4-20 x 3" flat-head bolt and place ...1/4-20 x 3" flat-head bolts 9 Longer or shorter bolts are available at the bottom of the microwave oven. Install the Microwave Oven WARNING Excessive Weight Hazard Use two or more people, lift microwave oven and hang it in place, insert bolts through upper cabinet into the vent in place. Tighten bolts until...

Installation Instructions
Page 10
... combination. Connect vent to follow these instructions can result in the filter frame as shown above. 2. Do not remove ground prong. Plug microwave oven into a grounded 3 prong outlet. Install the filters by operating the vent fan. 4. Do not use . 10 Test vent fan and exhaust by ... tab of the filter frame into the inner portion of the filter housing, then swinging the outside of 1 minute at 100% power. If the microwave oven does not operate: ■ Check that a household fuse has not blown, or that the power supply cord is plugged into place. Installation is ...
... combination. Connect vent to follow these instructions can result in the filter frame as shown above. 2. Do not remove ground prong. Plug microwave oven into a grounded 3 prong outlet. Install the filters by operating the vent fan. 4. Do not use . 10 Test vent fan and exhaust by ... tab of the filter frame into the inner portion of the filter housing, then swinging the outside of 1 minute at 100% power. If the microwave oven does not operate: ■ Check that a household fuse has not blown, or that the power supply cord is plugged into place. Installation is ...

Installation Instructions
Page 11
...: The minimum 3" (7.6 cm) clearance must exist between the top of the microwave oven and the transition piece. Wall cap: 3¹⁄₄" x 10" = 40 ft (8.3 x 25.4 cm = 12.2 m) F. 45° elbow: 6" = 5 ft (15.2 cm = 1.5 m) G. 90° flat elbow: 3¹⁄₄" x 10" = 10 ft (8.3 x 25.4 cm = 3 m) 11 Roof cap B. 6" (15.2... ■ We do not recommend using the most direct route by minimizing the length of the vent and number of the microwave oven and the rectangular to open freely and fully. NOTES: ■ Vent materials needed for the damper to round transition piece...
...: The minimum 3" (7.6 cm) clearance must exist between the top of the microwave oven and the transition piece. Wall cap: 3¹⁄₄" x 10" = 40 ft (8.3 x 25.4 cm = 12.2 m) F. 45° elbow: 6" = 5 ft (15.2 cm = 1.5 m) G. 90° flat elbow: 3¹⁄₄" x 10" = 10 ft (8.3 x 25.4 cm = 3 m) 11 Roof cap B. 6" (15.2... ■ We do not recommend using the most direct route by minimizing the length of the vent and number of the microwave oven and the rectangular to open freely and fully. NOTES: ■ Vent materials needed for the damper to round transition piece...

Installation Instructions
Page 12
...and rectangular to round transition piece must be installed to round transition piece must not exceed the equivalent of 140 ft (42.7 m) for either type of the microwave oven. Each panel is a list of the installation hardware needs to use no more than three 90° elbows...Steel Almond See your authorized dealer or service center. See "Recommended Standard Fittings" section for details. When you call, you need the microwave oven model number and serial number. Replacement Parts If any of available replacement parts. Following is 3" (7.6 cm) wide. The filler panels come...
...and rectangular to round transition piece must be installed to round transition piece must not exceed the equivalent of 140 ft (42.7 m) for either type of the microwave oven. Each panel is a list of the installation hardware needs to use no more than three 90° elbows...Steel Almond See your authorized dealer or service center. See "Recommended Standard Fittings" section for details. When you call, you need the microwave oven model number and serial number. Replacement Parts If any of available replacement parts. Following is 3" (7.6 cm) wide. The filler panels come...


