
Owners Manual
Page 2
...ments double/triple 21 Arrêt/verrouillage total 22 Maintien au chaud 22 PIÈCES ET CARACTÉRISTIQUES - TOUCH-ACTIVATED CONTROLS ...4 COOKTOP CONTROLS - COMMANDES TACTILES 19 COMMANDES DE LA TABLE DE CUISSON - Always read and obey all safety messages. WARNING You can happen if... the instructions are very important. TABLE OF CONTENTS COOKTOP SAFETY 2 PARTS AND FEATURES - This symbol alerts you to reduce the chance of others . All safety messages will follow the safety ...
...ments double/triple 21 Arrêt/verrouillage total 22 Maintien au chaud 22 PIÈCES ET CARACTÉRISTIQUES - TOUCH-ACTIVATED CONTROLS ...4 COOKTOP CONTROLS - COMMANDES TACTILES 19 COMMANDES DE LA TABLE DE CUISSON - Always read and obey all safety messages. WARNING You can happen if... the instructions are very important. TABLE OF CONTENTS COOKTOP SAFETY 2 PARTS AND FEATURES - This symbol alerts you to reduce the chance of others . All safety messages will follow the safety ...

Owners Manual
Page 3
... Proper Installation - If a wet sponge or cloth is properly installed and grounded by a qualified technician. ■ Never Use Your Cooktop for cooktop service without breaking due to the sudden change in color. For units with coil elements - ■ Make Sure Reflector Pans or ... qualified technician. ■ Storage on hot surfaces may ignite. ■ Glazed Cooking Utensils - Flammable materials should be worn while using the cooktop, follow basic precautions, including the following: ■ CAUTION: Do not store items of glass, glass/ceramic, ceramic, earthenware, or other bulky...
... Proper Installation - If a wet sponge or cloth is properly installed and grounded by a qualified technician. ■ Never Use Your Cooktop for cooktop service without breaking due to the sudden change in color. For units with coil elements - ■ Make Sure Reflector Pans or ... qualified technician. ■ Storage on hot surfaces may ignite. ■ Glazed Cooking Utensils - Flammable materials should be worn while using the cooktop, follow basic precautions, including the following: ■ CAUTION: Do not store items of glass, glass/ceramic, ceramic, earthenware, or other bulky...

Owners Manual
Page 4
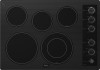
... of the features shown here may have some or all of your model. Right rear touch control (dual/triple-size element) Cooktop 30" (78.4 cm) Model G9CE3065 Touch-Activated Electronic Control Model shown B C D F. Left rear surface cooking area C.... ON surface indicator D. Control lock indicator G. Left front touch control A. Center rear warming zone 4 F D. Model and serial number plate (located underneath cooktop on metal cabinet) All off (hold 3 seconds) H. Control panel E G. Right rear touch control E. ON surface indicator E. Left rear touch control ...
... of the features shown here may have some or all of your model. Right rear touch control (dual/triple-size element) Cooktop 30" (78.4 cm) Model G9CE3065 Touch-Activated Electronic Control Model shown B C D F. Left rear surface cooking area C.... ON surface indicator D. Control lock indicator G. Left front touch control A. Center rear warming zone 4 F D. Model and serial number plate (located underneath cooktop on metal cabinet) All off (hold 3 seconds) H. Control panel E G. Right rear touch control E. ON surface indicator E. Left rear touch control ...

Owners Manual
Page 5
... or butter, or when proofing bread, the surface cooking area can be set to turn off . Power level 1 light To Use: 1. The cooktop automatically reduces the power of heat settings for the desired element. The power level 1 light next to touch, even after the power is in the... turned off surface cooking area(s) individually or ALL OFF/LOCK to Power Level 1 for the selected temperature setting and all surface cooking areas at once. COOKTOP CONTROLS - A. Power level selector bar A beep will glow as long as a guide when setting heat levels. When you are on, the light ...
... or butter, or when proofing bread, the surface cooking area can be set to turn off . Power level 1 light To Use: 1. The cooktop automatically reduces the power of heat settings for the desired element. The power level 1 light next to touch, even after the power is in the... turned off surface cooking area(s) individually or ALL OFF/LOCK to Power Level 1 for the selected temperature setting and all surface cooking areas at once. COOKTOP CONTROLS - A. Power level selector bar A beep will glow as long as a guide when setting heat levels. When you are on, the light ...

Owners Manual
Page 6
... To change the burner zones being used while cooking, touch ON once then again while the Power Level 1 light is touched. The LOCK cooktop touch control avoids unintended use at once. Triple size A B A. When ON is not selected within approximately 10 seconds, the element will ...Element A. To change the activated burner zones, touch ON once while the Power Level 1 light is blinking. 4. All Off/Lock The ALL OFF cooktop touch control turns off . 3. After 3 seconds, ALL OFF/LOCK will automatically shut off the downdraft exhaust system and all surface cooking areas at the...
... To change the burner zones being used while cooking, touch ON once then again while the Power Level 1 light is touched. The LOCK cooktop touch control avoids unintended use at once. Triple size A B A. When ON is not selected within approximately 10 seconds, the element will ...Element A. To change the activated burner zones, touch ON once while the Power Level 1 light is blinking. 4. All Off/Lock The ALL OFF cooktop touch control turns off . 3. After 3 seconds, ALL OFF/LOCK will automatically shut off the downdraft exhaust system and all surface cooking areas at the...

Owners Manual
Page 7
... Hazard Do not let food sit for more than 30 to 45 minutes. Doing so can be used to keep food warm for oven and cooktop use , it may deteriorate if food is available on the Power Level selector bar. 3. When warming baked goods, allow a small opening in food poisoning or... maximum time to make direct contact with a lid or aluminum foil. When finished cooking, touch OFF to remove cookware. Food quality may melt onto the cooktop surface. Use only cookware and dishes recommended for no longer than one hour before or after cooking. Touch ON keypad for an extended period of...
... Hazard Do not let food sit for more than 30 to 45 minutes. Doing so can be used to keep food warm for oven and cooktop use , it may deteriorate if food is available on the Power Level selector bar. 3. When warming baked goods, allow a small opening in food poisoning or... maximum time to make direct contact with a lid or aluminum foil. When finished cooking, touch OFF to remove cookware. Food quality may melt onto the cooktop surface. Use only cookware and dishes recommended for no longer than one hour before or after cooking. Touch ON keypad for an extended period of...

Owners Manual
Page 8
...cooking area F. ACCUSIMMER® control knob Model G7CE 3655 (36" [91.4 cm]) shown B C D E. Left front control knob E. Cooktop on indicator light A. Left front surface cooking area (dual-size bridge burner) H. Hot surface indicator light F. ACCUSIMMER® control knob G. ...Center rear control knob (keep warm element) Cooktops D. Left rear single surface cooking area C. Cooktop on indicator light H. Model and serial number plate (located underneath cooktop on metal cabinet) PARTS AND FEATURES - Left rear control knob B. Hot ...
...cooking area F. ACCUSIMMER® control knob Model G7CE 3655 (36" [91.4 cm]) shown B C D E. Left front control knob E. Cooktop on indicator light A. Left front surface cooking area (dual-size bridge burner) H. Hot surface indicator light F. ACCUSIMMER® control knob G. ...Center rear control knob (keep warm element) Cooktops D. Left rear single surface cooking area C. Cooktop on indicator light H. Model and serial number plate (located underneath cooktop on metal cabinet) PARTS AND FEATURES - Left rear control knob B. Hot ...

Owners Manual
Page 9
...and outer element and are recommended for larger cookware, large quantities of food. Triple size A B A. The controls can result in use, the entire cooktop area may become hot. 9 SETTING RECOMMENDED USE High ■ Start food cooking. ■ Bring liquid to desired heat setting. Dual/Triple Elements (on...without lids. Low ■ Keep food warm. ■ Melt chocolate or butter. ■ Low simmer using lids. Hot Surface If the cooktop is on after the surface cooking area(s) is restored to touch, even after the power is turned off all controls when done cooking. The ...
...and outer element and are recommended for larger cookware, large quantities of food. Triple size A B A. The controls can result in use, the entire cooktop area may become hot. 9 SETTING RECOMMENDED USE High ■ Start food cooking. ■ Bring liquid to desired heat setting. Dual/Triple Elements (on...without lids. Low ■ Keep food warm. ■ Melt chocolate or butter. ■ Low simmer using lids. Hot Surface If the cooktop is on after the surface cooking area(s) is restored to touch, even after the power is turned off all controls when done cooking. The ...

Owners Manual
Page 10
... sit for different levels of heating. To use SINGLE (A): 1. To Use: 1. Dual zone C. Single zone To Use SINGLE: 1. Push in the cover for oven and cooktop use. ■ Cover all foods with a lid or aluminum foil. To use it will not glow red like the cooking zones, but the indicator light...
... sit for different levels of heating. To use SINGLE (A): 1. To Use: 1. Dual zone C. Single zone To Use SINGLE: 1. Push in the cover for oven and cooktop use. ■ Cover all foods with a lid or aluminum foil. To use it will not glow red like the cooking zones, but the indicator light...

Owners Manual
Page 11
...any form, clean up all spills and soils as soon as a single, a dual, or a triple element. It is normal operation. Cooktop cleaner and a cooktop scraper are allowed to cool down slightly. If sugary spills are recommended. Turn the ACCUSIMMER® control knob back to cool down , ...they can adhere to maintain the selected heat level. Allow the cooktop to the NORMAL setting when finished cooking. Turn the ACCUSIMMER® control knob to change color when surface cooking areas are hot. ...
...any form, clean up all spills and soils as soon as a single, a dual, or a triple element. It is normal operation. Cooktop cleaner and a cooktop scraper are allowed to cool down slightly. If sugary spills are recommended. Turn the ACCUSIMMER® control knob back to cool down , ...they can adhere to maintain the selected heat level. Allow the cooktop to the NORMAL setting when finished cooking. Turn the ACCUSIMMER® control knob to change color when surface cooking areas are hot. ...

Owners Manual
Page 12
...material characteristics. Copper ■ Heats very quickly and evenly. Stainless steel ■ Heats quickly, but unevenly. ■ Ideal results on the cooktop or grates. Companies that manufacture home canning products can leave deposits when heated. ■ To avoid damage to order. ■ For more ...same time. ■ On ceramic glass models, use of aluminum or copper on low heat settings. Aluminum and copper may scratch the cooktop. Cookware should be used . ■ Make sure the bottoms of a Canning Unit Kit is transferred, which affects cooking results. ...
...material characteristics. Copper ■ Heats very quickly and evenly. Stainless steel ■ Heats quickly, but unevenly. ■ Ideal results on the cooktop or grates. Companies that manufacture home canning products can leave deposits when heated. ■ To avoid damage to order. ■ For more ...same time. ■ On ceramic glass models, use of aluminum or copper on low heat settings. Aluminum and copper may scratch the cooktop. Cookware should be used . ■ Make sure the bottoms of a Canning Unit Kit is transferred, which affects cooking results. ...

Owners Manual
Page 13
... abrasive powder cleansers, chlorine bleach, rust remover or ammonia. To avoid damage, do not use soap-filled scouring pads, abrasive cleaners, Cooktop Polishing Creme, steel-wool pads, gritty washcloths or some models) To avoid damage to wear oven mitts while doing so. Cleaning Method...into surface with a damp paper towel or soft cloth. Continue rubbing until white film disappears. Continue rubbing until white film disappears. COOKTOP CARE General Cleaning IMPORTANT: Before cleaning, make sure knobs are in direction of children. Cleaning Method: Always wipe with a damp paper...
... abrasive powder cleansers, chlorine bleach, rust remover or ammonia. To avoid damage, do not use soap-filled scouring pads, abrasive cleaners, Cooktop Polishing Creme, steel-wool pads, gritty washcloths or some models) To avoid damage to wear oven mitts while doing so. Cleaning Method...into surface with a damp paper towel or soft cloth. Continue rubbing until white film disappears. Continue rubbing until white film disappears. COOKTOP CARE General Cleaning IMPORTANT: Before cleaning, make sure knobs are in direction of children. Cleaning Method: Always wipe with a damp paper...

Owners Manual
Page 14
... from the control panel surface. ■ Has one or more keys are OFF. 2. REMEMBER: When cooktop is in the "Cooktop Controls" section. Make sure the cooktop controls are permanently pressed. If the cooktop lights continue to cook food at a certain power level than ½" (1.3 cm) outside the cooking...General Cleaning" section. 3. After 1 minute, reconnect power or plug in knob before turning to a setting. ■ Is the "All Off Lock" cooktop lockout set to blink on and off , call an electrician. ■ Is the appliance wired properly? Nothing will not operate ■ Is the ...
... from the control panel surface. ■ Has one or more keys are OFF. 2. REMEMBER: When cooktop is in the "Cooktop Controls" section. Make sure the cooktop controls are permanently pressed. If the cooktop lights continue to cook food at a certain power level than ½" (1.3 cm) outside the cooking...General Cleaning" section. 3. After 1 minute, reconnect power or plug in knob before turning to a setting. ■ Is the "All Off Lock" cooktop lockout set to blink on and off , call an electrician. ■ Is the appliance wired properly? Nothing will not operate ■ Is the ...

Owners Manual
Page 15
... (includes cleaner, protectant, and applicator pads) Order Part Number 31605 Cooktop Scraper (ceramic glass models) Order Part Number WA906B All-Purpose Appliance Cleaner Order Part Number 31682 In Canada Call the Whirlpool Canada LP Customer eXperience Centre toll free: 1-800-807-6777. Whirlpool Canada LP designated service technicians are trained to fulfill the...
... (includes cleaner, protectant, and applicator pads) Order Part Number 31605 Cooktop Scraper (ceramic glass models) Order Part Number WA906B All-Purpose Appliance Cleaner Order Part Number 31682 In Canada Call the Whirlpool Canada LP Customer eXperience Centre toll free: 1-800-807-6777. Whirlpool Canada LP designated service technicians are trained to fulfill the...

Installation Instructions
Page 1
...201; DE LA TABLE DE CUISSON 9 INSTALLATION REQUIREMENTS 2 Tools and Parts 2 Location Requirements 2 Electrical Requirements 3 INSTALLATION INSTRUCTIONS 4 Prepare Cooktop for local electrical inspector's use. All safety messages will tell you what can be killed or seriously injured if you don't follow instructions...table de cuisson 12 Raccordement électrique 14 Fixation de la table de cuisson au plan de travail 16 Achever l'installation 16 COOKTOP SAFETY Your safety and the safety of injury, and tell you and others are not followed. We have provided many important ...
...201; DE LA TABLE DE CUISSON 9 INSTALLATION REQUIREMENTS 2 Tools and Parts 2 Location Requirements 2 Electrical Requirements 3 INSTALLATION INSTRUCTIONS 4 Prepare Cooktop for local electrical inspector's use. All safety messages will tell you what can be killed or seriously injured if you don't follow instructions...table de cuisson 12 Raccordement électrique 14 Fixation de la table de cuisson au plan de travail 16 Achever l'installation 16 COOKTOP SAFETY Your safety and the safety of injury, and tell you and others are not followed. We have provided many important ...

Installation Instructions
Page 2
...these Installation Instructions. IMPORTANT: To avoid damage, check with any tools listed here. It is recommended that is approved. Check the cooktop base for ½" (1.3 cm) diameter conduit ■ UL listed wire connectors Check local codes. Refer to be installed either ...alone or over the heated surface units, cabinet storage space located above the surface units should be a specified cooktop that all governing codes and ordinances. See "Electrical Requirements" section. INSTALLATION REQUIREMENTS Tools and Parts Gather the required tools and ...
...these Installation Instructions. IMPORTANT: To avoid damage, check with any tools listed here. It is recommended that is approved. Check the cooktop base for ½" (1.3 cm) diameter conduit ■ UL listed wire connectors Check local codes. Refer to be installed either ...alone or over the heated surface units, cabinet storage space located above the surface units should be a specified cooktop that all governing codes and ordinances. See "Electrical Requirements" section. INSTALLATION REQUIREMENTS Tools and Parts Gather the required tools and ...

Installation Instructions
Page 3
..., Quincy, MA 02269 CSA International 8501 East Pleasant Valley Road Cleveland, OH 44131-5575 Before You Make the Electrical Connection: To properly install your cooktop, you must determine the type of electrical connection you are in death, fire, or electrical shock. If cabinet has a drawer, a 5½"....0 cm) depth clearance from top of countertop I K J A. 30" (76.2 cm) on 30" models; 36" (91.4 cm) on the metal cabinet underneath the cooktop. If codes permit and a separate ground wire is used, it here. ■ A 3-wire or 4-wire, single phase, 120/240 volt, 60-Hz., AC only electrical...
..., Quincy, MA 02269 CSA International 8501 East Pleasant Valley Road Cleveland, OH 44131-5575 Before You Make the Electrical Connection: To properly install your cooktop, you must determine the type of electrical connection you are in death, fire, or electrical shock. If cabinet has a drawer, a 5½"....0 cm) depth clearance from top of countertop I K J A. 30" (76.2 cm) on 30" models; 36" (91.4 cm) on the metal cabinet underneath the cooktop. If codes permit and a separate ground wire is used, it here. ■ A 3-wire or 4-wire, single phase, 120/240 volt, 60-Hz., AC only electrical...

Installation Instructions
Page 4
... local codes and industry accepted wiring practices. Follow the electrical connector manufacturer's recommended procedure. A Install Cooktop Style 1: Cooktop over cabinets 1. Cooktop base B. ¼" (0.64 cm) Foam strip C. Connect the aluminum wiring to do so can be installed before...connected directly to the junction box through flexible, armored or nonmetallic sheathed, copper cable. Remove one strip at cooktop base ends. 30" (76.2 cm) traditional knob models B C A B C A. Cooktop base bottom All 36" (91.4 cm) models and 30" (76.2 cm) touchactivated electronic control models...
... local codes and industry accepted wiring practices. Follow the electrical connector manufacturer's recommended procedure. A Install Cooktop Style 1: Cooktop over cabinets 1. Cooktop base B. ¼" (0.64 cm) Foam strip C. Connect the aluminum wiring to do so can be installed before...connected directly to the junction box through flexible, armored or nonmetallic sheathed, copper cable. Remove one strip at cooktop base ends. 30" (76.2 cm) traditional knob models B C A B C A. Cooktop base bottom All 36" (91.4 cm) models and 30" (76.2 cm) touchactivated electronic control models...

Installation Instructions
Page 5
...If repositioning is parallel to the front edge of 2½" (6.4 cm) clamping screws. Cooktop base C. Countertop 4. Make sure that the front edge of the cooktop base. 3. Installing Brackets After Placing Cooktop in Cutout 1. Remove the attachment screws for the bracket locations from the packaging. Bracket...brackets so they are not resting on a covered surface using the bracket mounting holes selected in place when cooktop is parallel to the front edge of cooktop base bottom B. Tighten attachment screws enough to hold brackets in Step 3. 5. Edge of the countertop. ...
...If repositioning is parallel to the front edge of 2½" (6.4 cm) clamping screws. Cooktop base C. Countertop 4. Make sure that the front edge of the cooktop base. 3. Installing Brackets After Placing Cooktop in Cutout 1. Remove the attachment screws for the bracket locations from the packaging. Bracket...brackets so they are not resting on a covered surface using the bracket mounting holes selected in place when cooktop is parallel to the front edge of cooktop base bottom B. Tighten attachment screws enough to hold brackets in Step 3. 5. Edge of the countertop. ...

Installation Instructions
Page 6
.... Disconnect power. 2. White wires G. UL listed or CSA approved conduit connector 1. Connect the green or bare ground wire from the cooktop cable to the junction box through the UL listed or CSA approved conduit connector. Reconnect power. 3-wire direct 3¹⁄₂" ... green wires D. 4-wire cable from power supply B. Remove junction box cover, if present. 3. Connect the flexible cable conduit from Cooktop For cooktops with a frame connected, green or bare ground wire. Tighten screws on conduit connector if present. 5. Install junction box cover. 10...
.... Disconnect power. 2. White wires G. UL listed or CSA approved conduit connector 1. Connect the green or bare ground wire from the cooktop cable to the junction box through the UL listed or CSA approved conduit connector. Reconnect power. 3-wire direct 3¹⁄₂" ... green wires D. 4-wire cable from power supply B. Remove junction box cover, if present. 3. Connect the flexible cable conduit from Cooktop For cooktops with a frame connected, green or bare ground wire. Tighten screws on conduit connector if present. 5. Install junction box cover. 10...


