
English Manual
Page 1
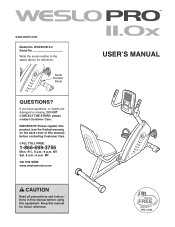
please contact Customer Care. Keep this manual) before using this equipment. Serial Number Decal QUESTIONS? If you have questions, or if parts are damaged or missing, DO NOT CONTACT THE STORE; IMPORTANT: Please register this product (see the limited warranty on the back cover of this manual ... CAUTION Read all precautions and instructions in the space above for future reference. Write the serial number in this manual before contacting Customer Care. www.weslo.com Model No. CALL TOLL-FREE: 1-866-699-3756 Mon.-Fri., 6 a.m.-6 p.m. MT Sat. 8 a.m.-4 p.m.
please contact Customer Care. Keep this manual) before using this equipment. Serial Number Decal QUESTIONS? If you have questions, or if parts are damaged or missing, DO NOT CONTACT THE STORE; IMPORTANT: Please register this product (see the limited warranty on the back cover of this manual ... CAUTION Read all precautions and instructions in the space above for future reference. Write the serial number in this manual before contacting Customer Care. www.weslo.com Model No. CALL TOLL-FREE: 1-866-699-3756 Mon.-Fri., 6 a.m.-6 p.m. MT Sat. 8 a.m.-4 p.m.
English Manual
Page 2
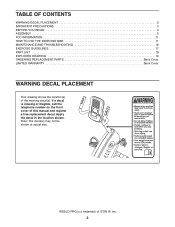
...YOU BEGIN 4 ASSEMBLY 5 FCC INFORMATION 11 HOW TO USE THE EXERCISE BIKE 11 MAINTENANCE AND TROUBLESHOOTING 16 EXERCISE GUIDELINES 17 PART LIST 18 EXPLODED DRAWING 19 ORDERING REPLACEMENT PARTS Back Cover LIMITED WARRANTY Back Cover ...WARNING DECAL PLACEMENT This drawing shows the location(s) of this manual and request a free replacement decal. Note: The decal(s) may not be shown at actual size. WESLO PRO...
...YOU BEGIN 4 ASSEMBLY 5 FCC INFORMATION 11 HOW TO USE THE EXERCISE BIKE 11 MAINTENANCE AND TROUBLESHOOTING 16 EXERCISE GUIDELINES 17 PART LIST 18 EXPLODED DRAWING 19 ORDERING REPLACEMENT PARTS Back Cover LIMITED WARRANTY Back Cover ...WARNING DECAL PLACEMENT This drawing shows the location(s) of this manual and request a free replacement decal. Note: The decal(s) may not be shown at actual size. WESLO PRO...
English Manual
Page 3
... in a controlled way. 12. Always keep your back. 13. Inspect and properly tighten all times. 11. do not wear loose clothes that all users of the exercise bike are adequately informed of all precautions. 4. The pulse sensor is intended for persons over age 35 or ...in this manual and all warnings on your exercise bike before using the exercise bike; The exercise bike is not a medical device. do not arch your back straight while using your exercise bike. 6. The pulse sensor is at all parts regularly. Over exercising may affect the accuracy of...
... in a controlled way. 12. Always keep your back. 13. Inspect and properly tighten all times. 11. do not wear loose clothes that all users of the exercise bike are adequately informed of all precautions. 4. The pulse sensor is intended for persons over age 35 or ...in this manual and all warnings on your exercise bike before using the exercise bike; The exercise bike is not a medical device. do not arch your back straight while using your exercise bike. 6. The pulse sensor is at all parts regularly. Over exercising may affect the accuracy of...
English Manual
Page 4
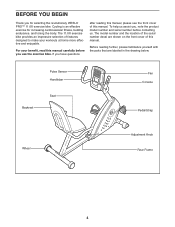
...and enjoyable. Cycling is an effective exercise for selecting the revolutionary WESLO PRO™ 11.0X exercise bike. The model number and the location of this manual carefully before contacting us. The 11.0X exercise bike provides an impressive selection of this manual. BEFORE YOU BEGIN Thank... you for increasing cardiovascular fitness, building endurance, and toning the body. Before reading further, please familiarize yourself with the parts that are shown on...
...and enjoyable. Cycling is an effective exercise for selecting the revolutionary WESLO PRO™ 11.0X exercise bike. The model number and the location of this manual carefully before contacting us. The 11.0X exercise bike provides an impressive selection of this manual. BEFORE YOU BEGIN Thank... you for increasing cardiovascular fitness, building endurance, and toning the body. Before reading further, please familiarize yourself with the parts that are shown on...
English Manual
Page 5
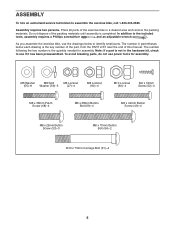
... assembly requires a Phillips screwdriver and an adjustable wrench . Do not dispose of the packing materials until assembly is the key number of the part, from the PART LIST near the end of the exercise bike in parentheses below to see if it has been preassembled. As you assemble the exercise... bike, use power tools for assembly. To avoid breaking parts, do not use the drawings below each drawing is completed. In addition to assemble the exercise bike, call 1-800-445-2480. The number in a cleared area and ...
... assembly requires a Phillips screwdriver and an adjustable wrench . Do not dispose of the packing materials until assembly is the key number of the part, from the PART LIST near the end of the exercise bike in parentheses below to see if it has been preassembled. As you assemble the exercise... bike, use power tools for assembly. To avoid breaking parts, do not use the drawings below each drawing is completed. In addition to assemble the exercise bike, call 1-800-445-2480. The number in a cleared area and ...
English Manual
Page 10
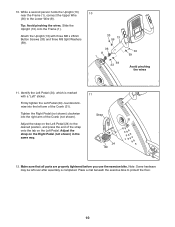
... the same way. 10. Slide the Upright (13) onto the Frame (1). Tip: Avoid pinching the wires. Make sure that all parts are properly tightened before you use the exercise bike. Tighten the Right Pedal (not shown) clockwise into the left over after assembly is marked with three M8 x 25mm Button Screws... Split Washers (59). 10 33 59 13 36 8 1 33 59 33 59 Avoid pinching the wires 11. Note: Some hardware may be left arm of the Crank (not shown). Place a mat beneath the exercise bike to the Lower Wire (8). While a second person holds the Upright (13) near the Frame (1), connect ...
... the same way. 10. Slide the Upright (13) onto the Frame (1). Tip: Avoid pinching the wires. Make sure that all parts are properly tightened before you use the exercise bike. Tighten the Right Pedal (not shown) clockwise into the left over after assembly is marked with three M8 x 25mm Button Screws... Split Washers (59). 10 33 59 13 36 8 1 33 59 33 59 Avoid pinching the wires 11. Note: Some hardware may be left arm of the Crank (not shown). Place a mat beneath the exercise bike to the Lower Wire (8). While a second person holds the Upright (13) near the Frame (1), connect ...
English Manual
Page 11
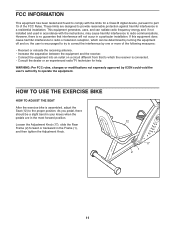
However, there is connected. • Consult the dealer or an experienced radio/TV technician for a Class B digital device, pursuant to part 15 of the following measures: • Reorient or relocate the receiving antenna. • Increase the separation between the equipment and the receiver. •... FCC Rules. These limits are in the Frame (1), and then tighten the Adjustment Knob. 12 17 1 2 11 HOW TO USE THE EXERCISE BIKE HOW TO ADJUST THE SEAT After the exercise bike is encouraged to try to correct the interference by ICON could void the user's authority to operate the equipment...
However, there is connected. • Consult the dealer or an experienced radio/TV technician for a Class B digital device, pursuant to part 15 of the following measures: • Reorient or relocate the receiving antenna. • Increase the separation between the equipment and the receiver. •... FCC Rules. These limits are in the Frame (1), and then tighten the Adjustment Knob. 12 17 1 2 11 HOW TO USE THE EXERCISE BIKE HOW TO ADJUST THE SEAT After the exercise bike is encouraged to try to correct the interference by ICON could void the user's authority to operate the equipment...
English Manual
Page 16
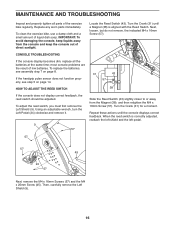
... 16mm Screw (57). When the reed switch is aligned with the Reed Switch. Then, carefully remove the Left Shield (9). 16 Replace any worn parts immediately. If the handgrip pulse sensor does not function properly, see assembly step 7 on page 14. IMPORTANT: To avoid damaging the console, keep... To replace the batteries, see step 5 on page 8. To clean the exercise bike, use a damp cloth and a small amount of low batteries. CONSOLE TROUBLESHOOTING If the console display becomes dim, replace all parts of direct sunlight. HOW TO ADJUST THE REED SWITCH 31 43 57 38 If ...
... 16mm Screw (57). When the reed switch is aligned with the Reed Switch. Then, carefully remove the Left Shield (9). 16 Replace any worn parts immediately. If the handgrip pulse sensor does not function properly, see assembly step 7 on page 14. IMPORTANT: To avoid damaging the console, keep... To replace the batteries, see step 5 on page 8. To clean the exercise bike, use a damp cloth and a small amount of low batteries. CONSOLE TROUBLESHOOTING If the console display becomes dim, replace all parts of direct sunlight. HOW TO ADJUST THE REED SWITCH 31 43 57 38 If ...
English Manual
Page 17
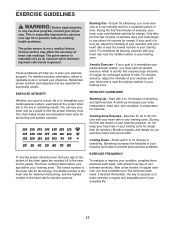
... age 35 or persons with 5 to burn fat, adjust the intensity of time. Training Zone Exercise-Exercise for 20 to make exercise a regular and enjoyable part of stretching. Cooling Down-Finish with pre-existing health problems. The pulse sensor is to 10 minutes of your training zone. The lowest number is...
... age 35 or persons with 5 to burn fat, adjust the intensity of time. Training Zone Exercise-Exercise for 20 to make exercise a regular and enjoyable part of stretching. Cooling Down-Finish with pre-existing health problems. The pulse sensor is to 10 minutes of your training zone. The lowest number is...
English Manual
Page 18
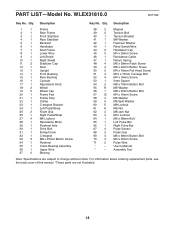
...-Model No. Assembly Tool Note: Specifications are not illustrated. 18 Qty. For information about ordering replacement parts, see the back cover of this manual. *These parts are subject to change without notice. Userʼs Manual * - Description 1 1 Frame 2 1 Rear Frame 3 1... Front Stabilizer 4 1 Rear Stabilizer 5 1 Backrest 6 1 Handlebar 7 1 Seat Frame 8 1 Lower Wire 9 1 Left Shield 10 1 Right Shield 11 2 Stabilizer ...
...-Model No. Assembly Tool Note: Specifications are not illustrated. 18 Qty. For information about ordering replacement parts, see the back cover of this manual. *These parts are subject to change without notice. Userʼs Manual * - Description 1 1 Frame 2 1 Rear Frame 3 1... Front Stabilizer 4 1 Rear Stabilizer 5 1 Backrest 6 1 Handlebar 7 1 Seat Frame 8 1 Lower Wire 9 1 Left Shield 10 1 Right Shield 11 2 Stabilizer ...
English Manual
Page 20
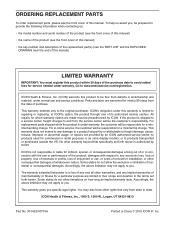
... • the name of the product (see the front cover of this manual) • the key number and description of the replacement part(s) (see the front cover of this product to avoid added fees for commercial or rental purposes or as store display models; Go to products... improper or abnormal usage, or repairs not provided by ICON. or other rights that specifically set forth herein. ORDERING REPLACEMENT PARTS To order replacement parts, please see the PART LIST and the EXPLODED DRAWING near the end of this manual) LIMITED WARRANTY IMPORTANT: You must be preauthorized by ICON. ICON...
... • the name of the product (see the front cover of this manual) • the key number and description of the replacement part(s) (see the front cover of this product to avoid added fees for commercial or rental purposes or as store display models; Go to products... improper or abnormal usage, or repairs not provided by ICON. or other rights that specifically set forth herein. ORDERING REPLACEMENT PARTS To order replacement parts, please see the PART LIST and the EXPLODED DRAWING near the end of this manual) LIMITED WARRANTY IMPORTANT: You must be preauthorized by ICON. ICON...


