
English Manual
Page 2
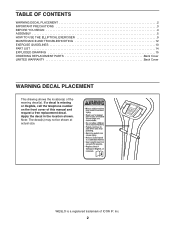
WESLO is missing or illegible, call the telephone number on the front cover of this manual and request a free replacement decal. Note: The decal(s) may not .... Apply the decal in the location shown. TABLE OF CONTENTS WARNING DECAL PLACEMENT 2 IMPORTANT PRECAUTIONS 3 BEFORE YOU BEGIN 4 ASSEMBLY 5 HOW TO USE THE ELLIPTICAL EXERCISER 9 MAINTENANCE AND TROUBLESHOOTING 12 EXERCISE GUIDELINES 13 PART LIST 14 EXPLODED DRAWING 15 ORDERING REPLACEMENT PARTS Back Cover LIMITED WARRANTY Back Cover WARNING DECAL PLACEMENT This drawing shows...
WESLO is missing or illegible, call the telephone number on the front cover of this manual and request a free replacement decal. Note: The decal(s) may not .... Apply the decal in the location shown. TABLE OF CONTENTS WARNING DECAL PLACEMENT 2 IMPORTANT PRECAUTIONS 3 BEFORE YOU BEGIN 4 ASSEMBLY 5 HOW TO USE THE ELLIPTICAL EXERCISER 9 MAINTENANCE AND TROUBLESHOOTING 12 EXERCISE GUIDELINES 13 PART LIST 14 EXPLODED DRAWING 15 ORDERING REPLACEMENT PARTS Back Cover LIMITED WARRANTY Back Cover WARNING DECAL PLACEMENT This drawing shows...

English Manual
Page 3
... affect the accuracy of heart rate readings. Before beginning any worn parts immediately. 6. Place your elliptical exerciser indoors, away from your elliptical exerciser; When you feel pain or dizziness while exercising, stop . 13. This is at all times. 7. Keep your elliptical exerciser on a level surface, with pre-existing health problems. 2. Keep children under age 12 and pets...
... affect the accuracy of heart rate readings. Before beginning any worn parts immediately. 6. Place your elliptical exerciser indoors, away from your elliptical exerciser; When you feel pain or dizziness while exercising, stop . 13. This is at all times. 7. Keep your elliptical exerciser on a level surface, with pre-existing health problems. 2. Keep children under age 12 and pets...

English Manual
Page 4
... drawing below. The MOMENTUM 630 provides a selection of this manual carefully before con- Before reading further, please familiarize yourself with the parts that are shown on the front cover of features designed to make your benefit, read this manual. If you use the elliptical exerciser. To avoid a registration fee for selecting the new WESLO® MOMENTUM 630 elliptical exerciser.
... drawing below. The MOMENTUM 630 provides a selection of this manual carefully before con- Before reading further, please familiarize yourself with the parts that are shown on the front cover of features designed to make your benefit, read this manual. If you use the elliptical exerciser. To avoid a registration fee for selecting the new WESLO® MOMENTUM 630 elliptical exerciser.

English Manual
Page 5
...the packing materials until assembly is narrower than the Rear Stabilizer (not shown). 1 While another person lifts the front of the elliptical exerciser in parentheses below to the included tool(s), assembly requires a Phillips screwdriver wrench , and a rubber mallet . , an adjustable As you assemble the... part, from the PART LIST near the end of this manual. The second number is not in the hardware kit, check to assemble the elliptical exerciser, call 1-800-445-2480. If a part is the quantity needed for assembly. Place all parts of the Frame (1), 34 attach the Front...
...the packing materials until assembly is narrower than the Rear Stabilizer (not shown). 1 While another person lifts the front of the elliptical exerciser in parentheses below to the included tool(s), assembly requires a Phillips screwdriver wrench , and a rubber mallet . , an adjustable As you assemble the... part, from the PART LIST near the end of this manual. The second number is not in the hardware kit, check to assemble the elliptical exerciser, call 1-800-445-2480. If a part is the quantity needed for assembly. Place all parts of the Frame (1), 34 attach the Front...

English Manual
Page 8
Apply a small amount of grease to the right side of the elliptical exerciser are properly tightened. Attach the Right Pedal Arm (not shown) to the axle on the end of the left ...and then place a Wave Washer (64) on the left Handlebar Arm with the Bolt Set. See step 5. Make sure that all parts of the elliptical exerciser in the same way. 7. Tighten the M6 x 38mm Button Bolts (50) in the same way. 11 36 13 8. Identify the Left Pedal... Handlebar Arm must pivot freely. See step 6. To protect the floor or carpet from damage, place a mat under the elliptical exerciser. 8
Apply a small amount of grease to the right side of the elliptical exerciser are properly tightened. Attach the Right Pedal Arm (not shown) to the axle on the end of the left ...and then place a Wave Washer (64) on the left Handlebar Arm with the Bolt Set. See step 5. Make sure that all parts of the elliptical exerciser in the same way. 7. Tighten the M6 x 38mm Button Bolts (50) in the same way. 11 36 13 8. Identify the Left Pedal... Handlebar Arm must pivot freely. See step 6. To protect the floor or carpet from damage, place a mat under the elliptical exerciser. 8

English Manual
Page 9
... see page 10. Indicators Pace Guide Handlebars Thumb Pulse Sensor Pedal Pedal Disc To dismount the elliptical exerciser, wait until the pedals come to vary your workouts more effective. Note: The elliptical exerciser does not have a free wheel; To use the manual mode, see page 11. Note.... Before using the built-in either direction. Then, step onto the other pedal. HOW TO USE THE ELLIPTICAL EXERCISER HOW TO EXERCISE ON THE ELLIPTICAL EXERCISER CONSOLE DIAGRAM To mount the elliptical exerciser, hold the handlebars and step onto the pedal in the lower position.
... see page 10. Indicators Pace Guide Handlebars Thumb Pulse Sensor Pedal Pedal Disc To dismount the elliptical exerciser, wait until the pedals come to vary your workouts more effective. Note: The elliptical exerciser does not have a free wheel; To use the manual mode, see page 11. Note.... Before using the built-in either direction. Then, step onto the other pedal. HOW TO USE THE ELLIPTICAL EXERCISER HOW TO EXERCISE ON THE ELLIPTICAL EXERCISER CONSOLE DIAGRAM To mount the elliptical exerciser, hold the handlebars and step onto the pedal in the lower position.

English Manual
Page 11
... on page 10. 5. When you stop pedaling for a few seconds. See step 1 on this page. 11 One resistance level and one target pace are finished exercising, the console will be too high or too low, or if your heart rate is not displayed, lift your thumb off the pulse sensor for... heart rate. A few seconds, the time will flash in the program. Follow your pedaling pace near the target pace setting for you are finished exercising, the console will show the time remaining in the display and the console will show the length of 20 or 30 oneminute segments. Begin pedaling...
... on page 10. 5. When you stop pedaling for a few seconds. See step 1 on this page. 11 One resistance level and one target pace are finished exercising, the console will be too high or too low, or if your heart rate is not displayed, lift your thumb off the pulse sensor for... heart rate. A few seconds, the time will flash in the program. Follow your pedaling pace near the target pace setting for you are finished exercising, the console will show the time remaining in the display and the console will show the length of 20 or 30 oneminute segments. Begin pedaling...

English Manual
Page 12
IMPORTANT: Keep liquids away from the console. To clean the elliptical exerciser, use a damp cloth and a small amount of low batteries. most console problems are the result of mild soap. BATTERY REPLACEMENT If the console display becomes...; During storage, remove the batteries from the console, place only a sealed water bottle in the water bottle holder, and keep the console out of the elliptical exerciser regularly. To replace the batteries, see step 3 on page 6. 12 Replace any worn parts immediately. MAINTENANCE AND TROUBLESHOOTING Inspect and tighten all parts of direct...
IMPORTANT: Keep liquids away from the console. To clean the elliptical exerciser, use a damp cloth and a small amount of low batteries. most console problems are the result of mild soap. BATTERY REPLACEMENT If the console display becomes...; During storage, remove the batteries from the console, place only a sealed water bottle in the water bottle holder, and keep the console out of the elliptical exerciser regularly. To replace the batteries, see step 3 on page 6. 12 Replace any worn parts immediately. MAINTENANCE AND TROUBLESHOOTING Inspect and tighten all parts of direct...

English Manual
Page 13
...workouts. WORKOUT GUIDELINES Warming Up-Start with 5 to burn fat, adjust the intensity of the chart (ages are essential for fat burning and aerobic exercise. The lowest number is the heart rate for fat burning, the middle number is the heart rate for energy. Only after the first few ...age of 35 or persons with your heart rate near the lowest number in your everyday life. 13 After a few weeks of time. For detailed exercise information, obtain a reputable book or consult your heart rate. Take a six-second heartbeat count, and multiply the result by 10 to find the proper...
...workouts. WORKOUT GUIDELINES Warming Up-Start with 5 to burn fat, adjust the intensity of the chart (ages are essential for fat burning and aerobic exercise. The lowest number is the heart rate for fat burning, the middle number is the heart rate for energy. Only after the first few ...age of 35 or persons with your heart rate near the lowest number in your everyday life. 13 After a few weeks of time. For detailed exercise information, obtain a reputable book or consult your heart rate. Take a six-second heartbeat count, and multiply the result by 10 to find the proper...


