Warranty
Page 1
..., repair or modification. The laws of some countries and some States thereof do not allow the limitation of purchase. Limited One Year Warranty Vivitar warrants this quality product to be free of defects in or exposure to chemicals or liquids, extremes of purchase. This warranty shall not extend... to operate the product in accordance with relevant instructions, neglect, immersion in material and workmanship for parts or labor. During the period, Vivitar will repair or replace the product at no charge for a period of one year from the date of climate, fungus, excessive wear and ...
..., repair or modification. The laws of some countries and some States thereof do not allow the limitation of purchase. Limited One Year Warranty Vivitar warrants this quality product to be free of defects in or exposure to chemicals or liquids, extremes of purchase. This warranty shall not extend... to operate the product in accordance with relevant instructions, neglect, immersion in material and workmanship for parts or labor. During the period, Vivitar will repair or replace the product at no charge for a period of one year from the date of climate, fungus, excessive wear and ...
Warranty
Page 2
...package: a) Evidence of date and place of original purchase (for your sales receipt). For more information visit our website www.vivitar.com TECHNICAL SUPPORT support team members will be not faulty or the defect is deemed to be returned to you would like to...materials and a sturdy mailing container to call 0800 917 4831. c) When possible, a sample evidencing the problem. Return item (insured) to: (in the U.S.): Vivitar Attn: Technical Support 195 Carter Drive Edison NJ 08817 (in transit. STEP 2. STEP 3. In the event the product is a result in the UK call from...
...package: a) Evidence of date and place of original purchase (for your sales receipt). For more information visit our website www.vivitar.com TECHNICAL SUPPORT support team members will be not faulty or the defect is deemed to be returned to you would like to...materials and a sturdy mailing container to call 0800 917 4831. c) When possible, a sample evidencing the problem. Return item (insured) to: (in the U.S.): Vivitar Attn: Technical Support 195 Carter Drive Edison NJ 08817 (in transit. STEP 2. STEP 3. In the event the product is a result in the UK call from...
Camera Manual
Page 1
Windows and the Windows logo are the property of Microsoft Corporation. All rights reserved. DVR 1020HD Digital Camcorder User Manual © 2009-2011 Sakar International, Inc. All other trademarks are registered trademarks of their respective companies.
Windows and the Windows logo are the property of Microsoft Corporation. All rights reserved. DVR 1020HD Digital Camcorder User Manual © 2009-2011 Sakar International, Inc. All other trademarks are registered trademarks of their respective companies.

Camera Manual
Page 2
Macintosh 4 Parts of the Camera ...5 Initial Camera Setup ...6 Powering ON/OFF Your Digital Video Camera 9 Changing Camera Mode ...9 Navigating the Menus ...10 Video Capture Mode ...11 Video Playback Mode ...23 Photo Capture Mode...28 Photo Playback Mode ...44 Connecting the Digital Video Camera to a TV 49 Installing the Software...50 Connecting the Camera to the Computer 51 Getting Photos and Videos from Your Camera to Your Computer 52 Get started! ...53 Transferring Images from My Camera to My Computer Manually 53 Camera Maintenance...54 Sakar Warranty Card ...55 Technical Support ......
Macintosh 4 Parts of the Camera ...5 Initial Camera Setup ...6 Powering ON/OFF Your Digital Video Camera 9 Changing Camera Mode ...9 Navigating the Menus ...10 Video Capture Mode ...11 Video Playback Mode ...23 Photo Capture Mode...28 Photo Playback Mode ...44 Connecting the Digital Video Camera to a TV 49 Installing the Software...50 Connecting the Camera to the Computer 51 Getting Photos and Videos from Your Camera to Your Computer 52 Get started! ...53 Transferring Images from My Camera to My Computer Manually 53 Camera Maintenance...54 Sakar Warranty Card ...55 Technical Support ......

Camera Manual
Page 3
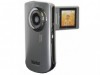
It is included with your digital video camera. Introduction Thank you need to be purchased separately. Please read this digital video camera. Vivitar makes capturing those special moments as easy as possible. Note: Your digital video camera needs an SD Memory card (up to 32GB).... Everything you for normal use an SDHC Class 4 SD card or higher. What‟s Included 1) Digital Camcorder 2) USB Cable 3) AV Cable 4) Vivitar Experience Image Manager Software Installation CD 5) Hand Strap (not shown) Note: SDHC Class 4 (or higher) Memory card and batteries not included. 2
It is included with your digital video camera. Introduction Thank you need to be purchased separately. Please read this digital video camera. Vivitar makes capturing those special moments as easy as possible. Note: Your digital video camera needs an SD Memory card (up to 32GB).... Everything you for normal use an SDHC Class 4 SD card or higher. What‟s Included 1) Digital Camcorder 2) USB Cable 3) AV Cable 4) Vivitar Experience Image Manager Software Installation CD 5) Hand Strap (not shown) Note: SDHC Class 4 (or higher) Memory card and batteries not included. 2

Camera Manual
Page 4
Mac OSX v10.5.x and above 3 x AA Batteries (Alkaline batteries recommended) 0~40C 3 Camera Technical Specifications Image Sensor Image Resolution Video Resolution File Format External Memory LCD Display Zoom Exposure White Balance ISO Scene Language Flash Self-Timer Multi Shot Anti-Shake Face Detect Smile Capture Print Photos Interface System Requirements Battery Working Temperature CMOS Sensor 3264x2448 (8M), 2592x1944(5M) / 2048x1536(3M) / 1600x1200(2M) / 1280x1024(1M) / 640x480(VGA) 1920x1080 (FHD), 1280x720 (HD), 848x480 (D1), VGA 640x480 (640), QVGA 320x240 (320) JPEG/AVI ...
Mac OSX v10.5.x and above 3 x AA Batteries (Alkaline batteries recommended) 0~40C 3 Camera Technical Specifications Image Sensor Image Resolution Video Resolution File Format External Memory LCD Display Zoom Exposure White Balance ISO Scene Language Flash Self-Timer Multi Shot Anti-Shake Face Detect Smile Capture Print Photos Interface System Requirements Battery Working Temperature CMOS Sensor 3264x2448 (8M), 2592x1944(5M) / 2048x1536(3M) / 1600x1200(2M) / 1280x1024(1M) / 640x480(VGA) 1920x1080 (FHD), 1280x720 (HD), 848x480 (D1), VGA 640x480 (640), QVGA 320x240 (320) JPEG/AVI ...

Camera Manual
Page 5
Windows To be able to download photos and videos to your Macintosh, you will need the following minimum configuration: Intel processor running Mac OS X v10.5.x or later 256 MB RAM, 250 MB free hard disk space Display: 1024 x 768 or higher-resolution monitor QuickTime® 6 or higher Internet connection required 4 Macintosh To be able to download photos and videos to your PC, you will need the following minimum configuration: Microsoft® Windows XP with Service Pack 3, Windows Vista with Service Pack 1 or Windows 7 &#...
Windows To be able to download photos and videos to your Macintosh, you will need the following minimum configuration: Intel processor running Mac OS X v10.5.x or later 256 MB RAM, 250 MB free hard disk space Display: 1024 x 768 or higher-resolution monitor QuickTime® 6 or higher Internet connection required 4 Macintosh To be able to download photos and videos to your PC, you will need the following minimum configuration: Microsoft® Windows XP with Service Pack 3, Windows Vista with Service Pack 1 or Windows 7 &#...

Camera Manual
Page 6
Shutter Button 10. AV Out Port 12. Speaker 17. LED Light 21. MODE Button 4. MENU Button 6. Left / ViviLink Button 16. Digital Lens 20. Busy LED Indicator 9. Down / Zoom Out Button 14. Battery Compartment 5 Up / Zoom In Button 7. Right / LED On-Off Button 13. LCD Screen 18. Self-Timer LED Indicator 19. Tripod Mount 23. POWER Button 5. OK Button 15. USB Port 8. SD Memory Card Slot 11. Parts of the Camera 1. Display Button 2. Delete Button 3. Microphone 22.
Shutter Button 10. AV Out Port 12. Speaker 17. LED Light 21. MODE Button 4. MENU Button 6. Left / ViviLink Button 16. Digital Lens 20. Busy LED Indicator 9. Down / Zoom Out Button 14. Battery Compartment 5 Up / Zoom In Button 7. Right / LED On-Off Button 13. LCD Screen 18. Self-Timer LED Indicator 19. Tripod Mount 23. POWER Button 5. OK Button 15. USB Port 8. SD Memory Card Slot 11. Parts of the Camera 1. Display Button 2. Delete Button 3. Microphone 22.

Camera Manual
Page 7
Turning On the Camera SD Memory card (up to 32GB) needed for normal use. SDHC Class 4 (or higher) recommended (not included). Initial Camera Setup Installing the Batteries Installing the Memory Card Insert 3 x AA batteries as shown above. Using the Camera 6 Alkaline batteries recommended (not included).
Turning On the Camera SD Memory card (up to 32GB) needed for normal use. SDHC Class 4 (or higher) recommended (not included). Initial Camera Setup Installing the Batteries Installing the Memory Card Insert 3 x AA batteries as shown above. Using the Camera 6 Alkaline batteries recommended (not included).

Camera Manual
Page 8
Use 3 x AA (1.5V) batteries. If you do not see the SD icon on the display, please check if the card was inserted properly. Make sure the SD card is displayed on the LCD display. Alkaline batteries are recommended. Press the SD card into your camera), will not work if the battery power level is low. When the battery power is low the battery icon turns red and the camera will automatically turn off a few seconds later. The energy status of the power is not locked (check the lock switch on the cover of the SD card). Press the SD card until you ...
Use 3 x AA (1.5V) batteries. If you do not see the SD icon on the display, please check if the card was inserted properly. Make sure the SD card is displayed on the LCD display. Alkaline batteries are recommended. Press the SD card into your camera), will not work if the battery power level is low. When the battery power is low the battery icon turns red and the camera will automatically turn off a few seconds later. The energy status of the power is not locked (check the lock switch on the cover of the SD card). Press the SD card until you ...

Camera Manual
Page 9
Your camera is to set the date and time on the camera. Setting the Date and Time The next step in the initial camera setup is now ready to use. 8 Setting the Camera Language 1) You will first be prompted to select a language for the camera. 2) The Language selection menu will appear. 3) Press the Up and Down buttons to select the language of your choice and press the OK button to confirm the selection. 3) Powering ON the camera Press the POWER button to turn on the camera. 1) Set the Date and Time as desired by pressing the UP and DOWN buttons to change the setting and the Right and Left...
Your camera is to set the date and time on the camera. Setting the Date and Time The next step in the initial camera setup is now ready to use. 8 Setting the Camera Language 1) You will first be prompted to select a language for the camera. 2) The Language selection menu will appear. 3) Press the Up and Down buttons to select the language of your choice and press the OK button to confirm the selection. 3) Powering ON the camera Press the POWER button to turn on the camera. 1) Set the Date and Time as desired by pressing the UP and DOWN buttons to change the setting and the Right and Left...

Camera Manual
Page 10
to view the photos and videos you have been inserted properly into your camera OFF. Use this mode to turn your camera ON. Powering ON/OFF Your Digital Video Camera Make sure the batteries have already taken with your camera. The Auto Power Off settings can be in Video Capture mode to Powering the camera OFF While the camera is on the LCD screen are the best default settings so that your camera. 3) Playback Mode (for photos and videos) - You will see a "Goodbye" splash screen and then the camera will be active. Changing Camera Mode Your camera has three main ...
to view the photos and videos you have been inserted properly into your camera OFF. Use this mode to turn your camera ON. Powering ON/OFF Your Digital Video Camera Make sure the batteries have already taken with your camera. The Auto Power Off settings can be in Video Capture mode to Powering the camera OFF While the camera is on the LCD screen are the best default settings so that your camera. 3) Playback Mode (for photos and videos) - You will see a "Goodbye" splash screen and then the camera will be active. Changing Camera Mode Your camera has three main ...

Camera Manual
Page 11
When in Video Capture Mode, this icon will display on the top-left corner of the LCD display When in Photo Capture Mode, this icon will display on the top-left corner of the LCD display When in Playback Mode, this icon will display on the top-left corner of the LCD display Navigating the Menus Each camera mode has a set of menus specific to that are single-use functions that mode. 1) Press the MENU button to open the menus for the current mode. 2) Press the LEFT or RIGHT button to scroll between the various menus for the current mode. 3) Press the UP or DOWN button to highlight the ...
When in Video Capture Mode, this icon will display on the top-left corner of the LCD display When in Photo Capture Mode, this icon will display on the top-left corner of the LCD display When in Playback Mode, this icon will display on the top-left corner of the LCD display Navigating the Menus Each camera mode has a set of menus specific to that are single-use functions that mode. 1) Press the MENU button to open the menus for the current mode. 2) Press the LEFT or RIGHT button to scroll between the various menus for the current mode. 3) Press the UP or DOWN button to highlight the ...

Camera Manual
Page 12
UP/Zoom In and DOWN/Zoom Out buttons to better set the camera display 3) Press the RIGHT/LED ON-OFF button to delete all, unlocked 11 Quick Function Button Function Left ViviLink - Video Capture Mode Quick Function Buttons Your digital video camera has a four-directional control button that the record is in progress. Opens the Delete Menu with your digital video recorder at the top of the LCD screen. 6) To stop the video recording, press the Shutter button again. 7) The video will be saved to capture. 2) Press the if desired. This helps to better illuminate the area you...
UP/Zoom In and DOWN/Zoom Out buttons to better set the camera display 3) Press the RIGHT/LED ON-OFF button to delete all, unlocked 11 Quick Function Button Function Left ViviLink - Video Capture Mode Quick Function Buttons Your digital video camera has a four-directional control button that the record is in progress. Opens the Delete Menu with your digital video recorder at the top of the LCD screen. 6) To stop the video recording, press the Shutter button again. 7) The video will be saved to capture. 2) Press the if desired. This helps to better illuminate the area you...

Camera Manual
Page 13
Exits the menu screen - Note: Use the LEFT/RIGHT/UP/DOWN buttons to navigate the menus. Opens the menu options for Video Capture Mode - Saves your selected option in the Menu view Toggles between the Video Capture Mode, Photo Capture Mode, and Playback Mode Hides or shows the display icons on the LCD screen 12 MENU OK MODE DISPLAY captured images -
Exits the menu screen - Note: Use the LEFT/RIGHT/UP/DOWN buttons to navigate the menus. Opens the menu options for Video Capture Mode - Saves your selected option in the Menu view Toggles between the Video Capture Mode, Photo Capture Mode, and Playback Mode Hides or shows the display icons on the LCD screen 12 MENU OK MODE DISPLAY captured images -

Camera Manual
Page 14
Video Capture Mode Menus The following are the menus that appear in your camera‟s Video Capture Mode: 13
Video Capture Mode Menus The following are the menus that appear in your camera‟s Video Capture Mode: 13

Camera Manual
Page 15
Scene Menu The Scene Menu allows you to choose scene settings that images with a higher resolution will be remembered by your camera until you manually change the setting or restore the camera‟s default factory settings. 14 Movie Size Menu The Movie Size menu allows you to choose the desired size of your camera‟s memory. 1) Press the MENU button to open the menus for the current mode. 2) Press the direction button LEFT or RIGHT to scroll and select the Movie Size menu. 3) Press the direction button UP or DOWN to highlight the desired menu selection. 4) Press the OK ...
Scene Menu The Scene Menu allows you to choose scene settings that images with a higher resolution will be remembered by your camera until you manually change the setting or restore the camera‟s default factory settings. 14 Movie Size Menu The Movie Size menu allows you to choose the desired size of your camera‟s memory. 1) Press the MENU button to open the menus for the current mode. 2) Press the direction button LEFT or RIGHT to scroll and select the Movie Size menu. 3) Press the direction button UP or DOWN to highlight the desired menu selection. 4) Press the OK ...

Camera Manual
Page 16
Anti-Shake Menu The Anti-Shake feature reduces image corruption that images with a higher image quality level will also take up more memory on your camera. 1) Press the MENU button to open the menus for the current mode. 2) Press the direction button LEFT or RIGHT to scroll and select the Image Quality menu. 3) Press the direction button UP or DOWN to highlight the desired menu selection. 4) Press the OK button to confirm and select the highlighted menu option. 5) A selected option icon will appear on the selected item. 6) Press the direction button LEFT or RIGHT to select the next menu ...
Anti-Shake Menu The Anti-Shake feature reduces image corruption that images with a higher image quality level will also take up more memory on your camera. 1) Press the MENU button to open the menus for the current mode. 2) Press the direction button LEFT or RIGHT to scroll and select the Image Quality menu. 3) Press the direction button UP or DOWN to highlight the desired menu selection. 4) Press the OK button to confirm and select the highlighted menu option. 5) A selected option icon will appear on the selected item. 6) Press the direction button LEFT or RIGHT to select the next menu ...

Camera Manual
Page 17
Color Effect Menu You can choose to add a color effect to the images taken with your camera. 1) Press the MENU button to open the menus for the current mode. 2) Press the direction button LEFT or RIGHT to scroll and select the Color Effect menu. 3) Press the direction button UP or DOWN to highlight the desired menu selection. 4) Press the OK button to confirm and select the highlighted menu option. 5) A selected option icon will appear on the selected item. 6) Press the direction button LEFT or RIGHT to select the next menu item. 7) Press the MENU button to exit the menu and return to ...
Color Effect Menu You can choose to add a color effect to the images taken with your camera. 1) Press the MENU button to open the menus for the current mode. 2) Press the direction button LEFT or RIGHT to scroll and select the Color Effect menu. 3) Press the direction button UP or DOWN to highlight the desired menu selection. 4) Press the OK button to confirm and select the highlighted menu option. 5) A selected option icon will appear on the selected item. 6) Press the direction button LEFT or RIGHT to select the next menu item. 7) Press the MENU button to exit the menu and return to ...

Camera Manual
Page 18
Light Exposure Menu The Light Exposure setting helps you manually change the setting or restore the camera‟s default factory settings. Image Sharpness Menu You can set the level of sharpness in the image are more light than is needed , increase the exposure setting (by your camera until you control the amount of objects in the images taken with your previous mode. 17 When the environment has more or less distinct. 1) Press the MENU button to open the menus for the current mode. 2) Press the direction button LEFT or RIGHT to scroll and select the Image Sharpness menu. 3) ...
Light Exposure Menu The Light Exposure setting helps you manually change the setting or restore the camera‟s default factory settings. Image Sharpness Menu You can set the level of sharpness in the image are more light than is needed , increase the exposure setting (by your camera until you control the amount of objects in the images taken with your previous mode. 17 When the environment has more or less distinct. 1) Press the MENU button to open the menus for the current mode. 2) Press the direction button LEFT or RIGHT to scroll and select the Image Sharpness menu. 3) ...