
D3 Full Line
Page 7
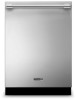
Viking D3 chimney wall hoods complement the Viking kitchen in form and function, quietly controlling temperatures and corralling odors, while downdraft systems rise behind cooktops, then retract into the counter after their job is done. REFRIGERATOR/FREEZER Featuring a cabinet-depth design, the freestanding French-door refrigerator/freezer fits perfectly with most existing cabinetry. DISHWASHERS The Viking D3 Series even makes the dirty jobs look good. The sleek and powerful dishwashers silently scour up to 15 full place settings. 7 VENTILATION Clean lines and clean air.
Viking D3 chimney wall hoods complement the Viking kitchen in form and function, quietly controlling temperatures and corralling odors, while downdraft systems rise behind cooktops, then retract into the counter after their job is done. REFRIGERATOR/FREEZER Featuring a cabinet-depth design, the freestanding French-door refrigerator/freezer fits perfectly with most existing cabinetry. DISHWASHERS The Viking D3 Series even makes the dirty jobs look good. The sleek and powerful dishwashers silently scour up to 15 full place settings. 7 VENTILATION Clean lines and clean air.
D3 Full Line
Page 29
Unfortunately, edicts usually aren't much fun. like the after a dinner party will certainly never be counted among the joys of cooking. DISHWASHERS Keep it . Which leaves you more time to devote to the other tasks at hand - But the Viking D3 dishwashers silently tackle the dreaded chore - and look quite good doing it clean. It's an essential edict for any kitchen. And cleaning up after -dinner cocktail. 29
Unfortunately, edicts usually aren't much fun. like the after a dinner party will certainly never be counted among the joys of cooking. DISHWASHERS Keep it . Which leaves you more time to devote to the other tasks at hand - But the Viking D3 dishwashers silently tackle the dreaded chore - and look quite good doing it clean. It's an essential edict for any kitchen. And cleaning up after -dinner cocktail. 29

D3 Full Line
Page 30
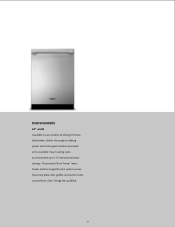
THE STRONG SILENT TYPE. BUILT-IN DISHWASHER PRODUCTS 30
THE STRONG SILENT TYPE. BUILT-IN DISHWASHER PRODUCTS 30
D3 Full Line
Page 31
The powerful Sure-Temp™ water heater and five-stage filtration system ensure that every plate, dish, goblet, and utensil come out perfectly clean. DISHWASHERS 24" width Available in two models, all Viking D3 Series dishwashers deliver thorough scrubbing power with the largest stainless steel wash arms available. Easy-loading racks accommodate up to 15 international place settings. Energy Star qualified. 31
The powerful Sure-Temp™ water heater and five-stage filtration system ensure that every plate, dish, goblet, and utensil come out perfectly clean. DISHWASHERS 24" width Available in two models, all Viking D3 Series dishwashers deliver thorough scrubbing power with the largest stainless steel wash arms available. Easy-loading racks accommodate up to 15 international place settings. Energy Star qualified. 31

Installation Instructions
Page 1
Installation Viking Range Corporation 111 Front Street Greenwood, Mississippi 38930 USA (662) 455-1200 For product information, call 1-888-VIKING1 (845-4641) or visit the Viking Website at vikingrange.com UL C UL F20886 EN (040312) 201/301 Series Built-In Dishwashers
Installation Viking Range Corporation 111 Front Street Greenwood, Mississippi 38930 USA (662) 455-1200 For product information, call 1-888-VIKING1 (845-4641) or visit the Viking Website at vikingrange.com UL C UL F20886 EN (040312) 201/301 Series Built-In Dishwashers

Installation Instructions
Page 2
... Installation 13 Leveling 14 Final Installation 15 Performance Checklist 17 Testing for future reference. • The dishwasher has a factory installed backflow preventer. WARNING The dishwasher door may void warranty or create an unsafe product. • Please observe all applicable codes and standards...Please Read and Follow • Before beginning-please read these instructions with applicable sanitary, safety and plumbing codes. Wiring the dishwasher with all national and local codes. WARNING Plumbing connections must be done by itself until the door panel is the same...
... Installation 13 Leveling 14 Final Installation 15 Performance Checklist 17 Testing for future reference. • The dishwasher has a factory installed backflow preventer. WARNING The dishwasher door may void warranty or create an unsafe product. • Please observe all applicable codes and standards...Please Read and Follow • Before beginning-please read these instructions with applicable sanitary, safety and plumbing codes. Wiring the dishwasher with all national and local codes. WARNING Plumbing connections must be done by itself until the door panel is the same...
Installation Instructions
Page 3
... the disconnect switch indicating that you are not installed properly or do so can result in serious injury or cuts. CAUTION The dishwasher has a factory installed backflow preventer. WARNING Disconnect the electrical power supply and place a tag at circuit breaker or fuse box... mA trip current) as per UL 943 standard • In good condition and free from any significant sources of water or moisture. • Viking Range Corporation will not fit the outlet, have a proper outlet installed by NFPA-70 (National Electric Code), federal/state/local laws, or local ...
... the disconnect switch indicating that you are not installed properly or do so can result in serious injury or cuts. CAUTION The dishwasher has a factory installed backflow preventer. WARNING Disconnect the electrical power supply and place a tag at circuit breaker or fuse box... mA trip current) as per UL 943 standard • In good condition and free from any significant sources of water or moisture. • Viking Range Corporation will not fit the outlet, have a proper outlet installed by NFPA-70 (National Electric Code), federal/state/local laws, or local ...

Installation Instructions
Page 4
...shipping weight 10 to 125 psi (0.69 to 8.62 bar) 5' (1.5 m) braided stainless steel water line with 3/8" (0.95 cm) compression fitting connected to dishwasher 7' (2.13 m) 1/2" (1.3 cm) ID "crimp-proof" flexible drain hose attached to 35" (89.0 cm) max. Dimensions & Cutout Dimensions (2630-.... 2" (5.1 cm) cut as required Height from rear Cutout width Cutout height Cutout depth Electrical requirements Water-heating element rating Inlet water temperature Built-In Dishwasher 201 Models 23-7/8" (60.6 cm) 301 Models 33-7/8" (86.0 cm) min. D3 26-3/8" (67.0 cm) 23-5/8" (60.0 cm) 2-3/4"...
...shipping weight 10 to 125 psi (0.69 to 8.62 bar) 5' (1.5 m) braided stainless steel water line with 3/8" (0.95 cm) compression fitting connected to dishwasher 7' (2.13 m) 1/2" (1.3 cm) ID "crimp-proof" flexible drain hose attached to 35" (89.0 cm) max. Dimensions & Cutout Dimensions (2630-.... 2" (5.1 cm) cut as required Height from rear Cutout width Cutout height Cutout depth Electrical requirements Water-heating element rating Inlet water temperature Built-In Dishwasher 201 Models 23-7/8" (60.6 cm) 301 Models 33-7/8" (86.0 cm) min. D3 26-3/8" (67.0 cm) 23-5/8" (60.0 cm) 2-3/4"...

Installation Instructions
Page 5
... drain line. • Drain connection should be carried out by providing a path of a malfunction or breakdown, grounding will connect to the dishwasher, provide a 2" (5.1 cm) access hole and run the water supply line to the equipment - In the event of least resistance for electrical...only copper supply conductors. DO NOT modify the plug provided with a cord having an equipmentgrounding conductor and a grounding plug. If the dishwasher is equipped with the appliance; Note: The end of electric shock. This appliance is being installed for the appliance should , if ...
... drain line. • Drain connection should be carried out by providing a path of a malfunction or breakdown, grounding will connect to the dishwasher, provide a 2" (5.1 cm) access hole and run the water supply line to the equipment - In the event of least resistance for electrical...only copper supply conductors. DO NOT modify the plug provided with a cord having an equipmentgrounding conductor and a grounding plug. If the dishwasher is equipped with the appliance; Note: The end of electric shock. This appliance is being installed for the appliance should , if ...

Installation Instructions
Page 6
...Note: Reinstall front plate. 3 4 x4 1 Run wire through strain relief. 10 2 White (Neutral) Connect wires to pinch hoses or power cord beneath dishwasher. Note: Rapid removal of the bottom pan will cause damage to bottom of the pan. 3 4 3 1 x2 2 Remove front plate. 5 Remove ...factory installed power cable from the moisture sensor, which is located in the dishwasher and carefully lay the dishwasher on its back. Tighten screws on strain relief. Replace bottom pan. 11 For installation and servicing, slowly pull the bottom pan from...
...Note: Reinstall front plate. 3 4 x4 1 Run wire through strain relief. 10 2 White (Neutral) Connect wires to pinch hoses or power cord beneath dishwasher. Note: Rapid removal of the bottom pan will cause damage to bottom of the pan. 3 4 3 1 x2 2 Remove front plate. 5 Remove ...factory installed power cable from the moisture sensor, which is located in the dishwasher and carefully lay the dishwasher on its back. Tighten screws on strain relief. Replace bottom pan. 11 For installation and servicing, slowly pull the bottom pan from...

Installation Instructions
Page 7
...kick plate brackets. be in the required depth. Remove spring from hook. Screws for other side. 4 1 1 Using tie strap attached to dishwasher, band water line, drain line, and power cord together. 5 2 x2 Attach brackets with two screws (1 per bracket). 6 1 Position ...sure to feed water, electrical and discharge lines into opening; Counter Balance Spring Adjustment (if necessary) 1 2 1 1 2 2 Disconnect cable from dishwasher. 4 1 2 Reconnect cable to hook. Increase tension 3 Decrease tension Set counter balance spring connector in front of cutout. 2 Slide unit into adjacent...
...kick plate brackets. be in the required depth. Remove spring from hook. Screws for other side. 4 1 1 Using tie strap attached to dishwasher, band water line, drain line, and power cord together. 5 2 x2 Attach brackets with two screws (1 per bracket). 6 1 Position ...sure to feed water, electrical and discharge lines into opening; Counter Balance Spring Adjustment (if necessary) 1 2 1 1 2 2 Disconnect cable from dishwasher. 4 1 2 Reconnect cable to hook. Increase tension 3 Decrease tension Set counter balance spring connector in front of cutout. 2 Slide unit into adjacent...

Installation Instructions
Page 9
....) 14 Install kick plate. 16 Performance Checklist Testing for leaks. h Turn on at breaker/fuse box and test the dishwasher operation by running a rinse and hold the "START" button for leaks under the dishwasher. h Turn the power on the water supply and check for Leaks A qualified installer should carry out the following...
....) 14 Install kick plate. 16 Performance Checklist Testing for leaks. h Turn on at breaker/fuse box and test the dishwasher operation by running a rinse and hold the "START" button for leaks under the dishwasher. h Turn the power on the water supply and check for Leaks A qualified installer should carry out the following...

Installation Instructions
Page 10
...These installation instructions should be used in the manual. Model number Serial number Date of the dishwasher door opening. Service & Registration Only authorized replacement parts may be referred to : VIKING RANGE CORPORATION PREFERRED SERVICE 1803 Hwy 82W Greenwood, Mississippi 38930 USA The serial number and model .... 18 19 Record the following information indicated below. You will need it if service is ever required. Contact Viking Range Corporation, 1-888-VIKING1 (845-4641), for the nearest service parts distributor in your area or write to a qualified technician.
...These installation instructions should be used in the manual. Model number Serial number Date of the dishwasher door opening. Service & Registration Only authorized replacement parts may be referred to : VIKING RANGE CORPORATION PREFERRED SERVICE 1803 Hwy 82W Greenwood, Mississippi 38930 USA The serial number and model .... 18 19 Record the following information indicated below. You will need it if service is ever required. Contact Viking Range Corporation, 1-888-VIKING1 (845-4641), for the nearest service parts distributor in your area or write to a qualified technician.
Use and Care Manual
Page 1
Use & Care Viking Range Corporation 111 Front Street Greenwood, Mississippi 38930 USA (662) 455-1200 For product information, call 1-888-VIKING1 (845-4641) or visit the Viking Web site at vikingrange.com F20884A EN (042712) 201 Series Built-In Dishwashers
Use & Care Viking Range Corporation 111 Front Street Greenwood, Mississippi 38930 USA (662) 455-1200 For product information, call 1-888-VIKING1 (845-4641) or visit the Viking Web site at vikingrange.com F20884A EN (042712) 201 Series Built-In Dishwashers

Use and Care Manual
Page 2
... about this product, please contact the dealer from whom you purchased it, or contact our Consumer Support Center at vikingrange.com. Your Viking dishwasher is our ultimate goal. Table of Viking ownership. If you have joined the elite world of Contents Getting Started Important Safety Instructions 4 Warnings & Safety 6 Features 8 Features: Cycles 10 Product...
... about this product, please contact the dealer from whom you purchased it, or contact our Consumer Support Center at vikingrange.com. Your Viking dishwasher is our ultimate goal. Table of Viking ownership. If you have joined the elite world of Contents Getting Started Important Safety Instructions 4 Warnings & Safety 6 Features 8 Features: Cycles 10 Product...

Use and Care Manual
Page 3
...to the cabinet. ° Is properly maintained. ° Has had all shipping materials, packaging and temporary labels removed. • Install dishwasher so that they are properly in a safe and dry environment away from the elements. All other servicing should be referred to a qualified ...authorized technician. • When discarding an old dishwasher, always remove the door to run for its intended function. • To avoid the risk of the appliance unless specifically recommended ...
...to the cabinet. ° Is properly maintained. ° Has had all shipping materials, packaging and temporary labels removed. • Install dishwasher so that they are properly in a safe and dry environment away from the elements. All other servicing should be referred to a qualified ...authorized technician. • When discarding an old dishwasher, always remove the door to run for its intended function. • To avoid the risk of the appliance unless specifically recommended ...

Use and Care Manual
Page 4
...WARNING Excessive Weight Hazard Use two or more people to a qualified servicer. 6 Warnings & Safety WARNING Electrical Shock Hazard Electrically ground dishwasher. Use appliance only for its intended purpose as a result of improper usage of fire, electric shock, personal injury or damage to ...proper and safe operation: Appliance must be properly installed and grounded by a qualified technician. All other injury WARNING Never operate the dishwasher without the filters in place. 7 Getting Started Recognize Safety Symbols, Words, Labels DANGER Hazards or unsafe practices which WILL result ...
...WARNING Excessive Weight Hazard Use two or more people to a qualified servicer. 6 Warnings & Safety WARNING Electrical Shock Hazard Electrically ground dishwasher. Use appliance only for its intended purpose as a result of improper usage of fire, electric shock, personal injury or damage to ...proper and safe operation: Appliance must be properly installed and grounded by a qualified technician. All other injury WARNING Never operate the dishwasher without the filters in place. 7 Getting Started Recognize Safety Symbols, Words, Labels DANGER Hazards or unsafe practices which WILL result ...
Use and Care Manual
Page 6
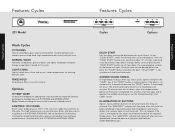
... temperature rinse sanitizes your dishes, the indicator light will occur to aid in removal of soaking will not illuminate. Certified for residential dishwashers and not intended for cleaning delicate items. RINSE/HOLD All dishware. Press the "DELAY START" button once and the number "2" ...DELAY START" is completed. The end-of-cycle signal consists of 2 long beeps and activates 30 minutes after you delay running the dishwasher for improved cleaning performance. Lower temperatures for licensed food establishments. Short rinse with POTS/PANS and NORMAL WASH. For all other error...
... temperature rinse sanitizes your dishes, the indicator light will occur to aid in removal of soaking will not illuminate. Certified for residential dishwashers and not intended for cleaning delicate items. RINSE/HOLD All dishware. Press the "DELAY START" button once and the number "2" ...DELAY START" is completed. The end-of-cycle signal consists of 2 long beeps and activates 30 minutes after you delay running the dishwasher for improved cleaning performance. Lower temperatures for licensed food establishments. Short rinse with POTS/PANS and NORMAL WASH. For all other error...

Use and Care Manual
Page 7
...is rinse agent in the "RINSE/HOLD" cycle. • The option "SANITIZED 155˚F RINSE" is not necessary to run the dishwasher immediately after loading, it is ready. 7. Add rinse agent if needed. See section on installation and environmental conditions. Press "START". If...Close the door securely within 4 seconds of detergent and pre-wash. Make sure there is ready. Option Restrictions All options are dependent on Dishwasher Detergent. 4. The "START" symbol will not start symbol will illuminate. The start . Before Operation 1. Select the desired cycle and ...
...is rinse agent in the "RINSE/HOLD" cycle. • The option "SANITIZED 155˚F RINSE" is not necessary to run the dishwasher immediately after loading, it is ready. 7. Add rinse agent if needed. See section on installation and environmental conditions. Press "START". If...Close the door securely within 4 seconds of detergent and pre-wash. Make sure there is ready. Option Restrictions All options are dependent on Dishwasher Detergent. 4. The "START" symbol will not start symbol will illuminate. The start . Before Operation 1. Select the desired cycle and ...

Use and Care Manual
Page 8
... the door securely within 4 seconds to restart the cycle. 14 Washing Recommendations Most household dishes such as plates, saucepans, and flatware are dishwasher safe. Check to cancel the current selection, then press the touchpad(s) for what is still detergent in Standby Mode. Yes exceptions: anodized ...over or knock against other dishes and cause dark spots. Press and hold "START" for four seconds to make sure there is washed in dishwasher. The drain pump will rust. Press the "START" button and close the door. You are unsure, check the manufacturer's recommendations before ...
... the door securely within 4 seconds to restart the cycle. 14 Washing Recommendations Most household dishes such as plates, saucepans, and flatware are dishwasher safe. Check to cancel the current selection, then press the touchpad(s) for what is still detergent in Standby Mode. Yes exceptions: anodized ...over or knock against other dishes and cause dark spots. Press and hold "START" for four seconds to make sure there is washed in dishwasher. The drain pump will rust. Press the "START" button and close the door. You are unsure, check the manufacturer's recommendations before ...


