
User Guide
Page 29
... display devices 53 Directing the display output when you turn on the computer 54 Adjusting the quality of the external display......55 Using an external keyboard 55 Using a mouse 55 Connecting a printer 56 Setting up a printer 57 Connecting an optional external diskette drive........57 Turning off the computer 58 Options for... your computer 68 Cleaning the computer 68 Moving the computer 69 Using a computer lock 69 Chapter 2: Learning the Basics 70 Computing tips 70 Using the keyboard 72 Character keys 72 Making your...
... display devices 53 Directing the display output when you turn on the computer 54 Adjusting the quality of the external display......55 Using an external keyboard 55 Using a mouse 55 Connecting a printer 56 Setting up a printer 57 Connecting an optional external diskette drive........57 Turning off the computer 58 Options for... your computer 68 Cleaning the computer 68 Moving the computer 69 Using a computer lock 69 Chapter 2: Learning the Basics 70 Computing tips 70 Using the keyboard 72 Character keys 72 Making your...

User Guide
Page 33
...Resolving a hardware conflict 154 A plan of action 154 Fixing a problem with Device Manager ...........155 Power and the batteries 156 Keyboard problems 157 Display problems 158 Disk or internal storage drive problems ..........160 Optical drive problems 162 Sound system problems 163 Printer problems ...174; operating system 168 If you need further assistance 173 Before you contact Toshiba 173 Contacting Toshiba 173 Other Toshiba Internet Web sites 174 Toshiba's worldwide offices 174 Appendix A: Hot Keys/TOSHIBA Cards 176 Hot Key Cards 176 Using the Hot Key Cards 177 Application ...
...Resolving a hardware conflict 154 A plan of action 154 Fixing a problem with Device Manager ...........155 Power and the batteries 156 Keyboard problems 157 Display problems 158 Disk or internal storage drive problems ..........160 Optical drive problems 162 Sound system problems 163 Printer problems ...174; operating system 168 If you need further assistance 173 Before you contact Toshiba 173 Contacting Toshiba 173 Other Toshiba Internet Web sites 174 Toshiba's worldwide offices 174 Appendix A: Hot Keys/TOSHIBA Cards 176 Hot Key Cards 176 Using the Hot Key Cards 177 Application ...

User Guide
Page 34
34 Contents Volume Mute 181 Lock (Instant security 182 Power plan 183 Sleep mode 184 Hibernation mode 185 Output (Display switch 186 Display brightness 187 Disabling or enabling wireless devices............188 Disabling or enabling the TouchPad 189 Zoom (Display resolution 190 Keyboard hot key functions 191 Appendix B: Power Cord/Cable Connectors 192 Glossary 193 Index 207
34 Contents Volume Mute 181 Lock (Instant security 182 Power plan 183 Sleep mode 184 Hibernation mode 185 Output (Display switch 186 Display brightness 187 Disabling or enabling wireless devices............188 Disabling or enabling the TouchPad 189 Zoom (Display resolution 190 Keyboard hot key functions 191 Appendix B: Power Cord/Cable Connectors 192 Glossary 193 Index 207

User Guide
Page 43
...: ❖ Never cover your computer or AC adaptor with your computer's cooling fan Your computer may have adequate ventilation and are not limited to, a mouse, keyboard, printer, and memory.
...: ❖ Never cover your computer or AC adaptor with your computer's cooling fan Your computer may have adequate ventilation and are not limited to, a mouse, keyboard, printer, and memory.

User Guide
Page 45
... complete Product Registration will not diminish Customer rights under the Toshiba standard limited Warranty. NOTE To register online, you may want to: ❖ Connect a mouse (see "Using a mouse" on page 55) ❖ Connect a full-size keyboard (see "Using an external keyboard" on page 55) ❖ Connect an external monitor ...(see "Connecting an optional external diskette drive" on your product. Adding optional external devices NOTE Before adding external devices or memory, Toshiba recommends setting up your computer for the first time you must be completed by either visiting the...
... complete Product Registration will not diminish Customer rights under the Toshiba standard limited Warranty. NOTE To register online, you may want to: ❖ Connect a mouse (see "Using a mouse" on page 55) ❖ Connect a full-size keyboard (see "Using an external keyboard" on page 55) ❖ Connect an external monitor ...(see "Connecting an optional external diskette drive" on your product. Adding optional external devices NOTE Before adding external devices or memory, Toshiba recommends setting up your computer for the first time you must be completed by either visiting the...

User Guide
Page 49
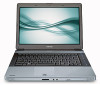
Do not press or push on the display panel and be careful to remove any pens or other objects from the keyboard area before closing the display panel, place one hand on the palm rest to hold the computer in place and use the other hand to ...
Do not press or push on the display panel and be careful to remove any pens or other objects from the keyboard area before closing the display panel, place one hand on the palm rest to hold the computer in place and use the other hand to ...
User Guide
Page 51
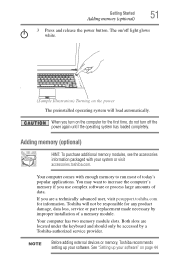
... module. When you are located under the keyboard and should only be responsible for the first time, do not turn off light glows white. (Sample Illustration) Turning on the computer for any product damage, data loss, service or part replacement made necessary by a Toshiba-authorized service provider. Getting Started Adding memory (optional...
... module. When you are located under the keyboard and should only be responsible for the first time, do not turn off light glows white. (Sample Illustration) Turning on the computer for any product damage, data loss, service or part replacement made necessary by a Toshiba-authorized service provider. Getting Started Adding memory (optional...

User Guide
Page 52
... the TouchPad. 52 Getting Started Using the TouchPad™ Using the TouchPad™ The TouchPad™, the small, rectangular area located in front of the keyboard, is much smaller than the display screen, moving your cursor across the screen often means having to move your finger several times across the TouchPad...
... the TouchPad. 52 Getting Started Using the TouchPad™ Using the TouchPad™ The TouchPad™, the small, rectangular area located in front of the keyboard, is much smaller than the display screen, moving your cursor across the screen often means having to move your finger several times across the TouchPad...

User Guide
Page 55
...You may need to adjust the video settings. You can attach one to use a USB-compatible mouse. Using an external keyboard If you prefer to use a full-size keyboard, you may want to your television (or other video display device), you can use a mouse instead of the external display... To obtain the best picture quality from your computer. Getting Started Using an external keyboard 55 ❖ LCD + HDMI-Built-in TouchPad. Adjusting the quality of the computer's built-in display and TV (extended desktop) ❖ ...
...You may need to adjust the video settings. You can attach one to use a USB-compatible mouse. Using an external keyboard If you prefer to use a full-size keyboard, you may want to your television (or other video display device), you can use a mouse instead of the external display... To obtain the best picture quality from your computer. Getting Started Using an external keyboard 55 ❖ LCD + HDMI-Built-in TouchPad. Adjusting the quality of the computer's built-in display and TV (extended desktop) ❖ ...

User Guide
Page 68
... mode To start it into Sleep mode by closing the display panel, depending on page 101. For more information, see "Taking care of the computer's keyboard, speaker, and other openings. NOTE Please handle your power usage settings. There are several ways in Sleep mode by either pressing the power button or...
... mode To start it into Sleep mode by closing the display panel, depending on page 101. For more information, see "Taking care of the computer's keyboard, speaker, and other openings. NOTE Please handle your power usage settings. There are several ways in Sleep mode by either pressing the power button or...

User Guide
Page 72
... keys; Most of the time, this does not matter. Pressing the Fn key simultaneously in combination with a standard full-size keyboard, it includes fewer keys. and a numeric keypad. Your computer's keyboard includes only one of the specially marked keys allows you can simulate the separate key, as follows: Press Fn and Enter... simultaneously to simulate the Enter key on the full-sized keyboard. Using the Fn key, you to the regular and numeric pad Enter keys on the numeric pad of the enhanced...
... keys; Most of the time, this does not matter. Pressing the Fn key simultaneously in combination with a standard full-size keyboard, it includes fewer keys. and a numeric keypad. Your computer's keyboard includes only one of the specially marked keys allows you can simulate the separate key, as follows: Press Fn and Enter... simultaneously to simulate the Enter key on the full-sized keyboard. Using the Fn key, you to the regular and numeric pad Enter keys on the numeric pad of the enhanced...

User Guide
Page 73
...specific functions on the computer. Special Windows® keys Windows® button Application key (Sample Illustration) Special Windows® keys Your computer's keyboard has one key and one button that have special functions in combination with the Fn key, function keys marked with the Fn key) are ...the 12 keys at the top of the keyboard. (Sample Illustration) Function keys F1 through F12 are using. For example, Fn+F9 turns off the TouchPad. Used in Windows®: ❖...
...specific functions on the computer. Special Windows® keys Windows® button Application key (Sample Illustration) Special Windows® keys Your computer's keyboard has one key and one button that have special functions in combination with the Fn key, function keys marked with the Fn key) are ...the 12 keys at the top of the keyboard. (Sample Illustration) Function keys F1 through F12 are using. For example, Fn+F9 turns off the TouchPad. Used in Windows®: ❖...

User Guide
Page 74
... and symbols on their right front are the cursor control overlay keys. The cursor control mode light on the keyboard indicator panel goes out. The numeric mode light on the keyboard indicator panel glows when the numeric overlay is on their left front are the numeric overlay keys. To disable ...press F10 again. This overlay lets you enter numeric data or control the cursor as you would using the 10-key keypad on a desktop computer's keyboard. (Sample Illustration) Numeric and cursor control overlay Using the overlay to type numeric data The keys with the numbers on . To turn the cursor...
... and symbols on their right front are the cursor control overlay keys. The cursor control mode light on the keyboard indicator panel goes out. The numeric mode light on the keyboard indicator panel glows when the numeric overlay is on their left front are the numeric overlay keys. To disable ...press F10 again. This overlay lets you enter numeric data or control the cursor as you would using the 10-key keypad on a desktop computer's keyboard. (Sample Illustration) Numeric and cursor control overlay Using the overlay to type numeric data The keys with the numbers on . To turn the cursor...

User Guide
Page 79
... on page 57. Using a file extension Most programs assign an extension to the file name that can contain up to set up a printer" on the keyboard, except for your Windows® online Help. Any file name with a .doc extension. For information on now. HINT: You only need to 260 characters and...
... on page 57. Using a file extension Most programs assign an extension to the file name that can contain up to set up a printer" on the keyboard, except for your Windows® online Help. Any file name with a .doc extension. For information on now. HINT: You only need to 260 characters and...

User Guide
Page 83
... control buttons located to the side of the sound coming from the computer. The Volume increase button allows you to increase the volume of the keyboard let you mute the sound and play audio CDs or DVD movies when the computer is currently playing. The Next track button skips to the...
... control buttons located to the side of the sound coming from the computer. The Volume increase button allows you to increase the volume of the keyboard let you mute the sound and play audio CDs or DVD movies when the computer is currently playing. The Next track button skips to the...

User Guide
Page 93
... (using the Windows® operating system Sleep command). When the on/off light ( ), and the power button light (near the upper-right corner of the keyboard).
... (using the Windows® operating system Sleep command). When the on/off light ( ), and the power button light (near the upper-right corner of the keyboard).

User Guide
Page 133
... Low-Sets the CPU speed to low when using after starting in display NOTE When the computer restarts, it remembers the last configuration. Utilities TOSHIBA Hardware Setup 133 ❖ CPU-Allows you to enable or disable CPU frequency switching modes Dynamically Switchable-This mode is the default setting for ... wake-on battery power, the CPU frequency mode is set to conserve power and extend the operating time of your computer is running on keyboard function If data does not appear on the display you are using either the battery or the AC adaptor ❖ Device Config-Shows the...
... Low-Sets the CPU speed to low when using after starting in display NOTE When the computer restarts, it remembers the last configuration. Utilities TOSHIBA Hardware Setup 133 ❖ CPU-Allows you to enable or disable CPU frequency switching modes Dynamically Switchable-This mode is the default setting for ... wake-on battery power, the CPU frequency mode is set to conserve power and extend the operating time of your computer is running on keyboard function If data does not appear on the display you are using either the battery or the AC adaptor ❖ Device Config-Shows the...

User Guide
Page 134
... ❖ Password-Allows you to set a user password ❖ USB-Allows you to set the panel LED and keyboard backlight conditions (available on certain models) (Sample Image) TOSHIBA Hardware Setup screen - "Power OFF" includes Sleep Mode, Hibernation Mode or shutdown state. This function can use the... Charge function (hereinafter called "compatible ports"). You can only be used for ports that have the ( ) symbol icon. 134 Utilities TOSHIBA Hardware Setup ❖ LAN-Allows you to enable/disable the network port and wake-on LAN function ❖ Illumination-Allows you to ...
... ❖ Password-Allows you to set a user password ❖ USB-Allows you to set the panel LED and keyboard backlight conditions (available on certain models) (Sample Image) TOSHIBA Hardware Setup screen - "Power OFF" includes Sleep Mode, Hibernation Mode or shutdown state. This function can use the... Charge function (hereinafter called "compatible ports"). You can only be used for ports that have the ( ) symbol icon. 134 Utilities TOSHIBA Hardware Setup ❖ LAN-Allows you to enable/disable the network port and wake-on LAN function ❖ Illumination-Allows you to ...

User Guide
Page 136
...on the Device Manager and even though you have the "USB Sleep and Charge function"-compatible icon ( ), if you can reconfigure that appear in TOSHIBA Hardware Setup, the "USB Wakeup function" does not work with Mode-1 setting, change will be supplied if the computer is in Sleep Mode. NOTE...By changing any of the options that function. Any options that you change it to use the "USB Wakeup function," attach the mouse or keyboard to allow the Wakeup) check box will become default settings when you can change the setting to the USB ports. Enables the function Enabled ...
...on the Device Manager and even though you have the "USB Sleep and Charge function"-compatible icon ( ), if you can reconfigure that appear in TOSHIBA Hardware Setup, the "USB Wakeup function" does not work with Mode-1 setting, change will be supplied if the computer is in Sleep Mode. NOTE...By changing any of the options that function. Any options that you change it to use the "USB Wakeup function," attach the mouse or keyboard to allow the Wakeup) check box will become default settings when you can change the setting to the USB ports. Enables the function Enabled ...

User Guide
Page 138
.... 3 Make the desired selections. 4 Click Close. To access TOSHIBA Button Support: 1 Click the TOSHIBA Button Support icon in the Notification Area and then click Help. These buttons are located on the system control panel directly above the keyboard. The TOSHIBA Button Support window appears. (Sample Image) TOSHIBA Button Support screen 2 Under Button Name, select the...
.... 3 Make the desired selections. 4 Click Close. To access TOSHIBA Button Support: 1 Click the TOSHIBA Button Support icon in the Notification Area and then click Help. These buttons are located on the system control panel directly above the keyboard. The TOSHIBA Button Support window appears. (Sample Image) TOSHIBA Button Support screen 2 Under Button Name, select the...

