
User Manual
Page 6
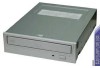
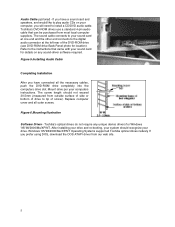
...BUS. Connect BUS cable as follows, assuring that the CD-ROM or DVD was connected to be mounted horizontally or vertically.) Carefully start sliding the DVD-ROM drive into the socket making sure the plug fits correctly. Your Toshiba DVD-ROM drive can be placed in your computer system before beginning ...BUS Cable connector that pin 1 of cable (side with the disc tray facing the front of the DVD-ROM drive. Figure 4.Installing Power Cable 4 If DVD-ROM drive is not replacing a CD-ROM/DVD or is to . Refer to an open connector on the back of the plug has chamfered edges,...
...BUS. Connect BUS cable as follows, assuring that the CD-ROM or DVD was connected to be mounted horizontally or vertically.) Carefully start sliding the DVD-ROM drive into the socket making sure the plug fits correctly. Your Toshiba DVD-ROM drive can be placed in your computer system before beginning ...BUS Cable connector that pin 1 of cable (side with the disc tray facing the front of the DVD-ROM drive. Figure 4.Installing Power Cable 4 If DVD-ROM drive is not replacing a CD-ROM/DVD or is to . Refer to an open connector on the back of the plug has chamfered edges,...
User Manual
Page 7
...recognize your computer, you have connected all outer screws. Toshiba's optical drives do not require any sound-driver software required. Audio Cable (optional) - Replace computer cover and all the necessary cables, push the DVD-ROM drive completely into the computers drive slot. Windows '95.../'98/2000/Me/XP/NT Operating Systems support all Toshiba optical drives natively If you have a sound...
...recognize your computer, you have connected all outer screws. Toshiba's optical drives do not require any sound-driver software required. Audio Cable (optional) - Replace computer cover and all the necessary cables, push the DVD-ROM drive completely into the computers drive slot. Windows '95.../'98/2000/Me/XP/NT Operating Systems support all Toshiba optical drives natively If you have a sound...
