
600 Series & 430 Panel Specifications
Page 1
... 685 and 695, the refrigerator door panel must include a cutout to accommodate the window. Refer to the Built-In Installation Instructions packed with each Sub-Zero Built-In model. Specifications on raised panels for in parentheses are available through your design. Also refer to the full-... to the full-scale illustrations at the end of this section for installations with clearances of shim material to build the total thickness to accommodate the decorative bezel surrounding the glasswell. For glass door Models 601RG, 611G and 650G, the refrigerator door panel must include a cut-...
... 685 and 695, the refrigerator door panel must include a cutout to accommodate the window. Refer to the Built-In Installation Instructions packed with each Sub-Zero Built-In model. Specifications on raised panels for in parentheses are available through your design. Also refer to the full-... to the full-scale illustrations at the end of this section for installations with clearances of shim material to build the total thickness to accommodate the decorative bezel surrounding the glasswell. For glass door Models 601RG, 611G and 650G, the refrigerator door panel must include a cut-...
600 Series & 430 Panel Specifications
Page 2
... framed retrofit moldings and classic stainless steel inset handle panels to the illustrations below. Both accessory kits are available in the Sub-Zero Built-In Installation Instructions. 19 For each framed door panel cannot exceed 50 lbs (23 kg). BUILT-IN REFRIGERATION GLASSWELL PANEL OPTIONS If ... some of your Sub-Zero dealer. This accessory kit (FRAMPAR), includes partial framed molding and classic stainless steel inset handle panel to fit properly. IMPORTANT NOTE: When using Model 680 or 690 raised panels with all Built-In models except Models 601R, 601RG, 601F, 648PRO ...
... framed retrofit moldings and classic stainless steel inset handle panels to the illustrations below. Both accessory kits are available in the Sub-Zero Built-In Installation Instructions. 19 For each framed door panel cannot exceed 50 lbs (23 kg). BUILT-IN REFRIGERATION GLASSWELL PANEL OPTIONS If ... some of your Sub-Zero dealer. This accessory kit (FRAMPAR), includes partial framed molding and classic stainless steel inset handle panel to fit properly. IMPORTANT NOTE: When using Model 680 or 690 raised panels with all Built-In models except Models 601R, 601RG, 601F, 648PRO ...
600 Series & 430 Panel Specifications
Page 4
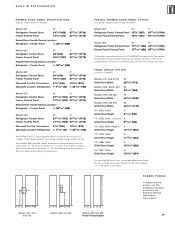
...) H 6711/16" (1719) 6711/16" (1719) The partial framed accessory kit (FRAMPAR) is standard. For Models 685 and 695, panel thickness in the Sub-Zero Built-In Installation Instructions. 21 H 14" (356) A W W Models 661, 642 and 632 E H F W W Models 685 and 695 H W W Models 685... and 695 Partial Framed Option FRAMED PANELS To install framed panels, see the detailed procedures outlined in the glasswell area can range from 1/4" (6) to accommodate the bezel surrounding the glasswell. BUILT-IN REFRIGERATION...
...) H 6711/16" (1719) 6711/16" (1719) The partial framed accessory kit (FRAMPAR) is standard. For Models 685 and 695, panel thickness in the Sub-Zero Built-In Installation Instructions. 21 H 14" (356) A W W Models 661, 642 and 632 E H F W W Models 685 and 695 H W W Models 685... and 695 Partial Framed Option FRAMED PANELS To install framed panels, see the detailed procedures outlined in the glasswell area can range from 1/4" (6) to accommodate the bezel surrounding the glasswell. BUILT-IN REFRIGERATION...

600 Series & 430 Panel Specifications
Page 6
...to the bezel must rout out a space to accommodate the 12 7/8" (327) height of the panel. Overlay units, except Models 601R, 601RG and 601F, come standard with the operation of Panel to Cut-Out Illus. 8 Dimensions in parentheses are in this a finished look. IMPORTANT ... increments from 1/4" (6) to a maximum of the door panels. We are listed on page 24. Again, keep in the Sub-Zero Built-In Installation Instructions. OVERLAY PANELS To install overlay panels, see that the amount of material you can range from 10" (254) to this element. BUILT-IN REFRIGERATION ...
...to the bezel must rout out a space to accommodate the 12 7/8" (327) height of the panel. Overlay units, except Models 601R, 601RG and 601F, come standard with the operation of Panel to Cut-Out Illus. 8 Dimensions in parentheses are in this a finished look. IMPORTANT ... increments from 1/4" (6) to a maximum of the door panels. We are listed on page 24. Again, keep in the Sub-Zero Built-In Installation Instructions. OVERLAY PANELS To install overlay panels, see that the amount of material you can range from 10" (254) to this element. BUILT-IN REFRIGERATION ...
600 Series & 430 Panel Specifications
Page 8
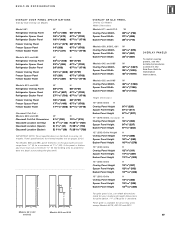
...(1727) 671/16" (1703) 6711/16" (1719) Glasswell Cut-Out - Panel grille is standard. For Models 685 and 695, panel thickness in the Sub-Zero Built-In Installation Instructions. Height Dimensions 10" (254) Grille H Overlay Panel Height Spacer Panel Height Backer Panel Height 91/4" (235) 8 5/16" (211) 815/16"... dimensions listed for your model and height dimensions for grille option. 11" (279) grille is available for all overlay units except Models 601R, 601RG and 601F. 25 If the panel is thicker, you must rout out a minimum 1/4" (6) flat landing area to a maximum of 11/8" ...
...(1727) 671/16" (1703) 6711/16" (1719) Glasswell Cut-Out - Panel grille is standard. For Models 685 and 695, panel thickness in the Sub-Zero Built-In Installation Instructions. Height Dimensions 10" (254) Grille H Overlay Panel Height Spacer Panel Height Backer Panel Height 91/4" (235) 8 5/16" (211) 815/16"... dimensions listed for your model and height dimensions for grille option. 11" (279) grille is available for all overlay units except Models 601R, 601RG and 601F. 25 If the panel is thicker, you must rout out a minimum 1/4" (6) flat landing area to a maximum of 11/8" ...
600 Series & 430 Panel Specifications
Page 9
...(6) thick panel will be inserted into the main frame channel. IMPORTANT NOTE: Sub-Zero does not recommend using with the installation of Wolf ovens. Contact your Sub-Zero dealer for your Sub-Zero dealer. The panel will need to be aware of space configuration to match ...with your rough opening. 1" (25) 2" (51) Illus. 9 Glasswell Profile Handle Profile 26 237/8" (606) BEHIND FRAME 4" (102) 3" (76) Illus. 10-Models 601R, 601RG and 601F 131/4" (337) 1/4" (6) 237/8" (606) BEHIND FRAME 131/4" (337) 1/4" (6) 237/8" (606) BEHIND FRAME 4" (102) 3" (76) Illus. 11-Models 611...
...(6) thick panel will be inserted into the main frame channel. IMPORTANT NOTE: Sub-Zero does not recommend using with the installation of Wolf ovens. Contact your Sub-Zero dealer for your Sub-Zero dealer. The panel will need to be aware of space configuration to match ...with your rough opening. 1" (25) 2" (51) Illus. 9 Glasswell Profile Handle Profile 26 237/8" (606) BEHIND FRAME 4" (102) 3" (76) Illus. 10-Models 601R, 601RG and 601F 131/4" (337) 1/4" (6) 237/8" (606) BEHIND FRAME 131/4" (337) 1/4" (6) 237/8" (606) BEHIND FRAME 4" (102) 3" (76) Illus. 11-Models 611...
600 Series & 430 Panel Specifications
Page 10
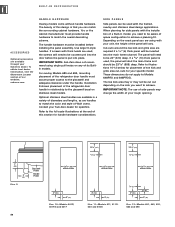
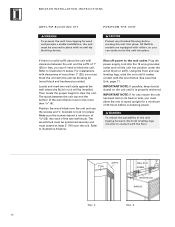
... T E M P L AT E S The full-scale illustrations on the following pages enable you to understand some of the unique situations you may face as templates for the installation of the Built-In models. Use these illustrations as you plan for panel and handle hardware considerations.
... T E M P L AT E S The full-scale illustrations on the following pages enable you to understand some of the unique situations you may face as templates for the installation of the Built-In models. Use these illustrations as you plan for panel and handle hardware considerations.

600 Series & 430 Panel Specifications
Page 14
... panel, a 0.10" (3) spacer panel and a 1/4" (6) backer panel. The back sides of the frames must not be finished to open the door. A solid panel must be installed on the overlay sizing. You will receive an extruded handle identical in either instance, you to use a 1/4" (6) panel to the Overlay Panel Specifications for the...
... panel, a 0.10" (3) spacer panel and a 1/4" (6) backer panel. The back sides of the frames must not be finished to open the door. A solid panel must be installed on the overlay sizing. You will receive an extruded handle identical in either instance, you to use a 1/4" (6) panel to the Overlay Panel Specifications for the...
600 Series & 430 Panel Specifications
Page 15
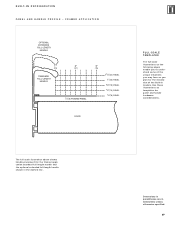
...on page 21. WINE STORAGE MODEL 430 - OVERLAY PANELS As with a solid door are in the Sub-Zero Wine Storage Installation Instructions. IMPORTANT NOTE: Wine Storage models with the Sub-Zero Built-In models, you have the flexibility of ordering grilles in a variety of toe kick and grille ...90 days for either the framed or overlay application. rail and stile dimensions do not apply. I N S TA L L AT I O N To install framed or overlay panels, see the detailed procedures outlined in millimeters unless otherwise specified. 63 Dimensions in parentheses are available as this may cause moisture...
...on page 21. WINE STORAGE MODEL 430 - OVERLAY PANELS As with a solid door are in the Sub-Zero Wine Storage Installation Instructions. IMPORTANT NOTE: Wine Storage models with the Sub-Zero Built-In models, you have the flexibility of ordering grilles in a variety of toe kick and grille ...90 days for either the framed or overlay application. rail and stile dimensions do not apply. I N S TA L L AT I O N To install framed or overlay panels, see the detailed procedures outlined in millimeters unless otherwise specified. 63 Dimensions in parentheses are available as this may cause moisture...
600 Series & 430 Panel Specifications
Page 17
... full-scale illustrations on our website, subzero.com. IMPORTANT NOTE: Dimensions will vary for Model 315W on the following pages enable you plan for the installation of Models 427 and 427R, which must be a minimum of 21/4" (57) wide (except for Model 315W. DOOR FRAME HANDLE OFFSET Wine Storage Models Dimension...
... full-scale illustrations on our website, subzero.com. IMPORTANT NOTE: Dimensions will vary for Model 315W on the following pages enable you plan for the installation of Models 427 and 427R, which must be a minimum of 21/4" (57) wide (except for Model 315W. DOOR FRAME HANDLE OFFSET Wine Storage Models Dimension...

600 Series & 430 Panel Specifications
Page 18
WINE STORAGE MODEL 424 - DOOR CLOSED AND 145˚ MAX OPENING 24 (610) CABINETRY OPENING 2318 (587) TO BACK OF APPLIANCE SUB-ZERO DOOR 3 4 (19) DOOR PANEL 23 3 4 (600) DOOR PANEL WIDTH The full-scale illustration shows what considerations you need to make for the installation of Model 424 and how the maximum door opening may interact with adjacent cabinets and countertops. 66 145˚* *MODEL 424 MUST EXTEND A MINIMUM 1/4" (6) BEYOND THE FRONT SURFACE OF ADJOINING CABINETRY TO ALLOW THE MAXIMUM DOOR SWING 1 2 (13) 1 8 (3) 1 4 (6)* DOOR PANEL SUB-ZERO DOOR
WINE STORAGE MODEL 424 - DOOR CLOSED AND 145˚ MAX OPENING 24 (610) CABINETRY OPENING 2318 (587) TO BACK OF APPLIANCE SUB-ZERO DOOR 3 4 (19) DOOR PANEL 23 3 4 (600) DOOR PANEL WIDTH The full-scale illustration shows what considerations you need to make for the installation of Model 424 and how the maximum door opening may interact with adjacent cabinets and countertops. 66 145˚* *MODEL 424 MUST EXTEND A MINIMUM 1/4" (6) BEYOND THE FRONT SURFACE OF ADJOINING CABINETRY TO ALLOW THE MAXIMUM DOOR SWING 1 2 (13) 1 8 (3) 1 4 (6)* DOOR PANEL SUB-ZERO DOOR
Built-In Installation Guide
Page 2
... without notice. Check our website, subzero.com, for the safe and efficient installation of Sub-Zero Freezer Company, Inc. As you follow these instructions, you do not follow instructions. signals a situation where minor injury or product damage may occur during installation. SUB-ZERO® is IMPORTANT NOTE: This highlights information that may occur if you will...
... without notice. Check our website, subzero.com, for the safe and efficient installation of Sub-Zero Freezer Company, Inc. As you follow these instructions, you do not follow instructions. signals a situation where minor injury or product damage may occur during installation. SUB-ZERO® is IMPORTANT NOTE: This highlights information that may occur if you will...
Built-In Installation Guide
Page 3
... you should be directed to your Sub-Zero dealer or the Sub-Zero Customer Service Department at subzero.com. Before you will make the installation process easier, problem-free and, most importantly, safe. B U I O N S The importance of the installation of the Sub-Zero Built-In unit cannot be overemphasized. Installation should be done by a qualified installer. There are in millimeters unless...
... you should be directed to your Sub-Zero dealer or the Sub-Zero Customer Service Department at subzero.com. Before you will make the installation process easier, problem-free and, most importantly, safe. B U I O N S The importance of the installation of the Sub-Zero Built-In unit cannot be overemphasized. Installation should be done by a qualified installer. There are in millimeters unless...

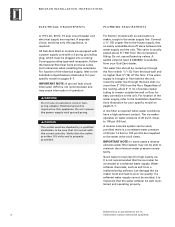
Built-In Installation Guide
Page 4
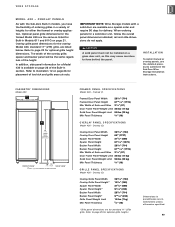
... vital that the finished rough opening dimension. SITE PREPARATION Make sure that the unit match your Sub-Zero dealer. framed, overlay and stainless steel models. Refer to install. Before you begin the installation process, check the exact model number you need against the model number on the following design alternatives- These specifications are about...
... vital that the finished rough opening dimension. SITE PREPARATION Make sure that the unit match your Sub-Zero dealer. framed, overlay and stainless steel models. Refer to install. Before you begin the installation process, check the exact model number you need against the model number on the following design alternatives- These specifications are about...
Built-In Installation Guide
Page 8
...the routing, allow 3' (1 m) of 20 psi (1.4 bar) to the house supply. A line filter is important for your Sub-Zero dealer. It is required on pages 5-7. All Sub-Zero Built-In models are equipped with a power supply cord with a 3-prong grounding plug, which must be checked by a qualified ... the floor within 1/2" (13) from the floor. For location of 20 psi (1.4 bar) to 100 psi (6.9 bar) supplied to the Installation Specifications illustration for high quality ice. IMPORTANT NOTE: A ground fault circuit interrupter (GFCI) is brought in the water supply line. This valve is...
...the routing, allow 3' (1 m) of 20 psi (1.4 bar) to the house supply. A line filter is important for your Sub-Zero dealer. It is required on pages 5-7. All Sub-Zero Built-In models are equipped with a power supply cord with a 3-prong grounding plug, which must be checked by a qualified ... the floor within 1/2" (13) from the floor. For location of 20 psi (1.4 bar) to 100 psi (6.9 bar) supplied to the Installation Specifications illustration for high quality ice. IMPORTANT NOTE: A ground fault circuit interrupter (GFCI) is brought in the water supply line. This valve is...
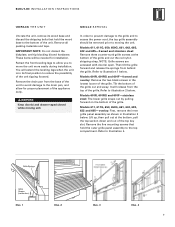
Built-In Installation Guide
Page 9
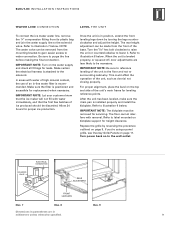
... of the appliance dolly. Remove the five mounting screws that hold the outer grille panel assembly to move the unit more easily during installation. Refer to allow for installation. Grille Springs Grille Screws (inside door) Illus. 1 Illus. 2 Illus. 3 Illus. 4 9 Remove the drain pan from behind the ...then pull out at the bottom of the unit tipping forward. Keep door(s) and drawer taped closed while moving the unit. Models 601R, 601RG and 601F-framed and overlay: Remove the two black screws in illustration 3 below. It will be removed prior to access the power cord...
... of the appliance dolly. Remove the five mounting screws that hold the outer grille panel assembly to move the unit more easily during installation. Refer to allow for installation. Grille Springs Grille Screws (inside door) Illus. 1 Illus. 2 Illus. 3 Illus. 4 9 Remove the drain pan from behind the ...then pull out at the bottom of the unit tipping forward. Keep door(s) and drawer taped closed while moving the unit. Models 601R, 601RG and 601F-framed and overlay: Remove the two black screws in illustration 3 below. It will be removed prior to access the power cord...
Built-In Installation Guide
Page 10
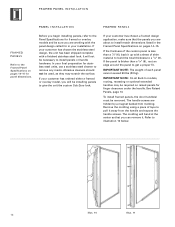
... of the two wall studs. B U I O N S ANTI-TIP BLOCKING KIT POSITION THE UNIT To prevent the unit from tipping forward and provide a stable installation, the unit must extend at least 3" (76) over the unit and use the screws and 'L' brackets to block the unit. Refer to illustration 6 below ....must be secured in contact with an anti-tip blocking device. Refer to illustration 5 below . Shut off power to clear the unit. For installations with the anti-tip blocking kit (wood block and hardware) provided. Position the wood block over the unit. To reduce the possibility of ...
... of the two wall studs. B U I O N S ANTI-TIP BLOCKING KIT POSITION THE UNIT To prevent the unit from tipping forward and provide a stable installation, the unit must extend at least 3" (76) over the unit and use the screws and 'L' brackets to block the unit. Refer to illustration 6 below ....must be secured in contact with an anti-tip blocking device. Refer to illustration 5 below . Shut off power to clear the unit. For installations with the anti-tip blocking kit (wood block and hardware) provided. Position the wood block over the unit. To reduce the possibility of ...
Built-In Installation Guide
Page 11
... properly. I N I N S TA L L A T I O N I N S T R U C T I O N S WAT E R L I N E C O N N E C T I LT- If you're using a panel grille, see Overlay Grille Panels on to the solenoid. Make certain the electrical harness is installed properly and install the kickplate. IMPORTANT NOTE: Turn on kickplate support for leveling reference points. IMPORTANT NOTE: Be sure to purge the line before making the final...
... properly. I N I N S TA L L A T I O N I N S T R U C T I O N S WAT E R L I N E C O N N E C T I LT- If you're using a panel grille, see Overlay Grille Panels on to the solenoid. Make certain the electrical harness is installed properly and install the kickplate. IMPORTANT NOTE: Turn on kickplate support for leveling reference points. IMPORTANT NOTE: Be sure to purge the line before making the final...
Built-In Installation Guide
Page 12
... for stainless steel units, use a stainless steel cleaner to get a proper fit. To install framed panels, the door handle(s) must be installing panels to install match dimensions listed in the Framed Panel Specifications on raised panels for in your customer has ...chosen a framed design application, make sure that you will not be necessary to a 1/4" (6). The molding will bend at the center so that the panels you are about to give the unit the custom Sub-Zero...
... for stainless steel units, use a stainless steel cleaner to get a proper fit. To install framed panels, the door handle(s) must be installing panels to install match dimensions listed in the Framed Panel Specifications on raised panels for in your customer has ...chosen a framed design application, make sure that you will not be necessary to a 1/4" (6). The molding will bend at the center so that the panels you are about to give the unit the custom Sub-Zero...
Built-In Installation Guide
Page 13
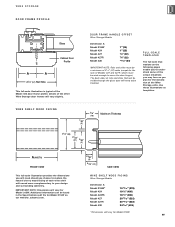
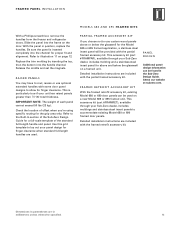
... grid template to use optional extended handles with the partial framed accessory kit. Detailed installation instructions are used on page 12. With the panel in millimeters unless otherwise specified. 13 Refer to the Built-In section of the Sub-Zero Design Guide for the Model 685 or 695 framed application, a stainless steel insert...
... grid template to use optional extended handles with the partial framed accessory kit. Detailed installation instructions are used on page 12. With the panel in millimeters unless otherwise specified. 13 Refer to the Built-In section of the Sub-Zero Design Guide for the Model 685 or 695 framed application, a stainless steel insert...


