
Operating Instructions
Page 1
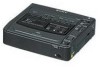
Model No. Refer to these numbers whenever you call upon your Sony dealer regarding this manual thoroughly, and retain it for future reference. 3-064-178-11 (1) Digital Video Cassette Recorder Operating Instructions Before operating the unit, please read this product. Record the serial number in the space provided below. AC- Owner's Record The model and serial numbers are located on the bottom. Model No. GV-D200 ©2000 Sony Corporation Serial No. GV-D200 Serial No.
Model No. Refer to these numbers whenever you call upon your Sony dealer regarding this manual thoroughly, and retain it for future reference. 3-064-178-11 (1) Digital Video Cassette Recorder Operating Instructions Before operating the unit, please read this product. Record the serial number in the space provided below. AC- Owner's Record The model and serial numbers are located on the bottom. Model No. GV-D200 ©2000 Sony Corporation Serial No. GV-D200 Serial No.
Operating Instructions
Page 2
... complies with Part 15 of Conformity Trade Name: SONY Model No.: GV-D200 Responsible Party:Sony Electronics Inc. Note: This equipment has been tested and found to This symbol is intended to alert the user to your nearest Sony Service Center or Factory Service Center. DISPOSE OF ...PROPERLY. You can return your authority to correct the interference by turning the equipment off and on a circuit different from that to persons. Consult the dealer or an experienced radio/TV technician for a Class B digital ...
... complies with Part 15 of Conformity Trade Name: SONY Model No.: GV-D200 Responsible Party:Sony Electronics Inc. Note: This equipment has been tested and found to This symbol is intended to alert the user to your nearest Sony Service Center or Factory Service Center. DISPOSE OF ...PROPERLY. You can return your authority to correct the interference by turning the equipment off and on a circuit different from that to persons. Consult the dealer or an experienced radio/TV technician for a Class B digital ...

Operating Instructions
Page 3
... battery pack (not supplied 9 Step 3 Inserting a cassette 12 Basic Operations Playing back a tape 13 Recording from the other VCR or TV 18 Advanced Operations Enlarging playback images - Digital program editing 37 Using with special effects - Data code function 30 Superimposing a title 31 Making your... 28 Displaying recording data and screen indicators - Digital effect 23 Quickly locating a scene - PB ZOOM 20 Watching a tape with an analog video unit and a personal computer - Insert Editing 48 Customizing Your VCR Changing the menu settings 50 Resetting the date ...
... battery pack (not supplied 9 Step 3 Inserting a cassette 12 Basic Operations Playing back a tape 13 Recording from the other VCR or TV 18 Advanced Operations Enlarging playback images - Digital program editing 37 Using with special effects - Data code function 30 Superimposing a title 31 Making your... 28 Displaying recording data and screen indicators - Digital effect 23 Quickly locating a scene - PB ZOOM 20 Watching a tape with an analog video unit and a personal computer - Insert Editing 48 Customizing Your VCR Changing the menu settings 50 Resetting the date ...

Operating Instructions
Page 4
...8 with the Digital8 system on your recordings on a TV, you read through this manual, buttons and settings on a tape. To view your VCR are shown in the Hi8 /standard 8 (analog) system. To enable smooth transition, we recommend that the operation is being carried out. Unauthorized ...recording of the copyright laws. 4 Getting started - Before using your VCR With your VCR plays back tapes recorded in capital letters. Howerer, you can hear a beep sound to indicate that you do not mix pictures recorded...
...8 with the Digital8 system on your recordings on a TV, you read through this manual, buttons and settings on a tape. To view your VCR are shown in the Hi8 /standard 8 (analog) system. To enable smooth transition, we recommend that the operation is being carried out. Unauthorized ...recording of the copyright laws. 4 Getting started - Before using your VCR With your VCR plays back tapes recorded in capital letters. Howerer, you can hear a beep sound to indicate that you do not mix pictures recorded...

Operating Instructions
Page 5
Sometimes this manual Precautions on VCR care •Do not let your VCR to a malfunction of the recording cannot be repaired [a]. •Never leave your VCR away from rain and sea water. Keep your VCR exposed to temperatures above 140°F (60°C ), such as in a car parked in the sun or under direct sunlight [b]. [a] [b] Contents of the VCR, video tape, etc. 5 Letting your VCR get wet may cause your VCR get wet. Getting started Using this malfunction cannot be compensated if recording or playback is not made due to malfunction.
Sometimes this manual Precautions on VCR care •Do not let your VCR to a malfunction of the recording cannot be repaired [a]. •Never leave your VCR away from rain and sea water. Keep your VCR exposed to temperatures above 140°F (60°C ), such as in a car parked in the sun or under direct sunlight [b]. [a] [b] Contents of the VCR, video tape, etc. 5 Letting your VCR get wet may cause your VCR get wet. Getting started Using this malfunction cannot be compensated if recording or playback is not made due to malfunction.

Operating Instructions
Page 6
Checking supplied accessories Make sure that the following accessories are supplied with your VCR. 1 2 3 1 AC-L10A/L10B/L10C AC power adaptor (1), Power cord (1) (p. 7, 9) 2 A/V converting cable (1) (p. 18, 47) 3 A/V connecting cable (1) (p. 7, 18, 35, 47) 6
Checking supplied accessories Make sure that the following accessories are supplied with your VCR. 1 2 3 1 AC-L10A/L10B/L10C AC power adaptor (1), Power cord (1) (p. 7, 9) 2 A/V converting cable (1) (p. 18, 47) 3 A/V connecting cable (1) (p. 7, 18, 35, 47) 6

Operating Instructions
Page 7
...S VIDEO VIDEO VIDEO OUT A/V connecting cable (supplied) AUDIO If your TV is monaural even on the VCR to LINE. Then, set the TV/VCR selector on the other VCR with your VCR and the TV or the other VCR. Set the input selector on stereo models. Connect an S video cable (not supplied) to the ...S VIDEO OUT jack on the TV or the other VCR. 7 Connect your VCR and the S video jack on your VCR to the TV using an S video cable (not supplied) to obtain high-quality pictures. Refer to the operating instructions of ...
...S VIDEO VIDEO VIDEO OUT A/V connecting cable (supplied) AUDIO If your TV is monaural even on the VCR to LINE. Then, set the TV/VCR selector on the other VCR with your VCR and the TV or the other VCR. Set the input selector on stereo models. Connect an S video cable (not supplied) to the ...S VIDEO OUT jack on the TV or the other VCR. 7 Connect your VCR and the S video jack on your VCR to the TV using an S video cable (not supplied) to obtain high-quality pictures. Refer to the operating instructions of ...

Operating Instructions
Page 8
... AC power adaptor can supply power even if the battery pack (not supplied) is disturbed. Using a car battery Use the Sony DC Adaptor/Charger (not supplied). 8 This means that you use your VCR. •The DC IN jack has "source priority." When you power it is connected to the wall outlet, even... outlet using the AC power adaptor. (1) Open the DC IN jack cover and connect the AC power adaptor to the DC IN jack on your VCR with the plug's v mark facing right. (2) Connect the power cord to the AC power adaptor. (3) Connect the power cord to a wall outlet. 1 2, 3 PRECAUTION The set...
... AC power adaptor can supply power even if the battery pack (not supplied) is disturbed. Using a car battery Use the Sony DC Adaptor/Charger (not supplied). 8 This means that you use your VCR. •The DC IN jack has "source priority." When you power it is connected to the wall outlet, even... outlet using the AC power adaptor. (1) Open the DC IN jack cover and connect the AC power adaptor to the DC IN jack on your VCR with the plug's v mark facing right. (2) Connect the power cord to the AC power adaptor. (3) Connect the power cord to a wall outlet. 1 2, 3 PRECAUTION The set...

Operating Instructions
Page 9
..." battery pack (L series). After you set the POWER switch to ON, it takes about 1 minute for the correct remaining battery time to your VCR. BATT Battery Pack (not supplied) To remove the battery pack While pressing BATT, slide the battery pack to use an InfoLITHIUM battery pack, the remaining...battery pack Press and slide the battery pack in the direction of use. After installing the battery pack Do not carry your VCR outdoors. If you use your VCR by holding the battery pack. It may slide off and cause damage to be displayed properly, however, depending on the monitor...
..." battery pack (L series). After you set the POWER switch to ON, it takes about 1 minute for the correct remaining battery time to your VCR. BATT Battery Pack (not supplied) To remove the battery pack While pressing BATT, slide the battery pack to use an InfoLITHIUM battery pack, the remaining...battery pack Press and slide the battery pack in the direction of use. After installing the battery pack Do not carry your VCR outdoors. If you use your VCR by holding the battery pack. It may slide off and cause damage to be displayed properly, however, depending on the monitor...

Operating Instructions
Page 10
... the battery pack. (2) Open the DC IN jack cover and connect the AC power adaptor (supplied with your VCR) to the DC IN jack with the metal parts of the DC plug of the AC power adaptor. Keep the battery pack in a cool place. ... used for an extended period, charge the battery pack once fully, and then use it until it for your VCR. Notes •Prevent metallic objects from the DC IN jack on your VCR. Step 2 Preparing the power supply Charging the battery pack Use the battery pack after charging it fully discharges again...
... the battery pack. (2) Open the DC IN jack cover and connect the AC power adaptor (supplied with your VCR) to the DC IN jack with the metal parts of the DC plug of the AC power adaptor. Keep the battery pack in a cool place. ... used for an extended period, charge the battery pack once fully, and then use it until it for your VCR. Notes •Prevent metallic objects from the DC IN jack on your VCR. Step 2 Preparing the power supply Charging the battery pack Use the battery pack after charging it fully discharges again...

Operating Instructions
Page 11
...395) NP-F930 575 (520) NP-F950 675 (610) NP-F960 790 (710) Approximate number of Sony Corporation. 11 What is compatible with the "InfoLITHIUM" battery pack (L series). This VCR is "InfoLITHIUM"? The "InfoLITHIUM" battery pack has the mark. "InfoLITHIUM" is a trademark of minutes when... you use a fully charged battery pack Numbers in a cold environment. The battery life will be shorter if you use your VCR in parentheses "( )" indicate the time using a normally charged battery pack. The "InfoLITHIUM" is corrected. You can exchange data, such as ...
...395) NP-F930 575 (520) NP-F950 675 (610) NP-F960 790 (710) Approximate number of Sony Corporation. 11 What is compatible with the "InfoLITHIUM" battery pack (L series). This VCR is "InfoLITHIUM"? The "InfoLITHIUM" battery pack has the mark. "InfoLITHIUM" is a trademark of minutes when... you use a fully charged battery pack Numbers in a cold environment. The battery life will be shorter if you use your VCR in parentheses "( )" indicate the time using a normally charged battery pack. The "InfoLITHIUM" is corrected. You can exchange data, such as ...

Operating Instructions
Page 12
...Digital8 system. •The recording time when you use standard 8 tape, be sure to play back standard 8 tape on the cassette to malfunction. •Your VCR records pictures in the menu settings, 3/4 of indicated time on Hi8 tape. •If you play back the tape on the cassette compartment. 2 EJECT 3 4... •Do not insert your fingers or touch inside of the cassette compartment with the window facing up and opens. (3) Insert a cassette with your VCR is open. The cassette compartment automatically lifts up . (4) Close the cassette compartment by pressing the mark on your...
...Digital8 system. •The recording time when you use standard 8 tape, be sure to play back standard 8 tape on the cassette to malfunction. •Your VCR records pictures in the menu settings, 3/4 of indicated time on Hi8 tape. •If you play back the tape on the cassette compartment. 2 EJECT 3 4... •Do not insert your fingers or touch inside of the cassette compartment with the window facing up and opens. (3) Insert a cassette with your VCR is open. The cassette compartment automatically lifts up . (4) Close the cassette compartment by pressing the mark on your...

Operating Instructions
Page 13
...) on the front lights up. (4) Press H to ON. To make the indicators disappear, press it to start playback. Playing back a tape (1) Connect your VCR to a TV, you connect your VCR to a TV (p. 8). (2) Prepare the power supply and insert a cassette to play back (p. 8-12). (3) While pressing the small green button on the monitor...
...) on the front lights up. (4) Press H to ON. To make the indicators disappear, press it to start playback. Playing back a tape (1) Connect your VCR to a TV, you connect your VCR to a TV (p. 8). (2) Prepare the power supply and insert a cassette to play back (p. 8-12). (3) While pressing the small green button on the monitor...

Operating Instructions
Page 14
...resume normal playback, press H. You can be performed smoothly on the playback pause mode •When playback pause mode lasts for 3 minutes, your VCR plays back tapes recorded in the Hi8/standard 8 system. •Sound is not a malfunction. To resume playback, press X or H. To ...up. In these various playback modes •Noise may appear as a mosaic image when playing back in the Digital8 system. •The VCR does not automatically detect Digital8 or Hi8/standard 8 system in stop mode. To resume normal playback, release the button. To rewind the tape...
...resume normal playback, press H. You can be performed smoothly on the playback pause mode •When playback pause mode lasts for 3 minutes, your VCR plays back tapes recorded in the Hi8/standard 8 system. •Sound is not a malfunction. To resume playback, press X or H. To ...up. In these various playback modes •Noise may appear as a mosaic image when playing back in the Digital8 system. •The VCR does not automatically detect Digital8 or Hi8/standard 8 system in stop mode. To resume normal playback, release the button. To rewind the tape...

Operating Instructions
Page 15
... HiFi SOUND, then press the dial. (4) Turn the SEL/PUSH EXEC dial to make the menu disappear. 1 MENU 3 VCR SET P EFFECT HiFi SOUND TBC DNR AUDIO MIX PB MODE A/V DV OUT RETURN STEREO [MENU] : END 4 VCR SET P EFFECT HiFi SOUND TBC DNR AUDIO MIX PB MODE A/V DV OUT RETURN STEREO 1 2 [MENU] : END... VCR SET P EFFECT HiFi SOUND TBC DNR AUDIO MIX PB MODE A/V DV OUT [MENU] : END VCR SET P EFFECT HiFi SOUND TBC DNR AUDIO MIX PB MODE A/V DV OUT RETURN STEREO 1 2 [MENU] : END VCR SET P EFFECT HiFi SOUND 1 TBC DNR AUDIO MIX PB MODE...
... HiFi SOUND, then press the dial. (4) Turn the SEL/PUSH EXEC dial to make the menu disappear. 1 MENU 3 VCR SET P EFFECT HiFi SOUND TBC DNR AUDIO MIX PB MODE A/V DV OUT RETURN STEREO [MENU] : END 4 VCR SET P EFFECT HiFi SOUND TBC DNR AUDIO MIX PB MODE A/V DV OUT RETURN STEREO 1 2 [MENU] : END... VCR SET P EFFECT HiFi SOUND TBC DNR AUDIO MIX PB MODE A/V DV OUT [MENU] : END VCR SET P EFFECT HiFi SOUND TBC DNR AUDIO MIX PB MODE A/V DV OUT RETURN STEREO 1 2 [MENU] : END VCR SET P EFFECT HiFi SOUND 1 TBC DNR AUDIO MIX PB MODE...

Operating Instructions
Page 16
.... Set COMMANDER in wide mode. 16 Code VTR 1 VTR 2 VTR 3 VTR 4 VTR 5 and 6 Sony product Betamax VCR 8mm video camera recorder Digital video camera recorder 8mm VCR VHS VCR Digital VCR Digital video camera recorder Digital VCR Note You cannot set screen mode of your VCR to the S video jack on the TV screen at full size when - For details, refer...
.... Set COMMANDER in wide mode. 16 Code VTR 1 VTR 2 VTR 3 VTR 4 VTR 5 and 6 Sony product Betamax VCR 8mm video camera recorder Digital video camera recorder 8mm VCR VHS VCR Digital VCR Digital video camera recorder Digital VCR Note You cannot set screen mode of your VCR to the S video jack on the TV screen at full size when - For details, refer...

Operating Instructions
Page 17
... start playback. (6) Point your VCR at the TV's remote sensor. •You can switch the video input of the TV automatically to the one which the AV cordless IR receiver is a trademark of Sony Corporation. 17 If you use a Sony TV •You can turn the power off The super laser link... function turns off . When the super laser link function is not needed. is connected. To do so, set the TV/VCR selector on the TV to VCR. (3) Set the POWER ...
... start playback. (6) Point your VCR at the TV's remote sensor. •You can switch the video input of the TV automatically to the one which the AV cordless IR receiver is a trademark of Sony Corporation. 17 If you use a Sony TV •You can turn the power off The super laser link... function turns off . When the super laser link function is not needed. is connected. To do so, set the TV/VCR selector on the TV to VCR. (3) Set the POWER ...

Operating Instructions
Page 18
...video cable (not supplied) to start recording from. The REC (red) and PAUSE (orange) lamps light up. (4) Press H on your (recording) VCR and the other (playback) VCR, the image being recorded may fluctuate. With this connection, you do not need to connect the yellow (video) plug of the other (playback...the A/V connecting cable. 18 Connect an S video cable (not supplied) to start playback if you use fast-forward or slow-playback mode on both your VCR as a recorder. (1) Insert a blank tape (or a tape you want to the S video jacks of the A/V connecting cable to the video output ...
...video cable (not supplied) to start recording from. The REC (red) and PAUSE (orange) lamps light up. (4) Press H on your (recording) VCR and the other (playback) VCR, the image being recorded may fluctuate. With this connection, you do not need to connect the yellow (video) plug of the other (playback...the A/V connecting cable. 18 Connect an S video cable (not supplied) to start playback if you use fast-forward or slow-playback mode on both your VCR as a recorder. (1) Insert a blank tape (or a tape you want to the S video jacks of the A/V connecting cable to the video output ...

Operating Instructions
Page 19
...audio signals are transmitted in digital form for high-quality editing. (1) Insert a blank tape (or a tape you want to start playback. The REC (red) and PAUSE (orange) lamps light up. (4) Press H on your (recording) VCR. The picture from a TV or the other (playback) VCR appears on the TV screen...OUT : Signal flow When you want to record over) into your (recording) VCR, and insert the recorded tape into the other (playback) VCR. (5) Press X on the monitor screen by pressing the DISPLAY button. 19 During digital editing The color of the DV products. However, this does not affect the...
...audio signals are transmitted in digital form for high-quality editing. (1) Insert a blank tape (or a tape you want to start playback. The REC (red) and PAUSE (orange) lamps light up. (4) Press H on your (recording) VCR. The picture from a TV or the other (playback) VCR appears on the TV screen...OUT : Signal flow When you want to record over) into your (recording) VCR, and insert the recorded tape into the other (playback) VCR. (5) Press X on the monitor screen by pressing the DISPLAY button. 19 During digital editing The color of the DV products. However, this does not affect the...

Operating Instructions
Page 20
... or stop playback The PB ZOOM function is enlarged, and R r T t appear on the other VCR using the PB ZOOM function with your VCR as a player. The image is automatically canceled. 20 When you have processed using your VCR. PB ZOOM You can enlarge moving and still images played back on tape. (1) Press PB... ZOOM on your VCR while you have processed using the PB ZOOM function, record the pictures on the monitor screen. (2) Turn the SEL/PUSH EXEC dial to move the ...
... or stop playback The PB ZOOM function is enlarged, and R r T t appear on the other VCR using the PB ZOOM function with your VCR as a player. The image is automatically canceled. 20 When you have processed using your VCR. PB ZOOM You can enlarge moving and still images played back on tape. (1) Press PB... ZOOM on your VCR while you have processed using the PB ZOOM function, record the pictures on the monitor screen. (2) Turn the SEL/PUSH EXEC dial to move the ...
