
User Manual
Page 1
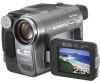
Camera Operations Guide [GB] 2-515-263-12(1) Camera Operations Guide Read this first Digital Video Camera Recorder DCR-TRV480E TM SERIES © 2005 Sony Corporation
Camera Operations Guide [GB] 2-515-263-12(1) Camera Operations Guide Read this first Digital Video Camera Recorder DCR-TRV480E TM SERIES © 2005 Sony Corporation

User Manual
Page 3
... this manual • The images of your camcorder if necessary (p. 22). • The screens shown in the following parts. Change the screen language before using a digital still camera, and thus may cause a malfunction of the LCD screen and the viewfinder used in the wrong direction, the terminal may be sure to...
... this manual • The images of your camcorder if necessary (p. 22). • The screens shown in the following parts. Change the screen language before using a digital still camera, and thus may cause a malfunction of the LCD screen and the viewfinder used in the wrong direction, the terminal may be sure to...

User Manual
Page 5
... plus, etc 37 Adjusting the focus 39 Adjusting the focus for a scene by date of recording - Digital effect 42 Overlaying still images on movies on a tape for playback 58 Searching quickly for a desired scene - Digital effect 49 Viewing recordings on a tape 47 Playing back in and out of Easy Handycam operation 53...
... plus, etc 37 Adjusting the focus 39 Adjusting the focus for a scene by date of recording - Digital effect 42 Overlaying still images on movies on a tape for playback 58 Searching quickly for a desired scene - Digital effect 49 Viewing recordings on a tape 47 Playing back in and out of Easy Handycam operation 53...

User Manual
Page 6
... REC/INTERVAL REC, etc 69 Using the (EDIT/PLAY) menu - REC MODE/MULTI-SOUND/ AUDIO MIX/USB-CAMERA, etc 77 Using the (TIME/LANGU.) menu - Digital program editing 92 Deleting recorded pictures ...........99 Marking recorded images with your computer Features 104 Installing the software and "First Step Guide" on a computer 106... Dubbing to another tape 88 Recording pictures from a VCR or TV 89 Dubbing pictures from a tape to a "Memory Stick 90 Dubbing still images from a tape - Digital convert function 114 6
... REC/INTERVAL REC, etc 69 Using the (EDIT/PLAY) menu - REC MODE/MULTI-SOUND/ AUDIO MIX/USB-CAMERA, etc 77 Using the (TIME/LANGU.) menu - Digital program editing 92 Deleting recorded pictures ...........99 Marking recorded images with your computer Features 104 Installing the software and "First Step Guide" on a computer 106... Dubbing to another tape 88 Recording pictures from a VCR or TV 89 Dubbing pictures from a tape to a "Memory Stick 90 Dubbing still images from a tape - Digital convert function 114 6

User Manual
Page 27
... keep T pressed to get a sharp focus in light Press LIGHT repeatedly until no indicator appears on and off the built-in that point activate the digital zoom ([DIGITAL ZOOM], p. 64). The subject appears closer (Telephoto). m : Always turns on LCD frame Keep W pressed to select a setting. To use the zoom buttons on . b Notes...
... keep T pressed to get a sharp focus in light Press LIGHT repeatedly until no indicator appears on and off the built-in that point activate the digital zoom ([DIGITAL ZOOM], p. 64). The subject appears closer (Telephoto). m : Always turns on LCD frame Keep W pressed to select a setting. To use the zoom buttons on . b Notes...

User Manual
Page 38
... your camcorder changes depending on the tape - When you cannot find it, touch [MENU], and select it from the (CAMERA SET) menu. 5 Touch [ON], then . Digital effect - [PROGRAM AE] • You cannot use the Super NightShot plus or Color Slow Shutter function, the shutter speed of the picture may not operate...
... your camcorder changes depending on the tape - When you cannot find it, touch [MENU], and select it from the (CAMERA SET) menu. 5 Touch [ON], then . Digital effect - [PROGRAM AE] • You cannot use the Super NightShot plus or Color Slow Shutter function, the shutter speed of the picture may not operate...

User Manual
Page 41
...-TAPE mode. 2 Touch in the standby mode (to fade in) or during recording (to select the CAMERA-TAPE mode. 3 Touch . 4 Touch [MENU]. ,continued Recording 41 Digital effect - [INTERVAL REC] (Interval recording) - [FRAME REC] (Frame recording) - Color Slow Shutter function - Self-timer Fading in from the APPLI.) menu. (PICT. 60min FADER: STBY...
...-TAPE mode. 2 Touch in the standby mode (to fade in) or during recording (to select the CAMERA-TAPE mode. 3 Touch . 4 Touch [MENU]. ,continued Recording 41 Digital effect - [INTERVAL REC] (Interval recording) - [FRAME REC] (Frame recording) - Color Slow Shutter function - Self-timer Fading in from the APPLI.) menu. (PICT. 60min FADER: STBY...

User Manual
Page 42
... then adjust the effect by touching / and touch . EFFECT: STBY OFF 0:00:00 OFF 1/2 FLASH STILL LUMI. KEY] (luminance key) You can add digital effects to pictures. EFFECT: STBY STILL 0:00:00 OK When you cannot find it, touch [MENU], and select it on white paper, with a serial-still...-image effect (strobe effect). [LUMI. Digital effect You can replace a brighter area in color, and at that an incidental image like a trail is not displayed on the screen, touch / . If ...
... then adjust the effect by touching / and touch . EFFECT: STBY OFF 0:00:00 OFF 1/2 FLASH STILL LUMI. KEY] (luminance key) You can add digital effects to pictures. EFFECT: STBY STILL 0:00:00 OK When you cannot find it, touch [MENU], and select it on white paper, with a serial-still...-image effect (strobe effect). [LUMI. Digital effect You can replace a brighter area in color, and at that an incidental image like a trail is not displayed on the screen, touch / . If ...

User Manual
Page 43
b Notes • You cannot use Digital effect together with : - [16:9 WIDE] mode - FADER function - MEMORY MIX function • You cannot use [SLOW SHUTTR]/[OLD MOVIE] together with [PROGRAM AE] (except [AUTO]). &#... adjustment necessary. * It is hard to adjust the focus automatically when you want to adjust The degree of transparency of frame-byframe playback. To cancel Digital effect Follow steps 2 and 3, then select [OFF] in the still image which you are currently recording on a tape - Still image Movie Blue [MTCAM CHROMA] (Memory...
b Notes • You cannot use Digital effect together with : - [16:9 WIDE] mode - FADER function - MEMORY MIX function • You cannot use [SLOW SHUTTR]/[OLD MOVIE] together with [PROGRAM AE] (except [AUTO]). &#... adjustment necessary. * It is hard to adjust the focus automatically when you want to adjust The degree of transparency of frame-byframe playback. To cancel Digital effect Follow steps 2 and 3, then select [OFF] in the still image which you are currently recording on a tape - Still image Movie Blue [MTCAM CHROMA] (Memory...

User Manual
Page 49
... repeatedly to select the PLAY/EDIT mode. 2 Touch while the picture you cannot output pictures edited with digital effects via the DV Interface. • The Digital effect function does not work with added effects - To cancel Digital effect Follow steps 2 to externally input pictures. Also, you want to add the effect to a ...the Hi8 /standard 8 mm system. EFFECT] by touching / and . 5 Select an effect, then adjust the effect by touching (decrease)/ (increase). 6 Touch twice, then . appears. Digital effect You can copy them to is displayed. 3 Touch [MENU]. 4 Select (PICT.
... repeatedly to select the PLAY/EDIT mode. 2 Touch while the picture you cannot output pictures edited with digital effects via the DV Interface. • The Digital effect function does not work with added effects - To cancel Digital effect Follow steps 2 to externally input pictures. Also, you want to add the effect to a ...the Hi8 /standard 8 mm system. EFFECT] by touching / and . 5 Select an effect, then adjust the effect by touching (decrease)/ (increase). 6 Touch twice, then . appears. Digital effect You can copy them to is displayed. 3 Touch [MENU]. 4 Select (PICT.

User Manual
Page 64
... You can select the maximum zoom level in case you are using the digital zoom. SELF-TIMER See page 29, 32 for details. Select to activate the digital zoom. 20 times through 40 times zoom is performed digitally. 64 Using the Menu The zooming zone appears when you select the zooming... level. Select to activate the digital zoom. 20 times through 990 times zoom is performed digitally. Up to deactivate the digital zoom. COLOR SLOW S See page 38 for details. GOFF 40 × 990 × Select to 20 times zoom...
... You can select the maximum zoom level in case you are using the digital zoom. SELF-TIMER See page 29, 32 for details. Select to activate the digital zoom. 20 times through 40 times zoom is performed digitally. 64 Using the Menu The zooming zone appears when you select the zooming... level. Select to activate the digital zoom. 20 times through 990 times zoom is performed digitally. Up to deactivate the digital zoom. COLOR SLOW S See page 38 for details. GOFF 40 × 990 × Select to 20 times zoom...

User Manual
Page 79
GOFF ON ( Select when not using the Digital convert function. ) To output analog images and sound in digital format using your camcorder. Select to adjust the color on the LCD screen. The analog signal input to the computer via your camcorder. For details,...intensity A/V c DV OUT You can adjust the brightness of your camcorder. LCD COLOR Touch / to brighten the LCD screen. LCD BL LEVEL You can connect a digital device and an analog device to your camcorder and convert the signal transmitted from the connected devices to outside power sources, [BRIGHT] is reduced by...
GOFF ON ( Select when not using the Digital convert function. ) To output analog images and sound in digital format using your camcorder. Select to adjust the color on the LCD screen. The analog signal input to the computer via your camcorder. For details,...intensity A/V c DV OUT You can adjust the brightness of your camcorder. LCD COLOR Touch / to brighten the LCD screen. LCD BL LEVEL You can connect a digital device and an analog device to your camcorder and convert the signal transmitted from the connected devices to outside power sources, [BRIGHT] is reduced by...

User Manual
Page 87
To use an i.LINK cable for connection Use an i.LINK cable (optional) to connect your camcorder to other devices. Note that you are transmitted digitally, producing high quality White Red VCRs or TVs pictures. Before connecting, make sure the [DISPLAY] setting in the following illustration. For details, see page 139. A/V ...
To use an i.LINK cable for connection Use an i.LINK cable (optional) to connect your camcorder to other devices. Note that you are transmitted digitally, producing high quality White Red VCRs or TVs pictures. Before connecting, make sure the [DISPLAY] setting in the following illustration. For details, see page 139. A/V ...

User Manual
Page 88
... via the DV Interface, you cannot record the title, indicators and words entered on screen (p. 55). • Pictures edited with Picture effect ([PICT. EFFECT] p. 69), Digital effect (p. 42, 49), or Playback zoom (p. 54) cannot be recorded on the tape. • To record the date/time and camera settings data, have them... VCR via the DV Interface, the picture may fluctuate. This is connected to hide indicators such as image signals from the DV Interface during playback. Digital signals are output as time code (p. 55).
... via the DV Interface, you cannot record the title, indicators and words entered on screen (p. 55). • Pictures edited with Picture effect ([PICT. EFFECT] p. 69), Digital effect (p. 42, 49), or Playback zoom (p. 54) cannot be recorded on the tape. • To record the date/time and camera settings data, have them... VCR via the DV Interface, the picture may fluctuate. This is connected to hide indicators such as image signals from the DV Interface during playback. Digital signals are output as time code (p. 55).

User Manual
Page 92
... the tape. Dubbing selected scenes from "Recording the selected scenes as VCRs or to the VCR via the DV Interface, you are performing a digital program edit for the first time to dub images modified on your computer or recorded with other camcorders on your camcorder and VCR for operation... set up to 20 scenes (programs) and record them in the desired order to other devices in the Hi8 / standard 8 mm system. b Note • The Digital program editing does not work with an HDD, etc • When your camcorder is connected to a "Memory Stick" inserted in a VCR. a DVD recorder, a ...
... the tape. Dubbing selected scenes from "Recording the selected scenes as VCRs or to the VCR via the DV Interface, you are performing a digital program edit for the first time to dub images modified on your computer or recorded with other camcorders on your camcorder and VCR for operation... set up to 20 scenes (programs) and record them in the desired order to other devices in the Hi8 / standard 8 mm system. b Note • The Digital program editing does not work with an HDD, etc • When your camcorder is connected to a "Memory Stick" inserted in a VCR. a DVD recorder, a ...

User Manual
Page 95
.../Editing 95 You can adjust the synchronization of the tape. 3 Touch , then [ADJ TEST]. The starting scenes may not get recorded when you are performing digital program edit for the first time to a tape in step 11 on p. 93. A picture (about 50 seconds long) with 5 [IN] and [OUT] indicators each for...
.../Editing 95 You can adjust the synchronization of the tape. 3 Touch , then [ADJ TEST]. The starting scenes may not get recorded when you are performing digital program edit for the first time to a tape in step 11 on p. 93. A picture (about 50 seconds long) with 5 [IN] and [OUT] indicators each for...

User Manual
Page 96
PROG. The calculated stop position for recording is finished. b Note • You cannot dub the title or display indicators. When you are performing a digital program edit for [CUT-IN], then touch . When you are recording on a "Memory Stick," insert a "Memory Stick" into your VCR. [Completed.] appears when the recording ...
PROG. The calculated stop position for recording is finished. b Note • You cannot dub the title or display indicators. When you are performing a digital program edit for [CUT-IN], then touch . When you are recording on a "Memory Stick," insert a "Memory Stick" into your VCR. [Completed.] appears when the recording ...

User Manual
Page 98
... PAUSE EXEC TOTAL 0:00:00:25 SCENE 3 b Notes • You cannot set the starting point or ending point on p. 93, and set program. To end Digital program editing Touch [END]. To cancel this operation, touch [CANCEL]. 98 Dubbing/Editing 13Touch [START]. A search for the beginning of the tape. SEARCH -x1 0:00...
... PAUSE EXEC TOTAL 0:00:00:25 SCENE 3 b Notes • You cannot set the starting point or ending point on p. 93, and set program. To end Digital program editing Touch [END]. To cancel this operation, touch [CANCEL]. 98 Dubbing/Editing 13Touch [START]. A search for the beginning of the tape. SEARCH -x1 0:00...

User Manual
Page 100
... 101 6 Touch the image that you want to print out while viewing them on your camcorder. (You cannot specify the number of printouts.) The DPOF (Digital Print Order Format) standard is not set to cancel image protection. - Image protection You can mark images that you want to protect. Selecting still images...
... 101 6 Touch the image that you want to print out while viewing them on your camcorder. (You cannot specify the number of printouts.) The DPOF (Digital Print Order Format) standard is not set to cancel image protection. - Image protection You can mark images that you want to protect. Selecting still images...

User Manual
Page 102
... switch repeatedly to select the PLAY/EDIT mode. 2 Select . 3 Touch [MENU]. 4 Select (STANDARD SET), then [USB-PLY/EDT] by connecting a printer directly to a digital video camera or digital still camera, regardless of models that are stored into your camcorder to the printer if [USB-PLY/EDT] in the menu settings is not...
... switch repeatedly to select the PLAY/EDIT mode. 2 Select . 3 Touch [MENU]. 4 Select (STANDARD SET), then [USB-PLY/EDT] by connecting a printer directly to a digital video camera or digital still camera, regardless of models that are stored into your camcorder to the printer if [USB-PLY/EDT] in the menu settings is not...


