
Operating Instructions
Page 9
... by matching the 3 and # ends on the system. Note • Do not leave the remote in Specifications, page 80. Attaching the foot pads to the subwoofer Attach the supplied foot pads to the bottom of time, remove the batteries to the markings inside the compartment. Getting Started - See Unpacking in an... extremely hot or humid place. • Do not use the remote for an extended period of the subwoofer to stabilize the subwoofer and prevent it at the remote sensor on the batteries to avoid possible damage from slipping. 9GB
... by matching the 3 and # ends on the system. Note • Do not leave the remote in Specifications, page 80. Attaching the foot pads to the subwoofer Attach the supplied foot pads to the bottom of time, remove the batteries to the markings inside the compartment. Getting Started - See Unpacking in an... extremely hot or humid place. • Do not use the remote for an extended period of the subwoofer to stabilize the subwoofer and prevent it at the remote sensor on the batteries to avoid possible damage from slipping. 9GB
Operating Instructions
Page 10
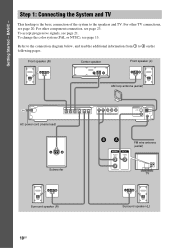
... SUR R SUR L R AUDIO IN L Y PB/CB PR/CR TV/VCR (DVD ONLY) COMPONENT VIDEO OUT MONITOR OUT S VIDEO (DVD ONLY) VIDEO AM COAXIAL FM 75 Subwoofer BA FM wire antenna (aerial) AUDIO OUT L VIDEO IN R TV Surround speaker (R) 10GB Surround speaker (L) To change the color system (PAL or NTSC), see page...
... SUR R SUR L R AUDIO IN L Y PB/CB PR/CR TV/VCR (DVD ONLY) COMPONENT VIDEO OUT MONITOR OUT S VIDEO (DVD ONLY) VIDEO AM COAXIAL FM 75 Subwoofer BA FM wire antenna (aerial) AUDIO OUT L VIDEO IN R TV Surround speaker (R) 10GB Surround speaker (L) To change the color system (PAL or NTSC), see page...
Operating Instructions
Page 14
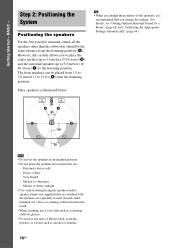
... the Appropriate Settings Automatically" (page 64). Step 2: Positioning the System Positioning the speakers For the best possible surround sound, all the speakers other than the subwoofer should be placed from 1.0 to 7.0 meters (3 to direct sunlight • Use caution when placing the speakers and/or speaker stands (not supplied) that you to...
... the Appropriate Settings Automatically" (page 64). Step 2: Positioning the System Positioning the speakers For the best possible surround sound, all the speakers other than the subwoofer should be placed from 1.0 to 7.0 meters (3 to direct sunlight • Use caution when placing the speakers and/or speaker stands (not supplied) that you to...
Operating Instructions
Page 16
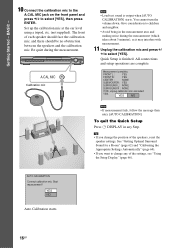
...). The front of the settings, see "Using the Setup Display" (page 66). All connections and setup operations are complete. FRONT L : YES FRONT R : YES CENTER : NONE SUBWOOFER : YES SURROUND L : NONE SURROUND R : NONE If OK, unplug calibration mic and select YES.
...). The front of the settings, see "Using the Setup Display" (page 66). All connections and setup operations are complete. FRONT L : YES FRONT R : YES CENTER : NONE SUBWOOFER : YES SURROUND L : NONE SURROUND R : NONE If OK, unplug calibration mic and select YES.
Operating Instructions
Page 29
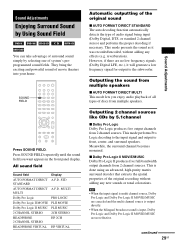
... This mode lets you want appears in the front panel display. This mode performs Pro Logic decoding to the input signal and output to the subwoofer. This is input, Dolby Pro Logic and Dolby Pro Logic II MOVIE/MUSIC are not effective. Note • When the input signal is multi channel...
... This mode lets you want appears in the front panel display. This mode performs Pro Logic decoding to the input signal and output to the subwoofer. This is input, Dolby Pro Logic and Dolby Pro Logic II MOVIE/MUSIC are not effective. Note • When the input signal is multi channel...
Operating Instructions
Page 30
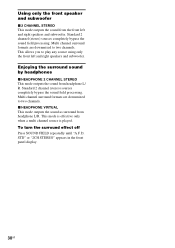
... STEREO This mode outputs the sound from the front left and right speakers and subwoofer. Enjoying the surround sound by headphones x HEADPHONE 2 CHANNEL STEREO This mode outputs the sound from headphone L/R. This mode is effective only when a multi channel source ... completely bypass the sound field processing. Multi channel surround formats are downmixed to play any source using only the front left and right speakers and subwoofer. Standard 2 channel (stereo) sources completely bypass the sound field processing.
... STEREO This mode outputs the sound from the front left and right speakers and subwoofer. Enjoying the surround sound by headphones x HEADPHONE 2 CHANNEL STEREO This mode outputs the sound from headphone L/R. This mode is effective only when a multi channel source ... completely bypass the sound field processing. Multi channel surround formats are downmixed to play any source using only the front left and right speakers and subwoofer. Standard 2 channel (stereo) sources completely bypass the sound field processing.

Operating Instructions
Page 65
.... Tip • You can check the distance between the speakers and the calibration mic. do not change the volume. - FRONT L : YES FRONT R : YES CENTER : NONE SUBWOOFER : YES SURROUND L : NONE SURROUND R : NONE If OK, unplug calibration mic and select YES. Calibration starts. Check speaker connection. x The measurement is overloaded. 6 Press C/X/x/c to avoid...
.... Tip • You can check the distance between the speakers and the calibration mic. do not change the volume. - FRONT L : YES FRONT R : YES CENTER : NONE SUBWOOFER : YES SURROUND L : NONE SURROUND R : NONE If OK, unplug calibration mic and select YES. Calibration starts. Check speaker connection. x The measurement is overloaded. 6 Press C/X/x/c to avoid...
Operating Instructions
Page 71
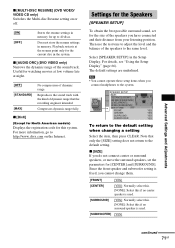
... 66). SPEAKER SETUP SIZE: DISTANCE(FRONT): DISTANCE(SURROUND): LEVEL(FRONT): LEVEL(SURROUND): TEST TONE: OFF FRONT: YES CENTER: YES SURROUND: YES SUBWOOFER: YES To return to the system. Useful for the size of the speakers you connect headphones to the default setting when changing a setting Select...for the Speakers [SPEAKER SETUP] To obtain the best possible surround sound, set the parameters for this if no center speaker is used. [SUBWOOFER] [YES] continued 71GB Then use the test tone to adjust the level and the balance of the sound track. The default settings are ...
... 66). SPEAKER SETUP SIZE: DISTANCE(FRONT): DISTANCE(SURROUND): LEVEL(FRONT): LEVEL(SURROUND): TEST TONE: OFF FRONT: YES CENTER: YES SURROUND: YES SUBWOOFER: YES To return to the system. Useful for the size of the speakers you connect headphones to the default setting when changing a setting Select...for the Speakers [SPEAKER SETUP] To obtain the best possible surround sound, set the parameters for this if no center speaker is used. [SUBWOOFER] [YES] continued 71GB Then use the test tone to adjust the level and the balance of the sound track. The default settings are ...
Operating Instructions
Page 73
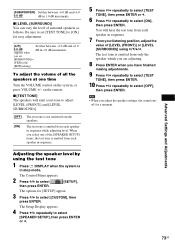
... remote. x [LEVEL (SURROUND)] You can vary the level of the [SPEAKER SETUP] items, the test tone is emitted from the speakers. Advanced Settings and Adjustments [SUBWOOFER] Set this between -6.0 dB and +6.0 0.0 dB dB in 1.0 dB increments. The Control Menu appears. 2 Press X/x to select then press ENTER. [SETUP], The options for [SETUP...
... remote. x [LEVEL (SURROUND)] You can vary the level of the [SPEAKER SETUP] items, the test tone is emitted from the speakers. Advanced Settings and Adjustments [SUBWOOFER] Set this between -6.0 dB and +6.0 0.0 dB dB in 1.0 dB increments. The Control Menu appears. 2 Press X/x to select then press ENTER. [SETUP], The options for [SETUP...
Operating Instructions
Page 77
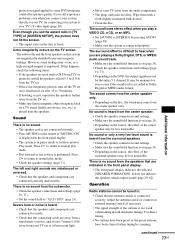
The subwoofer and the front speakers in Slow-motion Play mode. Sound There is no magnetic object (magnetic latch on the disc, the sound may be the ... them with a cloth slightly moistened with automatic tuning). The surround effect is performed. No sound or only a very low-level sound is heard from the subwoofer. • Check the speaker connections and settings (page 10, 71). • Set the sound field to normal play mode. • Check the speaker settings (page...
The subwoofer and the front speakers in Slow-motion Play mode. Sound There is no magnetic object (magnetic latch on the disc, the sound may be the ... them with a cloth slightly moistened with automatic tuning). The surround effect is performed. No sound or only a very low-level sound is heard from the subwoofer. • Check the speaker connections and settings (page 10, 71). • Set the sound field to normal play mode. • Check the speaker settings (page...

Operating Instructions
Page 80
...RMS output power, 10 % THD Front: 142 W + 142 W (with SS-TS51) Center*: 142 W (with SS-CT51) Surround*: 142 W + 142 W (with SS-TS51) Subwoofer*: 140 W (with SS-WS52) Other models: Stereo mode (rated) 108 W + 108 W (3 ohms at 9 kHz) Antenna (aerial) AM loop antenna (aerial) Intermediate frequency 450..., 10 % THD Front: 142 W + 142 W (with SS-TS51) Center*: 142 W (with SS-CT51) Surround*: 142 W + 142 W (with SS-TS51) Subwoofer*: 140 W (with SS-WS52) * Depending on the sound field settings and the source, there may be no sound output. Inputs (Analog) TV/VCR (AUDIO IN...
...RMS output power, 10 % THD Front: 142 W + 142 W (with SS-TS51) Center*: 142 W (with SS-CT51) Surround*: 142 W + 142 W (with SS-TS51) Subwoofer*: 140 W (with SS-WS52) Other models: Stereo mode (rated) 108 W + 108 W (3 ohms at 9 kHz) Antenna (aerial) AM loop antenna (aerial) Intermediate frequency 450..., 10 % THD Front: 142 W + 142 W (with SS-TS51) Center*: 142 W (with SS-CT51) Surround*: 142 W + 142 W (with SS-TS51) Subwoofer*: 140 W (with SS-WS52) * Depending on the sound field settings and the source, there may be no sound output. Inputs (Analog) TV/VCR (AUDIO IN...
Operating Instructions
Page 81
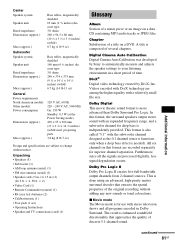
..., less signal degradation occurs. All six channels in Dolby Surround. DivX® Digital video technology created by Sony to automatically measure and adjusts the speaker settings to change without adding any new sounds or tonal colorations. Furthermore...0.1 channel (since all programs encoded in this format, the surround speakers output stereo sound with a relatively small file size. continued 81GB Unpacking • Speakers (5) • Subwoofer (1) • AM loop antenna (aerial) (1) • FM wire antenna (aerial) (1) • Speaker cords (5 m × 4, 15 m × 2) (...
..., less signal degradation occurs. All six channels in Dolby Surround. DivX® Digital video technology created by Sony to automatically measure and adjusts the speaker settings to change without adding any new sounds or tonal colorations. Furthermore...0.1 channel (since all programs encoded in this format, the surround speakers output stereo sound with a relatively small file size. continued 81GB Unpacking • Speakers (5) • Subwoofer (1) • AM loop antenna (aerial) (1) • FM wire antenna (aerial) (1) • Speaker cords (5 m × 4, 15 m × 2) (...
Operating Instructions
Page 82
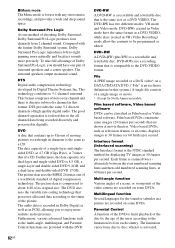
..., allowing you should have the same format as a CD. The picture data is compressed to about 1/40 of stereo rear channel and there is discrete subwoofer channel in digitally. The DVD-RW has two different modes: VR mode and Video mode. Film based software, Video based software DVDs can be programmed...
..., allowing you should have the same format as a CD. The picture data is compressed to about 1/40 of stereo rear channel and there is discrete subwoofer channel in digitally. The DVD-RW has two different modes: VR mode and Video mode. Film based software, Video based software DVDs can be programmed...
Operating Instructions
Page 90
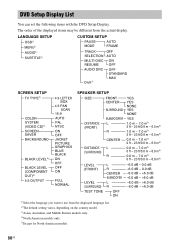
... PAL NTSC ON OFF JACKET PICTURE GRAPHICS BLUE BLACK ON OFF OFF ON FULL NORMAL SPEAKER SETUP SIZE DISTANCE (FRONT) DISTANCE (SURROUND) FRONT CENTER SURROUND SUBWOOFER L R CENTER L R YES YES NONE YES NONE YES 1.0 m - 7.0 m3) 3 ft - 23 ft/0.9 m - 6.9 m4) 1.0 m - 7.0 m3) 3 ft - 23 ft/0.9 m...0.0 m - 7.0 m3) 0 ft - 23 ft/0.0 m - 6.9 m4) 0.0 m - 7.0 m3) 0 ft - 23 ft/0.0 m - 6.9 m4) LEVEL (FRONT) LEVEL (SURROUND) TEST TONE L R CENTER SUBWOOFER L R OFF ON -6.0 dB - 0.0 dB -6.0 dB - 0.0 dB -6.0 dB - +6.0 dB -6.0 dB - +6.0 dB -6.0 dB - +6.0 dB -6.0 dB - +6.0 dB 1)Select the language you want to use...
... PAL NTSC ON OFF JACKET PICTURE GRAPHICS BLUE BLACK ON OFF OFF ON FULL NORMAL SPEAKER SETUP SIZE DISTANCE (FRONT) DISTANCE (SURROUND) FRONT CENTER SURROUND SUBWOOFER L R CENTER L R YES YES NONE YES NONE YES 1.0 m - 7.0 m3) 3 ft - 23 ft/0.9 m - 6.9 m4) 1.0 m - 7.0 m3) 3 ft - 23 ft/0.9 m...0.0 m - 7.0 m3) 0 ft - 23 ft/0.0 m - 6.9 m4) 0.0 m - 7.0 m3) 0 ft - 23 ft/0.0 m - 6.9 m4) LEVEL (FRONT) LEVEL (SURROUND) TEST TONE L R CENTER SUBWOOFER L R OFF ON -6.0 dB - 0.0 dB -6.0 dB - 0.0 dB -6.0 dB - +6.0 dB -6.0 dB - +6.0 dB -6.0 dB - +6.0 dB -6.0 dB - +6.0 dB 1)Select the language you want to use...


