
Instruction Manual
Page 3
... Machine identification 6 - 7 Accessories 8 - 9 Setting up your machine 10 - 11 Spool pins, Presser foot lifter 12 - 13 Feed dog control 12 - 13 Converting to -sew fabrics Manual buttonhole 68 - 69 Letter sewing and decorative patterns 70 - 79 Decorative designs 3. QUICK REFERENCE TABLE OF STITCH LENGTH AND WIDTH 88 - 92 For European version...
... Machine identification 6 - 7 Accessories 8 - 9 Setting up your machine 10 - 11 Spool pins, Presser foot lifter 12 - 13 Feed dog control 12 - 13 Converting to -sew fabrics Manual buttonhole 68 - 69 Letter sewing and decorative patterns 70 - 79 Decorative designs 3. QUICK REFERENCE TABLE OF STITCH LENGTH AND WIDTH 88 - 92 For European version...

Instruction Manual
Page 6
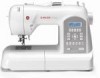
.... Needle clamp screw 28. Power line cord 33. Thread guide 1 2. Thread cutter/holder 3 6. Bobbin winder shaft 8. Power/light switch 14. Presser foot lifter 17. Instruction manual 19 20 21 22 23 7 8 9 10 15 16 18 17 24 25 26 27 28 29 30 31 32 33 34 6 1. KNOWING YOUR SEWING MACHINE...
.... Needle clamp screw 28. Power line cord 33. Thread guide 1 2. Thread cutter/holder 3 6. Bobbin winder shaft 8. Power/light switch 14. Presser foot lifter 17. Instruction manual 19 20 21 22 23 7 8 9 10 15 16 18 17 24 25 26 27 28 29 30 31 32 33 34 6 1. KNOWING YOUR SEWING MACHINE...

Instruction Manual
Page 44
... AUTO The top thread may appear on the bottom depending on the thread, fabric, type of the fabric. Slightly loosen the top thread tension and manually adjust the stitch length between 0.5 and 2.0 for appliqué, bartacking, etc. PLACEMENT OF PATTERNS Stitch width of stabilizer for sheer fabrics to set automatically when...
... AUTO The top thread may appear on the bottom depending on the thread, fabric, type of the fabric. Slightly loosen the top thread tension and manually adjust the stitch length between 0.5 and 2.0 for appliqué, bartacking, etc. PLACEMENT OF PATTERNS Stitch width of stabilizer for sheer fabrics to set automatically when...

Instruction Manual
Page 46
... length and width. Settings : Presser foot - Regular blind stitch for soft, stretchable fabrics 1. First finish the raw edge. NOTE: For a narrower or wider blindhem, first manually adjust the length and width controls to sew blind hems. Always make a sewing test first. 4 Top side Cara Endroit 46 If it under the foot...
... length and width. Settings : Presser foot - Regular blind stitch for soft, stretchable fabrics 1. First finish the raw edge. NOTE: For a narrower or wider blindhem, first manually adjust the length and width controls to sew blind hems. Always make a sewing test first. 4 Top side Cara Endroit 46 If it under the foot...

Instruction Manual
Page 48
... blouses and dresses). AUTO Turn under the seam allowances on both sides with needle. Stitch over the folded edge, pulling the fabric in illustration requires manual adjustment of the stitch sews just over the 1/8" (0.3 cm) allowance, just catching the fabric fold on the cut edges, and press. NOTE: Mending a tear or...
... blouses and dresses). AUTO Turn under the seam allowances on both sides with needle. Stitch over the folded edge, pulling the fabric in illustration requires manual adjustment of the stitch sews just over the 1/8" (0.3 cm) allowance, just catching the fabric fold on the cut edges, and press. NOTE: Mending a tear or...

Instruction Manual
Page 50
.... It is far stronger than an ordinary straight stitch because it also can also be used for edging neck-bands, armholes, sleeves and hems. When manually adjusted to a very narrow width, it locks three times - AUTO Stretch stitches are mainly for use in stretch and non-stretch fabrics, and for reinforcing...
.... It is far stronger than an ordinary straight stitch because it also can also be used for edging neck-bands, armholes, sleeves and hems. When manually adjusted to a very narrow width, it locks three times - AUTO Stretch stitches are mainly for use in stretch and non-stretch fabrics, and for reinforcing...

Instruction Manual
Page 68
NOTE: If stitch length is manually set at 0.8 (mm) for 2 step 1, set the stitch length at the beginning of the buttonhole. Push the reverse stitch switch to complete buttonhole. 4. Place the .... Stitch forward to the end of buttonhole mark to tie off the stitches. Sew second bartack and stitch backward until needle 1 reaches beginning of buttonhole. 3. MANUAL BUTTONHOLE * Use the automatic buttonhole foot up to 1 3/4 "(45 mm) in length, but don't lower the buttonhole lever or a beep will sound. * Use the satin...
NOTE: If stitch length is manually set at 0.8 (mm) for 2 step 1, set the stitch length at the beginning of the buttonhole. Push the reverse stitch switch to complete buttonhole. 4. Place the .... Stitch forward to the end of buttonhole mark to tie off the stitches. Sew second bartack and stitch backward until needle 1 reaches beginning of buttonhole. 3. MANUAL BUTTONHOLE * Use the automatic buttonhole foot up to 1 3/4 "(45 mm) in length, but don't lower the buttonhole lever or a beep will sound. * Use the satin...

Instruction Manual
Page 95
... sewing machine only for all instructions before using and before cleaning. This equipment is intended to install the proper outlet. Use this manual. 3. Do not operate where aerosol (spray) products are being administered. 8. POLARIZED PLUGS CAUTION (USA only) This appliance has ...been dropped or damaged, or dropped into any object into water. WARNING- DANGER- Moving parts-To reduce risk of The Singer Company Ltd or its intended use , or equivalent. IMPORTANT SAFETY INSTRUCTIONS When using an electrical appliance, basic safety precautions should ...
... sewing machine only for all instructions before using and before cleaning. This equipment is intended to install the proper outlet. Use this manual. 3. Do not operate where aerosol (spray) products are being administered. 8. POLARIZED PLUGS CAUTION (USA only) This appliance has ...been dropped or damaged, or dropped into any object into water. WARNING- DANGER- Moving parts-To reduce risk of The Singer Company Ltd or its intended use , or equivalent. IMPORTANT SAFETY INSTRUCTIONS When using an electrical appliance, basic safety precautions should ...


