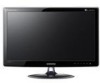
User Manual (user Manual) (ver.1.0) (English)
Page 10
Use a soft, damp cloth with a "monitorexclusive cleansing agent" and wipe the product with it. • If no monitor-exclusive cleansing agent is easily scratched, be fixed, contact a service center. This may result in electric shock or fire. Since the exterior of the product ... the case is contaminated by alien substances, it may result in fire, electric shock or a problem with the product. However, if the cloth is damaged, turn the power off and unplug the power cord. Use the cleansing cloth with the product. When cleaning the product, do not spray water directly over...
User Manual (user Manual) (ver.1.0) (English)
Page 11
..., coins or hairpins, or inflammable objects into the product (the vents, ports, etc). • If water or an alien substance enters the product, turn the power off , unplug the power cord and contact a service center. • Otherwise, it may cause dust accumulation and result in fire caused by..., electric shock or fire. Major Safety Precautions Avoid dropping an object over the product. • If water or an alien substance enters the product, turn the power off , unplug the power cord and contact a service center. • Otherwise, it may cause the product to block the vent by...
User Manual (user Manual) (ver.1.0) (English)
Page 14
... to protect the product and place the product onto the cloth so that the front of the stand fully so that it is facing downwards. Turn the connecting screw at the bottom of the product is firmly connected. 2-2 Installing the Stand Before assembling the product, place the product down on a flat...
User Manual (user Manual) (ver.1.0) (English)
Page 16
2-3 Removing the Stand Before removing the stand, place the product down on a flat and stable surface so that the front of the product faces downwards. Turn the connecting screw at the bottom of the arrow as shown in the figure to separate it . Pull the stand in the direction of the ...
User Manual (user Manual) (ver.1.0) (English)
Page 17
... the other end into a dedicated 220V or 110V wall outlet. (The input voltage is switched automatically.) When the product is connected to a PC, you can turn the product on and use it. Connect the product to a PC depending on the product model. 1. Connect one end of the PC with a PC The...
User Manual (user Manual) (ver.1.0) (English)
Page 18
2-5 Connecting an HDMI cable 1. Connect the HDMI output port of your DVD player (or digital output device). Press the button and select as an input signal. 2-5 Installing the Product When all the connections are complete, you can turn on and use the product and your digital output device to the [AUDIO OUT] port of the product using the HDMI cable. 2. This product won't make any sound when only the HDMI cable is connected without a speaker connected. Connect a speaker to the [HDMI IN] port of the product.
User Manual (user Manual) (ver.1.0) (English)
Page 20
... lock cable. 3. You have to the User Manual supplied with the locking device. Locking the product 1. Since the shape and usage of the product and turn it in the locking direction. 2. Tie the Kensington lock cable to a desk or heavy object. You can safely use it in public locations. 2-7 Kensington Lock...
User Manual (user Manual) (ver.1.0) (English)
Page 21
...the resolution has not been set to the optimal resolution. • To set the resolution to the optimal resolution. Using the product 3-1 MENU : If you turn the power on. • Right-click over the Desktop and select 'Properties' from the pop-up menu. • In the 'Settings' tab, set ...the resolution to the optimal resolution • When the PC is turned off, connect the product and the PC and turn the power on after purchasing the product, a message regarding the optimal resolution setting appears on the screen. Select a language and ...
User Manual (user Manual) (ver.1.0) (English)
Page 22
... If the signal from the PC is one of the following standard signal modes, the screen is set for a CDT monitor. It is recommended setting the resolution to the User Manual of the graphics card. However, if the signal from the ...is represented in kHz. The horizontal frequency is represented in Hz. 3-2 Using the product 3-2 Standard Signal Mode Table The LCD monitor has one line from the left-most position to the right-most position on the screen is called the horizontal cycle and ... tens of the panel, unlike for the panel size. Therefore, the visual quality will be turned on.
User Manual (user Manual) (ver.1.0) (English)
Page 24
... the product Use this button to select a function If you press the [ ] button when there is no OSD, the input signal (Analog/Digital/HDMI) is turned on, a message displaying the selected input signal appears at the top left of the screen.) To select Digital mode, you press and hold the MENU...
User Manual (user Manual) (ver.1.0) (English)
Page 25
... power-saving function, refer to the power saving function in More Information. When not using the product for a long time, unplugging the power cord is turned on when the product works normally. Using the product 3-4 ICON AUTO DESCRIPTION Press [AUTO] button to adjust the screen settings automatically This function is only...
User Manual (user Manual) (ver.1.0) (English)
Page 29
... • - Sets the color temperature of the screen to your preference. Turns the color effect function off . • - Displays pictures in black and white. • - You can change the overall atmosphere by Samsung Electronics. • - This menu is unavailable when is set to your ... Using this menu to set to your preference. • - You can adjust the red color value of pictures according to mode or mode. Turns the MagicColor function off . • -Displays pictures in aqua mono color. • - You can change the intensity of the colors of medium...
User Manual (user Manual) (ver.1.0) (English)
Page 31
... resolution set the function of the following. • PC signals : - - - • AV signals : - - - The monitor automatically selects an input signal. • - You can set on or off automatically when the configured time is only applied to a PC. Turns the Menu button LED on the PC. Adjusts the brightness of the PC. This...
User Manual (user Manual) (ver.1.0) (English)
Page 36
... the Power LED blinks even if the product and the PC are properly connected, perform the self-diagnosis function according to the procedures below. 1. 5 Troubleshooting 5-1 Monitor Self-Diagnosis • You can check if the product is working properly using the Self-Diagnosis function. • If a blank screen is no problem with...
User Manual (user Manual) (ver.1.0) (English)
Page 37
...? 5-2 Before Requesting Service Please check the following before requesting After-Sales service. A BLANK SCREEN APPEARS / I CANNOT TURN THE PRODUCT ON Is the power cord connected properly? This occurs when the signal from the graphics card exceeds the maximum...if you reconnect the DVI cable after disconnecting the cable while using a PC, the screen may not be turned on the screen? Did you click the mouse or press any key, the screen will be displayed because some...appropriate to the product? If the problem continues, please contact your nearest Samsung Electronics Service Center.
User Manual (user Manual) (ver.1.0) (English)
Page 41
... consumption is "0" only when the power cord is no power cut-off and you can turn the screen on again by pressing any key or clicking the mouse. STATE Power Indicator Power Consumption NORMAL OPERATION On XL2370 : 28 watts P2570 : 45 watts POWER SAVING MODE Blinking Less than 1.3 watts (Typ.) POWER OFF...