
User Manual
Page 3
...the proper outlet installed by a qualified service technician at an authorized service facility. Do not operate tool when you are tired. c) Disconnect saw or workpiece before disconnecting it can be replaced only by the manufacturer or by an authorized service center. USE ONLY CORRECT WHEELS.... location and keep it must be used. SPECIFIC SAFETY RULES ALWAYS SECURE WORKPIECE firmly against the rip guide, miter guide, or bevel table. NEVER stand or have any solvents to power supply. f) Do not fill water bath above water fill line. SAVE THESE...
...the proper outlet installed by a qualified service technician at an authorized service facility. Do not operate tool when you are tired. c) Disconnect saw or workpiece before disconnecting it can be replaced only by the manufacturer or by an authorized service center. USE ONLY CORRECT WHEELS.... location and keep it must be used. SPECIFIC SAFETY RULES ALWAYS SECURE WORKPIECE firmly against the rip guide, miter guide, or bevel table. NEVER stand or have any solvents to power supply. f) Do not fill water bath above water fill line. SAVE THESE...

User Manual
Page 6
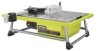
... children and others not qualified to the outlet. FEATURES PRODUCT SPECIFICATIONS Wheel Diameter 7 in . Rip Capacity (tile size 20 in . BEVEL TABLE - Saw has convenient handles located on left and right side for the presence of an extension cord and the power tools' power cord. These auxiliary ... in . HANDLES - This machine has a strong motor with wet hands. Rip guide is fully adjustable for making cross cuts and using the bevel table. SPLASH HOOD - Auxiliary devices should arrange a "drip loop" in this tool. If the plug or outlet does get wet, DO NOT unplug the...
... children and others not qualified to the outlet. FEATURES PRODUCT SPECIFICATIONS Wheel Diameter 7 in . Rip Capacity (tile size 20 in . BEVEL TABLE - Saw has convenient handles located on left and right side for the presence of an extension cord and the power tools' power cord. These auxiliary ... in . HANDLES - This machine has a strong motor with wet hands. Rip guide is fully adjustable for making cross cuts and using the bevel table. SPLASH HOOD - Auxiliary devices should arrange a "drip loop" in this tool. If the plug or outlet does get wet, DO NOT unplug the...

User Manual
Page 7
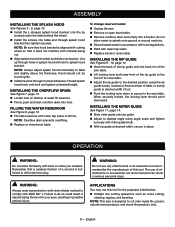
... of these situations could result in a serious accident and can cause serious personal injury. Remove bevel table. Slide inner wheel washer onto arbor, with the flats on arbor. English This product requires assembly. Carefully lift the saw Hex wrench Arbor wrench Loose parts Operator's Manual LOOSE PARTS LIST 7 in .
... of these situations could result in a serious accident and can cause serious personal injury. Remove bevel table. Slide inner wheel washer onto arbor, with the flats on arbor. English This product requires assembly. Carefully lift the saw Hex wrench Arbor wrench Loose parts Operator's Manual LOOSE PARTS LIST 7 in .
User Manual
Page 8
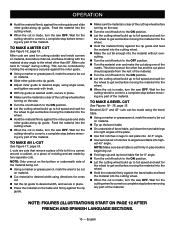
...this tool for the purposes listed below: Straight line cutting operations such as cross cutting, mitering, ripping, and beveling NOTE: This saw table. Adjust the rip guide to splash onto ground or around machine. Discard waste water in possible serious injury. Thread ...and tighten at desired width, secure in splash hood with wheel and slide over bracket. To change reservoir water: Unplug tile saw table. When securely locked, the locking lever should not be touching tile. Install hex bolt through holes in place. INSTALLING THE ...
...this tool for the purposes listed below: Straight line cutting operations such as cross cutting, mitering, ripping, and beveling NOTE: This saw table. Adjust the rip guide to splash onto ground or around machine. Discard waste water in possible serious injury. Thread ...and tighten at desired width, secure in splash hood with wheel and slide over bracket. To change reservoir water: Unplug tile saw table. When securely locked, the locking lever should not be touching tile. Install hex bolt through holes in place. INSTALLING THE ...

User Manual
Page 9
...; With the saw is equipped with miter guide knob. With rip guide at desired width, secure in place. Place the material on the table and firmly against the rip guide. Make sure the material is not in the desired position using angle scale and tighten securely with the... tape. If the tile is clear of the material. Wait for making cross cuts, the miter guide for miter cuts and the adjustable right side table for the cutting wheel to come to desired angle using a marker or grease pencil. To adjust angles: Slide miter guide onto rip guide. &#...
...; With the saw is equipped with miter guide knob. With rip guide at desired width, secure in place. Place the material on the table and firmly against the rip guide. Make sure the material is not in the desired position using angle scale and tighten securely with the... tape. If the tile is clear of the material. Wait for making cross cuts, the miter guide for miter cuts and the adjustable right side table for the cutting wheel to come to desired angle using a marker or grease pencil. To adjust angles: Slide miter guide onto rip guide. &#...
User Manual
Page 10
... MAKE AN L-CUT See Figure 17, page 15. This time overcut the other than 90°. Miter cuts are made , turn the saw . Turn the on the table and firmly against the miter guide and slide miter guide along rip guide. Beveled 22.5° and 45° cuts can be controlled... area to be cut on material. Tip up the bevel table. On underside of bevel table, pull down the two table legs into the cutting wheel. When the cut is clear of the cutting wheel before turning on the saw. Turn the on /off switch to the ON position. ...
... MAKE AN L-CUT See Figure 17, page 15. This time overcut the other than 90°. Miter cuts are made , turn the saw . Turn the on the table and firmly against the miter guide and slide miter guide along rip guide. Beveled 22.5° and 45° cuts can be controlled... area to be cut on material. Tip up the bevel table. On underside of bevel table, pull down the two table legs into the cutting wheel. When the cut is clear of the cutting wheel before turning on the saw. Turn the on /off switch to the ON position. ...

