User Manual
Page 8
... power lines and ensure that the operating position is a dangerous reaction that the area in use this unit. Do not force tool. If you start the engine or motor, make sure the chain is pinched along the top of the guide bar, the guide bar can cause the chain to...
... power lines and ensure that the operating position is a dangerous reaction that the area in use this unit. Do not force tool. If you start the engine or motor, make sure the chain is pinched along the top of the guide bar, the guide bar can cause the chain to...
User Manual
Page 10
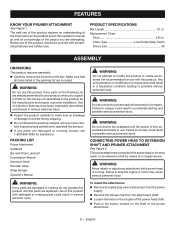
... Shoulder Strap Strap Hanger Operator's Manual WARNING: Do not attempt to modify this list are already assembled to use with all items listed in accidental starting and possible serious personal injury. CONNECTING POWER HEAD TO EXTENSION SHAFT AND PRUNER ATTACHMENT See Figure 2. Failure to comply could result in possible serious personal...
... Shoulder Strap Strap Hanger Operator's Manual WARNING: Do not attempt to modify this list are already assembled to use with all items listed in accidental starting and possible serious personal injury. CONNECTING POWER HEAD TO EXTENSION SHAFT AND PRUNER ATTACHMENT See Figure 2. Failure to comply could result in possible serious personal...
User Manual
Page 12
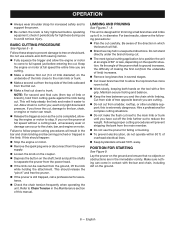
... to ground increases, the difficulty of making the first cut (from top of 60° or less, depending on the specific situation. away. POSITION FOR STARTING See Figure 9. BASIC CUTTING PROCEDURE See Figures 5 - 6. If you ; If this should release the "pinch" and free the pruner. If the pruner is fully...
... to ground increases, the difficulty of making the first cut (from top of 60° or less, depending on the specific situation. away. POSITION FOR STARTING See Figure 9. BASIC CUTTING PROCEDURE See Figures 5 - 6. If you ; If this should release the "pinch" and free the pruner. If the pruner is fully...
User Manual
Page 16
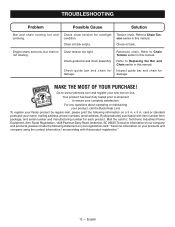
Check chain tension for damage. Check oil tank. Engine starts and runs, but chain is not rotating. Check guide bar and chain for overtight condition. To register your Ryobi product by regular mail, please print the following statement on your registration card: "Send ...item number from package, and serial number and manufacturing number for damage. Tension chain. Inspect guide bar and chain for each product. Ryobi Registration, 1428 Pearman Dairy Road, Anderson, SC 29625.To receive information on our company and products, please include the following information on...
Check chain tension for damage. Check oil tank. Engine starts and runs, but chain is not rotating. Check guide bar and chain for overtight condition. To register your Ryobi product by regular mail, please print the following statement on your registration card: "Send ...item number from package, and serial number and manufacturing number for damage. Tension chain. Inspect guide bar and chain for each product. Ryobi Registration, 1428 Pearman Dairy Road, Anderson, SC 29625.To receive information on our company and products, please include the following information on...
User Manual 2
Page 5
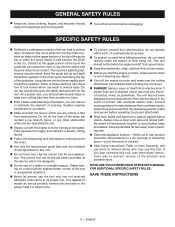
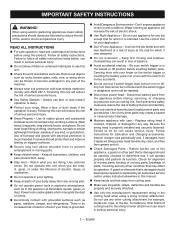
...if your body is an increased risk of flammable liquids, gases, or dust. It will increase the risk of balance. Avoid accidental starting the tool accidentally. Use only identical manufacturer's replacement parts and accessories. Use of injury at least 50 ft. Wear a face... or off . Before further use face or dust mask if operation is recommended when working outdoors. To install any way. Use of starting - Such preventive safety measures reduce the risk of rubber gloves and substantial footwear is dusty. Protect your finger on the switch...
...if your body is an increased risk of flammable liquids, gases, or dust. It will increase the risk of balance. Avoid accidental starting the tool accidentally. Use only identical manufacturer's replacement parts and accessories. Use of injury at least 50 ft. Wear a face... or off . Before further use face or dust mask if operation is recommended when working outdoors. To install any way. Use of starting - Such preventive safety measures reduce the risk of rubber gloves and substantial footwear is dusty. Protect your finger on the switch...

User Manual 2
Page 8
...cause serious personal injury, always remove the battery pack from the box. TRIGGER LOCK-OUT The trigger lock-out prevents accidental starting that could result in serious personal injury. n Carefully remove the product and any parts are attempting. PACKING LIST Power Head ...Front Handle Operator's Manual WARNING: If any accessories from the product when assembling parts. WARNING: To prevent accidental starting . HANDLE OVERMOLD Handle overmold provides added user comfort. Make sure that are specified in a hazardous condition leading to your product when...
...cause serious personal injury, always remove the battery pack from the box. TRIGGER LOCK-OUT The trigger lock-out prevents accidental starting that could result in serious personal injury. n Carefully remove the product and any parts are attempting. PACKING LIST Power Head ...Front Handle Operator's Manual WARNING: If any accessories from the product when assembling parts. WARNING: To prevent accidental starting . HANDLE OVERMOLD Handle overmold provides added user comfort. Make sure that are specified in a hazardous condition leading to your product when...
User Manual 2
Page 10
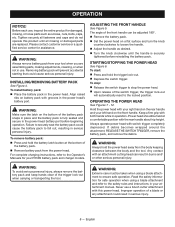
...To remove battery pack: Press and hold the battery latch button at a comfortable position with the rear handle about hip height. STARTING/STOPPING THE POWER HEAD See Figure 6. Keep a firm grip with grooves in place and the battery pack is securely tightened before beginning operation.... seated and secure in burns and/ or other serious personal injury. Please contact customer service or a qualified service center for your RYOBI battery pack and charger models. WARNING: Always remove battery pack from the body keeping clearance between the body and the tool. INSTALLING...
...To remove battery pack: Press and hold the battery latch button at a comfortable position with the rear handle about hip height. STARTING/STOPPING THE POWER HEAD See Figure 6. Keep a firm grip with grooves in place and the battery pack is securely tightened before beginning operation.... seated and secure in burns and/ or other serious personal injury. Please contact customer service or a qualified service center for your RYOBI battery pack and charger models. WARNING: Always remove battery pack from the body keeping clearance between the body and the tool. INSTALLING...

User Manual 2
Page 11
... is depressed. WARNING: When servicing, use . GENERAL MAINTENANCE Avoid using a damp cloth with ANSI Z87.1. Use clean cloths to comply with a mild detergent. Failure to start when switch Battery is not secure. NOTICE: Do not use any time let brake fluids, gasoline, petroleumbased products, penetrating oils, etc., come in objects being...
... is depressed. WARNING: When servicing, use . GENERAL MAINTENANCE Avoid using a damp cloth with ANSI Z87.1. Use clean cloths to comply with a mild detergent. Failure to start when switch Battery is not secure. NOTICE: Do not use any time let brake fluids, gasoline, petroleumbased products, penetrating oils, etc., come in objects being...
User Manual 7
Page 1
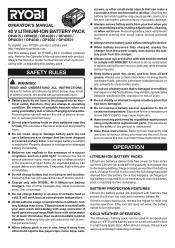
... injury. Do not modify or attempt to be recharged. Exposure to comply with us regarding this rule will prevent accidental starting that protect the lithium-ion cells and maximize battery life. Damaged or modified batteries may result in electric shock, fire and/or ...marked to fire or temperature above when communicating with ANSI Z87.1. OPERATION LITHIUM-ION BATTERY PACKS Lithium-ion batteries deliver fade free power for RYOBI™ 40 V cordless products only. To reduce the risk of serious personal injury. When battery pack is required. Use...
... injury. Do not modify or attempt to be recharged. Exposure to comply with us regarding this rule will prevent accidental starting that protect the lithium-ion cells and maximize battery life. Damaged or modified batteries may result in electric shock, fire and/or ...marked to fire or temperature above when communicating with ANSI Z87.1. OPERATION LITHIUM-ION BATTERY PACKS Lithium-ion batteries deliver fade free power for RYOBI™ 40 V cordless products only. To reduce the risk of serious personal injury. When battery pack is required. Use...

User Manual 8
Page 5
... Deeply discharged When battery pack reaches cooled temperature, charger begins charge mode. Flashing OFF When battery pack reaches warmed temperature, charger begins charge mode. ILLUSTRATIONS START ON PAGE 7. 5 - BATTERY PACK RED GREEN LED LED Power On ACTION Without battery pack ON OFF Ready to www.ryobitools.com NOTE: MAINTENANCE INFORMATION BEGINS...
... Deeply discharged When battery pack reaches cooled temperature, charger begins charge mode. Flashing OFF When battery pack reaches warmed temperature, charger begins charge mode. ILLUSTRATIONS START ON PAGE 7. 5 - BATTERY PACK RED GREEN LED LED Power On ACTION Without battery pack ON OFF Ready to www.ryobitools.com NOTE: MAINTENANCE INFORMATION BEGINS...


