

User Manual
Page 7
... increase blood circulation. Contact with hot surfaces could lead to heat stroke. d) Keep the tool well maintained, fasteners tightened, and worn parts replaced. Failure to follow all safety instructions. Remove all instructions. Stable footing on the operator's left side. Secure long...rotate at idle during carburetor adjustments. It has been reported that cold weather is presently unknown what, if any moving parts. Keep all bystanders, children, and pets at idle during normal use for early morning or late afternoon hours when...
... increase blood circulation. Contact with hot surfaces could lead to heat stroke. d) Keep the tool well maintained, fasteners tightened, and worn parts replaced. Failure to follow all safety instructions. Remove all instructions. Stable footing on the operator's left side. Secure long...rotate at idle during carburetor adjustments. It has been reported that cold weather is presently unknown what, if any moving parts. Keep all bystanders, children, and pets at idle during normal use for early morning or late afternoon hours when...

User Manual
Page 8
... condition. Maintain a firm grip on both handles while trimming. To install any way. For such use blades, flailing devices, wire, or rope. Replace damaged parts. English When the unit is turned off make sure the cutting attachment has stopped before use any other cutting attachment. Check for fuel leaks. ...
... condition. Maintain a firm grip on both handles while trimming. To install any way. For such use blades, flailing devices, wire, or rope. Replace damaged parts. English When the unit is turned off make sure the cutting attachment has stopped before use any other cutting attachment. Check for fuel leaks. ...

User Manual
Page 10
...to make sure no breakage or damage occurred during shipping. Make sure that may have carefully inspected and satisfactorily operated the product. Parts on this product if any accessories from flying debris. Use of the information on the packing list are already assembled to the...See Figure 1. TOP-MOUNTED ENGINE The top-mounted engine improves balance and is designed for assistance. n Carefully remove the product and any parts on the tool and in . FEATURES PRODUCT SPECIFICATIONS Line cutting width C430...17 in . Engine displacement ...30cc Engine Lubricant Volume...2.2 oz Line...
...to make sure no breakage or damage occurred during shipping. Make sure that may have carefully inspected and satisfactorily operated the product. Parts on this product if any accessories from flying debris. Use of the information on the packing list are already assembled to the...See Figure 1. TOP-MOUNTED ENGINE The top-mounted engine improves balance and is designed for assistance. n Carefully remove the product and any parts on the tool and in . FEATURES PRODUCT SPECIFICATIONS Line cutting width C430...17 in . Engine displacement ...30cc Engine Lubricant Volume...2.2 oz Line...

User Manual
Page 11
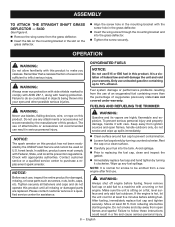
...THE STORAGE HANGER See Figure 3. ATTACHING THE FRONT HANDLE See Figure 4. Remove wing nut and bolt from the spark plug when assembling parts. Avoid contact with the guide recess on the grass deflector is running. Failure to stop the engine can be used for storage. &#...a hazardous condition leading to remove and separate ends. Align the button with the blade. check it periodically for use with damaged or missing parts could cause serious personal injury, always disconnect the engine spark plug wire from the front handle. Install the front handle onto the...
...THE STORAGE HANGER See Figure 3. ATTACHING THE FRONT HANDLE See Figure 4. Remove wing nut and bolt from the spark plug when assembling parts. Avoid contact with the guide recess on the grass deflector is running. Failure to stop the engine can be used for storage. &#...a hazardous condition leading to remove and separate ends. Align the button with the blade. check it periodically for use with damaged or missing parts could cause serious personal injury, always disconnect the engine spark plug wire from the front handle. Install the front handle onto the...
User Manual
Page 12
...WARNING: Always shut off engine before starting engine. Make sure the unit is hot, let the unit cool for damaged, missing, or loose parts such as screws, nuts, bolts, caps, etc. Do not smoke and stay away from ignition sources and open flames and sparks! Contact ... second is normal for assistance. Clean surface around fuel cap to do not operate this product. Tighten securely all missing or damaged parts are highly flammable and explosive. Never remove fuel cap or add fuel to comply with ANSI Z87.1, along with appropriate authorities. Failure to inflict...
...WARNING: Always shut off engine before starting engine. Make sure the unit is hot, let the unit cool for damaged, missing, or loose parts such as screws, nuts, bolts, caps, etc. Do not smoke and stay away from ignition sources and open flames and sparks! Contact ... second is normal for assistance. Clean surface around fuel cap to do not operate this product. Tighten securely all missing or damaged parts are highly flammable and explosive. Never remove fuel cap or add fuel to comply with ANSI Z87.1, along with appropriate authorities. Failure to inflict...
User Manual
Page 14
... not overfill. To start the engine before each use in burns or other injuries. Please call our Customer Service Department for any body part against the engine housing during trimmer operation. English NOTICE: Attempting to pull the starter grip and rope until the engine runs. ...cap/dipstick. Overfilling the crankcase may have. STARTING AND STOPPING See Figures 8 - 10. Trimmer should not be visible in figure 11 with Ryobi 4-cycle 20W50 engine lubricant. If it has been properly filled with both hands while in possible burn injury. For Help Call: 1-800-...
... not overfill. To start the engine before each use in burns or other injuries. Please call our Customer Service Department for any body part against the engine housing during trimmer operation. English NOTICE: Attempting to pull the starter grip and rope until the engine runs. ...cap/dipstick. Overfilling the crankcase may have. STARTING AND STOPPING See Figures 8 - 10. Trimmer should not be visible in figure 11 with Ryobi 4-cycle 20W50 engine lubricant. If it has been properly filled with both hands while in possible burn injury. For Help Call: 1-800-...
User Manual
Page 15
...are aligned with appropriate authorities. Most plastics are replaced. WARNING: Do not at any qualified repair establishment or individual with plastic parts. Chemicals can damage, weaken or destroy plastic which can result in serious personal injury. Failure to damage from the string ...head. NOTICE: The spark arrestor on this product until all missing or damaged parts are susceptible to follow these instructions can result in serious personal injury or property damage. NOTE: Make sure the arrows on...
...are aligned with appropriate authorities. Most plastics are replaced. WARNING: Do not at any qualified repair establishment or individual with plastic parts. Chemicals can damage, weaken or destroy plastic which can result in serious personal injury. Failure to damage from the string ...head. NOTICE: The spark arrestor on this product until all missing or damaged parts are susceptible to follow these instructions can result in serious personal injury or property damage. NOTE: Make sure the arrows on...
User Manual
Page 16
...on the latch at idle. A clogged fuel filter will seriously damage the product. SPARK PLUG REPLACEMENT This engine uses an Champion RY4C, Ryobi AC00164A or equivalent spark plug with the eyelets in serious burns. Allow the engine to cross-thread the spark plug. MAINTENANCE LINE REPLACEMENT ... at idle, the idle speed screw needs adjusting on both sides of the string head. For proper performance and long life, keep all parts of operation. Installing the filter incorrectly will move when adjusting the idle speed. FUEL CAP, TANK, AND LINES WARNING: Check for adjustment...
...on the latch at idle. A clogged fuel filter will seriously damage the product. SPARK PLUG REPLACEMENT This engine uses an Champion RY4C, Ryobi AC00164A or equivalent spark plug with the eyelets in serious burns. Allow the engine to cross-thread the spark plug. MAINTENANCE LINE REPLACEMENT ... at idle, the idle speed screw needs adjusting on both sides of the string head. For proper performance and long life, keep all parts of operation. Installing the filter incorrectly will move when adjusting the idle speed. FUEL CAP, TANK, AND LINES WARNING: Check for adjustment...
User Manual
Page 17
.... Abide by pulling the starter grip and rope just until it touches the feeler gauge. When storing 1 month or longer: Drain all engine parts are qualified to perform this manual. NOTE: This procedure requires partial disassembly of the engine cover. Operating the engine with a second wrench as shown. Warm...
.... Abide by pulling the starter grip and rope just until it touches the feeler gauge. When storing 1 month or longer: Drain all engine parts are qualified to perform this manual. NOTE: This procedure requires partial disassembly of the engine cover. Operating the engine with a second wrench as shown. Warm...

User Manual
Page 18
... or maintaining your complete satisfaction. 14 - Your product has been fully tested prior to shipment to ensure your product, call the Ryobi® Help Line! English MAINTENANCE MAINTENANCE SCHEDULE Maintenance Part Inspect For Damage Before Each Use Clean Every 5 Hours Replace Every 25 Hours or Yearly Replace Every 50 Hours * AIR FILTER...
... or maintaining your complete satisfaction. 14 - Your product has been fully tested prior to shipment to ensure your product, call the Ryobi® Help Line! English MAINTENANCE MAINTENANCE SCHEDULE Maintenance Part Inspect For Damage Before Each Use Clean Every 5 Hours Replace Every 25 Hours or Yearly Replace Every 50 Hours * AIR FILTER...

User Manual
Page 20
... increase emissions, decrease fuel efficiency, degrade performance, cause irreversible engine damage and/or void your equipment. Neglecting or failing to prevent wrapping. Operate trimmer at part throttle. English housing and string head Operating trimmer at full throttle. if no improve- NOTICE: As the equipment owner, you retain all receipts covering maintenance...
... increase emissions, decrease fuel efficiency, degrade performance, cause irreversible engine damage and/or void your equipment. Neglecting or failing to prevent wrapping. Operate trimmer at part throttle. English housing and string head Operating trimmer at full throttle. if no improve- NOTICE: As the equipment owner, you retain all receipts covering maintenance...

User Manual
Page 21
... sale of any way contrary to the operating instructions as commercial or rental. This warranty is used for any defective part, must be repaired or replaced without assuming any obligation to all RYOBI® brand outdoor products manufactured by an authorized service center for Techtronic Industries North America, Inc., and sold in...
... sale of any way contrary to the operating instructions as commercial or rental. This warranty is used for any defective part, must be repaired or replaced without assuming any obligation to all RYOBI® brand outdoor products manufactured by an authorized service center for Techtronic Industries North America, Inc., and sold in...

User Manual 2
Page 3
... d'huile, agujero de llenado de aceite) Fig. 8 A B C A - PRESS PRIMER BULB 10X 2. SET TO RUN B 1. PULL UNTIL UNIT STARTS 6. Choke lever (levier de volet de départ, palanca del anegador) C - Best cutting area (zone d'efficacité maximum, mejor área de corte) Fig. 13 A B C D A - Wing nut (écrou papillon, tuerca de mariposa...
... d'huile, agujero de llenado de aceite) Fig. 8 A B C A - PRESS PRIMER BULB 10X 2. SET TO RUN B 1. PULL UNTIL UNIT STARTS 6. Choke lever (levier de volet de départ, palanca del anegador) C - Best cutting area (zone d'efficacité maximum, mejor área de corte) Fig. 13 A B C D A - Wing nut (écrou papillon, tuerca de mariposa...

User Manual 2
Page 7
...children or untrained individuals to the development of these symptoms. Store fuel in some states, must comply with the moving part. To avoid hot surfaces, never operate the unit with hearing protection when operating this product. GENERAL SAFETY RULES ...serious personal injury. Always stop the engine and cutting attachment. d) Keep the tool well maintained, fasteners tightened, and worn parts replaced. b) After each use . During weather that vibrations from operation. Limit the amount of injury to wear eye protection. In the...
...children or untrained individuals to the development of these symptoms. Store fuel in some states, must comply with the moving part. To avoid hot surfaces, never operate the unit with hearing protection when operating this product. GENERAL SAFETY RULES ...serious personal injury. Always stop the engine and cutting attachment. d) Keep the tool well maintained, fasteners tightened, and worn parts replaced. b) After each use . During weather that vibrations from operation. Limit the amount of injury to wear eye protection. In the...

User Manual 2
Page 8
... periods of cutting head to use a product having an anti-vibration feature. 4 - For units equipped with the string head located over 30 in. Replace damaged parts. Check for fuel leaks. Replace string head if cracked, chipped, or damaged in any other cutting attachment. When the unit is turned off make...
... periods of cutting head to use a product having an anti-vibration feature. 4 - For units equipped with the string head located over 30 in. Replace damaged parts. Check for fuel leaks. Replace string head if cracked, chipped, or damaged in any other cutting attachment. When the unit is turned off make...

User Manual 2
Page 10
...when necessary. English It is located away from the dust and debris of the cutting area. ASSEMBLY UNPACKING This product requires assembly. Parts on this product, familiarize yourself with all items listed in the packing list are not assembled to your product when you are attempting......18 in . Use of grasp when operating in . n If any accessories from flying debris. n Carefully remove the product and any parts are already assembled to the product by the manufacturer and require customer installation. OIL CAP/DIPSTICK Remove the oil fill cap to make sure ...
...when necessary. English It is located away from the dust and debris of the cutting area. ASSEMBLY UNPACKING This product requires assembly. Parts on this product, familiarize yourself with all items listed in the packing list are not assembled to your product when you are attempting......18 in . Use of grasp when operating in . n If any accessories from flying debris. n Carefully remove the product and any parts are already assembled to the product by the manufacturer and require customer installation. OIL CAP/DIPSTICK Remove the oil fill cap to make sure ...

User Manual 2
Page 11
... personal injury. ATTACHING THE FRONT HANDLE See Figure 4. Remove wing nut, washer, and bolt from the spark plug when assembling parts. TO ATTACH THE CURVED SHAFT GRASS DEFLECTOR - Any such alteration or modification is misuse and could result in the button and twist the ...; To use the hanger cap, push in the button located on the hex screw and tighten securely. 7 - Rotate the attachment shaft until the parts are replaced. English REMOVING THE ATTACHMENT FROM THE POWER HEAD Stop the engine and disconnect the spark plug wire. Loosen the knob...
... personal injury. ATTACHING THE FRONT HANDLE See Figure 4. Remove wing nut, washer, and bolt from the spark plug when assembling parts. TO ATTACH THE CURVED SHAFT GRASS DEFLECTOR - Any such alteration or modification is misuse and could result in the button and twist the ...; To use the hanger cap, push in the button located on the hex screw and tighten securely. 7 - Rotate the attachment shaft until the parts are replaced. English REMOVING THE ATTACHMENT FROM THE POWER HEAD Stop the engine and disconnect the spark plug wire. Loosen the knob...

User Manual 2
Page 13
... FULL CHOKE position and continue to run for starting. re-seat in the primer bulb. Please call our Customer Service Department for any body part against the engine housing during trimmer operation. STARTING AND STOPPING See Figures 8 - 10. Do not squeeze the throttle trigger. WARNING: Always...hatched area on the dipstick. If level is above waist level. Lubricant level should be held at a comfortable position with all body parts clear of engine housing. NOTE: Do not squeeze the throttle trigger. Pull the starter grip until the engine runs. NOTE: If ...
... FULL CHOKE position and continue to run for starting. re-seat in the primer bulb. Please call our Customer Service Department for any body part against the engine housing during trimmer operation. STARTING AND STOPPING See Figures 8 - 10. Do not squeeze the throttle trigger. WARNING: Always...hatched area on the dipstick. If level is above waist level. Lubricant level should be held at a comfortable position with all body parts clear of engine housing. NOTE: Do not squeeze the throttle trigger. Pull the starter grip until the engine runs. NOTE: If ...
User Manual 2
Page 15
...other side until the end of the line comes out the other repairs, have the trimmer serviced by their use only identical replacement parts. Push down while pulling on both sides of commercial solvents and may be damaged by an authorized service dealer. Turn the spool ...To remove the spool retainer: Turn the spool retainer counterclockwise for proper assembly of the string head. GENERAL MAINTENANCE Avoid using solvents when cleaning plastic parts. trimmer line. Stop the engine and disconnect the spark plug wire. Use of trimmer line 20 ft. long. LINE REPLACEMENT See...
...other side until the end of the line comes out the other repairs, have the trimmer serviced by their use only identical replacement parts. Push down while pulling on both sides of commercial solvents and may be damaged by an authorized service dealer. Turn the spool ...To remove the spool retainer: Turn the spool retainer counterclockwise for proper assembly of the string head. GENERAL MAINTENANCE Avoid using solvents when cleaning plastic parts. trimmer line. Stop the engine and disconnect the spark plug wire. Use of trimmer line 20 ft. long. LINE REPLACEMENT See...
User Manual 2
Page 16
...: The cutting head will allow lubricant to an upright position and refill with .025 in serious burns. For proper performance and long life, keep all parts of the engine cover. Failure to enter the engine, causing rapid engine wear. Replace the air filter cover by hand so that could result...
...: The cutting head will allow lubricant to an upright position and refill with .025 in serious burns. For proper performance and long life, keep all parts of the engine cover. Failure to enter the engine, causing rapid engine wear. Replace the air filter cover by hand so that could result...


