Operator's Manual
Page 5
...the risk of dust. Check the work area before each use for gasoline and restrain the unit from the unit. Remove all moving before starting . Service on a ladder, rooftop, tree, or other unstable support. This product is above shoulder level to follow all instructions. Check..., allow to cool before refueling. Loosen fuel cap slowly to release pressure and to keep the wire away from the plug to prevent starting engine. Never attempt to cool. Empty fuel tank into rotating parts, do not wear loose clothing, scarves, neck chains, etc...
...the risk of dust. Check the work area before each use for gasoline and restrain the unit from the unit. Remove all moving before starting . Service on a ladder, rooftop, tree, or other unstable support. This product is above shoulder level to follow all instructions. Check..., allow to cool before refueling. Loosen fuel cap slowly to release pressure and to keep the wire away from the plug to prevent starting engine. Never attempt to cool. Empty fuel tank into rotating parts, do not wear loose clothing, scarves, neck chains, etc...
Operator's Manual
Page 6
... objects inside the blower tubes. Use only as directed in the direction of ignition until fuel vapors have stopped rotating before starting engine. Never attempt to burn off spilled fuel under any other debris can cause severe injury. When used as a vacuum... fuel with contacting rotating parts, stop engine, and allow to cool before installing or removing attachments. Always close vacuum bag completely before starting the engine. specific SAFETY RULES Always hold the blower/vacuum in a container approved for gasoline. Mix fuel outdoors...
... objects inside the blower tubes. Use only as directed in the direction of ignition until fuel vapors have stopped rotating before starting engine. Never attempt to burn off spilled fuel under any other debris can cause severe injury. When used as a vacuum... fuel with contacting rotating parts, stop engine, and allow to cool before installing or removing attachments. Always close vacuum bag completely before starting the engine. specific SAFETY RULES Always hold the blower/vacuum in a container approved for gasoline. Mix fuel outdoors...

Operator's Manual
Page 8
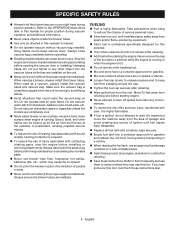
... Bag Vacuum Bag Adaptor 2-Cycle Engine Lubricant Operator's Manual NOTE: Read and remove all operating features and safety rules. SIMPLE START™ The Simple Start™ allows for assistance. Use of the project you to scrape wet leaves or debris while operating the blower. Vacuum tubes...installed on the tool and in this list are damaged or missing, please call 1-800-860-4050 for easier and quicker starting. Before use of the information on the blower using any accessories from the box. FEATURES PRODUCT SPECIFICATIONS Engine Displacement...26cc Air Velocity:...
... Bag Vacuum Bag Adaptor 2-Cycle Engine Lubricant Operator's Manual NOTE: Read and remove all operating features and safety rules. SIMPLE START™ The Simple Start™ allows for assistance. Use of the project you to scrape wet leaves or debris while operating the blower. Vacuum tubes...installed on the tool and in this list are damaged or missing, please call 1-800-860-4050 for easier and quicker starting. Before use of the information on the blower using any accessories from the box. FEATURES PRODUCT SPECIFICATIONS Engine Displacement...26cc Air Velocity:...
Operator's Manual
Page 9
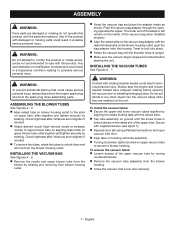
... is zipped and closed before opening opposite the zipper. Always stop the engine and ensure impeller blades have stopped rotating before starting that could result in possible serious personal injury. Check tightness after initial use with the raised slots. Tap tube... Close the vacuum inlet cover door securely. 7 - Use of the upper vacuum tube by twisting. WARNING: To prevent accidental starting the unit. slide together and tighten securely by turning counterclockwise. Remove the vacuum tube assembly from blower housing outlet. Unzip...
... is zipped and closed before opening opposite the zipper. Always stop the engine and ensure impeller blades have stopped rotating before starting that could result in possible serious personal injury. Check tightness after initial use with the raised slots. Tap tube... Close the vacuum inlet cover door securely. 7 - Use of the upper vacuum tube by twisting. WARNING: To prevent accidental starting the unit. slide together and tighten securely by turning counterclockwise. Remove the vacuum tube assembly from blower housing outlet. Unzip...
Operator's Manual
Page 10
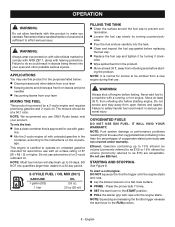
... than usable in the container, according to comply with ANSI Z87.1, along with a running or hot engine. WARNING: Always shut off engine before start lever to the RUN position. 8 - Do not smoke and stay away from the product. Move at least 30 ft. Press the... percentages of 87 [(R + M) / 2] or higher. IT WILL VOID YOUR WARRANTY. Gasoline containing up to make you use ONLY Ryobi (exact mix) your product. STARTING AND STOPPING See Figure 8. OPERATION WARNING: Do not allow familiarity with this product for use with gaso- APPLICATIONS You may use this ...
... than usable in the container, according to comply with ANSI Z87.1, along with a running or hot engine. WARNING: Always shut off engine before start lever to the RUN position. 8 - Do not smoke and stay away from the product. Move at least 30 ft. Press the... percentages of 87 [(R + M) / 2] or higher. IT WILL VOID YOUR WARRANTY. Gasoline containing up to make you use ONLY Ryobi (exact mix) your product. STARTING AND STOPPING See Figure 8. OPERATION WARNING: Do not allow familiarity with this product for use with gaso- APPLICATIONS You may use this ...
Operator's Manual
Page 11
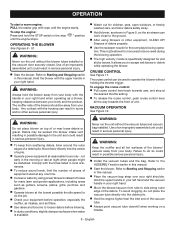
...without holding the throttle trigger. Hold the upper handle in your left hand and the vacuum handle in serious personal injury. Start the blower. English To engage the cruise control: Pull cruise control lever back towards the front of a debris pile. Failure... personal injury. Cruise control See Figure 11. WARNING: Keep the muffler and all the way towards user, and stop " until the engine starts. " position OPERATING THE BLOWER See Figures 9 - 10. Hold the blower with the housing can result in your equipment before operation, especially...
...without holding the throttle trigger. Hold the upper handle in your left hand and the vacuum handle in serious personal injury. Start the blower. English To engage the cruise control: Pull cruise control lever back towards the front of a debris pile. Failure... personal injury. Cruise control See Figure 11. WARNING: Keep the muffler and all the way towards user, and stop " until the engine starts. " position OPERATING THE BLOWER See Figures 9 - 10. Hold the blower with the housing can result in your equipment before operation, especially...
Operator's Manual
Page 13
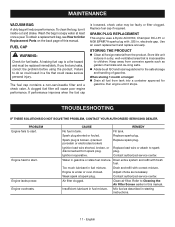
... engine performance. FUEL CAP WARNING: Check for the safe storage and handling of this manual. SPARK PLUG replacement This engine uses a Ryobi AC00160, Champion RCJ-6Y or NGK BPMR7A spark plug with correct mixture. STORING THE PRODUCT Clean all fuel from spark plug... fouled. Replace spark plug. Spark plug is under or over choked. Drain entire system and refill with fresh fuel. Too much lubricant in starting instructions. 11 - Engine is broken. (cracked porcelain or electrodes broken) Replace spark plug. Adjust choke as garden chemicals and...
... engine performance. FUEL CAP WARNING: Check for the safe storage and handling of this manual. SPARK PLUG replacement This engine uses a Ryobi AC00160, Champion RCJ-6Y or NGK BPMR7A spark plug with correct mixture. STORING THE PRODUCT Clean all fuel from spark plug... fouled. Replace spark plug. Spark plug is under or over choked. Drain entire system and refill with fresh fuel. Too much lubricant in starting instructions. 11 - Engine is broken. (cracked porcelain or electrodes broken) Replace spark plug. Adjust choke as garden chemicals and...
Operator's Manual
Page 15
... Coverage. DEFECT WARRANTY COVERAGE REQUIREMENTS: (a) The warranty period begins on or modified part. If any such part (including any RYOBI® Authorized Service Center at the time of the following California Air Resources Board (CARB) statement only applies to model numbers...Metering System (i) Carburetor and internal parts (and/or pressure regulator or fuel injection system). (ii) Air/fuel ratio feedback and control system. (iii) Cold start enrichment system. (iv) Fuel Tank. (2) Air Induction System (i) Controlled hot air intake system. (ii) Intake manifold. (iii) Air filter. (3) ...
... Coverage. DEFECT WARRANTY COVERAGE REQUIREMENTS: (a) The warranty period begins on or modified part. If any such part (including any RYOBI® Authorized Service Center at the time of the following California Air Resources Board (CARB) statement only applies to model numbers...Metering System (i) Carburetor and internal parts (and/or pressure regulator or fuel injection system). (ii) Air/fuel ratio feedback and control system. (iii) Cold start enrichment system. (iv) Fuel Tank. (2) Air Induction System (i) Controlled hot air intake system. (ii) Intake manifold. (iii) Air filter. (3) ...
Parts List
Page 2
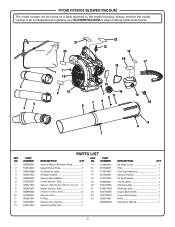
RYOBI RY09053 BLOWER/VACUUM The model number will be found on a label attached to the engine housing. Always mention the model number in 2 22 940752006 Logo Label (... Vacuum Bag Adaptor 1 18 570107001 Air Box Gasket 1 570562001 Lower Vacuum Tube 1 19 940868001 Choke Label 1 660621001 Vacuum Tube Screw (10-14 x 1/2 in.)..... 4 20 940734083 Starting Label 1 580892001 Upper Vacuum Tube 1 21 940657039 Warning Label 1 660880001 Screw (1/4-20 x 3/4 in all correspondence regarding your BLOWER/VACUUM or when ordering replacement parts. 2 5 4 21...
RYOBI RY09053 BLOWER/VACUUM The model number will be found on a label attached to the engine housing. Always mention the model number in 2 22 940752006 Logo Label (... Vacuum Bag Adaptor 1 18 570107001 Air Box Gasket 1 570562001 Lower Vacuum Tube 1 19 940868001 Choke Label 1 660621001 Vacuum Tube Screw (10-14 x 1/2 in.)..... 4 20 940734083 Starting Label 1 580892001 Upper Vacuum Tube 1 21 940657039 Warning Label 1 660880001 Screw (1/4-20 x 3/4 in all correspondence regarding your BLOWER/VACUUM or when ordering replacement parts. 2 5 4 21...


