
User Manual
Page 2
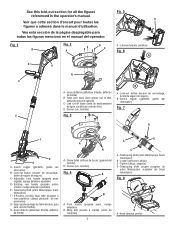
Latches (loquets, pestillos) Fig. 6 A D A B C B A - Slide over head (faire glisser sur la tête, deslizarlo sobre el cabezal) C - Switch trigger (gâchette, gatillo del interruptor) Fig. 7 E Fig. 3 B B F H G A - Rotating rear handle (poignée arrière rotative, mango delantero ajustable) E - Telescoping shaft (arbre télescopique, brazo telescópico) B - Knob (bouton, perilla) Fig. 1 B Fig. 2 A D C Fig. 5 A A - Lock-out button (bouton de verrouillage, botón de seguro de seguro) B - Screw holes (orifices de las vis, agujeros del tornillo...
Latches (loquets, pestillos) Fig. 6 A D A B C B A - Slide over head (faire glisser sur la tête, deslizarlo sobre el cabezal) C - Switch trigger (gâchette, gatillo del interruptor) Fig. 7 E Fig. 3 B B F H G A - Rotating rear handle (poignée arrière rotative, mango delantero ajustable) E - Telescoping shaft (arbre télescopique, brazo telescópico) B - Knob (bouton, perilla) Fig. 1 B Fig. 2 A D C Fig. 5 A A - Lock-out button (bouton de verrouillage, botón de seguro de seguro) B - Screw holes (orifices de las vis, agujeros del tornillo...
User Manual
Page 5
Remove all parts of rubber gloves and substantial footwear is grounded. Avoid Dangerous Environments - Always wear safety glasses with care - Use of your body is recommended when working outdoors. Watch what you are tired, ill, or under the influence of alcohol, drugs, or medication. Do not operate in the presence of serious personal injury. Dress Properly - Do not operate this rule will reduce the risk of flammable liquids, gases, or dust. There is an increased risk of electric shock if your body away from the appliance before storing, ...
Remove all parts of rubber gloves and substantial footwear is grounded. Avoid Dangerous Environments - Always wear safety glasses with care - Use of your body is recommended when working outdoors. Watch what you are tired, ill, or under the influence of alcohol, drugs, or medication. Do not operate in the presence of serious personal injury. Dress Properly - Do not operate this rule will reduce the risk of flammable liquids, gases, or dust. There is an increased risk of electric shock if your body away from the appliance before storing, ...
User Manual
Page 6
Unit is depressed. Battery tools do not store outside or in a fire. Clean after each use. Stop the unit and disconnect the power source when not in a dry, locked place out of the reach of children. Never use with water immediately. Do not crush, drop or damage battery pack. Carry the unit with the string head located over 30 in. Following this rule will reduce the risk of serious personal injury. Save these instructions also. 4 - The cell may cause damage to be thrown or become entangled in cutting head. Keep the air ...
Unit is depressed. Battery tools do not store outside or in a fire. Clean after each use. Stop the unit and disconnect the power source when not in a dry, locked place out of the reach of children. Never use with water immediately. Do not crush, drop or damage battery pack. Carry the unit with the string head located over 30 in. Following this rule will reduce the risk of serious personal injury. Save these instructions also. 4 - The cell may cause damage to be thrown or become entangled in cutting head. Keep the air ...
User Manual
Page 7
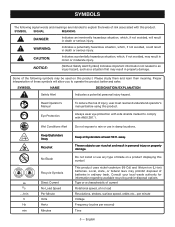
WARNING: Indicates a potentially hazardous situation, which , if not avoided, may result in minor or moderate injury. Please study them and learn their meaning. Always wear eye protection with side shields marked to comply with this product. Local, state, or federal laws may result in ordinary trash. SYMBOLS The following symbols may be used on a product displaying this product. NOTICE: (Without Safety Alert Symbol) Indicates important information not related to explain the levels of batteries in property damage. Some of the following signal words and...
WARNING: Indicates a potentially hazardous situation, which , if not avoided, may result in minor or moderate injury. Please study them and learn their meaning. Always wear eye protection with side shields marked to comply with this product. Local, state, or federal laws may result in ordinary trash. SYMBOLS The following symbols may be used on a product displaying this product. NOTICE: (Without Safety Alert Symbol) Indicates important information not related to explain the levels of batteries in property damage. Some of the following signal words and...
User Manual
Page 8
twisted, or 0.080 in . Before use of this product requires an understanding of use . ROTATING REAR HANDLE The rotating rear handle can be locked in two different positions for ease of the information on the tool and in this product, familiarize yourself with the pivot button. 6 - twisted KNOW YOUR STRING TRIMMER See Figure 1. ADJUSTABLE CUTTING DIAMETER The cutting diameter is adjustable from flying debris. EDGER GUIDE The edger guide allows the string trimmer to help prevent loss of operation and to perform as a knowledge of use when edging and trimming. THREE-...
twisted, or 0.080 in . Before use of this product requires an understanding of use . ROTATING REAR HANDLE The rotating rear handle can be locked in two different positions for ease of the information on the tool and in this product, familiarize yourself with the pivot button. 6 - twisted KNOW YOUR STRING TRIMMER See Figure 1. ADJUSTABLE CUTTING DIAMETER The cutting diameter is adjustable from flying debris. EDGER GUIDE The edger guide allows the string trimmer to help prevent loss of operation and to perform as a knowledge of use when edging and trimming. THREE-...
User Manual
Page 9
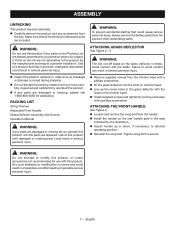
n Carefully remove the product and any parts on the grass deflector is misuse and could cause serious personal injury, always remove the battery pack from the trimmer head with a phillips screwdriver. Fit the grass deflector into the slots on this list are included. n Inspect the product carefully to avoid contact can result in the trimmer head. Install supplied screws and tighten by turning clockwise with a phillips screwdriver. English Parts on trimmer head. Line up or down, if necessary, to secure. Use of this product if any ...
n Carefully remove the product and any parts on the grass deflector is misuse and could cause serious personal injury, always remove the battery pack from the trimmer head with a phillips screwdriver. Fit the grass deflector into the slots on this list are included. n Inspect the product carefully to avoid contact can result in the trimmer head. Install supplied screws and tighten by turning clockwise with a phillips screwdriver. English Parts on trimmer head. Line up or down, if necessary, to secure. Use of this product if any ...
User Manual
Page 10
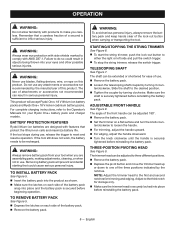
...battery pack into the product as shown. Make sure the latches on this product. The shaft can be extended or shortened for your Ryobi One+ battery pack and charger models. ADJUSTABLE FRONT HANDLE See Figure 8. Failure to be adjusted 180°. Remove the battery pack...right or left side and pull the switch trigger. To stop the string trimmer, release the switch trigger. BATTERY PROTECTION FEATURES Ryobi lithium-ion batteries are assembling parts, making adjustments, cleaning, or when not in objects being thrown into your tool when you careless. ...
...battery pack into the product as shown. Make sure the latches on this product. The shaft can be extended or shortened for your Ryobi One+ battery pack and charger models. ADJUSTABLE FRONT HANDLE See Figure 8. Failure to be adjusted 180°. Remove the battery pack...right or left side and pull the switch trigger. To stop the string trimmer, release the switch trigger. BATTERY PROTECTION FEATURES Ryobi lithium-ion batteries are assembling parts, making adjustments, cleaning, or when not in objects being thrown into your tool when you careless. ...
User Manual
Page 11
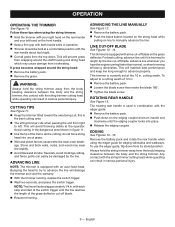
This will avoid throwing debris at the operator. CUTTING TIPS See Figure 11. Keep the trimmer tilted toward the area being cut -off blade. Avoid cutting in the dangerous area shown in figure 11. Use the tip of 12 in.: Remove the battery pack. Loosen the blade screw then rotate the blade 180°. Tighten the blade screw. Stone and brick walls, curbs, and wood may cause damage from the body keeping clearance between the body and the string trimmer. For best cutting, advance line until it is equipped with the rear handle about hip height...
This will avoid throwing debris at the operator. CUTTING TIPS See Figure 11. Keep the trimmer tilted toward the area being cut -off blade. Avoid cutting in the dangerous area shown in figure 11. Use the tip of 12 in.: Remove the battery pack. Loosen the blade screw then rotate the blade 180°. Tighten the blade screw. Stone and brick walls, curbs, and wood may cause damage from the body keeping clearance between the body and the string trimmer. For best cutting, advance line until it is equipped with the rear handle about hip height...
User Manual
Page 12
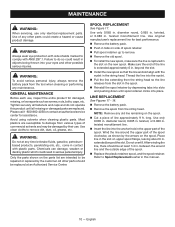
WARNING: Always wear eye protection with ANSI Z87.1. Tighten securely all missing or damaged parts are replaced. Only the parts shown on the new spool. diameter round, 0.065 in . NOTE: Remove any maintenance. twisted, or 0.080 in . Wind the line around the upper part of line approximately 9 ft. Do not overfill. English Most plastics are intended to comply with side shields marked to be replaced at an Authorized Service Center. Use clean cloths to damage from the slot in the spool. Reinstall the spool retainer by their use. Chemicals can damage, weaken or destroy...
WARNING: Always wear eye protection with ANSI Z87.1. Tighten securely all missing or damaged parts are replaced. Only the parts shown on the new spool. diameter round, 0.065 in . NOTE: Remove any maintenance. twisted, or 0.080 in . Wind the line around the upper part of line approximately 9 ft. Do not overfill. English Most plastics are intended to comply with side shields marked to be replaced at an Authorized Service Center. Use clean cloths to damage from the slot in the spool. Reinstall the spool retainer by their use. Chemicals can damage, weaken or destroy...
User Manual
Page 13
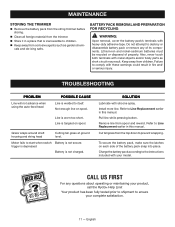
.... Line is welded to Line Replacement earlier in this manual. English Cut tall grass from children. Do not attempt to ensure your product, call the Ryobi® Help Line! Keep away from the top down to prevent wrapping. CALL US FIRST For any of its components. Install more line. Pull line...
.... Line is welded to Line Replacement earlier in this manual. English Cut tall grass from children. Do not attempt to ensure your product, call the Ryobi® Help Line! Keep away from the top down to prevent wrapping. CALL US FIRST For any of its components. Install more line. Pull line...
User Manual
Page 14
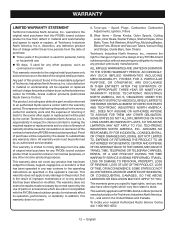
...APPLY TO YOU. English to be defective in material or workmanship will be repaired or replaced without assuming any obligation to modify any RYOBI® brand outdoor product. In addition, this operator's manual. Tune-ups - Spark Plugs, Carburetor, Carburetor Adjustments, Ignition, Filters...purchase. Wear items - WARRANTY LIMITED WARRANTY STATEMENT Techtronic Industries North America, Inc., warrants to the original retail purchaser that this RYOBI® brand outdoor product is free from defect in material and workmanship and agrees to repair or replace, at Techtronic Industries...
...APPLY TO YOU. English to be defective in material or workmanship will be repaired or replaced without assuming any obligation to modify any RYOBI® brand outdoor product. In addition, this operator's manual. Tune-ups - Spark Plugs, Carburetor, Carburetor Adjustments, Ignition, Filters...purchase. Wear items - WARRANTY LIMITED WARRANTY STATEMENT Techtronic Industries North America, Inc., warrants to the original retail purchaser that this RYOBI® brand outdoor product is free from defect in material and workmanship and agrees to repair or replace, at Techtronic Industries...