User Guide
Page 3
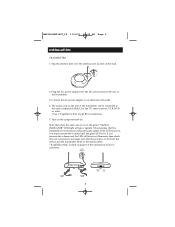
Connect the AC power adapter to the section titled "Troubleshooting" located on , the green "SIGNAL INDICATOR" LED light will glow (green). Turn on for both the device and the transmitter. If you must increase the ... indicates that when the audio device is receiving an adequate audio signal. Note that the transmitter is on page 8 of this instruction book for R & L type RCA connections. 5. Plug the AC power adapter into the DC jack located on the rear of the transmitter can be connected to the audio output jack...
Connect the AC power adapter to the section titled "Troubleshooting" located on , the green "SIGNAL INDICATOR" LED light will glow (green). Turn on for both the device and the transmitter. If you must increase the ... indicates that when the audio device is receiving an adequate audio signal. Note that the transmitter is on page 8 of this instruction book for R & L type RCA connections. 5. Plug the AC power adapter into the DC jack located on the rear of the transmitter can be connected to the audio output jack...
User Guide
Page 8
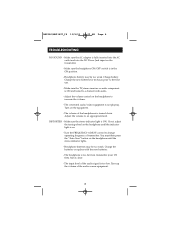
.... Make sure the headphone ON/OFF switch is too low. Charge the new batteries for 24 hours prior to increase the volume. - WHP160/WHP160T_IB 11/5/01 10:09 AM Page 8 TROUBLESHOOTING NO SOUND - Adjust the volume to change operating frequency of the audio source equipment. 8 Turn up the volume of transmitter. Make...
.... Make sure the headphone ON/OFF switch is too low. Charge the new batteries for 24 hours prior to increase the volume. - WHP160/WHP160T_IB 11/5/01 10:09 AM Page 8 TROUBLESHOOTING NO SOUND - Adjust the volume to change operating frequency of the audio source equipment. 8 Turn up the volume of transmitter. Make...