PDWM2550 Manual 1
Page 1
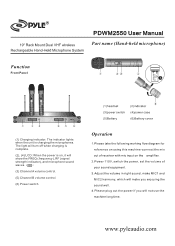
The indicator lights when the unit is on, it will show the FREQ (frequency), RF (signal strength indicator), and microphone sound waves. (3) Channel A volume control. (5) Channel B volume control. (6) Power switch. (1) Charging indicator. The light will turn off when charging is complete. (2), (4) LCD: When the power is charging the microphones.
The indicator lights when the unit is on, it will show the FREQ (frequency), RF (signal strength indicator), and microphone sound waves. (3) Channel A volume control. (5) Channel B volume control. (6) Power switch. (1) Charging indicator. The light will turn off when charging is complete. (2), (4) LCD: When the power is charging the microphones.
PDWM2550 Manual 1
Page 2
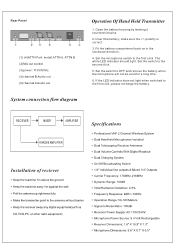
make sure the +/- Set the switch to the first click, please recharge the battery. If the LED indicator does not light when switched to the second click. 5. Insert the battery; Fit the battery compartment back on in the clockwise direction. 4. Open the battery housing by twisting it counterclockwise. 2. polarity is correct. 3. Set the switch to the first click. Set the microphone switch to OFF and remove the battery when the microphone will not be used for a long time. 6. 1. The white LED indicator should light.
make sure the +/- Set the switch to the first click, please recharge the battery. If the LED indicator does not light when switched to the second click. 5. Insert the battery; Fit the battery compartment back on in the clockwise direction. 4. Open the battery housing by twisting it counterclockwise. 2. polarity is correct. 3. Set the switch to the first click. Set the microphone switch to OFF and remove the battery when the microphone will not be used for a long time. 6. 1. The white LED indicator should light.


