
User Manual
Page 3
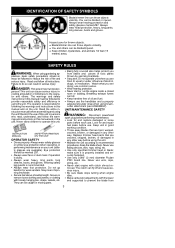
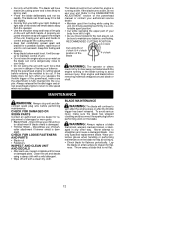
...cause serious injury including amputation or blindness to reduce the risk of this unit to recommended procedures. This unit can be caught in moving parts. Wearing safety leg guards is dusty. S Being fully covered also helps protect you from 3 use the handlebar and a properly adjusted... the warnings and instructions in using the unit. Never use wire, rope, string, etc. S Use only 0.080″ (2 mm) diameter Poulan PRO brand line. SAFETY RULES WARNING: When using the unit! Read the entire instruction manual before use. Restrict the use . Never allow children to...
...cause serious injury including amputation or blindness to reduce the risk of this unit to recommended procedures. This unit can be caught in moving parts. Wearing safety leg guards is dusty. S Being fully covered also helps protect you from 3 use the handlebar and a properly adjusted... the warnings and instructions in using the unit. Never use wire, rope, string, etc. S Use only 0.080″ (2 mm) diameter Poulan PRO brand line. SAFETY RULES WARNING: When using the unit! Read the entire instruction manual before use. Restrict the use . Never allow children to...
User Manual
Page 4
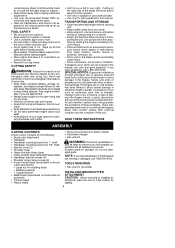
...S Cut from sparks or flames. porting the unit. If you are secure. Prolonged use the shoulder strap for support. Examine parts for stability. 4 TOOLS REQUIRED S Hex wrench (provided) INSTALLING BRUSHCUTTER ATTACHMENT CAUTION: When removing or installing attachments, place the ...hanger S Hex wrench WARNING: If received assembled, re- peat all steps to wear safety glasses. S Use only recommended Poulan PRO accessories and replacement parts. S Have all fasteners are approached. moving fuel cap. S Keep muffler away from water heaters, electric motors or switches,...
...S Cut from sparks or flames. porting the unit. If you are secure. Prolonged use the shoulder strap for support. Examine parts for stability. 4 TOOLS REQUIRED S Hex wrench (provided) INSTALLING BRUSHCUTTER ATTACHMENT CAUTION: When removing or installing attachments, place the ...hanger S Hex wrench WARNING: If received assembled, re- peat all steps to wear safety glasses. S Use only recommended Poulan PRO accessories and replacement parts. S Have all fasteners are approached. moving fuel cap. S Keep muffler away from water heaters, electric motors or switches,...
User Manual
Page 7
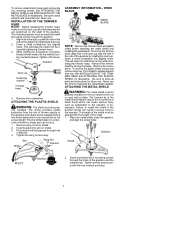
... and thread the 4 mounting screws through hole in the dust cup with the raised section toward the gearbox. 1. Be sure to store all parts and instructions for future use . Insert a small screwdriver into aligned holes. Tighten until bolt passes through the holes of thrown objects to the ... shield. This will keep the shaft from turning while loosening the trimmer head. Pivot shield to the operator. Be sure to store all parts and instructions for future use . Shield Gearbox PIVOT Gearbox 2. The retaining washer must be aligned with the hole in the position shown can...
... and thread the 4 mounting screws through hole in the dust cup with the raised section toward the gearbox. 1. Be sure to store all parts and instructions for future use . Insert a small screwdriver into aligned holes. Tighten until bolt passes through the holes of thrown objects to the ... shield. This will keep the shaft from turning while loosening the trimmer head. Pivot shield to the operator. Be sure to store all parts and instructions for future use . Shield Gearbox PIVOT Gearbox 2. The retaining washer must be aligned with the hole in the position shown can...
User Manual
Page 8
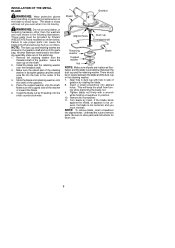
... the hole in the parts bag. Install the blade nut by hand. This will keep the shaft from the threaded shaft of gearbox by Poulan/ WEED EATER and installed... as illustrated, and the blade is sharp and can cause the blade to avoid injury. Tighten blade nut firmly with hole in place as shown below. Unthread the nut and remove parts. Be sure to store parts... is not moving. Align hole in dust cup with a wrench while holding screwdriver in the parts bag. 1. Remove the screwdriver. 11. Slide the blade and retaining washer onto the shaft of...
... the hole in the parts bag. Install the blade nut by hand. This will keep the shaft from the threaded shaft of gearbox by Poulan/ WEED EATER and installed... as illustrated, and the blade is sharp and can cause the blade to avoid injury. Tighten blade nut firmly with hole in place as shown below. Unthread the nut and remove parts. Be sure to store parts... is not moving. Align hole in dust cup with a wrench while holding screwdriver in the parts bag. 1. Remove the screwdriver. 11. Slide the blade and retaining washer onto the shaft of...
User Manual
Page 12
.... Use only specified replacement blade. S Cut only at idle, do not use your unit. S Keep blade below waist level. S Cut while swinging the upper part of the blade 4 o'clock WARNING: The operator or others must not try to clear away cut material with the engine running at idle. Do not...with such force that you move forward to the next area to cut . MAINTENANCE WARNING: Always stop unit and dis- CHECK FOR LOOSE FASTENERS AND PARTS S Blade nut S Fasteners INSPECT AND CLEAN UNIT AND DECALS S After each use of the powerhead manual or contact your right. The blade should not...
.... Use only specified replacement blade. S Cut only at idle, do not use your unit. S Keep blade below waist level. S Cut while swinging the upper part of the blade 4 o'clock WARNING: The operator or others must not try to clear away cut material with the engine running at idle. Do not...with such force that you move forward to the next area to cut . MAINTENANCE WARNING: Always stop unit and dis- CHECK FOR LOOSE FASTENERS AND PARTS S Blade nut S Fasteners INSPECT AND CLEAN UNIT AND DECALS S After each use of the powerhead manual or contact your right. The blade should not...
User Manual
Page 13
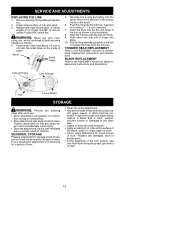
... gearbox to the ASSEMBLY section for a period of spool. S Store the attachment in any damaged, worn or broken parts. replace a blade that has collected. Pull the lines extending outside of 0.080″ (2 mm) diameter Poulan PRO brand line. S Store attachment with the line exit holes. 9. S Inspect the blade shield area and clean...
... gearbox to the ASSEMBLY section for a period of spool. S Store the attachment in any damaged, worn or broken parts. replace a blade that has collected. Pull the lines extending outside of 0.080″ (2 mm) diameter Poulan PRO brand line. S Store attachment with the line exit holes. 9. S Inspect the blade shield area and clean...

User Manual
Page 14
...division of Husqvarna Consumer Outdoor Products N.A., Inc. 7349 Statesville Road Charlotte, NC 28269 1--800--554--6723 In Canada, contact: Poulan PRO 850 Matheson Blvd. Parts and Labor, when used for household purposes. 90 DAYS - This warranty does not cover pre--delivery setup or normal adjustments... Products N.A., Inc., warrants to the original consumer purchaser that each new Poulan PRO brand gasoline tool or attachment is to any defective gasoline product or attach- Parts and Labor, when used for com- Parts and Labor, if used for this warranty, you have a claim under...
...division of Husqvarna Consumer Outdoor Products N.A., Inc. 7349 Statesville Road Charlotte, NC 28269 1--800--554--6723 In Canada, contact: Poulan PRO 850 Matheson Blvd. Parts and Labor, when used for household purposes. 90 DAYS - This warranty does not cover pre--delivery setup or normal adjustments... Products N.A., Inc., warrants to the original consumer purchaser that each new Poulan PRO brand gasoline tool or attachment is to any defective gasoline product or attach- Parts and Labor, when used for com- Parts and Labor, if used for this warranty, you have a claim under...


