
User Manual
Page 2
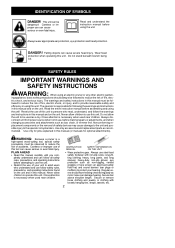
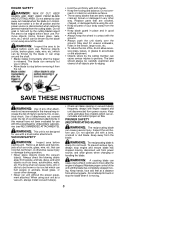
Careless or improper use of your hearing. Always wear appropriate ear protection, eye protection and head protection. Use only accessories and replacement parts as non-fogging, vented goggles or face screen; WARNING: Because a pruner is necessary when used near children. PLAN AHEAD S Read this manual (or manuals for ...
Careless or improper use of your hearing. Always wear appropriate ear protection, eye protection and head protection. Use only accessories and replacement parts as non-fogging, vented goggles or face screen; WARNING: Because a pruner is necessary when used near children. PLAN AHEAD S Read this manual (or manuals for ...
User Manual
Page 4
...Circuit Interrupter (GFCI) protection should a means of these persons may be used for two-handed use a pruner to avoid the possibility of the cut . Replacement parts for an instant. S Avoid any object such as metal fences, or pipes, to cut . The symbol (square within a square) may catch in the ...the backward, upward or sudden forward motion of the guide bar occurring when the chain near the upper tip of the guide bar. S Keep all parts of control. WARNING: All electrical repairs to repair unit. S Do not attempt to this unit. S Do not cut wood only. Always replace bar...
...Circuit Interrupter (GFCI) protection should a means of these persons may be used for two-handed use a pruner to avoid the possibility of the cut . Replacement parts for an instant. S Avoid any object such as metal fences, or pipes, to cut . The symbol (square within a square) may catch in the ...the backward, upward or sudden forward motion of the guide bar occurring when the chain near the upper tip of the guide bar. S Keep all parts of control. WARNING: All electrical repairs to repair unit. S Do not attempt to this unit. S Do not cut wood only. Always replace bar...
User Manual
Page 6
...and grease. S Maintain unit according to avoid creating a hazard and/or voiding warranty. Use only 0.080″ (2 mm) diameter Poulan brand line. make sure it is damaged should be repaired or replaced by a qualified service dealer with the exception of this manual (...indoors in - S Install required shield properly before using the trimmer attachment. leased. S Follow instructions for lubricating and changing accessories and for damaged parts. S Use unit properly. S Keep oil cap, screws, and fasteners securely tightened. S When storing unit, unplug from unstable surfaces such as...
...and grease. S Maintain unit according to avoid creating a hazard and/or voiding warranty. Use only 0.080″ (2 mm) diameter Poulan brand line. make sure it is damaged should be repaired or replaced by a qualified service dealer with the exception of this manual (...indoors in - S Install required shield properly before using the trimmer attachment. leased. S Follow instructions for lubricating and changing accessories and for damaged parts. S Use unit properly. S Keep oil cap, screws, and fasteners securely tightened. S When storing unit, unplug from unstable surfaces such as...
User Manual
Page 7
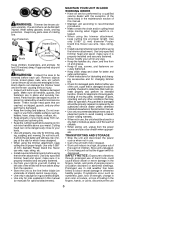
...rocks, glass, wire, etc. S Look behind and use until unit is equipped with both hands S Keep firm footing and balance. S Keep all parts of your unit (as this unit might stop the tines. RECOMMENDED ATTACHMENTS This model is in air intake opening as shown below) when operating the...medical attention. Do not over- S After striking a foreign object, stop the motor and inspect the unit for worn, loose, missing or damaged parts. tor before each optional attach- Clean unit and labels with this could be cut material or hold attachment by the air intake and thrown out...
...rocks, glass, wire, etc. S Look behind and use until unit is equipped with both hands S Keep firm footing and balance. S Keep all parts of your unit (as this unit might stop the tines. RECOMMENDED ATTACHMENTS This model is in air intake opening as shown below) when operating the...medical attention. Do not over- S After striking a foreign object, stop the motor and inspect the unit for worn, loose, missing or damaged parts. tor before each optional attach- Clean unit and labels with this could be cut material or hold attachment by the air intake and thrown out...
User Manual
Page 8
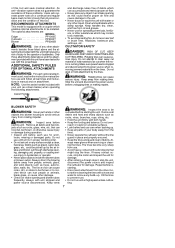
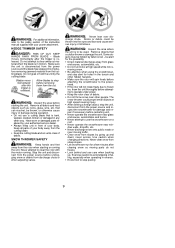
...struck by Underwriters Laboratories (see RECOMMENDED ATTACHMENTS). SAVE THESE INSTRUCTIONS WARNING: Use of the unit until the blade has completely stopped moving parts. S Never place objects inside the vacuum tube(s). When using the unit. To prevent serious injury, always stop engine and ensure ...etc. VACUUM SAFETY WARNING: Inspect area before using your body away from the blade. S Keep firm footing and balance. Replace parts that are cracked, chipped, or damaged before starting unit. PRUNER SAFETY (RECIPROCATING BLADE) WARNING: The reciprocating blade can cause serious...
...struck by Underwriters Laboratories (see RECOMMENDED ATTACHMENTS). SAVE THESE INSTRUCTIONS WARNING: Use of the unit until the blade has completely stopped moving parts. S Never place objects inside the vacuum tube(s). When using the unit. To prevent serious injury, always stop engine and ensure ...etc. VACUUM SAFETY WARNING: Inspect area before using your body away from the blade. S Keep firm footing and balance. Replace parts that are cracked, chipped, or damaged before starting unit. PRUNER SAFETY (RECIPROCATING BLADE) WARNING: The reciprocating blade can cause serious...
User Manual
Page 9
...of your authorized service dealer. Remove objects that is to the powerhead. S Keep the rotor clear of debris. Have worn or damaged parts replaced by the cutting blade. S Direct material discharge away from steep slopes. S Look behind and use the snowthrower on a roof...to operate under power. WARNING: For additional information, refer to avoid slipping or falling, especially when operating in reverse. Remove all parts of the instruction manual supplied with the motor running the unit. S Let snowthrower run motor at high speed causing injury. Exercise ...
...of your authorized service dealer. Remove objects that is to the powerhead. S Keep the rotor clear of debris. Have worn or damaged parts replaced by the cutting blade. S Direct material discharge away from steep slopes. S Look behind and use the snowthrower on a roof...to operate under power. WARNING: For additional information, refer to avoid slipping or falling, especially when operating in reverse. Remove all parts of the instruction manual supplied with the motor running the unit. S Let snowthrower run motor at high speed causing injury. Exercise ...
User Manual
Page 10
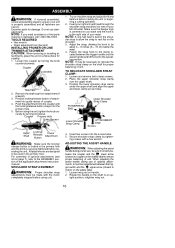
...remains be used in the shoulder strap to relocate the shoulder strap clamp on the safety label. 1. NOTE: If you need assistance or find parts missing or damaged, call 1-800-554-6723. Loosen the coupler by turning the knob counterclockwise. Fasten the strap hook to motor) on the ... using the unit, tighten the knob securely by tighten- ADJUSTING THE ASSIST HANDLE WARNING: When adjusting the assist handle during use damaged parts. Remove the shaft cap from attachment (if present). 3. ger switch and the upper arrow (closest to the clamp located between the trig- ...
...remains be used in the shoulder strap to relocate the shoulder strap clamp on the safety label. 1. NOTE: If you need assistance or find parts missing or damaged, call 1-800-554-6723. Loosen the coupler by turning the knob counterclockwise. Fasten the strap hook to motor) on the ... using the unit, tighten the knob securely by tighten- ADJUSTING THE ASSIST HANDLE WARNING: When adjusting the assist handle during use damaged parts. Remove the shaft cap from attachment (if present). 3. ger switch and the upper arrow (closest to the clamp located between the trig- ...
User Manual
Page 15
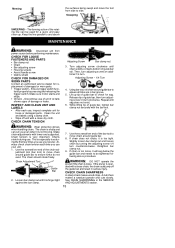
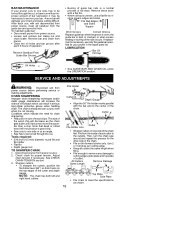
.... Make chain adjustments with the bar tool. 7. Chain Adjustment Tool Guide Bar 2. Turn adjusting screw clockwise until chain solidly contacts bottom of damaged or worn parts. Then, turn adjusting screw an additional 1/4 turn clockwise. Using bar tool, roll chain around guide bar. 8. Lift up . ing screw 1/4 turn ....AND LABELS S After each time you even when it will sag below the guide bar and needs to be used for loose or damaged parts. Use the screwdriver end of guide bar, tighten bar clamp nut securely with lower end supported. Ensure trigger switch func- tions properly ...
.... Make chain adjustments with the bar tool. 7. Chain Adjustment Tool Guide Bar 2. Turn adjusting screw clockwise until chain solidly contacts bottom of damaged or worn parts. Then, turn adjusting screw an additional 1/4 turn clockwise. Using bar tool, roll chain around guide bar. 8. Lift up . ing screw 1/4 turn ....AND LABELS S After each time you even when it will sag below the guide bar and needs to be used for loose or damaged parts. Use the screwdriver end of guide bar, tighten bar clamp nut securely with lower end supported. Ensure trigger switch func- tions properly ...
User Manual
Page 16
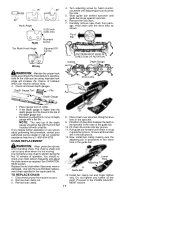
... CHAIN TENSION section. 3. Check chain for your bar. Then, turn the chain saw around and repeat the process for chain sharpening: S Reduction in the repair parts list. S Saw cuts to meet the specifications as the chain gets duller until it becomes more like a powder than a chip. Sharpen cutters. S Keep all sawdust...
... CHAIN TENSION section. 3. Check chain for your bar. Then, turn the chain saw around and repeat the process for chain sharpening: S Reduction in the repair parts list. S Saw cuts to meet the specifications as the chain gets duller until it becomes more like a powder than a chip. Sharpen cutters. S Keep all sawdust...
User Manual
Page 17
... flat with the front half rounded off with a flat file. Remove bar clamp nut. 3. Place chain over sprocket, fitting the drive links in the repair parts list. Ensure all drive links are unsure about performing this procedure, contact your chain tension frequently and adjust the chain tension as shown. Remove the...
... flat with the front half rounded off with a flat file. Remove bar clamp nut. 3. Place chain over sprocket, fitting the drive links in the repair parts list. Ensure all drive links are unsure about performing this procedure, contact your chain tension frequently and adjust the chain tension as shown. Remove the...
User Manual
Page 18
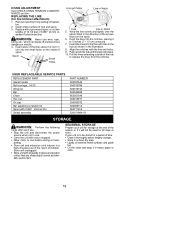
... (7 -- 12 cm) unwound. 7. Store unit unplugged. tally cause injury. Insert ends of 0.080″ (2 mm) diameter Poulan brand line. Push the lines into place. 10. S Carry the unit with 0.080″ trimmer line Shield assembly PART NUMBER 530057546 530015786 530016152 530044908 952051549 530015917 530053072 530069110 952711616 530071964--01 STORAGE WARNING: Perform the...
... (7 -- 12 cm) unwound. 7. Store unit unplugged. tally cause injury. Insert ends of 0.080″ (2 mm) diameter Poulan brand line. Push the lines into place. 10. S Carry the unit with 0.080″ trimmer line Shield assembly PART NUMBER 530057546 530015786 530016152 530044908 952051549 530015917 530053072 530069110 952711616 530071964--01 STORAGE WARNING: Perform the...
User Manual
Page 20
...parts that will wear and require replacement with reasonable use of accessories and/or attachments not specifically recommended by improper handling, improper maintenance or alteration, or the use during the warranty period. This warranty does not cover pre--delivery setup or normal adjustments explained in head. 2. In Canada, contact: Poulan... Road Charlotte, NC 28269 1--800--554--6723 Giving the model number, serial number and date of purchase of your Poulan brand electric or cordless product should fail within two (2) years from whom it was purchased for this product. Crowding ...
...parts that will wear and require replacement with reasonable use of accessories and/or attachments not specifically recommended by improper handling, improper maintenance or alteration, or the use during the warranty period. This warranty does not cover pre--delivery setup or normal adjustments explained in head. 2. In Canada, contact: Poulan... Road Charlotte, NC 28269 1--800--554--6723 Giving the model number, serial number and date of purchase of your Poulan brand electric or cordless product should fail within two (2) years from whom it was purchased for this product. Crowding ...
Parts List
Page 1
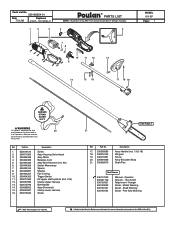
...model due to the Service Reference Indicated for more information.(Located at the END of the IPL) Ref. Operator Wrench - Part No. 17. 530058583 18. 530016152 19. 530016381 20. 530094408 21. 530056570 Description Assy-Handle (Incl. 13 & 18)... Hex (5/32") Attachment - WARNING All repairs, adjustments and 20 maintenance not described in the Operator's Manual must be performed by Qualified Service Personnel. Part No. 1. 530016120 2. 530071962 3. 530404326 4. 530404385 5. 530404386 6. 530404396 7. 530404165 8. 530400897 9. 530404327 10. 530404325 11. 530071965 12. 530057986...
...model due to the Service Reference Indicated for more information.(Located at the END of the IPL) Ref. Operator Wrench - Part No. 17. 530058583 18. 530016152 19. 530016381 20. 530094408 21. 530056570 Description Assy-Handle (Incl. 13 & 18)... Hex (5/32") Attachment - WARNING All repairs, adjustments and 20 maintenance not described in the Operator's Manual must be performed by Qualified Service Personnel. Part No. 1. 530016120 2. 530071962 3. 530404326 4. 530404385 5. 530404386 6. 530404396 7. 530404165 8. 530400897 9. 530404327 10. 530404325 11. 530071965 12. 530057986...
Parts List
Page 2
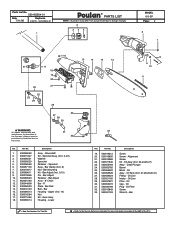
...Cap - Bar Mounting Kit - Bar Adjust Accy - 8" Chain Bar - 8" Plate - Housing - Gear Plunger Barrel Block - Sprocket Assy - Bar = New Part Number For This IPL = Refer to design changes. 2 3 45 MODEL 810 EP Page: 2 6 7 16 17 18 19 20 22 21 25 23 24...530056513 16. 530016284 17. 530071646 18. 530056514 Description Assy. - Sprocket Assy. (Incl. 3,4,5) Washer Sprocket Retainer - Bar Pad Bolt - Bar Housing - Part No. 19. 530016312 20. 530015805 21. 530015886 22. 530071645 23. 530053764 24. 530053765 25. 530056522 26. 530056528 27. 530056524 28. 530021160 29. ...
...Cap - Bar Mounting Kit - Bar Adjust Accy - 8" Chain Bar - 8" Plate - Housing - Gear Plunger Barrel Block - Sprocket Assy - Bar = New Part Number For This IPL = Refer to design changes. 2 3 45 MODEL 810 EP Page: 2 6 7 16 17 18 19 20 22 21 25 23 24...530056513 16. 530016284 17. 530071646 18. 530056514 Description Assy. - Sprocket Assy. (Incl. 3,4,5) Washer Sprocket Retainer - Bar Pad Bolt - Bar Housing - Part No. 19. 530016312 20. 530015805 21. 530015886 22. 530071645 23. 530053764 24. 530053765 25. 530056522 26. 530056528 27. 530056524 28. 530021160 29. ...


