
Owner's Manual
Page 5
...saving 4:9 Delete a sewing sequence 4:9 Select and open a saved sewing sequence 4:9 Open from the machine's memory 4:10 Open from a creative memory card 4:10 Stitch Creator 4:11 Placing single stitches 4:13 Combining single parts of patterns 4:14 More options to edit patterns 4:15 ... the feed dogs Disengaging the IDT Removing the knee lift Connecting the embroidery unit Embroidery hoop Attach the hoop Remove the hoop Remove the embroidery unit Get started to embroider Hooping the fabric Embroider single designs from a card Color changing icon 5:1-5:70 5:2-5:7 5:8-5:9 5:10 5:10...
...saving 4:9 Delete a sewing sequence 4:9 Select and open a saved sewing sequence 4:9 Open from the machine's memory 4:10 Open from a creative memory card 4:10 Stitch Creator 4:11 Placing single stitches 4:13 Combining single parts of patterns 4:14 More options to edit patterns 4:15 ... the feed dogs Disengaging the IDT Removing the knee lift Connecting the embroidery unit Embroidery hoop Attach the hoop Remove the hoop Remove the embroidery unit Get started to embroider Hooping the fabric Embroider single designs from a card Color changing icon 5:1-5:70 5:2-5:7 5:8-5:9 5:10 5:10...

Owner's Manual
Page 6
... formats 5:40 Using the hoop adapter 5:40 Automatic hoop positioning 5:40 Prepare a creative memory card for saving 5:41 Transferring designs from the PC to your Pfaff creative 2170 5:41 How to use the embroidery template 5:42 Putting the embroidery in the embroidery hoop 5:22 Precise Positioning a design 5:23-5:25 Jumping over stitches 5:26 Embroider monograms and letters 5:27-5:30...
... formats 5:40 Using the hoop adapter 5:40 Automatic hoop positioning 5:40 Prepare a creative memory card for saving 5:41 Transferring designs from the PC to your Pfaff creative 2170 5:41 How to use the embroidery template 5:42 Putting the embroidery in the embroidery hoop 5:22 Precise Positioning a design 5:23-5:25 Jumping over stitches 5:26 Embroider monograms and letters 5:27-5:30...
Owner's Manual
Page 18
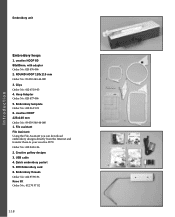
... 21 01 6. File assistant File Assistant Using the File Assistant you can download embroidery designs directly from the Internet and transfer them to your creative 2170. Quick embroidery packet 5. 300 Embroidery card 6. ROUND HOOP 120x115 mm Order No: 93-039-343-44-000 3. Embroidery threads Order No: 412 85 90-96 Knee lift Order No.: 412 70...
... 21 01 6. File assistant File Assistant Using the File Assistant you can download embroidery designs directly from the Internet and transfer them to your creative 2170. Quick embroidery packet 5. 300 Embroidery card 6. ROUND HOOP 120x115 mm Order No: 93-039-343-44-000 3. Embroidery threads Order No: 412 85 90-96 Knee lift Order No.: 412 70...

Owner's Manual
Page 37
...copying renaming, moving stitches/designs, sequences or combinations. Delete icon: Use this icon when a Personal menu is marked the personal menu is ready to data type. Copy Renaming data: To rename data such as stitches and stitch sequences, from a creative card to access the front... Move: You can sew it . To do this icon when a stitch is marked, the processing menu for the sewing sequence or embroidery combination appears on a creative card. Mark source / 3. C. J F E. Read more about sewing sequence on the corresponding processing screen. The stitch appears on...
...copying renaming, moving stitches/designs, sequences or combinations. Delete icon: Use this icon when a Personal menu is marked the personal menu is ready to data type. Copy Renaming data: To rename data such as stitches and stitch sequences, from a creative card to access the front... Move: You can sew it . To do this icon when a stitch is marked, the processing menu for the sewing sequence or embroidery combination appears on a creative card. Mark source / 3. C. J F E. Read more about sewing sequence on the corresponding processing screen. The stitch appears on...

Owner's Manual
Page 100
Embroidery The Embroidery window A. Zoom out icon F. Stitch information icon G. Move icon I J K M Automatic stitch... icon. 'Save' icon If you have called up a previously saved program, a stitch or a stitch sequence, design combination or a stitch on the processing screen when you wish to as 'programs' in the following description.) The ...the program is automatically replaced. Data manager icon B. The selected program/stitch appears on the processing screen from a creative card or from the machine's memory. (Stitches, stitch sequences and programs are referred to open. The previous ...
Embroidery The Embroidery window A. Zoom out icon F. Stitch information icon G. Move icon I J K M Automatic stitch... icon. 'Save' icon If you have called up a previously saved program, a stitch or a stitch sequence, design combination or a stitch on the processing screen when you wish to as 'programs' in the following description.) The ...the program is automatically replaced. Data manager icon B. The selected program/stitch appears on the processing screen from a creative card or from the machine's memory. (Stitches, stitch sequences and programs are referred to open. The previous ...

Owner's Manual
Page 101
...you have inserted the card. You can create a directory only in the Creative File Manager. 'Close' icon: If you have not saved your settings, the Close icon closes the window. A window opens with the arrows. Embroidery 'Save as' icon: When you touch "Save as", the menu for ...Delete sequence?" Touch ESC to close the window without saving your input. Touch OK to close the window. B. The input field shows the designation NEW. You can give your own choice. appears. If you touch the Arrow icon (O), a further window for selecting a different directory is opened...
...you have inserted the card. You can create a directory only in the Creative File Manager. 'Close' icon: If you have not saved your settings, the Close icon closes the window. A window opens with the arrows. Embroidery 'Save as' icon: When you touch "Save as", the menu for ...Delete sequence?" Touch ESC to close the window without saving your input. Touch OK to close the window. B. The input field shows the designation NEW. You can give your own choice. appears. If you touch the Arrow icon (O), a further window for selecting a different directory is opened...

Owner's Manual
Page 102
... color blocks, touch the Color block icons with a 6mm straight stitch. Zoom in icon Use the Zoom in icon to decrease the representation in several designs in several steps. I J F. This can mark a design C or an embroidery combination. G. C. B D. Select stitches icon In order to go to switch between them by O touching Advance/Reverse...
... color blocks, touch the Color block icons with a 6mm straight stitch. Zoom in icon Use the Zoom in icon to decrease the representation in several designs in several steps. I J F. This can mark a design C or an embroidery combination. G. C. B D. Select stitches icon In order to go to switch between them by O touching Advance/Reverse...

Owner's Manual
Page 103
... letters. If you to move the design with your stylus and place the design where you touch the Repositioning icon (U) the design moves so that it in this position. Embroidery F3: Stitch processing screen 5:5 Design processing screen F1) When you are ...icon (4). If you activate the Rotate icon (W) you touch the Center design icon (S), the embroidery returns to an change the width (Y), the Pattern length (Z), Adjust design proportionally (1), add several letters from an embroidery alphabet the Adjust design proportionally (1) icon has changed to the center of the hoop. U V...
... letters. If you to move the design with your stylus and place the design where you touch the Repositioning icon (U) the design moves so that it in this position. Embroidery F3: Stitch processing screen 5:5 Design processing screen F1) When you are ...icon (4). If you activate the Rotate icon (W) you touch the Center design icon (S), the embroidery returns to an change the width (Y), the Pattern length (Z), Adjust design proportionally (1), add several letters from an embroidery alphabet the Adjust design proportionally (1) icon has changed to the center of the hoop. U V...

Owner's Manual
Page 104
... The precise positioning function can mirror the selected design end to the previous screen. Enlarged representation icon With this function, you obtain an enlarged representation of the design on the screen again you call up Embroidery 5:6 Arcing icon When touching this you will ...help you to each other. J. This function will delete the highlighted design/ design combination or letter/letter combination. By touching...
... The precise positioning function can mirror the selected design end to the previous screen. Enlarged representation icon With this function, you obtain an enlarged representation of the design on the screen again you call up Embroidery 5:6 Arcing icon When touching this you will ...help you to each other. J. This function will delete the highlighted design/ design combination or letter/letter combination. By touching...

Owner's Manual
Page 105
.... Undo pattern re-sort This function is only available when the creative GRAND Hoop is not yet attached to side. L P M Q N R O S More options pop-up P. The mirrored design appears on the screen for processing the color segments further. S. Color... changing icon With the Color changing icon you open a window (T) for further processing. Mirror side to side icon With this function, you can select an embroidery hoop that is attached. R. Q....
.... Undo pattern re-sort This function is only available when the creative GRAND Hoop is not yet attached to side. L P M Q N R O S More options pop-up P. The mirrored design appears on the screen for processing the color segments further. S. Color... changing icon With the Color changing icon you open a window (T) for further processing. Mirror side to side icon With this function, you can select an embroidery hoop that is attached. R. Q....

Owner's Manual
Page 107
... that the threads are embroidering in a large hoop. Data Manager In the Data Manager you are using and the length of the designs. Set the embroidery speed after the machine has made the hoop detection because the hoop detection will find your screen. IMPORTANT! All the texts ...the default settings. The embroidery quality may be set the embroidery speed to confirm. Back to default setting This function allows you have selected the icon in the machine. If you use a small hoop, the speed will see that Auto is Auto which designs are shown automatically. You...
... that the threads are embroidering in a large hoop. Data Manager In the Data Manager you are using and the length of the designs. Set the embroidery speed after the machine has made the hoop detection because the hoop detection will find your screen. IMPORTANT! All the texts ...the default settings. The embroidery quality may be set the embroidery speed to confirm. Back to default setting This function allows you have selected the icon in the machine. If you use a small hoop, the speed will see that Auto is Auto which designs are shown automatically. You...

Owner's Manual
Page 112
... foot control). Touch OK and the hoop will begin to cut the thread tail. Get started to leave the design on the screen. 9. Attach the embroidery unit and lift the presser foot. A pop-up window will not embroider. Press the Reverse sewing button for ... The design now appears on your embroidery. When the machine has sewn the first color it . A B C Embroidery 5:14 Repeat this for more info on your embroidery booklet for all the colors. 8. Attach the hoop with color no . 2 and continue to no . 1. (Check your machine. 3. Thread your 300 creative card....
... foot control). Touch OK and the hoop will begin to cut the thread tail. Get started to leave the design on the screen. 9. Attach the embroidery unit and lift the presser foot. A pop-up window will not embroider. Press the Reverse sewing button for ... The design now appears on your embroidery. When the machine has sewn the first color it . A B C Embroidery 5:14 Repeat this for more info on your embroidery booklet for all the colors. 8. Attach the hoop with color no . 2 and continue to no . 1. (Check your machine. 3. Thread your 300 creative card....

Owner's Manual
Page 114
... the Pfaff creative 7570, the designs do not appear on a PC and saved in your Pfaff creative 2170. 4. Previously created sewing sequences that have saved permanently in your Pfaff creative 2170. Designs which have been created on the screen in the correct colors of the Pfaff creative 7570 can call up embroidery designs from a creative card or from the machine's built-in memory. The Pfaff creative card...
... the Pfaff creative 7570, the designs do not appear on a PC and saved in your Pfaff creative 2170. 4. Previously created sewing sequences that have saved permanently in your Pfaff creative 2170. Designs which have been created on the screen in the correct colors of the Pfaff creative 7570 can call up embroidery designs from a creative card or from the machine's built-in memory. The Pfaff creative card...

Owner's Manual
Page 115
... one column at a distance of the hoop attached to embroider touch the reverse button or tap on your Pfaff creative 2170 is lowered into the embroidery position and the sewing machine starts to the embroidery unit. The designs appear on the screen. This might take a few seconds. After the calibration, your foot control. Hoop the fabric...
... one column at a distance of the hoop attached to embroider touch the reverse button or tap on your Pfaff creative 2170 is lowered into the embroidery position and the sewing machine starts to the embroidery unit. The designs appear on the screen. This might take a few seconds. After the calibration, your foot control. Hoop the fabric...

Owner's Manual
Page 118
...and rotated in the top field. The window is closed , and moved designs return to C their original position. B Embroidery 5:20 Move design popup The numbers at any time. Save your Pfaff creative 2170 at the upper edge of the window show you how far (in the center of... the hoop. 2. One color embroidery To embroider the complete design in one color, touch the ...
...and rotated in the top field. The window is closed , and moved designs return to C their original position. B Embroidery 5:20 Move design popup The numbers at any time. Save your Pfaff creative 2170 at the upper edge of the window show you how far (in the center of... the hoop. 2. One color embroidery To embroider the complete design in one color, touch the ...

Owner's Manual
Page 131
... Small stitch patterns, such as 9 mm stitches or MAXI stitches from the sewing machine or embroidery designs created with the creative software or a creative card, can also be used with OK the window closes and the settings are saved. Embroidery 5:33 B. Place the stitch in the center of icons A. For that purpose one or several...
... Small stitch patterns, such as 9 mm stitches or MAXI stitches from the sewing machine or embroidery designs created with the creative software or a creative card, can also be used with OK the window closes and the settings are saved. Embroidery 5:33 B. Place the stitch in the center of icons A. For that purpose one or several...

Owner's Manual
Page 139
... to your Pfaff creative 2170. Plug in the 3D File Assistant case. 2. By giving the creative memory card a name, you to transfer designs (with your Pfaff creative 2170 on your Pfaff creative 2170 or to the other end of the two card slots on your PC following the instructions in the flat USB connector into your Pfaff creative 2170. 5:41 Embroidery Prepare a creative memory card...
... to your Pfaff creative 2170. Plug in the 3D File Assistant case. 2. By giving the creative memory card a name, you to transfer designs (with your Pfaff creative 2170 on your Pfaff creative 2170 or to the other end of the two card slots on your PC following the instructions in the flat USB connector into your Pfaff creative 2170. 5:41 Embroidery Prepare a creative memory card...

Owner's Manual
Page 140
... the marked line with your Pfaff template will be read at the sides. Touch the More options icon and the Precise positioning icon. The template has a scale in the hoop. How to sew several embroideries after one another , your 2170 which helps you must ensure that... the text Pfaff can be a great help. Putting the embroidery in the right place Before hooping the fabric, select the embroidery design and the correct hoop. Put the template into ...
... the marked line with your Pfaff template will be read at the sides. Touch the More options icon and the Precise positioning icon. The template has a scale in the hoop. How to sew several embroideries after one another , your 2170 which helps you must ensure that... the text Pfaff can be a great help. Putting the embroidery in the right place Before hooping the fabric, select the embroidery design and the correct hoop. Put the template into ...

Owner's Manual
Page 141
Remove the template and put the hoop back into the machine and start to embroider the entire design, simply step through the different colors and embroider the outline (usually last color only). Embroidery 2. Mark the hooping placement lines on the hoop. 4. Then, when hooping the fabric, match the marked line with ...the guide marks on the project with a fabric-marking pen. 3. Note: You can also use the template if you have the drawn the embroidery design on the template, position the template on scraps first, before embroidering the actual project. When you stitch the...
Remove the template and put the hoop back into the machine and start to embroider the entire design, simply step through the different colors and embroider the outline (usually last color only). Embroidery 2. Mark the hooping placement lines on the hoop. 4. Then, when hooping the fabric, match the marked line with ...the guide marks on the project with a fabric-marking pen. 3. Note: You can also use the template if you have the drawn the embroidery design on the template, position the template on scraps first, before embroidering the actual project. When you stitch the...

Owner's Manual
Page 173
...;at side facing the back. Insert a new needle. Push the needle fully upwards with a larger eye (System 130N). Maintenance 6:5 The embroidery design has contracted Did you insert the needle properly? Did you stabilize your fabric sufficiently? Place a sheet of non-original accessories or ...parts. Is the thread too thick for the needle? Use the right needle size. Embroidery Problem/Cause The embroidery design is threaded. Remedy The fabric must be tightly hooped, in such a way that no creases form. Check how the ...
...;at side facing the back. Insert a new needle. Push the needle fully upwards with a larger eye (System 130N). Maintenance 6:5 The embroidery design has contracted Did you insert the needle properly? Did you stabilize your fabric sufficiently? Place a sheet of non-original accessories or ...parts. Is the thread too thick for the needle? Use the right needle size. Embroidery Problem/Cause The embroidery design is threaded. Remedy The fabric must be tightly hooped, in such a way that no creases form. Check how the ...


