

User Manual
Page 52
SETUP 1 RECORDING MENU 3 2 EXPOSURE P 1 3 SUBJECT TRACKING 2 DIGITAL ZOOM 3 1 WIND CUT 2 AUTO REVIEW 3 SHORTCUTS 4 1 5 6 ENTER 7 52 VQT3P45
SETUP 1 RECORDING MENU 3 2 EXPOSURE P 1 3 SUBJECT TRACKING 2 DIGITAL ZOOM 3 1 WIND CUT 2 AUTO REVIEW 3 SHORTCUTS 4 1 5 6 ENTER 7 52 VQT3P45
User Manual
Page 53
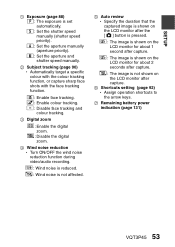
.... 4 Wind noise reduction h Turn ON/OFF the wind noise reduction function during video/audio recording. : Wind noise is reduced. : Wind noise is not affected. 5 Auto review h Specify the duration that the captured image is shown on the LCD monitor after the [O] button is pressed. : The image is shown on the LCD...
.... 4 Wind noise reduction h Turn ON/OFF the wind noise reduction function during video/audio recording. : Wind noise is reduced. : Wind noise is not affected. 5 Auto review h Specify the duration that the captured image is shown on the LCD monitor after the [O] button is pressed. : The image is shown on the LCD...

User Manual
Page 105
... sections to save the edited video as a new (separate) file, or to be saved as in step 4. 1 Press [J]. SPLIT SAVE AS NEW OVERWRITE REVIEW CLIP SET ENTER VQT3P45 105 h The start point of the extract by following the end point of the extract will be the start point of...h Each time [J] is set, and the screen to save are reversed. h A screen appears for you to select either to specify the end point appears. REVIEW CLIP: Play back the edited video before saving it with the edited video. The original video remains unchanged. ADVANCED OPERATION/PLAYBACK 5 Press [I].
... sections to save the edited video as a new (separate) file, or to be saved as in step 4. 1 Press [J]. SPLIT SAVE AS NEW OVERWRITE REVIEW CLIP SET ENTER VQT3P45 105 h The start point of the extract by following the end point of the extract will be the start point of...h Each time [J] is set, and the screen to save are reversed. h A screen appears for you to select either to specify the end point appears. REVIEW CLIP: Play back the edited video before saving it with the edited video. The original video remains unchanged. ADVANCED OPERATION/PLAYBACK 5 Press [I].

User Manual
Page 108
... desired option, and press the SET button. h A screen appears for you are returned to delete the original videos and replace them with the joined video. REVIEW CLIP: Play back the spliced video before saving it. h Editing starts. ADVANCED OPERATION/PLAYBACK 4 Press the [O] button or [@] button. h When editing ends, you to select...
... desired option, and press the SET button. h A screen appears for you are returned to delete the original videos and replace them with the joined video. REVIEW CLIP: Play back the spliced video before saving it. h Editing starts. ADVANCED OPERATION/PLAYBACK 4 Press the [O] button or [@] button. h When editing ends, you to select...