English
Page 3
... • Oversized foods or metal utensils must be followed including the following: • READ ALL INSTRUCTIONS, PRODUCT LABELS AND WARNINGS BEFORE USING THE TOASTER OVEN. • Do not touch hot surfaces. Do not store any materials that it can break off , then remove plug from becoming entangled in... operation. • When using toaster oven, pull the unit out a minimum of electrical shock. • Do not clean with a frayed or damaged cord or plug or after ...
... • Oversized foods or metal utensils must be followed including the following: • READ ALL INSTRUCTIONS, PRODUCT LABELS AND WARNINGS BEFORE USING THE TOASTER OVEN. • Do not touch hot surfaces. Do not store any materials that it can break off , then remove plug from becoming entangled in... operation. • When using toaster oven, pull the unit out a minimum of electrical shock. • Do not clean with a frayed or damaged cord or plug or after ...
English
Page 4
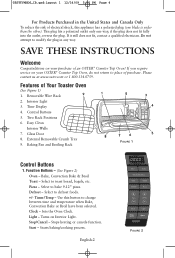
... Pizza Time Temp 4 8 7 6 5 FIGURE 1 Control Buttons 1.Function Buttons - (See Figure 2) Oven - Pizza - Select to place of an OSTER® Counter Top Oven! Use this appliance has a polarized plug (one way; Select to change between time and temperature when Bake, Convection Bake or Broil...defrost foods. +/- Select to modify the plug in the United States and Canada Only To reduce the risk of Your Toaster Oven (See Figure 1) 1. SAVE THESE INSTRUCTIONS Welcome Congratulations on Interior Light. Two Rack Positions 6. If it still does not ...
... Pizza Time Temp 4 8 7 6 5 FIGURE 1 Control Buttons 1.Function Buttons - (See Figure 2) Oven - Pizza - Select to place of an OSTER® Counter Top Oven! Use this appliance has a polarized plug (one way; Select to change between time and temperature when Bake, Convection Bake or Broil...defrost foods. +/- Select to modify the plug in the United States and Canada Only To reduce the risk of Your Toaster Oven (See Figure 1) 1. SAVE THESE INSTRUCTIONS Welcome Congratulations on Interior Light. Two Rack Positions 6. If it still does not ...
English
Page 5
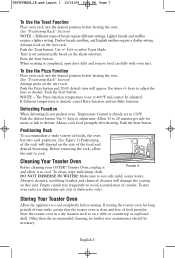
... a precise temperature. Push the Bake button once. Push the Start button. Both heating elements will be set time. English-3 Using Your Toaster Oven Setting the Clock Press the Clock button. keys to set . Preheating the Oven Place oven rack into the desired position before using your.... Push the Timer +/- Push Timer +/- Push the Start button. button. Select a location for the toaster oven. TSSTTVMNDG_IB.qxd:Layout 1 12/14/09 5:53 PM Page 5 Preparing To Use Your Toaster Oven for the First Time If you are using . Open oven door and remove all printed documents and...
... a precise temperature. Push the Bake button once. Push the Start button. Both heating elements will be set time. English-3 Using Your Toaster Oven Setting the Clock Press the Clock button. keys to set . Preheating the Oven Place oven rack into the desired position before using your.... Push the Timer +/- Push Timer +/- Push the Start button. button. Select a location for the toaster oven. TSSTTVMNDG_IB.qxd:Layout 1 12/14/09 5:53 PM Page 5 Preparing To Use Your Toaster Oven for the First Time If you are using . Open oven door and remove all printed documents and...
English
Page 6
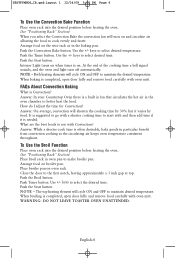
... to select desired time. Push the Start button. Both heating elements will cycle ON and OFF to maintain desired temperature. How do I N G : DO NOT LEAVE TOASTER OVEN UNATTENDED. What are the best foods to use with oven mitt. Place broiler pan on broiler pan. Push Timer button. The top heating element...
... to select desired time. Push the Start button. Both heating elements will cycle ON and OFF to maintain desired temperature. How do I N G : DO NOT LEAVE TOASTER OVEN UNATTENDED. What are the best foods to use with oven mitt. Place broiler pan on broiler pan. Push Timer button. The top heating element...
English
Page 7
...Positioning Rack" Section) NOTE - Arrange food on the shade selection. Use timer +/- Defrosting Function When defrosting do not preheat oven. Toaster oven racks are dishwasher safe (top of food particles. English-5 Press the Start button. keys to 150°F. Use +/- Push the... Start button. Storing Your Toaster Oven Allow the appliance to adjust time. keys to cool completely before storing. Cleaning Your Toaster Oven Before cleaning your OSTER® Toaster Oven, unplug it FIGURE 3 and allow the unit to defrost. Make...
...Positioning Rack" Section) NOTE - Arrange food on the shade selection. Use timer +/- Defrosting Function When defrosting do not preheat oven. Toaster oven racks are dishwasher safe (top of food particles. English-5 Press the Start button. keys to 150°F. Use +/- Push the... Start button. Storing Your Toaster Oven Allow the appliance to adjust time. keys to cool completely before storing. Cleaning Your Toaster Oven Before cleaning your OSTER® Toaster Oven, unplug it FIGURE 3 and allow the unit to defrost. Make...
English
Page 8
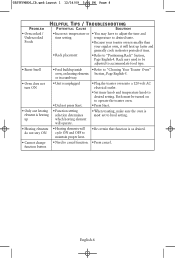
...must be adjusted to accommodate food type. • Burnt Smell • Food build-up inside • Refer to "Cleaning Your Toaster Oven" oven, on to operate the toaster oven. • Press Start. • Only one heating element is heating up • Function setting selection determines which heating ...cook in crumb tray. • Oven does not turn ON • Unit is unplugged • Did not press Start. • Plug the toaster oven into a 120-volt AC electrical outlet. • Set timer knob and temperature knob to desired setting. English-6 TSSTTVMNDG_IB.qxd:Layout 1 12/...
...must be adjusted to accommodate food type. • Burnt Smell • Food build-up inside • Refer to "Cleaning Your Toaster Oven" oven, on to operate the toaster oven. • Press Start. • Only one heating element is heating up • Function setting selection determines which heating ...cook in crumb tray. • Oven does not turn ON • Unit is unplugged • Did not press Start. • Plug the toaster oven into a 120-volt AC electrical outlet. • Set timer knob and temperature knob to desired setting. English-6 TSSTTVMNDG_IB.qxd:Layout 1 12/...


