English
Page 2
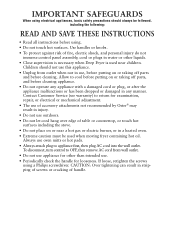
.... • Periodically check the handle for examination, repair, or electrical or mechanical adjustment. • The use of accessory attachments not recommended by Oster® may result in any appliance with a damaged cord or plug, or after the appliance malfunctions or has been dropped or damaged in injury.... let cord hang over edge of handle. To disconnect, turn control to return for looseness. Always use , before putting on or taking off parts, and before cleaning. Use handles or knobs. • To protect against risk of fire, electric shock, and personal injury do not immerse ...
.... • Periodically check the handle for examination, repair, or electrical or mechanical adjustment. • The use of accessory attachments not recommended by Oster® may result in any appliance with a damaged cord or plug, or after the appliance malfunctions or has been dropped or damaged in injury.... let cord hang over edge of handle. To disconnect, turn control to return for looseness. Always use , before putting on or taking off parts, and before cleaning. Use handles or knobs. • To protect against risk of fire, electric shock, and personal injury do not immerse ...
English
Page 3
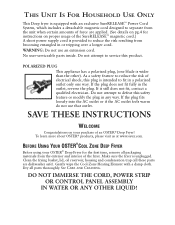
... safe). THIS UNIT IS FOR HOUSEHOLD USE ONLY This Deep fryer is equipped with a damp cloth. To learn more about OSTER® products, please visit us at www.oster.com. No user-serviceable parts inside. As a safety feature to reduce the risk of the SureRELEASE™ magnetic cord.) A short power supply cord is...
... safe). THIS UNIT IS FOR HOUSEHOLD USE ONLY This Deep fryer is equipped with a damp cloth. To learn more about OSTER® products, please visit us at www.oster.com. No user-serviceable parts inside. As a safety feature to reduce the risk of the SureRELEASE™ magnetic cord.) A short power supply cord is...
English
Page 4
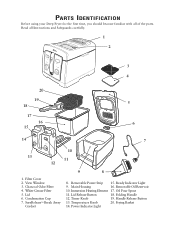
.... 1 2 3 4 20 19 5 18 17 16 6 15 14 7 10 13 11 12 1. SureReleaseTM Break Away Cordset 9 8 8. Main Housing 16. Frying Basket 14. Read all of the parts. Removable Power Strip 15. Immersion Heating Element 17. Oil Pour Spout 11. Handle Release Button 13. Lid Release Button 18. Filter Cover 2. Lid 6. Ready Indicator...
.... 1 2 3 4 20 19 5 18 17 16 6 15 14 7 10 13 11 12 1. SureReleaseTM Break Away Cordset 9 8 8. Main Housing 16. Frying Basket 14. Read all of the parts. Removable Power Strip 15. Immersion Heating Element 17. Oil Pour Spout 11. Handle Release Button 13. Lid Release Button 18. Filter Cover 2. Lid 6. Ready Indicator...
English
Page 7
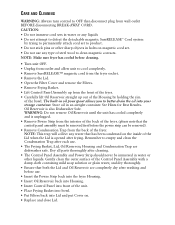
... and put Cover on the inside of the unit. • Place Frying Basket into bowl. • Put Filters back into your storage container. Dry all parts thoroughly after each use . • Insert the Power Strip back into the fryer Housing. • Insert Oil Reservoir back into Housing. • Insert Control Panel...
... and put Cover on the inside of the unit. • Place Frying Basket into bowl. • Put Filters back into your storage container. Dry all parts thoroughly after each use . • Insert the Power Strip back into the fryer Housing. • Insert Oil Reservoir back into Housing. • Insert Control Panel...
English
Page 12
... improper voltage or current, use or misuse of incidental or consequential damages or limitations on JCS's Liability? This warranty does not cover normal wear of parts or damage resulting from defects in Boca Raton, Florida 33431. If you . If the product is your exclusive warranty. If you have any other warranties...
... improper voltage or current, use or misuse of incidental or consequential damages or limitations on JCS's Liability? This warranty does not cover normal wear of parts or damage resulting from defects in Boca Raton, Florida 33431. If you . If the product is your exclusive warranty. If you have any other warranties...
