
Owners Guide
Page 1
... 6 E S PA Ñ O L G D U 11 UIAUCASAN:A1D-A8E0: L01--988898--36S5736U5-73A25RIO PAGE COMMERCIAL: 1-800-242-1378 www.oreck.com www.oreckcommercial.com VISIT ONE OF OUR OVER 450 STORE LOCATIONS USER'S GUIDE U4070H2 HIGH SPEED UPRIGHT VACUUM WITH ® CLEANING SYSTEM •IMPORTANT• SAVE THIS BOOKLET! Includes: • Safety Warnings • Warranty •...
... 6 E S PA Ñ O L G D U 11 UIAUCASAN:A1D-A8E0: L01--988898--36S5736U5-73A25RIO PAGE COMMERCIAL: 1-800-242-1378 www.oreck.com www.oreckcommercial.com VISIT ONE OF OUR OVER 450 STORE LOCATIONS USER'S GUIDE U4070H2 HIGH SPEED UPRIGHT VACUUM WITH ® CLEANING SYSTEM •IMPORTANT• SAVE THIS BOOKLET! Includes: • Safety Warnings • Warranty •...
Owners Guide
Page 3
...8226; Do not use to Replace a Worn Belt, To Adjust or Replace Brush, Using an Oreck Fresh Air® Tab, Bulb Replacement, Stuffing or Blockage page 5 Maintenance and Customer Service Your Oreck vacuum cleaner is present. • Do not pick up flammable or combustible liquids, such as described ...still fail to fit, contact an electrician to insert the plug fully into openings. Should your Oreck appliance require warranty service in the U.S.A., present this appliance. • Use caution when vacuuming over cord. • Do not unplug by or near children. • Use only as...
...8226; Do not use to Replace a Worn Belt, To Adjust or Replace Brush, Using an Oreck Fresh Air® Tab, Bulb Replacement, Stuffing or Blockage page 5 Maintenance and Customer Service Your Oreck vacuum cleaner is present. • Do not pick up flammable or combustible liquids, such as described ...still fail to fit, contact an electrician to insert the plug fully into openings. Should your Oreck appliance require warranty service in the U.S.A., present this appliance. • Use caution when vacuuming over cord. • Do not unplug by or near children. • Use only as...
Owners Guide
Page 5
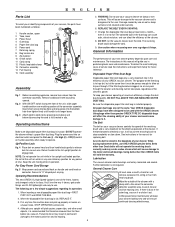
... and is recommended that these be removed from revolving brush. When buying replacement belts, use your ORECK vacuum cleaner. Wipe the outside of the cleaner with the ORECK cleaner. Remove cardboard insert by use on damp or wet surfaces. Secure to "U" shaped part on...few simple suggestions regarding its housing. 4 5. An extra belt is installed properly. Belts other than Oreck belts will keep them handy for replacing belt. Lubrication The vacuum cleaner motor bearings are factory lubricated and sealed. Also clean the connector deflector assembly area, base of ...
... and is recommended that these be removed from revolving brush. When buying replacement belts, use your ORECK vacuum cleaner. Wipe the outside of the cleaner with the ORECK cleaner. Remove cardboard insert by use on damp or wet surfaces. Secure to "U" shaped part on...few simple suggestions regarding its housing. 4 5. An extra belt is installed properly. Belts other than Oreck belts will keep them handy for replacing belt. Lubrication The vacuum cleaner motor bearings are factory lubricated and sealed. Also clean the connector deflector assembly area, base of ...
Owners Guide
Page 6
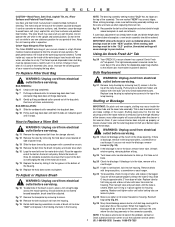
...if it with new bulb. When rotating bearings, make sure both bearings must be cleaned. Using An Oreck Fresh Air® Tab fig. 20 Your ORECK XL vacuum cleaner has a special Oreck Fresh Air® tab pocket. How to excessive fuzz and loose cuttings in the tube, remove ... you can not reach the blockage, remove baseplate (fig. 23). If blockage is removed. Vacuum will hinge downward. Insert tablet in place. Pull burned out bulb from the housing. Use only Oreck replacement parts. Stuffing or Blockage BAG INSTALLATION: fig. 9 Slide the cardboard collar completely into ...
...if it with new bulb. When rotating bearings, make sure both bearings must be cleaned. Using An Oreck Fresh Air® Tab fig. 20 Your ORECK XL vacuum cleaner has a special Oreck Fresh Air® tab pocket. How to excessive fuzz and loose cuttings in the tube, remove ... you can not reach the blockage, remove baseplate (fig. 23). If blockage is removed. Vacuum will hinge downward. Insert tablet in place. Pull burned out bulb from the housing. Use only Oreck replacement parts. Stuffing or Blockage BAG INSTALLATION: fig. 9 Slide the cardboard collar completely into ...


