
User Guide
Page 4
... off ...14 Placing the headset over the ear...15 Call functions...15 Answering and ending a call ...15 Automatic answer...16 Rejecting a call ...16 Redialling the last dialled number ...16 Muting an ongoing call...16 Voice dialling...16 Adjusting the earphone volume ...17 Copyright © 2004 Nokia. Getting started 8 Overview...8 Chargers and batteries...9 Charging the...
... off ...14 Placing the headset over the ear...15 Call functions...15 Answering and ending a call ...15 Automatic answer...16 Rejecting a call ...16 Redialling the last dialled number ...16 Muting an ongoing call...16 Voice dialling...16 Adjusting the earphone volume ...17 Copyright © 2004 Nokia. Getting started 8 Overview...8 Chargers and batteries...9 Charging the...
User Guide
Page 9
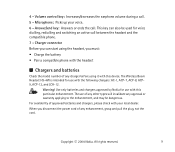
...up your local dealer. Use only batteries and chargers approved by Nokia for use with the following chargers: AC-1, ACP-7, ACP-8, ACP9, ACP-12, and LCH-12. The use with this device. Answer/end key: Answers or ends the call . 5 - Charger connector Before you can also be dangerous. ...When you must: • Charge the battery • Pair a compatible phone with your voice. 6 - The Wireless Boom Headset HS-4W is intended for voice dialling, redialling and switching an active ...
...up your local dealer. Use only batteries and chargers approved by Nokia for use with the following chargers: AC-1, ACP-7, ACP-8, ACP9, ACP-12, and LCH-12. The use with this device. Answer/end key: Answers or ends the call . 5 - Charger connector Before you can also be dangerous. ...When you must: • Charge the battery • Pair a compatible phone with your voice. 6 - The Wireless Boom Headset HS-4W is intended for voice dialling, redialling and switching an active ...

User Guide
Page 10
Connect the charger cable to the headset, open the flap. 2. Before connecting the charger cable to the headset as shown in Figure 2. Connect the charger to 2 hours 45 minutes depending on the charger. 3. The red indicator light is displayed. Copyright © 2004 Nokia. Charging the battery fully may take up to an AC wall outlet. When the battery is fully charged, the green indicator light is displayed during charging. Disconnect the charger from the AC wall outlet and the headset. All rights reserved. 10 I Charging the battery 1.
Connect the charger cable to the headset, open the flap. 2. Before connecting the charger cable to the headset as shown in Figure 2. Connect the charger to 2 hours 45 minutes depending on the charger. 3. The red indicator light is displayed. Copyright © 2004 Nokia. Charging the battery fully may take up to an AC wall outlet. When the battery is fully charged, the green indicator light is displayed during charging. Disconnect the charger from the AC wall outlet and the headset. All rights reserved. 10 I Charging the battery 1.

User Guide
Page 19
... I Charging and Discharging The battery can affect the ability of your battery only with a hot or cold battery may Copyright © 2004 Nokia. Do not short-circuit the battery. terminals of the battery (metal strips on the battery), for example, when you carry a spare battery... in summer or winter conditions, will reduce the capacity and lifetime of times but it will discharge itself over time. A headset with the chargers approved by a rechargeable battery. Use only batteries approved by the manufacturer and recharge your battery to keep the battery between 15°...
... I Charging and Discharging The battery can affect the ability of your battery only with a hot or cold battery may Copyright © 2004 Nokia. Do not short-circuit the battery. terminals of the battery (metal strips on the battery), for example, when you carry a spare battery... in summer or winter conditions, will reduce the capacity and lifetime of times but it will discharge itself over time. A headset with the chargers approved by a rechargeable battery. Use only batteries approved by the manufacturer and recharge your battery to keep the battery between 15°...


