
User Manual
Page 3
... • Supports most IBM VGA, SVGA, XGA , SXGA/UXGA(with NEC's Advanced AccuBlend on the ceiling. • NEC's exclusive Advanced AccuBlend intelligent pixel blending tech- INTRODUCTION Ͼ Introduction to the Projector • Safety protect by Password and Security functions Password and Security features ...be discouraged. • The built-in front or behind a screen, and the projector can be installed on LT260K/LT240K. This includes NTSC, PAL, PAL-N, PAL-M, PAL60, SECAM and NTSC4.43 standard video signals. *3 A UXGA (1600ן1200) and SXGA image (1280&#...
... • Supports most IBM VGA, SVGA, XGA , SXGA/UXGA(with NEC's Advanced AccuBlend on the ceiling. • NEC's exclusive Advanced AccuBlend intelligent pixel blending tech- INTRODUCTION Ͼ Introduction to the Projector • Safety protect by Password and Security functions Password and Security features ...be discouraged. • The built-in front or behind a screen, and the projector can be installed on LT260K/LT240K. This includes NTSC, PAL, PAL-N, PAL-M, PAL60, SECAM and NTSC4.43 standard video signals. *3 A UXGA (1600ן1200) and SXGA image (1280&#...

User Manual
Page 4
INTRODUCTION Ͼ Introduction to the Projector NOTE: Composite video standards are as follows: NTSC: U.S. PAL-N: TV standard used in Argentine, Paraguay and Uruguay. PAL60: TV standard used in Western Europe. NTSC4.43: TV standard used in Middle East countries. and Canada. SECAM: TV standard used in Brazil. TV standard for NTSC playback on PAL TVs. PAL: TV standard used in U.S. E-4 PAL-M: TV standard used for video in France and Eastern Europe.
INTRODUCTION Ͼ Introduction to the Projector NOTE: Composite video standards are as follows: NTSC: U.S. PAL-N: TV standard used in Argentine, Paraguay and Uruguay. PAL60: TV standard used in Western Europe. NTSC4.43: TV standard used in Middle East countries. and Canada. SECAM: TV standard used in Brazil. TV standard for NTSC playback on PAL TVs. PAL: TV standard used in U.S. E-4 PAL-M: TV standard used for video in France and Eastern Europe.

User Manual
Page 9
...this button to exit "Menus". AUTO ADJUST Button Use this button to adjust Position-H/V and Pixel Clock/Phase for a minimum of the Projector Ͼ Top Features 4. When no input signal is pressed for an optimal picture. If no menus appear, these buttons to select the..., Viewer (PC card), or LAN. Press this button quickly to the last condition while you wish to select a video source such as follows: RGB1 → RGB2 → Video → S-Video → Viewer → RGB1 → ... ENTER Button Executes your menu selection and activates items selected from the ...
...this button to exit "Menus". AUTO ADJUST Button Use this button to adjust Position-H/V and Pixel Clock/Phase for a minimum of the Projector Ͼ Top Features 4. When no input signal is pressed for an optimal picture. If no menus appear, these buttons to select the..., Viewer (PC card), or LAN. Press this button quickly to the last condition while you wish to select a video source such as follows: RGB1 → RGB2 → Video → S-Video → Viewer → RGB1 → ... ENTER Button Executes your menu selection and activates items selected from the ...

User Manual
Page 11
... or DVD player. See page E-28 for more details. 2. RGB OUT Connector (Mini D-Sub 15 Pin) You can use this connector to connect a component video output of the Projector Ͼ Terminal Panel Features Terminal Panel Features 13 12 9 10 11 3 5 8 76 1 2 4 1. RGB IN 2 / Component Input Connector (Mini D-Sub 15 Pin) This connector...
... or DVD player. See page E-28 for more details. 2. RGB OUT Connector (Mini D-Sub 15 Pin) You can use this connector to connect a component video output of the Projector Ͼ Terminal Panel Features Terminal Panel Features 13 12 9 10 11 3 5 8 76 1 2 4 1. RGB IN 2 / Component Input Connector (Mini D-Sub 15 Pin) This connector...

User Manual
Page 12
...is no audio output from your PC and serial communication protocol to control the projector. VIDEO AUDIO IN Jacks (RCA) L : This is your projector via a serial cable. This enables you connect the S-Video input from the VIDEO source. A cap is your own program, typical PC control codes are writing...(Stereo Mini) Connect an additional audio equipment here to listen to project video. 8. Remove the cap when using Dynamic Image Utility 2.0 included on your PC. R : This is put on page E-136. E-12 The NEC optional serial cable (CA03D) is where you to control your left channel...
...is no audio output from your PC and serial communication protocol to control the projector. VIDEO AUDIO IN Jacks (RCA) L : This is your projector via a serial cable. This enables you connect the S-Video input from the VIDEO source. A cap is your own program, typical PC control codes are writing...(Stereo Mini) Connect an additional audio equipment here to listen to project video. 8. Remove the cap when using Dynamic Image Utility 2.0 included on your PC. R : This is put on page E-136. E-12 The NEC optional serial cable (CA03D) is where you to control your left channel...

User Manual
Page 14
... turn on the projector cabinet. VIDEO 1. LASER Pointer Beams a laser light when the LA- 3 SER button is applied, you can click either the right-click or left-click button to activate the mouse. E-14 PJ SELECT LASER RGB2 AUTO ADJ. ON 2 1 POWER RGB1 OFF S-VIDEO 2. Infrared Transmitter ...Direct the remote control toward the remote sensor on the projector, press 21 and hold the POWER OFF button for a minimum of two seconds. POWER ON Button ...
... turn on the projector cabinet. VIDEO 1. LASER Pointer Beams a laser light when the LA- 3 SER button is applied, you can click either the right-click or left-click button to activate the mouse. E-14 PJ SELECT LASER RGB2 AUTO ADJ. ON 2 1 POWER RGB1 OFF S-VIDEO 2. Infrared Transmitter ...Direct the remote control toward the remote sensor on the projector, press 21 and hold the POWER OFF button for a minimum of two seconds. POWER ON Button ...

User Manual
Page 21
... when it is simple to set up your computer or video equipment to connect video and audio sources. 1 2 3 To the wall outlet. x Connect your projector and how to the projector. NOTE: Ensure that the power cable and any other cables are disconnected before you get started, you must first: z Set up a screen and the...
... when it is simple to set up your computer or video equipment to connect video and audio sources. 1 2 3 To the wall outlet. x Connect your projector and how to the projector. NOTE: Ensure that the power cable and any other cables are disconnected before you get started, you must first: z Set up a screen and the...

User Manual
Page 27
...VGA or Compatibles (Desktop type or notebook type) (Desktop type or notebook type) DVD Player (with component output) NOTE: When using with the projector. * If the screen goes blank while using your remote control, it may be the result of the computer's screen-saver or power management ... longer than the supplied cable. E-27 INSTALLATION AND CONNECTIONS Making Connections Wiring Diagram VCR, DVD Player or LaserDisc Player Document Camera Monitor To video, S-video, and audio inputs on the power to the notebook PC. RGB Signal cable (supplied) To mini D-Sub 15-pin connector on the ...
...VGA or Compatibles (Desktop type or notebook type) (Desktop type or notebook type) DVD Player (with component output) NOTE: When using with the projector. * If the screen goes blank while using your remote control, it may be the result of the computer's screen-saver or power management ... longer than the supplied cable. E-27 INSTALLATION AND CONNECTIONS Making Connections Wiring Diagram VCR, DVD Player or LaserDisc Player Document Camera Monitor To video, S-video, and audio inputs on the power to the notebook PC. RGB Signal cable (supplied) To mini D-Sub 15-pin connector on the ...
User Manual
Page 28
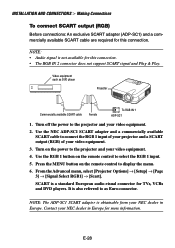
... on the remote control to the projector and your video equipment. 3. It is a standard European audio-visual connector for TVs, VCRs and DVD players. E-28 Use the NEC ADP-SC1 SCART adapter and a commercially available SCART cable to the projector and your NEC dealer in Europe. INSTALLATION AND CONNECTIONS... & Play. NOTE: • Audio signal is obtainable from your NEC dealer in Europe for this connection. Turn on the power to connect the RGB 1 input of your projector and a SCART output (RGB) of your video equipment. 2. NOTE: The ADP-SC1 SCART adapter is not available for...
... on the remote control to the projector and your video equipment. 3. It is a standard European audio-visual connector for TVs, VCRs and DVD players. E-28 Use the NEC ADP-SC1 SCART adapter and a commercially available SCART cable to the projector and your NEC dealer in Europe. INSTALLATION AND CONNECTIONS... & Play. NOTE: • Audio signal is obtainable from your NEC dealer in Europe for this connection. Turn on the power to connect the RGB 1 input of your projector and a SCART output (RGB) of your video equipment. 2. NOTE: The ADP-SC1 SCART adapter is not available for...

User Manual
Page 29
... a signal cable longer than the supplied one. E-29 It is recommended that you use a commercially available pin adapter (not supplied) to connect to your Mac's video port. INSTALLATION AND CONNECTIONS Ͼ Making Connections Connecting Your PC or Macintosh Computer AUDIO IN RGB IN1 RGB IN2 RGB signal cable (supplied) To mini...
... a signal cable longer than the supplied one. E-29 It is recommended that you use a commercially available pin adapter (not supplied) to connect to your Mac's video port. INSTALLATION AND CONNECTIONS Ͼ Making Connections Connecting Your PC or Macintosh Computer AUDIO IN RGB IN1 RGB IN2 RGB signal cable (supplied) To mini...

User Manual
Page 30
...to project your computer's screen image for an impressive presentation. NOTE: The LT260K/LT240K is not compatible with video decoded outputs of inactivity, it may be caused by a screen saver installed on the projector and the computer. 4. E-30 Use the supplied signal cable to connect... to your projector and computer. 2. INSTALLATION AND CONNECTIONS Ͼ Making Connections Connecting your PC or Macintosh computer to your projector will enable you 've connected to the projector. Turn off the power to the projector. 3. If the projector goes blank after a period of NEC ISS-6020 and...
...to project your computer's screen image for an impressive presentation. NOTE: The LT260K/LT240K is not compatible with video decoded outputs of inactivity, it may be caused by a screen saver installed on the projector and the computer. 4. E-30 Use the supplied signal cable to connect... to your projector and computer. 2. INSTALLATION AND CONNECTIONS Ͼ Making Connections Connecting your PC or Macintosh computer to your projector will enable you 've connected to the projector. Turn off the power to the projector. 3. If the projector goes blank after a period of NEC ISS-6020 and...

User Manual
Page 32
... NOTE: Refer to your DVD player's owner's manual for more information about your projector to a DVD player with component output or Video output. INSTALLATION AND CONNECTIONS Ͼ Making Connections Connecting Your Video Equipment Connecting Your DVD Player RGB IN1 or IN2 Optional 15-pin-to-RCA (...OUT RL AUDIO IN LR COMPONENT OUT Audio cable (not supplied) You can connect your DVD player's video output requirements, E-32 Turn on the projector. mercially available component video cable (RCAן3) and the optional 15-pin-to-RCA (female)ן3 cable...
... NOTE: Refer to your DVD player's owner's manual for more information about your projector to a DVD player with component output or Video output. INSTALLATION AND CONNECTIONS Ͼ Making Connections Connecting Your Video Equipment Connecting Your DVD Player RGB IN1 or IN2 Optional 15-pin-to-RCA (...OUT RL AUDIO IN LR COMPONENT OUT Audio cable (not supplied) You can connect your DVD player's video output requirements, E-32 Turn on the projector. mercially available component video cable (RCAן3) and the optional 15-pin-to-RCA (female)ן3 cable...

User Manual
Page 33
...33 INSTALLATION AND CONNECTIONS Ͼ Making Connections Connecting Your VCR or Laser Disc Player VIDEO IN S-VIDEO IN Video cable (not supplied) S-video cable (not supplied) Audio equipment VCR/ Laser disc player AUDIO OUT RL S-VIDEO OUT VIDEO OUT AUDIO IN LR Audio cable (not supplied) Use common RCA cables (not ...VCR, laser disc player or document camera to the Video input on the back of your VCR or laser disc player, connect the other end to your projector. Connect one end of your RCA cable to the video output connector on your right and left channel connections correct...
...33 INSTALLATION AND CONNECTIONS Ͼ Making Connections Connecting Your VCR or Laser Disc Player VIDEO IN S-VIDEO IN Video cable (not supplied) S-video cable (not supplied) Audio equipment VCR/ Laser disc player AUDIO OUT RL S-VIDEO OUT VIDEO OUT AUDIO IN LR Audio cable (not supplied) Use common RCA cables (not ...VCR, laser disc player or document camera to the Video input on the back of your VCR or laser disc player, connect the other end to your projector. Connect one end of your RCA cable to the video output connector on your right and left channel connections correct...

User Manual
Page 34
NOTE: Refer to your VCR or laser disc player owner's manual for more information about your equipment's video output requirements. NOTE: An image may not be displayed correctly when a Video or S-Video source is played back in fast-forward or fast-rewind via a scan converter. E-34 INSTALLATION AND CONNECTIONS Ͼ Making Connections 3. Turn on the projector and the VCR or laser disc player.
NOTE: Refer to your VCR or laser disc player owner's manual for more information about your equipment's video output requirements. NOTE: An image may not be displayed correctly when a Video or S-Video source is played back in fast-forward or fast-rewind via a scan converter. E-34 INSTALLATION AND CONNECTIONS Ͼ Making Connections 3. Turn on the projector and the VCR or laser disc player.

User Manual
Page 36
...). PROJECTING AN IMAGE (BASIC OPERATION) This section describes how to turn on the projector and to the off[O] position. Turning on the Projector NOTE: • When plugging in "Projector Options" on and that the computer or video source is turned on page E-114 for a minimum of 2 seconds will the ...power indicator turn to green and the projector become ready to use this feature, ...
...). PROJECTING AN IMAGE (BASIC OPERATION) This section describes how to turn on the projector and to the off[O] position. Turning on the Projector NOTE: • When plugging in "Projector Options" on and that the computer or video source is turned on page E-114 for a minimum of 2 seconds will the ...power indicator turn to green and the projector become ready to use this feature, ...

User Manual
Page 39
..., press the ENTER button. Each time the SOURCE button is available, the projector will change as follows: "Video" (VCR, document camera, or laser disc player), S-Video", "RGB1" or "RGB2" (computer or DVD with component output) , "Viewer" (slides on the projector cabinet to display the Source list. Selecting from Source List Source List Press... PC). LASER ASPECT FREEZE 3D REFORM HELP POINTER VIEWER VOLUME MAGNIFY SLIDE PICTURE PIC-MUTE FOLDER SLIDE LIST Press any one of the RGB1, RGB2, VIDEO, S-VIDEO or VIEWER buttons. PROJECTING AN IMAGE Selecting a Source Selecting the computer or...
..., press the ENTER button. Each time the SOURCE button is available, the projector will change as follows: "Video" (VCR, document camera, or laser disc player), S-Video", "RGB1" or "RGB2" (computer or DVD with component output) , "Viewer" (slides on the projector cabinet to display the Source list. Selecting from Source List Source List Press... PC). LASER ASPECT FREEZE 3D REFORM HELP POINTER VIEWER VOLUME MAGNIFY SLIDE PICTURE PIC-MUTE FOLDER SLIDE LIST Press any one of the RGB1, RGB2, VIDEO, S-VIDEO or VIEWER buttons. PROJECTING AN IMAGE Selecting a Source Selecting the computer or...

User Manual
Page 40
E-40 When the input source you press and hold the SOURCE button for the next available input source. Each time you wish to project is present, the input will search for a minimum of ONE second, the projector will be skipped. Press the ENTER button. PROJECTING AN IMAGE Ͼ Selecting a Source Detecting the Signal Automatically Press and hold the SOURCE button, the input source will change as follows: → RGB1 → RGB2 → Video → S-Video → Viewer If no input signal is displayed, release the button.
E-40 When the input source you press and hold the SOURCE button for the next available input source. Each time you wish to project is present, the input will search for a minimum of ONE second, the projector will be skipped. Press the ENTER button. PROJECTING AN IMAGE Ͼ Selecting a Source Detecting the Signal Automatically Press and hold the SOURCE button, the input source will change as follows: → RGB1 → RGB2 → Video → S-Video → Viewer If no input signal is displayed, release the button.

User Manual
Page 50
... power under any one of two seconds. The power indicator will be displayed after the projector is turned off). • While accessing a PC card. (The PC Card Access indicator lights.) OFF POWER VIDEO S-VIDEO RGB1 ON RGB2 AUTO ADJ. appears. This message will go out. The power indicator...VOLUME MAGNIFY SLIDE PICTURE PIC-MUTE FOLDER SLIDE LIST E-50 PROJECTING AN IMAGE Turning off the Projector To turn off the projector: First press the POWER (ON/STAND BY) button on the projector cabinet or the POWER OFF button on the remote control for a minimum of the following ...
... power under any one of two seconds. The power indicator will be displayed after the projector is turned off). • While accessing a PC card. (The PC Card Access indicator lights.) OFF POWER VIDEO S-VIDEO RGB1 ON RGB2 AUTO ADJ. appears. This message will go out. The power indicator...VOLUME MAGNIFY SLIDE PICTURE PIC-MUTE FOLDER SLIDE LIST E-50 PROJECTING AN IMAGE Turning off the Projector To turn off the projector: First press the POWER (ON/STAND BY) button on the projector cabinet or the POWER OFF button on the remote control for a minimum of the following ...

User Manual
Page 52
... on the drawing work as the Enter button on the projector. CONVENIENT FEATURES Ͼ Using the Remote Mouse Function Switching operation mode between computer and projector The three shaded buttons shown on the projector. L L OFF POWER VIDEO S-VIDEO RGB1 ON RGB2 AUTO ADJ. Works as a computer mouse...POINTER PC CARD KEYSTONE MAGNIFY SLIDE FREEZE VOLUME FOLDER PIC-MUTE SLIDE LIST Works as the Cancel button on the projector. Not lit OFF POWER VIDEO S-VIDEO RGB1 ON RGB2 AUTO ADJ. E-52 MENU LASER SELECT ENTER CANCE PJ FOCUS ZOOM SHIFT HELP POINTER PC CARD...
... on the drawing work as the Enter button on the projector. CONVENIENT FEATURES Ͼ Using the Remote Mouse Function Switching operation mode between computer and projector The three shaded buttons shown on the projector. L L OFF POWER VIDEO S-VIDEO RGB1 ON RGB2 AUTO ADJ. Works as a computer mouse...POINTER PC CARD KEYSTONE MAGNIFY SLIDE FREEZE VOLUME FOLDER PIC-MUTE SLIDE LIST Works as the Cancel button on the projector. Not lit OFF POWER VIDEO S-VIDEO RGB1 ON RGB2 AUTO ADJ. E-52 MENU LASER SELECT ENTER CANCE PJ FOCUS ZOOM SHIFT HELP POINTER PC CARD...

User Manual
Page 68
...68 If you return back to play automatically. NOTE: Even if you will start to the Viewer, you switch the current Viewer source to the Projector mode and the PJ button lights red. SELECT ENTER CANCE PJ L Works as the Select button on the remote control for Viewer operation, press ...the PJ button to switch to another source, the current slide is possible to switch from the projector. The PC card editing operation cannot be performed from a Viewer slide to the video picture then back to the Viewer slide simply by using the Viewer button. USING THE VIEWER NOTE: You...
...68 If you return back to play automatically. NOTE: Even if you will start to the Viewer, you switch the current Viewer source to the Projector mode and the PJ button lights red. SELECT ENTER CANCE PJ L Works as the Select button on the remote control for Viewer operation, press ...the PJ button to switch to another source, the current slide is possible to switch from the projector. The PC card editing operation cannot be performed from a Viewer slide to the video picture then back to the Viewer slide simply by using the Viewer button. USING THE VIEWER NOTE: You...


