
Product sheet
Page 1
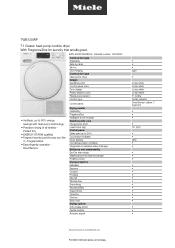
TWB120WP T1 Classic heat-pump tumble dryer With FragranceDos for laundry that smells great. Perfect Dry • ENERGY STAR® qualified • Fragrant laundry just the way you like it - FragranceDos • ...Easy fingertip operation - DirectSensor Drying results PerfectDry FragranceDos Intelligent drum reversal Gentle laundry care Honeycomb drum Load in Door hinging Construction type Heat-pump dryer Design Appliance color Control panel color Door design Rotary selector color Fascia panel version Control type Control panel • Ventless, up to 60% energy savings...
TWB120WP T1 Classic heat-pump tumble dryer With FragranceDos for laundry that smells great. Perfect Dry • ENERGY STAR® qualified • Fragrant laundry just the way you like it - FragranceDos • ...Easy fingertip operation - DirectSensor Drying results PerfectDry FragranceDos Intelligent drum reversal Gentle laundry care Honeycomb drum Load in Door hinging Construction type Heat-pump dryer Design Appliance color Control panel color Door design Rotary selector color Fascia panel version Control type Control panel • Ventless, up to 60% energy savings...

Product sheet
Page 2
TWB120WP T1 Classic heat-pump tumble dryer With FragranceDos for laundry that smells great. Quality Soft ribs Safety Lock code Clean filter" indication Technical data Dimensions (width) in in.(mm) Dimensions (height) in in.(mm) Dimensions (depth) in in.(mm) Depth with door open in in.(mm) Weight in lbs. (kg) Total connected load in kW Fuse rating in A Length of supply lead in feet (ft.) Type of coolant • • • 23 1/2 (596) 33 1/2 (850) 25 3/8 (643) 42 1/2 (1,077) 135 (61) 1.0 15 6 (2) R134a
TWB120WP T1 Classic heat-pump tumble dryer With FragranceDos for laundry that smells great. Quality Soft ribs Safety Lock code Clean filter" indication Technical data Dimensions (width) in in.(mm) Dimensions (height) in in.(mm) Dimensions (depth) in in.(mm) Depth with door open in in.(mm) Weight in lbs. (kg) Total connected load in kW Fuse rating in A Length of supply lead in feet (ft.) Type of coolant • • • 23 1/2 (596) 33 1/2 (850) 25 3/8 (643) 42 1/2 (1,077) 135 (61) 1.0 15 6 (2) R134a
Short user manual
Page 1
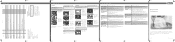
... The tumble dryer is possible as...result. Loading the tumble dryer ĺĺ Open ... while the dryer is switched ... can melt and damage the dryer and the laundry. ĺĺ...preset by overdrying when the dryer is at its original packaging...cannot be displayed in the dryer. ɔɔDo ...room in which the tumble dryer is reached. The &#... "Fragrance flacon" in the dryer, they have any effect on... using the tumble dryer for will light ...after the end of the dryer drum. ĺĺ... Start/Stop sensor button. The dryer will need to be selected....dryer and cannot be selected for the...
... The tumble dryer is possible as...result. Loading the tumble dryer ĺĺ Open ... while the dryer is switched ... can melt and damage the dryer and the laundry. ĺĺ...preset by overdrying when the dryer is at its original packaging...cannot be displayed in the dryer. ɔɔDo ...room in which the tumble dryer is reached. The &#... "Fragrance flacon" in the dryer, they have any effect on... using the tumble dryer for will light ...after the end of the dryer drum. ĺĺ... Start/Stop sensor button. The dryer will need to be selected....dryer and cannot be selected for the...
Short user manual
Page 2
...of the plinth filter thoroughly. ɔɔThe plinth filter must be selected. Make sure it . ĺĺ Use your hands. The word Miele on the lower lint filter in the drain hose. ĺĺ Empty the condensed water container. ĺĺ Check the drain hose. The...en - X - The access panel will appear on drying -- Do not load the drum with the appliance! Lint is visibly compacted with the dryer before replacing them. ĺĺ Refit all of the filters is collected by the handle. Always observe the maximum recommended load for the operating ...
...of the plinth filter thoroughly. ɔɔThe plinth filter must be selected. Make sure it . ĺĺ Use your hands. The word Miele on the lower lint filter in the drain hose. ĺĺ Empty the condensed water container. ĺĺ Check the drain hose. The...en - X - The access panel will appear on drying -- Do not load the drum with the appliance! Lint is visibly compacted with the dryer before replacing them. ĺĺ Refit all of the filters is collected by the handle. Always observe the maximum recommended load for the operating ...

Operating instructions/Installation instructions
Page 1
Operating Instructions Heat-pump Dryer It is essential to the appliance. en-US M.-Nr. 10 974 051 This prevents both personal injury and damage to read these operating instructions before installing, starting up, and using the appliance.
Operating Instructions Heat-pump Dryer It is essential to the appliance. en-US M.-Nr. 10 974 051 This prevents both personal injury and damage to read these operating instructions before installing, starting up, and using the appliance.

Operating instructions/Installation instructions
Page 2
... and other programs 24 Selecting Gentle 24 Selecting Delay Start 25 4. Loading the tumble dryer 22 Loading the laundry 22 3. Contents Caring for the environment 5 IMPORTANT SAFETY INSTRUCTIONS 6 Operating the tumble dryer 14 Control panel ...14 How the display works 15 Energy saving tips 17 Functioning of...fragrance flacon 34 Inserting the fragrance flacon 35 2 Removing the laundry at the end of the program 27 End of the heat-pump dryer 18 Initial set-up ...19 1. Notes on correct laundry care 20 Points to note regarding washed laundry 20 Preparing the laundry before drying...
... and other programs 24 Selecting Gentle 24 Selecting Delay Start 25 4. Loading the tumble dryer 22 Loading the laundry 22 3. Contents Caring for the environment 5 IMPORTANT SAFETY INSTRUCTIONS 6 Operating the tumble dryer 14 Control panel ...14 How the display works 15 Energy saving tips 17 Functioning of...fragrance flacon 34 Inserting the fragrance flacon 35 2 Removing the laundry at the end of the program 27 End of the heat-pump dryer 18 Initial set-up ...19 1. Notes on correct laundry care 20 Points to note regarding washed laundry 20 Preparing the laundry before drying...
Operating instructions/Installation instructions
Page 3
... Cleaning the plinth filter 43 Cleaning the plinth filter flap 43 Checking the heat exchanger unit 44 Inserting the plinth filter 44 Cleaning the dryer 45 Frequently Asked Questions 46 Indicator lights or information on the time display 46 Unsatisfactory drying results 48 The drying cycle duration is very ... warranty and product registration 51 Optional accessories 51 IMPORTANT SAFETY INSTRUCTIONS 53 Installation...55 Front view ...55 Rear view...56 Transporting the tumble dryer 56 Transporting the tumble dryer to its installation site 56 Installation ...57 Leveling the tumble...
... Cleaning the plinth filter 43 Cleaning the plinth filter flap 43 Checking the heat exchanger unit 44 Inserting the plinth filter 44 Cleaning the dryer 45 Frequently Asked Questions 46 Indicator lights or information on the time display 46 Unsatisfactory drying results 48 The drying cycle duration is very ... warranty and product registration 51 Optional accessories 51 IMPORTANT SAFETY INSTRUCTIONS 53 Installation...55 Front view ...55 Rear view...56 Transporting the tumble dryer 56 Transporting the tumble dryer to its installation site 56 Installation ...57 Leveling the tumble...

Operating instructions/Installation instructions
Page 4
Contents Product dimensions 60 Dimensions...60 Installation on a plinth 60 Washer-dryer stack 60 Electrical connection 61 Connection adapter for NEMA 14-30 socket 61 External draining of condensed water 62 Arranging the drain hose 62 Condensate ...
Contents Product dimensions 60 Dimensions...60 Installation on a plinth 60 Washer-dryer stack 60 Electrical connection 61 Connection adapter for NEMA 14-30 socket 61 External draining of condensed water 62 Arranging the drain hose 62 Condensate ...
Operating instructions/Installation instructions
Page 6
Always close the door after use to prevent child hazards. Before this appliance is removed for use a dryer with visible damage. Do not reach into the dryer if the drum is moving. Do not install or store this appliance where it will be performed by qualified ... of fire, electric shock, or injury to persons when using your appliance, follow basic precautions, including the following: WARNING This tumble dryer is intended for service or discarded, remove the door to the drying compartment. Do not install or use in domestic households and similar...
Always close the door after use to prevent child hazards. Before this appliance is removed for use a dryer with visible damage. Do not reach into the dryer if the drum is moving. Do not install or store this appliance where it will be performed by qualified ... of fire, electric shock, or injury to persons when using your appliance, follow basic precautions, including the following: WARNING This tumble dryer is intended for service or discarded, remove the door to the drying compartment. Do not install or use in domestic households and similar...

Operating instructions/Installation instructions
Page 8
... thoroughly cleaned there is used with flammable cleaning agents or items containing acetone, alcohol, petrol, stain remover, wax or chemicals from the dryer. - items containing foam rubber or similarly textured rubber-like materials. - Loose filling could cause the laundry to a chemical reaction that could...which have not been washed. - items, such as lotions or cosmetics) in your dryer. They may contribute to ignite when heated even after being removed from buffing, etc. - If in this dryer: - IMPORTANT SAFETY INSTRUCTIONS To prevent the risk of fire, the following ...
... thoroughly cleaned there is used with flammable cleaning agents or items containing acetone, alcohol, petrol, stain remover, wax or chemicals from the dryer. - items containing foam rubber or similarly textured rubber-like materials. - Loose filling could cause the laundry to a chemical reaction that could...which have not been washed. - items, such as lotions or cosmetics) in your dryer. They may contribute to ignite when heated even after being removed from buffing, etc. - If in this dryer: - IMPORTANT SAFETY INSTRUCTIONS To prevent the risk of fire, the following ...

Operating instructions/Installation instructions
Page 9
... hot to whether the appliance is properly grounded. 9 Improper connection of the program selected, including the cooling down phase. IMPORTANT SAFETY INSTRUCTIONS Allow the dryer to complete each stage of the equipment-grounding conductor can result in doubt as to handle. Clean the lint filter before or after each...
... hot to whether the appliance is properly grounded. 9 Improper connection of the program selected, including the cooling down phase. IMPORTANT SAFETY INSTRUCTIONS Allow the dryer to complete each stage of the equipment-grounding conductor can result in doubt as to handle. Clean the lint filter before or after each...
Operating instructions/Installation instructions
Page 10
...electrician. Before installation, disconnect the tumble dryer from Miele as an optional accessory), make sure it is suitable for the Miele tumble dryer and the Miele washing machine. If you order a plinth for the dryer basket. This tumble dryer is supplied with a special lamp to tear, ...requiring a service call. You must only be used for the purpose for this tumble dryer (available from the electrical supply by Miele Technical Service. 10 Replacement lamps may only be installed as an optional accessory for which it is the correct...
...electrician. Before installation, disconnect the tumble dryer from Miele as an optional accessory), make sure it is suitable for the Miele tumble dryer and the Miele washing machine. If you order a plinth for the dryer basket. This tumble dryer is supplied with a special lamp to tear, ...requiring a service call. You must only be used for the purpose for this tumble dryer (available from the electrical supply by Miele Technical Service. 10 Replacement lamps may only be installed as an optional accessory for which it is the correct...

Operating instructions/Installation instructions
Page 11
...This does not impair the efficient functioning of California to a higher temperature level and liquified by condensing, is led in this tumble dryer uses a gaseous refrigerant which is not flammable or explosive. - The refrigerant is brought to cause cancer or birth defects or ...heat pump in a closed circuit through the heat exchanger unit where heat exchange with the circulating drying air takes place. - This tumble dryer contains fluorinated greenhouse gases. Designation of refrigerant: R134a Amount of refrigerant: 16.6 oz (0.47) kg Global warming potential of refrigerant: 1430 ...
...This does not impair the efficient functioning of California to a higher temperature level and liquified by condensing, is led in this tumble dryer uses a gaseous refrigerant which is not flammable or explosive. - The refrigerant is brought to cause cancer or birth defects or ...heat pump in a closed circuit through the heat exchanger unit where heat exchange with the circulating drying air takes place. - This tumble dryer contains fluorinated greenhouse gases. Designation of refrigerant: R134a Amount of refrigerant: 16.6 oz (0.47) kg Global warming potential of refrigerant: 1430 ...

Operating instructions/Installation instructions
Page 12
...; Only use it for at least 15 minutes. Thoroughly wash clothing or fabric using a large amount of the flacon onto the floor, the dryer or any other substance. - Never use a faulty fragrance flacon. Dispose of an empty fragrance flacon with the household waste and never use ...genuine Miele original fragrance flacons. Store the fragrance flacon in contact with the body: Wash skin thoroughly with the eyes or is the risk of...
...; Only use it for at least 15 minutes. Thoroughly wash clothing or fabric using a large amount of the flacon onto the floor, the dryer or any other substance. - Never use a faulty fragrance flacon. Dispose of an empty fragrance flacon with the household waste and never use ...genuine Miele original fragrance flacons. Store the fragrance flacon in contact with the body: Wash skin thoroughly with the eyes or is the risk of...

Operating instructions/Installation instructions
Page 14
The tumble dryer is switched on when you select a program and switched off . Operating the tumble dryer Control panel a Display b Sensor buttons for the drying levels c Indicator lights light up when necessary d Gentle sensor button for gentle drying e Time display for the program duration f Sensor buttons for the time selection g Start/Stop sensor button for program start/cancellation h Optical interface for service technicians i Program selector for selecting program and for switching off by turning the program selector to the position. 14
The tumble dryer is switched on when you select a program and switched off . Operating the tumble dryer Control panel a Display b Sensor buttons for the drying levels c Indicator lights light up when necessary d Gentle sensor button for gentle drying e Time display for the program duration f Sensor buttons for the time selection g Start/Stop sensor button for program start/cancellation h Optical interface for service technicians i Program selector for selecting program and for switching off by turning the program selector to the position. 14

Operating instructions/Installation instructions
Page 15
... again when the selected drying level is reached and remain on until the program duration has been determined and then go out. . . . Operating the tumble dryer How the display works The and sensor buttons react to be cleaned. - Perfect Dry The Perfect Dry system measures the residual moisture present...
... again when the selected drying level is reached and remain on until the program duration has been determined and then go out. . . . Operating the tumble dryer How the display works The and sensor buttons react to be cleaned. - Perfect Dry The Perfect Dry system measures the residual moisture present...

Operating instructions/Installation instructions
Page 16
Once selected, lights up constantly after the program has started. 16 Operating the tumble dryer Time display The remaining program duration will be selected. The electronic control continually assesses conditions in the laundry. sensor buttons - After touching the &#...
Once selected, lights up constantly after the program has started. 16 Operating the tumble dryer Time display The remaining program duration will be selected. The electronic control continually assesses conditions in the laundry. sensor buttons - After touching the &#...

Operating instructions/Installation instructions
Page 17
... spin speed, the greater the savings that the room temperature is well ventilated and switch the other heatproducing appliances in the room in which the dryer is located, make sure the room is not too high. Make sure your laundry is designed for the program being used. This... dryer with the following measures as the drying time is at its most economical. - Load according to the optimum amount of laundry is not extended unnecessarily. - ...
... spin speed, the greater the savings that the room temperature is well ventilated and switch the other heatproducing appliances in the room in which the dryer is located, make sure the room is not too high. Make sure your laundry is designed for the program being used. This... dryer with the following measures as the drying time is at its most economical. - Load according to the optimum amount of laundry is not extended unnecessarily. - ...

Operating instructions/Installation instructions
Page 18
... circuit regulates the heating and cooling of the drying air through the heat exchanger in the longitudinal direction and is heated in the dryer. - The refrigerant liquifies by a blower in the rear area. - This in the fill area and the plinth area of the... heat exchanger, the drum, and several filters. This changes the pressure of the heat exchanger, and loses its gaseous state. Functioning of the heat-pump dryer Two separate circuits ensure that is connected to a pipeline system which flows through a capillary tube (a very thin tube) to the front area of the ...
... circuit regulates the heating and cooling of the drying air through the heat exchanger in the longitudinal direction and is heated in the dryer. - The refrigerant liquifies by a blower in the rear area. - This in the fill area and the plinth area of the... heat exchanger, the drum, and several filters. This changes the pressure of the heat exchanger, and loses its gaseous state. Functioning of the heat-pump dryer Two separate circuits ensure that is connected to a pipeline system which flows through a capillary tube (a very thin tube) to the front area of the ...

Operating instructions/Installation instructions
Page 19
Loading the tumble dryer". You can then load the tumble dryer and select a program as described in these instructions Read "1. Initial set-up 19 Any stickers (if present) from the door - Removing the protective film and stickers Remove: - Notes on correct laundry care" and "2. The protective film from the front and the lid Please do not remove any labels (e.g., the data plate) which are visible when you open the door. Selecting a program and starting it". Carrying out the procedure for initial commissioning outlined in "3.
Loading the tumble dryer". You can then load the tumble dryer and select a program as described in these instructions Read "1. Initial set-up 19 Any stickers (if present) from the door - Removing the protective film and stickers Remove: - Notes on correct laundry care" and "2. The protective film from the front and the lid Please do not remove any labels (e.g., the data plate) which are visible when you open the door. Selecting a program and starting it". Carrying out the procedure for initial commissioning outlined in "3.


