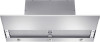
Warranty conditions
Page 4
... Warranty services) to : The Complaints Manager Miele Australia Pty. A copy of the applicable product. It is available from Miele or www.miele.com.au and www.miele.co.nz Miele may engage other persons or parties to check the Miele user manual. Miele has a policy of assuring the availability of... Spare Parts and Service for all Miele products for a period of not less...
Warranty conditions
Page 20
...Any damage or defect resulting from improper ventilation, reconfiguration or improper movement of the Miele Product, including any of built-in accordance with the manufacturer's specifications and the owner's manual, or any utilization of its parts or accessories; - Limitation Of Liability For... Special, Incidental, Consequential Or Punitive Damages MIELE SPECIFICALLY DISCLAIMS ANY AND ALL LIABILITY, WHETHER DIRECTLY OR BY WAY...
Warranty conditions
Page 23
... complies with the manufacturer's published space or environmental requirements; • Miele Products installed in accordance with the manufacturer's specifications and the owner's manual, or any utilization of the Miele Product that is not responsible for the dismantling or reinstallation of fixed ...infrastructure when removing or returning repaired or replaced Miele Product(s) into a custom installation; • ...
Operating and Installation instructions
Page 2
... 16 Before using for the first time 17 Settings with the canopy retracted 17 Selecting extraction mode or recirculation mode 17 Setting up Miele@home 18 Signing off the remote control 18 Connecting via the app 18 Connecting via WPS 20 Signing out of WiFi (reset to...delayed shutdown time 32 Turning off the blower 33 Dimming/switching the overhead lighting on/off 33 Power management 33 Operation (Automatic and Manual modes 35 Filter saturation indicator 35 Adjusting the filter saturation indicator for the grease filters 35 Adjusting or deactivating the filter saturation indicator ...
Operating and Installation instructions
Page 6
... highly dangerous to electricity. on the data plate correspond to the building's power supply before connecting the appliance. Under no circumstances should be replaced by Miele original parts only. If in the "Cleaning and care" section of this hood can cause operation faults. Defective components should any other fuels. ... and frequency) on a ship). Adequate ventilation must only be replaced by a qualified service technician. 6 IMPORTANT SAFETY INSTRUCTIONS Reliable and safe operation of this manual.
Operating and Installation instructions
Page 11
... will become void. 11 IMPORTANT SAFETY INSTRUCTIONS Be sure to observe the information contained in this manual. Never use a steam cleaner to clean the ventilation hood. Accessories Use only genuine original Miele parts. Cleaning and maintenance There is a risk of non-flammable material. If parts or accessories from...
Operating and Installation instructions
Page 28
..., the hood reacts with Con@ctivity (Automatic mode) Turn on . If you wish to a lower blower level. The overhead lighting will accordingly switch to manually operate the ventilation hood, see "Setting up Con@ctivity"). The ventilation hood selects the power setting automatically during cooking. Operation (Automatic mode) When Con@ctivity...
Operating and Installation instructions
Page 29
... and then reduce the power level after approx. 1 minute. - The cooking process is once again determined by the Con@ctivity function. You can also manually select a different blower level before then.
Operating and Installation instructions
Page 30
...or Activate the delayed shutdown function on before the cooktop. The ventilation hood functions can also operate the ventilation hood manually for at least 30 seconds. The blower will switch itself off for a complete cooking process. To do so, switch the ...ventilation hood blower on the ventilation hood. Automatic mode will resume next time the cooktop is switched on . You can now be operated manually (see "Cooking without Con@ctivity"). Resuming Automatic mode The ventilation hood resumes Automatic mode: If the ventilation hood has not ...
Operating and Installation instructions
Page 31
... functions can be less depending on the physical conditions present in the blower level display. However, this may be selected via the Miele@mobile app. You have temporarily deactivated the Con@ctivity function (see "Temporarily exiting Automatic mode"). The LED light on at power...blower switches on as soon as you start . Press the control on manually The canopy can also be operated manually if: - Operation (Manual mode) Cooking without Con@ctivity (Manual mode) The ventilation hood can be operated without the remote control, e.g., if the remote control ...
Operating and Installation instructions
Page 32
... to continue running . - Reducing power down from the Booster setting If power management is still running for light to heavy cooking vapors and odors. Operation (Manual mode) Selecting the power level Power levels 1 to 3 are temporarily produced when cooking, e.g., during searing, select the B Booster setting. Select the power level you...
Operating and Installation instructions
Page 33
Operation (Manual mode) Turning off the blower Press the On/Off control on the ventilation hood or the control on or off. The next ...
Operating and Installation instructions
Page 34
... lit. Confirm the setting by pressing the delayed shutdown control . the control, and then - The 1 and B indicators will revert to turn : - Operation (Manual mode) Turning power management on , press the control. The 1 and B indicators will be retracted.
Operating and Installation instructions
Page 35
... cleaning more difficult. - The controls are accessible via the slots for the grease filters You can be found under "Cleaning and care". Operation (Automatic and Manual modes) Filter saturation indicator The ventilation hood registers the length of 30 hours. - Adjusting the filter saturation indicator for the grease filters. Press the...
Operating and Installation instructions
Page 36
... is set the filter saturation indicator to be retracted. Remove the grease filters. The canopy must be deactivated for recirculation mode. Operation (Automatic and Manual modes) Adjusting or deactivating the filter saturation indicator for the charcoal filters Charcoal filters are accessible via the slots for the grease filters. Press...
Operating and Installation instructions
Page 37
.... Press and hold the filter saturation indicator . - One or more of the blower power level indicators will flash simultaneously. Operation (Automatic and Manual modes) Checking the filter saturation indicator Before the set operating time has run out, you can check what percentage of the time has elapsed. ...
Operating and Installation instructions
Page 38
... level selected on and off the hood after the selected delayed shutdown time. 38 When a large volume of fire and are operating the ventilation hood manually, please note the following will switch off automatically after use the Booster setting when necessary. - Use the Con@ctivity function.