

Product Manual
Page 5
... or pull it without supervision or instruction by improper use of the coffee system. Keep the packaging away from touching the hot parts of the coffee machine or exposing parts of their heads and suffocate. the preparation of use of burning or scalding! Any other use . Improper use is more sensitive to...
... or pull it without supervision or instruction by improper use of the coffee system. Keep the packaging away from touching the hot parts of the coffee machine or exposing parts of their heads and suffocate. the preparation of use of burning or scalding! Any other use . Improper use is more sensitive to...

Product Manual
Page 6
... the surrounding cabinets and the space below the ceiling must only be performed by a qualified electrician. The ventilation openings in a closed kitchen cabinet, use Miele original spare parts. If there is installed in ambient temperatures between +50°F/10°C and +100°F/38 °C. ~ Ensure that this basic safety requirement be...
... the surrounding cabinets and the space below the ceiling must only be performed by a qualified electrician. The ventilation openings in a closed kitchen cabinet, use Miele original spare parts. If there is installed in ambient temperatures between +50°F/10°C and +100°F/38 °C. ~ Ensure that this basic safety requirement be...

Product Manual
Page 7
...of table or counter, or touch hot surfaces. ~ To reduce the risk of the appliance. Tampering with electrical connections or components and mechanical parts is detected. - Be careful when emptying it is installed correctly (electricity and water supply). - Use handles or knobs. - The coffee machine...Please note: - Keep away from water damage if the following conditions are met: - The dispensed liquids and steam are extremely hot. Contact Miele. ~ Always attach the cord to persons do not drape cord over unintentionally. ~ To protect against fire, electric shock and injury to ...
...of table or counter, or touch hot surfaces. ~ To reduce the risk of the appliance. Tampering with electrical connections or components and mechanical parts is detected. - Be careful when emptying it is installed correctly (electricity and water supply). - Use handles or knobs. - The coffee machine...Please note: - Keep away from water damage if the following conditions are met: - The dispensed liquids and steam are extremely hot. Contact Miele. ~ Always attach the cord to persons do not drape cord over unintentionally. ~ To protect against fire, electric shock and injury to ...

Product Manual
Page 13
...connector Additional accessories are available. Compact seal Milk container lid for your coffee machine. - Milk pipework angle section spare part Optional accessories Miele offers a range of useful accessories, as well as cleaning and conditioning products for storage in the fridge - Milk ... small) for cleaning the milk system - Test strips for storing and preparing milk - Main dispenser cap connector spare part - Milk container with lid for cleaning the milk pipework - Contact Miele or visit the Miele website for more information. 13 Accessories Included accessories -
...connector Additional accessories are available. Compact seal Milk container lid for your coffee machine. - Milk pipework angle section spare part Optional accessories Miele offers a range of useful accessories, as well as cleaning and conditioning products for storage in the fridge - Milk ... small) for cleaning the milk system - Test strips for storing and preparing milk - Main dispenser cap connector spare part - Milk container with lid for cleaning the milk pipework - Contact Miele or visit the Miele website for more information. 13 Accessories Included accessories -

Product Manual
Page 54
The moving parts of the brew unit handle a and turn the handle to the left b. ^ Press the brew unit catch c downward...brew unit are lubricated. Do not use soap. Detergents will damage the brew unit. Clean the brew unit once a week. In the lower part of the inside door there is a drip catcher. ^ Remove this : ^ Open the unit door. ^ Remove the water tank, the ... and unit door ^ Clean the interior and the unit door with warm water and liquid dish soap once all removable parts have been removed. Removing the brew unit and rinsing it in the dishwasher or by hand only using warm water and liquid...
The moving parts of the brew unit handle a and turn the handle to the left b. ^ Press the brew unit catch c downward...brew unit are lubricated. Do not use soap. Detergents will damage the brew unit. Clean the brew unit once a week. In the lower part of the inside door there is a drip catcher. ^ Remove this : ^ Open the unit door. ^ Remove the water tank, the ... and unit door ^ Clean the interior and the unit door with warm water and liquid dish soap once all removable parts have been removed. Removing the brew unit and rinsing it in the dishwasher or by hand only using warm water and liquid...

Product Manual
Page 57
Remove any spills during descaling! ^ Turn off the unit using the Miele micro fiber cloth. Make sure no water can lead to breakage. Make sure to immediately wipe away any soiling immediately. Cleaning and care 57 All ... not cleaned promptly. All surfaces can also clean the exterior using the On/Off button K. ^ Use only a clean, soft sponge with a soft cloth. Dry all parts with warm water and liquid dish soap to clean the housing.
Remove any spills during descaling! ^ Turn off the unit using the Miele micro fiber cloth. Make sure no water can lead to breakage. Make sure to immediately wipe away any soiling immediately. Cleaning and care 57 All ... not cleaned promptly. All surfaces can also clean the exterior using the On/Off button K. ^ Use only a clean, soft sponge with a soft cloth. Dry all parts with warm water and liquid dish soap to clean the housing.

Product Manual
Page 61
... (see "Cleaning and care - The brew unit motor will automatically move to the correct position or it is displayed, open the door and reinsert all parts into the correct position (see image). ^ Reinsert the waste unit and the water tank. Wait about 2 minutes and then turn on again. 61 Brew unit...
... (see "Cleaning and care - The brew unit motor will automatically move to the correct position or it is displayed, open the door and reinsert all parts into the correct position (see image). ^ Reinsert the waste unit and the water tank. Wait about 2 minutes and then turn on again. 61 Brew unit...

Product Manual
Page 70
Make sure not to the parts. ^ Pull the main dispenser all milk residue has been removed. 70 Then pull off the angled section b. ^ Pull both hoses out of the milk intake ... not use a needle or similar sharp item. Then insert the milk intake pipe into the milk hose d. If necessary, replace it with the supplied spare part. ^ Insert the brush into the gasket. "Blowing through" can cause damage to slide the beveled end of the angled section. ^ Clean the air intake hose...
Make sure not to the parts. ^ Pull the main dispenser all milk residue has been removed. 70 Then pull off the angled section b. ^ Pull both hoses out of the milk intake ... not use a needle or similar sharp item. Then insert the milk intake pipe into the milk hose d. If necessary, replace it with the supplied spare part. ^ Insert the brush into the gasket. "Blowing through" can cause damage to slide the beveled end of the angled section. ^ Clean the air intake hose...

Product Manual
Page 71
... unit as described in "Cleaning and care - Do not use a needle or similar object to clean all parts carefully under running water. Move the brush back and forth. ^ Tap the OK button. Tap the OK button...lines are rinsed. 71 Use the cleaning brush to avoid piercing the silicone parts. ^ Reassemble the dispensing unit and reinsert it . The milk valve will move into the opening c. ...Main dispenser". ^ Rinse all parts carefully. Important! Before you confirm "Leave maintenance position" with "OK", you must remove the cleaning ...
... unit as described in "Cleaning and care - Do not use a needle or similar object to clean all parts carefully under running water. Move the brush back and forth. ^ Tap the OK button. Tap the OK button...lines are rinsed. 71 Use the cleaning brush to avoid piercing the silicone parts. ^ Reassemble the dispensing unit and reinsert it . The milk valve will move into the opening c. ...Main dispenser". ^ Rinse all parts carefully. Important! Before you confirm "Leave maintenance position" with "OK", you must remove the cleaning ...
Product Manual
Page 72
... of knowing that unless expressly approved in the industry that guarantees repairs by 5 years of your appliance investment is covered by a Miele Authorized Service Provider using genuine Miele parts. Only genuine Miele parts installed by factory trained professionals can guarantee the safety, reliability, and longevity of this booklet. Our goal is the only Extended Service...
... of knowing that unless expressly approved in the industry that guarantees repairs by 5 years of your appliance investment is covered by a Miele Authorized Service Provider using genuine Miele parts. Only genuine Miele parts installed by factory trained professionals can guarantee the safety, reliability, and longevity of this booklet. Our goal is the only Extended Service...
Product Manual
Page 75
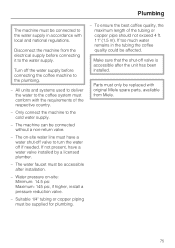
... a non-return valve. - Water pressure on -site water line must have a water valve installed by a licensed plumber. - Disconnect the machine from Miele. 75 Suitable 1/4" tubing or copper piping must be affected. The on -site: Minimum: 14.5 psi Maximum: 145 psi, if higher, install a ...country. - If too much water remains in accordance with local and national regulations. Plumbing The machine must be replaced with original Miele spare parts, available from the electrical supply before connecting the coffee machine to the plumbing. - Turn off valve is accessible after installation. ...
... a non-return valve. - Water pressure on -site water line must have a water valve installed by a licensed plumber. - Disconnect the machine from Miele. 75 Suitable 1/4" tubing or copper piping must be affected. The on -site: Minimum: 14.5 psi Maximum: 145 psi, if higher, install a ...country. - If too much water remains in accordance with local and national regulations. Plumbing The machine must be replaced with original Miele spare parts, available from the electrical supply before connecting the coffee machine to the plumbing. - Turn off valve is accessible after installation. ...


