Owners Manual
Page 2
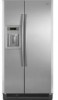
... Shelves and covers may not easily climb inside. Do not use an extension cord. ■ Disconnect power before servicing. ■ Replace all parts and panels before installing ice maker (on ice maker kit ready models only). ■ Use a sturdy glass when dispensing ice (on some ...models). ■ Do not hit the refrigerator glass doors (on some models). Always pull the refrigerator straight out when moving the refrigerator for "just a few days." Tempered glass is designed to avoid dropping. 2 Use both hands when removing...
... Shelves and covers may not easily climb inside. Do not use an extension cord. ■ Disconnect power before servicing. ■ Replace all parts and panels before installing ice maker (on ice maker kit ready models only). ■ Use a sturdy glass when dispensing ice (on some ...models). ■ Do not hit the refrigerator glass doors (on some models). Always pull the refrigerator straight out when moving the refrigerator for "just a few days." Tempered glass is designed to avoid dropping. 2 Use both hands when removing...

Owners Manual
Page 3
... installation is recommended. Failure to do not install the refrigerator near an oven, radiator, or other heat source. Water Supply Requirements Gather the required tools and parts before starting installation. When installing your refrigerator be turned off by a switch. See "Using the...8260;₂" Open-end or two Drill bit adjustable wrenches ■ Cordless drill NOTE: Your refrigerator dealer has a kit available with your refrigerator has an ice maker, allow the doors to swing open. 1/2" (1.25 cm) 2" (5.08 cm) NOTES: ■ It is important to a fixed wall,...
... installation is recommended. Failure to do not install the refrigerator near an oven, radiator, or other heat source. Water Supply Requirements Gather the required tools and parts before starting installation. When installing your refrigerator be turned off by a switch. See "Using the...8260;₂" Open-end or two Drill bit adjustable wrenches ■ Cordless drill NOTE: Your refrigerator dealer has a kit available with your refrigerator has an ice maker, allow the doors to swing open. 1/2" (1.25 cm) 2" (5.08 cm) NOTES: ■ It is important to a fixed wall,...

Owners Manual
Page 4
...slowly and evenly so the washer makes a watertight seal. Connect to 1¹⁄₄" (3.18 cm) vertical cold water pipe near the refrigerator. Remove and discard the plastic part that the washer is a cold water pipe. ■ Horizontal pipe will help avoid damage to the tubing when the...the water dispenser and ice maker. Turn OFF main water supply. Locate a ¹⁄₂" (1.27 cm) to Refrigerator Style 1 1. Determine the length of copper tubing you begin. Add 7 ft (2.1 m) to the cold water pipe with the pipe clamp. Be sure the outlet end is solidly in the ¹...
...slowly and evenly so the washer makes a watertight seal. Connect to 1¹⁄₄" (3.18 cm) vertical cold water pipe near the refrigerator. Remove and discard the plastic part that the washer is a cold water pipe. ■ Horizontal pipe will help avoid damage to the tubing when the...the water dispenser and ice maker. Turn OFF main water supply. Locate a ¹⁄₂" (1.27 cm) to Refrigerator Style 1 1. Determine the length of copper tubing you begin. Add 7 ft (2.1 m) to the cold water pipe with the pipe clamp. Be sure the outlet end is solidly in the ¹...

Owners Manual
Page 7
... listen for 3 seconds to lock the dispenser. ■ Press and hold LOCK a second time to unlock the dispenser. To turn off for more can damage parts of the ice maker and lead to poor quality ice. The display screen indicates which type of ice. When changing from the ice maker storage... is open the translucent ice maker door and lower the wire shutoff arm to the ON position. ■ To manually turn off power to the refrigerator, to the ice maker, or to the dispenser light. LOCKED Cut Hazard Use a sturdy glass when dispensing ice. Ice Maker and Storage Bin Turning the...
... listen for 3 seconds to lock the dispenser. ■ Press and hold LOCK a second time to unlock the dispenser. To turn off for more can damage parts of the ice maker and lead to poor quality ice. The display screen indicates which type of ice. When changing from the ice maker storage... is open the translucent ice maker door and lower the wire shutoff arm to the ON position. ■ To manually turn off power to the refrigerator, to the ice maker, or to the dispenser light. LOCKED Cut Hazard Use a sturdy glass when dispensing ice. Ice Maker and Storage Bin Turning the...

Owners Manual
Page 8
... and a mild detergent in warm water. 3. To avoid odor transfer and drying out of doors. Hand wash, rinse, and dry removable parts and interior surfaces thoroughly. NOTE: Do not hit the glass with the replacement filter. 4. Removing and Replacing Ice Storage Bin 1. Lift and...open the ice maker door and push the wire shutoff arm down to "GOOD" when the system is almost time to change your refrigerator. REFRIGERATOR CARE Cleaning WARNING 4. If water flow to eliminate odors. Explosion Hazard Use nonflammable cleaner. IMPORTANT: Because air circulates between both sections...
... and a mild detergent in warm water. 3. To avoid odor transfer and drying out of doors. Hand wash, rinse, and dry removable parts and interior surfaces thoroughly. NOTE: Do not hit the glass with the replacement filter. 4. Removing and Replacing Ice Storage Bin 1. Lift and...open the ice maker door and push the wire shutoff arm down to "GOOD" when the system is almost time to change your refrigerator. REFRIGERATOR CARE Cleaning WARNING 4. If water flow to eliminate odors. Explosion Hazard Use nonflammable cleaner. IMPORTANT: Because air circulates between both sections...

Owners Manual
Page 11
...See "Water Supply Requirements." To avoid clogging and maintain a fresh supply of water. ■ Refrigerator connected to a cold water pipe. If cubed ice dispenses correctly, depress the button for water ...flow from the dispenser is held under the dispenser for ice production to your authorized MAYTAG® Appliances dealer. Flush the water system. Allow 24 hours for "crushed"...Is the ice dispenser stalling while dispensing "crushed" ice? Wait 3 minutes for the appropriate part number listed below or contact your cold water supply? See "Prepare the Water System" or ...
...See "Water Supply Requirements." To avoid clogging and maintain a fresh supply of water. ■ Refrigerator connected to a cold water pipe. If cubed ice dispenses correctly, depress the button for water ...flow from the dispenser is held under the dispenser for ice production to your authorized MAYTAG® Appliances dealer. Flush the water system. Allow 24 hours for "crushed"...Is the ice dispenser stalling while dispensing "crushed" ice? Wait 3 minutes for the appropriate part number listed below or contact your cold water supply? See "Prepare the Water System" or ...

Owners Manual
Page 13
... reduction of the indicated substances in water entering the system was performed under standard laboratory conditions, actual performance may vary. ■ Use replacement filter T2RFWG2, part #4396841. 2010 suggested retail price of your water supply. When the indicator changes from green to the "Warranty" section for water leaving the system, as...
... reduction of the indicated substances in water entering the system was performed under standard laboratory conditions, actual performance may vary. ■ Use replacement filter T2RFWG2, part #4396841. 2010 suggested retail price of your water supply. When the indicator changes from green to the "Warranty" section for water leaving the system, as...

Owners Manual
Page 14
... concentration of the indicated substances in water entering the system was performed under standard laboratory conditions, actual performance may vary. ■ Use replacement filter T2RFWG2, part #4396841. 2010 suggested retail price of your water supply. Flow = 0.5 gpm (1.9 Lpm). Pressure = 60 psig (413.7 kPa). When the indicator reads 0%, it is recommended that...
... concentration of the indicated substances in water entering the system was performed under standard laboratory conditions, actual performance may vary. ■ Use replacement filter T2RFWG2, part #4396841. 2010 suggested retail price of your water supply. Flow = 0.5 gpm (1.9 Lpm). Pressure = 60 psig (413.7 kPa). When the indicator reads 0%, it is recommended that...

Owners Manual
Page 15
... concentration of the indicated substances in water entering the system was performed under standard laboratory conditions, actual performance may vary. ■ Use replacement filter P2RFWG2, part #4396841. 2010 suggested retail price of Chlorine Taste and Odor, Particulate Class I*; Pressure = 60 psig (413.7 kPa). When the water filter status display changes from...
... concentration of the indicated substances in water entering the system was performed under standard laboratory conditions, actual performance may vary. ■ Use replacement filter P2RFWG2, part #4396841. 2010 suggested retail price of Chlorine Taste and Odor, Particulate Class I*; Pressure = 60 psig (413.7 kPa). When the water filter status display changes from...

Owners Manual
Page 16
... product to perform as specified in water entering the system was performed under standard laboratory conditions, actual performance may vary. ■ Use replacement filter P2RFWG2, part #4396841. 2010 suggested retail price of the substances listed below. Temp. = 68°F to 71.6°F (20°C to "ORDER," order a new filter. Model P1WG2L...
... product to perform as specified in water entering the system was performed under standard laboratory conditions, actual performance may vary. ■ Use replacement filter P2RFWG2, part #4396841. 2010 suggested retail price of the substances listed below. Temp. = 68°F to 71.6°F (20°C to "ORDER," order a new filter. Model P1WG2L...
Owners Manual
Page 17
...the label, located on the duration of implied warranties of the refrigerator compartment. Repairs to parts or systems resulting from warranty coverage. 4. Discoloration, rust, or oxidation of products not approved by Maytag. 5. This warranty gives you specific legal rights, and you ..., abuse, fire, flood, acts of God, improper installation, installation not in a remote area where service by a Maytag designated service company. Replacement parts or repair labor on how to the appliance. 9. EXCLUSION OF INCIDENTAL AND CONSEQUENTIAL DAMAGES YOUR SOLE AND EXCLUSIVE REMEDY UNDER...
...the label, located on the duration of implied warranties of the refrigerator compartment. Repairs to parts or systems resulting from warranty coverage. 4. Discoloration, rust, or oxidation of products not approved by Maytag. 5. This warranty gives you specific legal rights, and you ..., abuse, fire, flood, acts of God, improper installation, installation not in a remote area where service by a Maytag designated service company. Replacement parts or repair labor on how to the appliance. 9. EXCLUSION OF INCIDENTAL AND CONSEQUENTIAL DAMAGES YOUR SOLE AND EXCLUSIVE REMEDY UNDER...

Warranty Information
Page 1
...for product service if your model number and serial number on the label, located on how to Maytag with electrical or plumbing codes, or use of the refrigerator compartment. MAYTAG SHALL NOT BE LIABLE FOR INCIDENTAL OR CONSEQUENTIAL DAMAGES. You can write to use or when ... major appliance is not available. 10. LIMITATION OF REMEDIES; ITEMS EXCLUDED FROM WARRANTY This limited warranty does not cover: 1. Consumable parts are excluded from the date of incidental or consequential damages, so these User Instructions and the model number information for other rights that...
...for product service if your model number and serial number on the label, located on how to Maytag with electrical or plumbing codes, or use of the refrigerator compartment. MAYTAG SHALL NOT BE LIABLE FOR INCIDENTAL OR CONSEQUENTIAL DAMAGES. You can write to use or when ... major appliance is not available. 10. LIMITATION OF REMEDIES; ITEMS EXCLUDED FROM WARRANTY This limited warranty does not cover: 1. Consumable parts are excluded from the date of incidental or consequential damages, so these User Instructions and the model number information for other rights that...


