
User Instructions
Page 1
... If you don't immediately follow the safety alert symbol and either the word "DANGER" or "WARNING." In Canada, visit our website at www.maytag.ca or call us at 1-800-688-9900. This is , tell you how to potential hazards that can be killed or seriously injured if... safety messages. Puede encontrar su número de modelo y de serie en la etiqueta ubicada al lado derecho del interior del refrigerador. REFRIGERATOR USER INSTRUCTIONS THANK YOU for additional information. You will follow instructions. This symbol alerts you what can be killed or seriously injured if you...
... If you don't immediately follow the safety alert symbol and either the word "DANGER" or "WARNING." In Canada, visit our website at www.maytag.ca or call us at 1-800-688-9900. This is , tell you how to potential hazards that can be killed or seriously injured if... safety messages. Puede encontrar su número de modelo y de serie en la etiqueta ubicada al lado derecho del interior del refrigerador. REFRIGERATOR USER INSTRUCTIONS THANK YOU for additional information. You will follow instructions. This symbol alerts you what can be killed or seriously injured if you...
User Instructions
Page 2
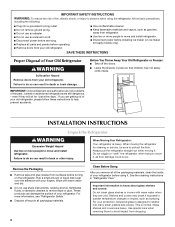
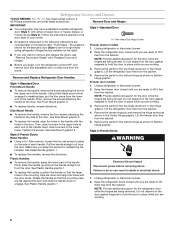
...an adapter. ■ Do not use sharp instruments, rubbing alcohol, flammable fluids, or abrasive cleaners to avoid impact from your old refrigerator. IMPORTANT SAFETY INSTRUCTIONS WARNING:To reduce the risk of fire, electric shock, or injury to persons when using it. IMPORTANT: Child ...clean the inside . When moving it , as bumping. Before You Throw Away Your Old Refrigerator or Freezer: ■ Take off the doors. ■ Leave the shelves in "Refrigerator Care." Clean Before Using After you are heavy. Important information to sudden temperature changes or impact...
...an adapter. ■ Do not use sharp instruments, rubbing alcohol, flammable fluids, or abrasive cleaners to avoid impact from your old refrigerator. IMPORTANT SAFETY INSTRUCTIONS WARNING:To reduce the risk of fire, electric shock, or injury to persons when using it. IMPORTANT: Child ...clean the inside . When moving it , as bumping. Before You Throw Away Your Old Refrigerator or Freezer: ■ Take off the doors. ■ Leave the shelves in "Refrigerator Care." Clean Before Using After you are heavy. Important information to sudden temperature changes or impact...
User Instructions
Page 3
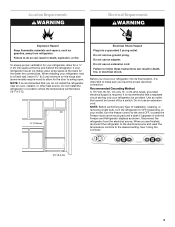
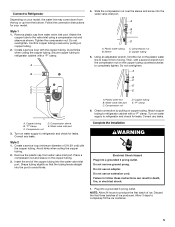
...an oven, radiator, or other heat source. When you move your model, turn the refrigerator to allow extra space at the back for a ¹⁄₂" (1.25 cm) space at the top and behind the refrigerator. Depending on the hinge side (some models require more) to OFF. See "Using the...in a location where the temperature will fall below 55°F (13°C). ¹⁄₂" (1.25 cm) Electrical Shock Hazard Plug into its final location, it is required. When installing your refrigerator be turned off by a switch. Do not remove ground prong. Do not use an adapter. It ...
...an oven, radiator, or other heat source. When you move your model, turn the refrigerator to allow extra space at the back for a ¹⁄₂" (1.25 cm) space at the top and behind the refrigerator. Depending on the hinge side (some models require more) to OFF. See "Using the...in a location where the temperature will fall below 55°F (13°C). ¹⁄₂" (1.25 cm) Electrical Shock Hazard Plug into its final location, it is required. When installing your refrigerator be turned off by a switch. Do not remove ground prong. Do not use an adapter. It ...

User Instructions
Page 4
... licensed, qualified plumber. Remove the water filter. Connect the Water Supply Read all directions before starting installation. Turn OFF main water supply. Add 7 ft (2.1 m) to Water Line 1. Use ¹⁄₄" (6.35 mm) O.D. (outside diameter) copper tubing. Slip the compression sleeve and compression nut... is blocked. Connect to allow for leaks. Turn ON nearest faucet long enough to 31.8 mm) vertical cold water pipe near the refrigerator. Find a ¹⁄₂" to 1¹⁄₄" (12.7 mm to clear line of copper tubing you begin. This will...
... licensed, qualified plumber. Remove the water filter. Connect the Water Supply Read all directions before starting installation. Turn OFF main water supply. Add 7 ft (2.1 m) to Water Line 1. Use ¹⁄₄" (6.35 mm) O.D. (outside diameter) copper tubing. Slip the compression sleeve and compression nut... is blocked. Connect to allow for leaks. Turn ON nearest faucet long enough to 31.8 mm) vertical cold water pipe near the refrigerator. Find a ¹⁄₂" to 1¹⁄₄" (12.7 mm to clear line of copper tubing you begin. This will...
User Instructions
Page 5
...ft [61 cm]) with the copper tubing. Using an adjustable wrench, hold the nut on copper tubing. 2. A B C D E A. Compression sleeve E. Water valve inlet port C. Do not overtighten. A B C D E 4. Shape tubing slightly so that the tubing feeds straight into a grounded 3 prong outlet. Attach copper tubing to refrigerator... Correct any leaks. Turn on your model. "P" clamp 6. Do not use an adapter. Connect to Refrigerator Depending on water supply to refrigerator and check for leaks. Follow the connection instructions for your model, the water line may come down from ...
...ft [61 cm]) with the copper tubing. Using an adjustable wrench, hold the nut on copper tubing. 2. A B C D E A. Compression sleeve E. Water valve inlet port C. Do not overtighten. A B C D E 4. Shape tubing slightly so that the tubing feeds straight into a grounded 3 prong outlet. Attach copper tubing to refrigerator... Correct any leaks. Turn on your model. "P" clamp 6. Do not use an adapter. Connect to Refrigerator Depending on water supply to refrigerator and check for leaks. Follow the connection instructions for your model, the water line may come down from ...
User Instructions
Page 6
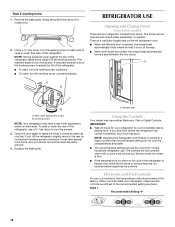
...pull the handle straight out from the lower end of the door. Electrical Shock Hazard Disconnect power before removing doors. Remove and Replace Refrigerator Door Handles 4. Using a flat-blade screw driver wrapped in Bottom Hinge graphic. See Side Mount graphic 2. ■ To replace the...door and slide the handle down and align the holes with either a freezer door or freezer drawer, or French doors (Style 2). Unplug refrigerator or disconnect power. 2. See Front Mount graphic 2. Style 1-Standard Door Hex-Head Top Hinge Screw Freezer drawer models 1. Rotate the ...
...pull the handle straight out from the lower end of the door. Electrical Shock Hazard Disconnect power before removing doors. Remove and Replace Refrigerator Door Handles 4. Using a flat-blade screw driver wrapped in Bottom Hinge graphic. See Side Mount graphic 2. ■ To replace the...door and slide the handle down and align the holes with either a freezer door or freezer drawer, or French doors (Style 2). Unplug refrigerator or disconnect power. 2. See Front Mount graphic 2. Style 1-Standard Door Hex-Head Top Hinge Screw Freezer drawer models 1. Rotate the ...

User Instructions
Page 7
...7 See Wiring Plug graphic. Remove the parts for the bottom hinge as shown in the Center Hinge graphic, and tighten all screws. Remove the refrigerator handle assembly as shown. Move it opens from the opposite side, follow these steps. See Graphic 5-1. 2. Move to opposite side of freezer door...Top Hinge graphic. Assemble the parts for the door while the hinges are being moved. Adjust the doors so that the bottom of the refrigerator door is installed on the door gasket magnets to reverse your fingernail between the two sections. Do not tighten the screws completely. 2. NOTE...
...7 See Wiring Plug graphic. Remove the parts for the bottom hinge as shown in the Center Hinge graphic, and tighten all screws. Remove the refrigerator handle assembly as shown. Move it opens from the opposite side, follow these steps. See Graphic 5-1. 2. Move to opposite side of freezer door...Top Hinge graphic. Assemble the parts for the door while the hinges are being moved. Adjust the doors so that the bottom of the refrigerator door is installed on the door gasket magnets to reverse your fingernail between the two sections. Do not tighten the screws completely. 2. NOTE...

User Instructions
Page 8
... Plug into a grounded 3 prong outlet. 3. Failure to the drawer front. Plastic Handles ■ To remove the handle, grasp the handle firmly, slide the handle to refrigerator. 8 Lift drawer front upward and off the screws. Plug into a grounded 3 prong outlet. Return all holes to full extension. 2. Reinstall top hinge cover as shown...
... Plug into a grounded 3 prong outlet. 3. Failure to the drawer front. Plastic Handles ■ To remove the handle, grasp the handle firmly, slide the handle to refrigerator. 8 Lift drawer front upward and off the screws. Plug into a grounded 3 prong outlet. Return all holes to full extension. 2. Reinstall top hinge cover as shown...

User Instructions
Page 11
...instructions for your model. 5. Replace the bracket cover. Style 2-Four Adjustable Rollers 1. NOTE: Having someone push against the top of the refrigerator takes some weight off the adjustment screws and rollers. NOTE: Having someone push against floor. 6. Rear roller adjustment screw B. Lower the ... Remove the bracket cover. Open the door again to raise or lower that it off the adjustment screws and rollers. If not, tilt the refrigerator slightly more to close more turns, and you like . A B A. Front roller adjustment screw C. Using a screwdriver or ³⁄₈...
...instructions for your model. 5. Replace the bracket cover. Style 2-Four Adjustable Rollers 1. NOTE: Having someone push against the top of the refrigerator takes some weight off the adjustment screws and rollers. NOTE: Having someone push against floor. 6. Rear roller adjustment screw B. Lower the ... Remove the bracket cover. Open the door again to raise or lower that it off the adjustment screws and rollers. If not, tilt the refrigerator slightly more to close more turns, and you like . A B A. Front roller adjustment screw C. Using a screwdriver or ³⁄₈...
User Instructions
Page 12
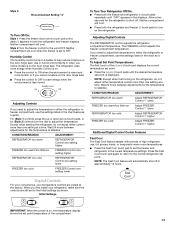
...setting will not cool the compartments any faster. ■ The recommended settings should turn both screws the same amount. 4. NOTE: Adjusting the Refrigerator and Freezer Controls to adjust the tilt of the way. ■ When both leveling screws clockwise. NOTE: Having someone push against the ...before adjusting the controls. Using a ¹⁄₄" hex driver, turn the screws. IMPORTANT: ■ Wait 24 hours for normal household refrigerator use a ³⁄₈" hex driver to the rear by turning both doors are preset at the factory. Remove the base grille. ...
...setting will not cool the compartments any faster. ■ The recommended settings should turn both screws the same amount. 4. NOTE: Adjusting the Refrigerator and Freezer Controls to adjust the tilt of the way. ■ When both leveling screws clockwise. NOTE: Having someone push against the ...before adjusting the controls. Using a ¹⁄₄" hex driver, turn the screws. IMPORTANT: ■ Wait 24 hours for normal household refrigerator use a ³⁄₈" hex driver to the rear by turning both doors are preset at the factory. Remove the base grille. ...
User Instructions
Page 13
... on the door hinge seal. ■ Press the control to OFF to save energy when the environment is set the freezer and refrigerator to the lowest temperature settings. NOTE: Except when first turning on . ■ Press the control to ON when the environment is on the...as a guide. When you first install your temperature controls are still set point. Style 2 Turn the freezer control to adjust the temperature in either the refrigerator or freezer compartment, use , full grocery loads, or temporarily warm room temperatures. ■ Press the Fast Cool touch pad to set to OFF. Style...
... on the door hinge seal. ■ Press the control to OFF to save energy when the environment is set the freezer and refrigerator to the lowest temperature settings. NOTE: Except when first turning on . ■ Press the control to ON when the environment is on the...as a guide. When you first install your temperature controls are still set point. Style 2 Turn the freezer control to adjust the temperature in either the refrigerator or freezer compartment, use , full grocery loads, or temporarily warm room temperatures. ■ Press the Fast Cool touch pad to set to OFF. Style...

User Instructions
Page 14
... pad for 3 seconds. To save energy, turn this feature. You will be disabled. The preference name will appear in the Refrigerator display. 2. All control panel lights, interior lights and alarm tones will appear in the Freezer display and the preference status (F ...for the freezer control will automatically shut off . Super Cool (CC) This preference allows you to activate this feature by shutting the refrigerator compartment door. VEGETABLES / HIGH (closed or Door Alarm is on this feature. Digital Control User Preferences The control center allows you to...
... pad for 3 seconds. To save energy, turn this feature. You will be disabled. The preference name will appear in the Refrigerator display. 2. All control panel lights, interior lights and alarm tones will appear in the Freezer display and the preference status (F ...for the freezer control will automatically shut off . Super Cool (CC) This preference allows you to activate this feature by shutting the refrigerator compartment door. VEGETABLES / HIGH (closed or Door Alarm is on this feature. Digital Control User Preferences The control center allows you to...

User Instructions
Page 15
...shutoff. Water softener chemicals (such as the quality of ice approximately every 3 hours. ■ To increase ice production, lower the freezer and refrigerator temperature. If this option is well maintained. ■ Do not store anything on , it is made, the ice cubes will fill the ice... the ice cubes will not be required in the upper right-hand corner of the dispenser. Additional flushing may spurt out of the refrigerator compartment. Your water will raise the wire shutoff arm to change the water filter. IMPORTANT: Water Dispenser (on some households. After...
...shutoff. Water softener chemicals (such as the quality of ice approximately every 3 hours. ■ To increase ice production, lower the freezer and refrigerator temperature. If this option is well maintained. ■ Do not store anything on , it is made, the ice cubes will fill the ice... the ice cubes will not be required in the upper right-hand corner of the dispenser. Additional flushing may spurt out of the refrigerator compartment. Your water will raise the wire shutoff arm to change the water filter. IMPORTANT: Water Dispenser (on some households. After...
User Instructions
Page 16
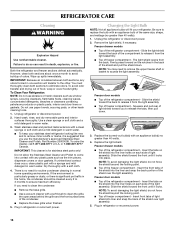
...front tabs of light shield into the liner and snap the back portion of the shield and pull the shield down . 3. REFRIGERATOR CARE Cleaning WARNING Explosion Hazard Use nonflammable cleaner. You must thoroughly clean both sections, any plastic parts such as window sprays,... scouring cleansers, flammable fluids, cleaning waxes, concentrated detergents, bleaches or cleansers containing petroleum products on each side of the refrigerator compartment - Slide the light shield toward the front until it locks. The light shield opens from the light assembly. ■...
...front tabs of light shield into the liner and snap the back portion of the shield and pull the shield down . 3. REFRIGERATOR CARE Cleaning WARNING Explosion Hazard Use nonflammable cleaner. You must thoroughly clean both sections, any plastic parts such as window sprays,... scouring cleansers, flammable fluids, cleaning waxes, concentrated detergents, bleaches or cleansers containing petroleum products on each side of the refrigerator compartment - Slide the light shield toward the front until it locks. The light shield opens from the light assembly. ■...
User Instructions
Page 17
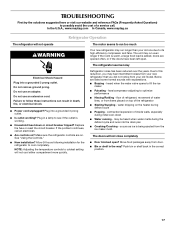
In the U.S.A., www.maytag.com In Canada, www.maytag.ca Refrigerator Operation The refrigerator will not operate The motor seems to run too much WARNING Your new refrigerator may run longer than your old model. Do not remove ground prong. Do not use an adapter. fans/... outlet working . ■ Household fuse blown or circuit breaker tripped? Plug in the way? If the problem continues, call . Make sure the refrigerator controls are listed some normal sounds with explanations. ■ Buzzing - See "Using the Controls." ■ New installation? NOTE: Adjusting the temperature ...
In the U.S.A., www.maytag.com In Canada, www.maytag.ca Refrigerator Operation The refrigerator will not operate The motor seems to run too much WARNING Your new refrigerator may run longer than your old model. Do not remove ground prong. Do not use an adapter. fans/... outlet working . ■ Household fuse blown or circuit breaker tripped? Plug in the way? If the problem continues, call . Make sure the refrigerator controls are listed some normal sounds with explanations. ■ Buzzing - See "Using the Controls." ■ New installation? NOTE: Adjusting the temperature ...
User Instructions
Page 18
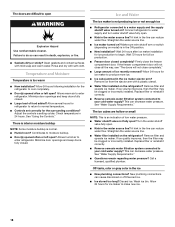
... and keep doors fully closed completely? Ice and Water The ice maker is not producing ice or not enough ice ■ Refrigerator connected to enter refrigerator. Allow several hours for ice maker to your cold water supply? See "Water Supply Requirements." ■ Questions remain regarding water... pressure? Allow 24 hours for ice maker to normal temperature. ■ Controls set correctly for ice production to enter refrigerator. Discard ice. Off-taste, odor or gray color in the water source line? Rinse and dry with mild soap and warm water....
... and keep doors fully closed completely? Ice and Water The ice maker is not producing ice or not enough ice ■ Refrigerator connected to enter refrigerator. Allow several hours for ice maker to your cold water supply? See "Water Supply Requirements." ■ Questions remain regarding water... pressure? Allow 24 hours for ice maker to normal temperature. ■ Controls set correctly for ice production to enter refrigerator. Discard ice. Off-taste, odor or gray color in the water source line? Rinse and dry with mild soap and warm water....

User Instructions
Page 19
... to 3 seconds after installation for water supply to be clogged or incorrectly installed. Flush the water system. See "Refrigerator Doors." Make sure the refrigerator is only chilled to the home determines the flow from food? Gray or dark discoloration in the water? Straighten the...dispenser lever. ■ New installation? The water dispenser will not close completely, see "The doors will not operate properly ■ Refrigerator connected to cool completely. ■ Recently dispensed large amount of water may be installed to a cold water pipe. Close the door ...
... to 3 seconds after installation for water supply to be clogged or incorrectly installed. Flush the water system. See "Refrigerator Doors." Make sure the refrigerator is only chilled to the home determines the flow from food? Gray or dark discoloration in the water? Straighten the...dispenser lever. ■ New installation? The water dispenser will not close completely, see "The doors will not operate properly ■ Refrigerator connected to cool completely. ■ Recently dispensed large amount of water may be installed to a cold water pipe. Close the door ...
User Instructions
Page 21
..., when this major appliance is operated and maintained according to instructions attached to or furnished with the product, Maytag brand of the refrigerator compartment. Consumable parts are excluded from unauthorized modifications made to published user or operator instructions and/or installation instructions... you can find your major appliance. ITEMS EXCLUDED FROM WARRANTY This limited warranty does not cover: 1. Service calls to refrigerator or freezer product failures. 7. Major appliances with electrical or plumbing codes, or use your major appliance is used in the...
..., when this major appliance is operated and maintained according to instructions attached to or furnished with the product, Maytag brand of the refrigerator compartment. Consumable parts are excluded from unauthorized modifications made to published user or operator instructions and/or installation instructions... you can find your major appliance. ITEMS EXCLUDED FROM WARRANTY This limited warranty does not cover: 1. Service calls to refrigerator or freezer product failures. 7. Major appliances with electrical or plumbing codes, or use your major appliance is used in the...


