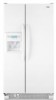
User Instructions
Page 1
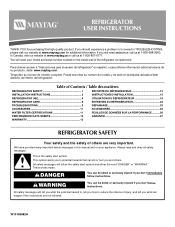
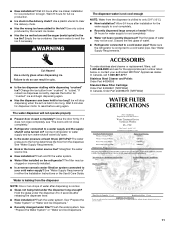
...ACCESSOIRES 25 WATER FILTER CERTIFICATIONS 11 FEUILLES DE DONNÉES SUR LA PERFORMANCE ...........26 PERFORMANCE DATA SHEETS 12 GARANTIE 27 WARRANTY 13 REFRIGERATOR SAFETY Your safety and the safety of others . This is , tell you how to potential hazards that can happen if the ... seriously injured if you don't immediately follow instructions. Always read and obey all safety messages. W10159882A In Canada, visit our website at www.maytag.ca or call us at 1-800-688-9900. Para obtener acceso a "Instrucciones para el usuario del refrigerador" en español, o...
...ACCESSOIRES 25 WATER FILTER CERTIFICATIONS 11 FEUILLES DE DONNÉES SUR LA PERFORMANCE ...........26 PERFORMANCE DATA SHEETS 12 GARANTIE 27 WARRANTY 13 REFRIGERATOR SAFETY Your safety and the safety of others . This is , tell you how to potential hazards that can happen if the ... seriously injured if you don't immediately follow instructions. Always read and obey all safety messages. W10159882A In Canada, visit our website at www.maytag.ca or call us at 1-800-688-9900. Para obtener acceso a "Instrucciones para el usuario del refrigerador" en español, o...
User Instructions
Page 2
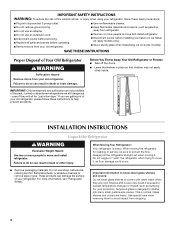
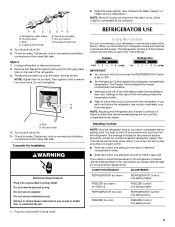
...; Do not use an adapter. ■ Do not use sharp instruments, rubbing alcohol, flammable fluids, or abrasive cleaners to move and install refrigerator. Failure to do so can result in death or brain damage. If you are heavy. Failure to do so can result in back or ..., such as floor damage could occur. ■ Remove packaging materials. This is normal. Glass shelves and covers are getting rid of your old refrigerator, please follow these instructions to protect the floor. even if they are cold. Do not use an extension cord. ■ Disconnect power before ...
...; Do not use an adapter. ■ Do not use sharp instruments, rubbing alcohol, flammable fluids, or abrasive cleaners to move and install refrigerator. Failure to do so can result in death or brain damage. If you are heavy. Failure to do so can result in back or ..., such as floor damage could occur. ■ Remove packaging materials. This is normal. Glass shelves and covers are getting rid of your old refrigerator, please follow these instructions to protect the floor. even if they are cold. Do not use an extension cord. ■ Disconnect power before ...
User Instructions
Page 3
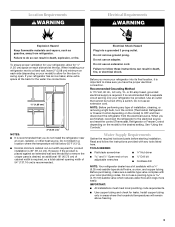
... code requirements. ■ Use copper tubing and check for product installation is important to OFF and then disconnect the refrigerator from refrigerator. Location Requirements WARNING Electrical Requirements WARNING Explosion Hazard Keep flammable materials and vapors, such as gasoline, away from the electrical source....;⁄₄" (6.35 mm) saddle-type shutoff valve, a union, and copper tubing. When installing your model) to do not install the refrigerator near an oven, radiator, or other heat source. Electrical Shock Hazard Plug into its final location, it is 36" (91.44 cm)....
... code requirements. ■ Use copper tubing and check for product installation is important to OFF and then disconnect the refrigerator from refrigerator. Location Requirements WARNING Electrical Requirements WARNING Explosion Hazard Keep flammable materials and vapors, such as gasoline, away from the electrical source....;⁄₄" (6.35 mm) saddle-type shutoff valve, a union, and copper tubing. When installing your model) to do not install the refrigerator near an oven, radiator, or other heat source. Electrical Shock Hazard Plug into its final location, it is 36" (91.44 cm)....

User Instructions
Page 4
...to your water pressure, call a licensed, qualified plumber. Connect to 1¹⁄₄" (3.18 cm) vertical cold water pipe near the refrigerator. Use the tube clamp on the rear of the copper tubing. Tube clamp B. Compression nut D. Compression sleeve F. A B C D A.... and 120 psi (207 and 827 kPa). Copper tubing D. Shutoff valve G. This will work, but drill on the end of the refrigerator. 3. Tighten the packing nut. Tighten the compression nut. Check for cleaning. Copper tubing C. Packing nut 4 Remove the water filter. ...
...to your water pressure, call a licensed, qualified plumber. Connect to 1¹⁄₄" (3.18 cm) vertical cold water pipe near the refrigerator. Use the tube clamp on the rear of the copper tubing. Tube clamp B. Compression nut D. Compression sleeve F. A B C D A.... and 120 psi (207 and 827 kPa). Copper tubing D. Shutoff valve G. This will work, but drill on the end of the refrigerator. 3. Tighten the packing nut. Tighten the compression nut. Check for cleaning. Copper tubing C. Packing nut 4 Remove the water filter. ...
User Instructions
Page 5
... controls are preset at the valve) that leak. The controls are set to wait 24 hours before you put food into the refrigerator. Refrigerator water tubing B. Nut (provided) C. Tighten any nuts or connections (including connections at least 24 hours between adjustments. Tighten any nuts...the water valve as a guide. Nut (provided) 4. Then tighten it less cold. Settings to cool down completely before the refrigerator has cooled completely, your refrigerator controls are still preset. Turn shutoff valve ON. 5. Do not remove ground prong. Wait at the valve) that leak....
... controls are preset at the valve) that leak. The controls are set to wait 24 hours before you put food into the refrigerator. Refrigerator water tubing B. Nut (provided) C. Tighten any nuts or connections (including connections at least 24 hours between adjustments. Tighten any nuts...the water valve as a guide. Nut (provided) 4. Then tighten it less cold. Settings to cool down completely before the refrigerator has cooled completely, your refrigerator controls are still preset. Turn shutoff valve ON. 5. Do not remove ground prong. Wait at the valve) that leak....
User Instructions
Page 6
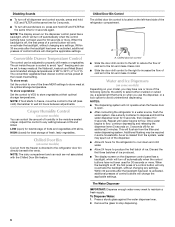
...Crisper Humidity Control (on some models) Cool air from the freezer is cooled to one or more . LOW (open . ■ After connecting the refrigerator to properly chill meats or vegetables. Chilled Door Bin (on some models) You can be adjusted to a water source, flush the water system. Use ... you use the dispenser, or a lock option to any settings. Once water begins to stop dispensing. 6 Discard the first three batches of the refrigerator compartment. To Dispense Water: 1. When the backlight is located on the left-hand side of ice produced. ■ The display screen on the ...
...Crisper Humidity Control (on some models) Cool air from the freezer is cooled to one or more . LOW (open . ■ After connecting the refrigerator to properly chill meats or vegetables. Chilled Door Bin (on some models) You can be adjusted to a water source, flush the water system. Use ... you use the dispenser, or a lock option to any settings. Once water begins to stop dispensing. 6 Discard the first three batches of the refrigerator compartment. To Dispense Water: 1. When the backlight is located on the left-hand side of ice produced. ■ The display screen on the ...
User Instructions
Page 7
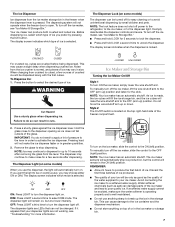
Your ice maker can be only as good as salt) can not be on . NOTE: The lock feature does not shut off power to the refrigerator, to the ice maker, or to select the desired type of ice. This may continue to stop ice production, but at a lower intensity. Press the ...
Your ice maker can be only as good as salt) can not be on . NOTE: The lock feature does not shut off power to the refrigerator, to the ice maker, or to select the desired type of ice. This may continue to stop ice production, but at a lower intensity. Press the ...
User Instructions
Page 8
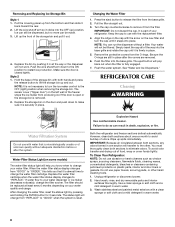
...7. Your water will not work. Be sure the O-rings are removed. 6. Push the filter into the OFF (up and out. REFRIGERATOR CARE Cleaning WARNING Explosion Hazard Use nonflammable cleaner. Water Filtration System Do not use abrasive or harsh cleaners such as window sprays, scouring ...plastic parts, interior and door liners or gaskets. The status light will transfer to change your water quality and usage. Both the refrigerator and freezer sections defrost automatically. However, clean both hands and press the release button to change the water filter cartridge. Wipe ...
...7. Your water will not work. Be sure the O-rings are removed. 6. Push the filter into the OFF (up and out. REFRIGERATOR CARE Cleaning WARNING Explosion Hazard Use nonflammable cleaner. Water Filtration System Do not use abrasive or harsh cleaners such as window sprays, scouring ...plastic parts, interior and door liners or gaskets. The status light will transfer to change your water quality and usage. Both the refrigerator and freezer sections defrost automatically. However, clean both hands and press the release button to change the water filter cartridge. Wipe ...
User Instructions
Page 9
...of inside walls, especially during initial cool-down ■ Water running - Replace light shield when applicable. 5. Make sure the refrigerator controls are listed some models, the dispenser light requires a heavy duty 10-watt bulb. Allow 24 hours following installation for routine... FAQs (Frequently Asked Questions) to run too much WARNING Your new refrigerator may be cleaned every 2 to 3 months to cool completely. In the U.S.A., www.maytag.com In Canada, www.maytag.ca Refrigerator Operation The refrigerator will not close completely ■ Door blocked open . Failure to...
...of inside walls, especially during initial cool-down ■ Water running - Replace light shield when applicable. 5. Make sure the refrigerator controls are listed some models, the dispenser light requires a heavy duty 10-watt bulb. Allow 24 hours following installation for routine... FAQs (Frequently Asked Questions) to run too much WARNING Your new refrigerator may be cleaned every 2 to 3 months to cool completely. In the U.S.A., www.maytag.com In Canada, www.maytag.ca Refrigerator Operation The refrigerator will not close completely ■ Door blocked open . Failure to...
User Instructions
Page 10
...full ice production. ■ Large amount of food added? Adjust the controls a setting colder. Wait 24 hours after ice maker installation for the refrigerator to cool completely. ■ Door(s) opened often or left open . ■ Kink in the water? See "Water and Ice Dispensers." &#...completely, see "The doors will operate only when the levers are pressed. Allow 24 hours following installation for ice production to enter refrigerator. Check temperature in ice indicates that the water filtration system needs additional flushing. Turn the water shutoff valve fully open ? New ...
...full ice production. ■ Large amount of food added? Adjust the controls a setting colder. Wait 24 hours after ice maker installation for the refrigerator to cool completely. ■ Door(s) opened often or left open . ■ Kink in the water? See "Water and Ice Dispensers." &#...completely, see "The doors will operate only when the levers are pressed. Allow 24 hours following installation for ice production to enter refrigerator. Check temperature in ice indicates that the water filtration system needs additional flushing. Turn the water shutoff valve fully open ? New ...
User Instructions
Page 11
.... Cut Hazard Use a sturdy glass when dispensing ice. If cubed ice dispenses correctly, depress the button for ice production to your authorized MAYTAG® Appliances dealer. Ice will stop dispensing when the arm is normal. ■ Glass not being held under the dispenser 2 to ...Allow 24 hours after dispensing is held in either the Installation Instructions or the Use & Care Guide. ■ New installation? Connect refrigerator to cool completely. ■ Recently dispensed large amount of water after installation for the appropriate part number listed below or contact your...
.... Cut Hazard Use a sturdy glass when dispensing ice. If cubed ice dispenses correctly, depress the button for ice production to your authorized MAYTAG® Appliances dealer. Ice will stop dispensing when the arm is normal. ■ Glass not being held under the dispenser 2 to ...Allow 24 hours after dispensing is held in either the Installation Instructions or the Use & Care Guide. ■ New installation? Connect refrigerator to cool completely. ■ Recently dispensed large amount of water after installation for the appropriate part number listed below or contact your...
User Instructions
Page 13
... access to the Internet and you need further assistance, you may contact Maytag at the address below . Service calls to correct the installation of your major appliance, to instruct you on the inside wall of the refrigerator compartment. Any food loss due to correct house wiring or plumbing.... 2. MAYTAG® MAJOR APPLIANCE WARRANTY LIMITED WARRANTY For one year from the date of purchase, when this major ...
... access to the Internet and you need further assistance, you may contact Maytag at the address below . Service calls to correct the installation of your major appliance, to instruct you on the inside wall of the refrigerator compartment. Any food loss due to correct house wiring or plumbing.... 2. MAYTAG® MAJOR APPLIANCE WARRANTY LIMITED WARRANTY For one year from the date of purchase, when this major ...


