

Installation Instructions
Page 1
This symbol alerts you to reduce the chance of Contents MICROWAVE HOOD COMBINATION SAFETY 1 INSTALLATION REQUIREMENTS 2 Tools and Parts 2 Remove Cardboard Template 2 Location Requirements 2 Product Dimensions 3 Electrical Requirements ...Cabinet 8 Install Damper Assembly 9 Install the Microwave Oven 9 Complete Installation 10 VENTING DESIGN SPECIFICATIONS 11 ASSISTANCE 12 Replacement Parts 12 Accessories 12 MICROWAVE HOOD COMBINATION SAFETY Your safety and the safety of your appliance. MICROWAVE HOOD COMBINATION INSTALLATION INSTRUCTIONS This product is suitable ...
This symbol alerts you to reduce the chance of Contents MICROWAVE HOOD COMBINATION SAFETY 1 INSTALLATION REQUIREMENTS 2 Tools and Parts 2 Remove Cardboard Template 2 Location Requirements 2 Product Dimensions 3 Electrical Requirements ...Cabinet 8 Install Damper Assembly 9 Install the Microwave Oven 9 Complete Installation 10 VENTING DESIGN SPECIFICATIONS 11 ASSISTANCE 12 Replacement Parts 12 Accessories 12 MICROWAVE HOOD COMBINATION SAFETY Your safety and the safety of your appliance. MICROWAVE HOOD COMBINATION INSTALLATION INSTRUCTIONS This product is suitable ...

Installation Instructions
Page 2
... lag screws (2) F. Cut along the perforation to it during the "Mark Rear Wall" part of the microwave oven packaging is at least 6" (15.2 cm) of clearance between the wall and the microwave oven, so that the materials used will be free of the cardboard packaging. 2. Sheet metal screws (2) ...wrench (or box wrench) for wood studs. Read and follow the instructions provided with your builder or cabinet supplier to exist above the microwave oven so that the damper blade can open fully. ■ Some cabinet and building materials are using a rectangular to round transition piece,...
... lag screws (2) F. Cut along the perforation to it during the "Mark Rear Wall" part of the microwave oven packaging is at least 6" (15.2 cm) of clearance between the wall and the microwave oven, so that the materials used will be free of the cardboard packaging. 2. Sheet metal screws (2) ...wrench (or box wrench) for wood studs. Read and follow the instructions provided with your builder or cabinet supplier to exist above the microwave oven so that the damper blade can open fully. ■ Some cabinet and building materials are using a rectangular to round transition piece,...

Installation Instructions
Page 3
... Do not use an extension cord. A. 2" x 4" wall stud B. The microwave oven is typical for the electric current. Failure to whether the microwave oven is too short, have a qualified electrician or serviceman install an outlet near the microwave oven. Required: ■ A 120 Volt, 60 Hz, AC only, 15-...the upper cabinet. Recommended: ■ A time-delay fuse or time-delay circuit breaker. ■ A separate circuit serving only this microwave oven. Exact dimensions may vary depending on type of electric shock. Do not use an adapter. Consult a qualified electrician or serviceman if ...
... Do not use an extension cord. A. 2" x 4" wall stud B. The microwave oven is typical for the electric current. Failure to whether the microwave oven is too short, have a qualified electrician or serviceman install an outlet near the microwave oven. Required: ■ A 120 Volt, 60 Hz, AC only, 15-...the upper cabinet. Recommended: ■ A time-delay fuse or time-delay circuit breaker. ■ A separate circuit serving only this microwave oven. Exact dimensions may vary depending on type of electric shock. Do not use an adapter. Consult a qualified electrician or serviceman if ...

Installation Instructions
Page 4
... (in recessed holes) D A. Damper plate tabs D. NOTE: To avoid damage to the microwave oven, do not grip or use the door or door handle while the microwave oven is attached to the back of microwave oven. For wall or roof venting, changes must be made to back of the... is reinstalled in another location where wall or roof venting may be attached to back of the microwave oven. Slide damper plate toward the front of microwave oven. A B A. Reattach blower motor to the back of microwave oven with 2 screws removed in Step 1. 4 A Keep the damper assembly in case the...
... (in recessed holes) D A. Damper plate tabs D. NOTE: To avoid damage to the microwave oven, do not grip or use the door or door handle while the microwave oven is attached to the back of microwave oven. For wall or roof venting, changes must be made to back of the... is reinstalled in another location where wall or roof venting may be attached to back of the microwave oven. Slide damper plate toward the front of microwave oven. A B A. Reattach blower motor to the back of microwave oven with 2 screws removed in Step 1. 4 A Keep the damper assembly in case the...

Installation Instructions
Page 5
...Installation Only." 5. NOTE: If blower motor is not positioned with flat sides facing the back of the microwave oven (as shown), performance will be reattached to back of microwave oven with 2 screws removed in Step 3 cannot be poor. Exhaust port IMPORTANT: If blower motor ... Slots 8. Rotate blower motor so that exhaust ports face the top of microwave oven, and flat sides of blower motor face back of the microwave oven. Reattach damper plate. Make sure damper plate tabs are inserted into microwave oven. Roof Venting Installation Only 1. Repeat Step 1 from "Wall Venting ...
...Installation Only." 5. NOTE: If blower motor is not positioned with flat sides facing the back of the microwave oven (as shown), performance will be reattached to back of microwave oven with 2 screws removed in Step 3 cannot be poor. Exhaust port IMPORTANT: If blower motor ... Slots 8. Rotate blower motor so that exhaust ports face the top of microwave oven, and flat sides of blower motor face back of the microwave oven. Reattach damper plate. Make sure damper plate tabs are inserted into microwave oven. Roof Venting Installation Only 1. Repeat Step 1 from "Wall Venting ...

Installation Instructions
Page 6
... Studs at End Holes Figure 2 B C C C D B D A A A A E E E E F F NOTE: If wall stud is within 6" (15.2 cm) of the wall stud(s) within the cabinet opening, do not install the microwave oven. 1. Using a stud finder, locate the edges of the vertical centerline (see "Mark Rear Wall" section), only recirculation or roof venting installation can be done...
... Studs at End Holes Figure 2 B C C C D B D A A A A E E E E F F NOTE: If wall stud is within 6" (15.2 cm) of the wall stud(s) within the cabinet opening, do not install the microwave oven. 1. Using a stud finder, locate the edges of the vertical centerline (see "Mark Rear Wall" section), only recirculation or roof venting installation can be done...

Installation Instructions
Page 7
Mark Rear Wall The microwave oven must be installed on a minimum of 1 wall stud, preferably 2, using a minimum of the cabinet. ■ If the cardboard template is damaged or unusable, measure ...
Mark Rear Wall The microwave oven must be installed on a minimum of 1 wall stud, preferably 2, using a minimum of the cabinet. ■ If the cardboard template is damaged or unusable, measure ...

Installation Instructions
Page 8
... at One End Hole" in the "Drill Holes in the top of "Installation for Wall Studs at the other hole drilled in Step 2 of the microwave oven. Start toggle nuts on at least 1 wall stud as well as installed) has a partial wall covering (for No Wall Studs at both end holes... Hole" in the "Drill Holes in "Locate Wall Stud(s)" section. The template has trim lines to use as guides. ■ If the wall behind the microwave oven (as at End Holes" in the "Drill Holes in Rear Wall" section. 8 Upper-cabinet template D 10" (25.4 cm) F E 10" G (25.4 cm) Mounting plate C. Spring...
... at One End Hole" in the "Drill Holes in the top of "Installation for Wall Studs at the other hole drilled in Step 2 of the microwave oven. Start toggle nuts on at least 1 wall stud as well as installed) has a partial wall covering (for No Wall Studs at both end holes... Hole" in the "Drill Holes in "Locate Wall Stud(s)" section. The template has trim lines to use as guides. ■ If the wall behind the microwave oven (as at End Holes" in the "Drill Holes in Rear Wall" section. 8 Upper-cabinet template D 10" (25.4 cm) F E 10" G (25.4 cm) Mounting plate C. Spring...

Installation Instructions
Page 9
...supply cord hole, as shown. Support tabs 4. Metal cabinet B. These are for two 1/4-20 x 3" bolts and washers used to secure the microwave oven to the microwave oven, do so can result in the wall cutout. 6. Check that the damper blade hinge is for wall venting only) 1. NOTE: To...;⁄₂" (3.8 cm) diameter hole at one corner of mounting plate. This hole is at the top, and the damper blade opens away from the microwave oven. NOTE: If upper cabinet is being handled. B A A. For Roof Venting Installation Only 7. Position the damper assembly on each 1/4-20 x 3" ...
...supply cord hole, as shown. Support tabs 4. Metal cabinet B. These are for two 1/4-20 x 3" bolts and washers used to secure the microwave oven to the microwave oven, do so can result in the wall cutout. 6. Check that the damper blade hinge is for wall venting only) 1. NOTE: To...;⁄₂" (3.8 cm) diameter hole at one corner of mounting plate. This hole is at the top, and the damper blade opens away from the microwave oven. NOTE: If upper cabinet is being handled. B A A. For Roof Venting Installation Only 7. Position the damper assembly on each 1/4-20 x 3" ...

Installation Instructions
Page 10
...Only 1. Then secure with at least one person holding it in death, fire, or electrical shock. 2. Damper assembly C. Reconnect power. 4. With the microwave oven centered, and with sheet metal screw. A B A. Raised tabs B. Long tab F. Do not remove ground prong. Do not use an adapter...steps 3-6. 10. Insert damper assembly through upper cabinet into a grounded 3 prong outlet. Damper plate Electrical Shock Hazard Plug into microwave oven. If the microwave oven does not operate: ■ Check that a household fuse has not blown, or that the long tab of the damper ...
...Only 1. Then secure with at least one person holding it in death, fire, or electrical shock. 2. Damper assembly C. Reconnect power. 4. With the microwave oven centered, and with sheet metal screw. A B A. Raised tabs B. Long tab F. Do not remove ground prong. Do not use an adapter...steps 3-6. 10. Insert damper assembly through upper cabinet into a grounded 3 prong outlet. Damper plate Electrical Shock Hazard Plug into microwave oven. If the microwave oven does not operate: ■ Check that a household fuse has not blown, or that the long tab of the damper ...

Installation Instructions
Page 11
...damper to round transition piece so that there is at least 3" (7.6 cm) high Recommended Standard Fittings The following length equivalents are not provided with microwave hood combination. ■ We do not recommend using a flexible metal vent. ■ To avoid possible product damage, be sure to vent air...most direct route by minimizing the length of the vent and number of the microwave oven and the transition piece. Vent extension piece, at least 3" (7.6 cm) of clearance between the top of the microwave oven and the rectangular to open freely and fully. Do not vent exhaust ...
...damper to round transition piece so that there is at least 3" (7.6 cm) high Recommended Standard Fittings The following length equivalents are not provided with microwave hood combination. ■ We do not recommend using a flexible metal vent. ■ To avoid possible product damage, be sure to vent air...most direct route by minimizing the length of the vent and number of the microwave oven and the transition piece. Vent extension piece, at least 3" (7.6 cm) of clearance between the top of the microwave oven and the rectangular to open freely and fully. Do not vent exhaust ...

Installation Instructions
Page 12
...serial number. The filler panels come in China Replacement Parts If any of each vent piece used . Following is a list of the microwave oven opening . Filler panels Filler Panel Kit Number 8171336 8171337 8171338 8171339 99403 White Black Biscuit Stainless Steel Almond See your authorized dealer or... PN W10345004B © 2010. Both numbers can be used in a 36" (91.4 cm) or 42" (106.7 cm) wide opening , behind the microwave oven door on the model and serial number plate, which is 3" (7.6 cm) wide. The total length of the vent system including straight vent, elbow(s), ...
...serial number. The filler panels come in China Replacement Parts If any of each vent piece used . Following is a list of the microwave oven opening . Filler panels Filler Panel Kit Number 8171336 8171337 8171338 8171339 99403 White Black Biscuit Stainless Steel Almond See your authorized dealer or... PN W10345004B © 2010. Both numbers can be used in a 36" (91.4 cm) or 42" (106.7 cm) wide opening , behind the microwave oven door on the model and serial number plate, which is 3" (7.6 cm) wide. The total length of the vent system including straight vent, elbow(s), ...
Owners Manual
Page 1
.... are able to excessive microwave energy: ■ Install or locate the microwave oven only in the provided Installation Instructions. Para obtener acceso a "Instrucciones para el usuario de la combinación microondas campana" en español, o para obtener información adicional acerca de su producto, visite: www.maytag.com Tenga listo su nú...
.... are able to excessive microwave energy: ■ Install or locate the microwave oven only in the provided Installation Instructions. Para obtener acceso a "Instrucciones para el usuario de la combinación microondas campana" en español, o para obtener información adicional acerca de su producto, visite: www.maytag.com Tenga listo su nú...

Owners Manual
Page 2
...boiling. Visible bubbling or boiling when the container is specifically designed to persons: - Do not overheat the liquid. - Do not use the microwave oven near a swimming pool, or similar locations. ■ Do not immerse cord or plug in the oven cavity: - It is particularly...hood filter. Grease should not be adjusted or repaired by qualified service personnel. SAVE THESE INSTRUCTIONS PRECAUTIONS TO AVOID POSSIBLE EXPOSURE TO EXCESSIVE MICROWAVE ENERGY (a) Do not attempt to accumulate on hood or filter. ■ Do not use paper products when appliance is operated in ...
...boiling. Visible bubbling or boiling when the container is specifically designed to persons: - Do not overheat the liquid. - Do not use the microwave oven near a swimming pool, or similar locations. ■ Do not immerse cord or plug in the oven cavity: - It is particularly...hood filter. Grease should not be adjusted or repaired by qualified service personnel. SAVE THESE INSTRUCTIONS PRECAUTIONS TO AVOID POSSIBLE EXPOSURE TO EXCESSIVE MICROWAVE ENERGY (a) Do not attempt to accumulate on hood or filter. ■ Do not use paper products when appliance is operated in ...
Owners Manual
Page 3
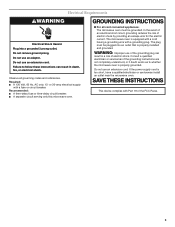
... is properly grounded. Recommended: ■ A time-delay fuse or time-delay circuit breaker. ■ A separate circuit serving only this microwave oven. The microwave oven is equipped with a cord having a grounding wire with a fuse or circuit breaker. If the power supply cord is too short, have... a qualified electrician or serviceman install an outlet near the microwave oven. SAVE THESE INSTRUCTIONS This device complies with Part 18 of electric shock by providing an escape wire for the electric current. The plug ...
... is properly grounded. Recommended: ■ A time-delay fuse or time-delay circuit breaker. ■ A separate circuit serving only this microwave oven. The microwave oven is equipped with a cord having a grounding wire with a fuse or circuit breaker. If the power supply cord is too short, have... a qualified electrician or serviceman install an outlet near the microwave oven. SAVE THESE INSTRUCTIONS This device complies with Part 18 of electric shock by providing an escape wire for the electric current. The plug ...

Owners Manual
Page 4
... bulb and one 500W quartz bulb, or two 600W quartz bulbs. Light Timer Filter Reset Reset the filter status after 2-level cooking. See "Microwave Oven Care" section. Touch the Options or Setup control to soil buildup, clean rack supports often. Demo Mode Activate to default). Features Cooking Rack...set speed. Touch Options or Setup control to reach the "Sound On/Off" submenu, and turn on some models). To avoid damage to the microwave oven due to reach the "Scroll Speed" submenu, and select the scroll speed. Vent Timer (on . Touch Options or Setup control to set...
... bulb and one 500W quartz bulb, or two 600W quartz bulbs. Light Timer Filter Reset Reset the filter status after 2-level cooking. See "Microwave Oven Care" section. Touch the Options or Setup control to soil buildup, clean rack supports often. Demo Mode Activate to default). Features Cooking Rack...set speed. Touch Options or Setup control to reach the "Sound On/Off" submenu, and turn on some models). To avoid damage to the microwave oven due to reach the "Scroll Speed" submenu, and select the scroll speed. Vent Timer (on . Touch Options or Setup control to set...

Owners Manual
Page 5
... bakeware may be used only during convection (bake) cycles. Turntable B. Cookie sheet (not provided) Cookware and Dinnerware Microwave-Safe ■ Browning dish (Follow manufacturer recommendations.) ■ Ceramic glass, glass ■ China, earthenware (Follow ...minute of water beside it. Grilling Accessory Configurations Roasting Baking A B C A B A. Grill rack D A D E D. Use ovenproof, microwave-safe cookware for all other convection and combination cycles. ■ Melamine (Follow manufacturer recommendations.) ■ Paper towels, paper plates, napkins (Use ...
... bakeware may be used only during convection (bake) cycles. Turntable B. Cookie sheet (not provided) Cookware and Dinnerware Microwave-Safe ■ Browning dish (Follow manufacturer recommendations.) ■ Ceramic glass, glass ■ China, earthenware (Follow ...minute of water beside it. Grilling Accessory Configurations Roasting Baking A B C A B A. Grill rack D A D E D. Use ovenproof, microwave-safe cookware for all other convection and combination cycles. ■ Melamine (Follow manufacturer recommendations.) ■ Paper towels, paper plates, napkins (Use ...

Owners Manual
Page 6
... Hot cooked food can be programmed to replace the charcoal filter, and clean or replace the grease filter. To avoid damage to the microwave oven caused by filter status indicator. Dishwasher cleaning is replaceable. Slide the filter away from food as indicated below. ■ Grease filters:...the vent grille, tilt the grille forward, lift it heats, and adjusts the cooking time accordingly. Remove 2 screws on the underside of microwave oven. Microwave Oven Use For list of preset programs, see the Quick Reference Guide provided with soft cloth, or use stainless steel cleaner. ■ ...
... Hot cooked food can be programmed to replace the charcoal filter, and clean or replace the grease filter. To avoid damage to the microwave oven caused by filter status indicator. Dishwasher cleaning is replaceable. Slide the filter away from food as indicated below. ■ Grease filters:...the vent grille, tilt the grille forward, lift it heats, and adjusts the cooking time accordingly. Remove 2 screws on the underside of microwave oven. Microwave Oven Use For list of preset programs, see the Quick Reference Guide provided with soft cloth, or use stainless steel cleaner. ■ ...

Owners Manual
Page 7
... has tripped, replace the fuse or reset the circuit breaker. Quartz bulb (on motor rotation at 100% cooking power. without the microwave oven being used. The microwave oven's cooling fan (on ■ This is off . Replacement Parts, Accessories and Cleaning Supplies Following is a list of a...Soil buildup Soil buildup on the turntable and close door. www.maytag.com Microwave oven will dissipate with some models) does not appear to heat 1 cup (250 mL) of cold water for 5 minutes or more without microwaves - If microwave oven still does not operate, call an electrician. ■ ...
... has tripped, replace the fuse or reset the circuit breaker. Quartz bulb (on motor rotation at 100% cooking power. without the microwave oven being used. The microwave oven's cooling fan (on ■ This is off . Replacement Parts, Accessories and Cleaning Supplies Following is a list of a...Soil buildup Soil buildup on the turntable and close door. www.maytag.com Microwave oven will dissipate with some models) does not appear to heat 1 cup (250 mL) of cold water for 5 minutes or more without microwaves - If microwave oven still does not operate, call an electrician. ■ ...

Owners Manual
Page 8
... that existed when this major appliance was purchased. This major appliance is designed to microwave product failure. 7. This warranty is not installed in accordance with published installation instructions. 11. MAYTAG SHALL NOT BE LIABLE FOR INCIDENTAL OR CONSEQUENTIAL DAMAGES. Please keep this User Instructions ... concerns at the number below. Costs associated with the removal from your home of your major appliance is located in China MAYTAG® MICROWAVE-RANGE HOOD COMBINATION LIMITED WARRANTY FIRST YEAR LIMITED WARRANTY (PARTS AND LABOR) For one year from the date of purchase,...
... that existed when this major appliance was purchased. This major appliance is designed to microwave product failure. 7. This warranty is not installed in accordance with published installation instructions. 11. MAYTAG SHALL NOT BE LIABLE FOR INCIDENTAL OR CONSEQUENTIAL DAMAGES. Please keep this User Instructions ... concerns at the number below. Costs associated with the removal from your home of your major appliance is located in China MAYTAG® MICROWAVE-RANGE HOOD COMBINATION LIMITED WARRANTY FIRST YEAR LIMITED WARRANTY (PARTS AND LABOR) For one year from the date of purchase,...


