
Installation Instructions
Page 1
.... This is the safety alert symbol. W10344702B Table of Contents MICROWAVE HOOD COMBINATION SAFETY 1 INSTALLATION REQUIREMENTS 2 Tools and Parts 2 Remove Cardboard Template 2 Location Requirements 2 Product Dimensions 3 Electrical Requirements 3 INSTALLATION INSTRUCTIONS 4 Remove Mounting Plate 4 Rotate Blower Motor 4 Locate Wall Stud(s 6 Mark Rear Wall 7 Drill Holes in Rear Wall 7 Attach Mounting Plate to...
.... This is the safety alert symbol. W10344702B Table of Contents MICROWAVE HOOD COMBINATION SAFETY 1 INSTALLATION REQUIREMENTS 2 Tools and Parts 2 Remove Cardboard Template 2 Location Requirements 2 Product Dimensions 3 Electrical Requirements 3 INSTALLATION INSTRUCTIONS 4 Remove Mounting Plate 4 Rotate Blower Motor 4 Locate Wall Stud(s 6 Mark Rear Wall 7 Drill Holes in Rear Wall 7 Attach Mounting Plate to...

Installation Instructions
Page 2
... fits properly, and the damper blade opens freely and fully. Sheet metal screws (2) G. The piece inside upper cabinet. See "Installation Dimensions" illustration. ■ Minimum one 2" x 4" (50.8 x 101.6 mm) wood wall stud and minimum 3/8" (10 mm) ... so that the materials used will be installed. Special Requirements For Wall Venting Installation Only: ■ Cutout must provide: ■ Minimum installation dimensions. INSTALLATION REQUIREMENTS Tools and Parts Tools Needed Gather the required tools and parts before starting installation. For other damages. A B C D E...
... fits properly, and the damper blade opens freely and fully. Sheet metal screws (2) G. The piece inside upper cabinet. See "Installation Dimensions" illustration. ■ Minimum one 2" x 4" (50.8 x 101.6 mm) wood wall stud and minimum 3/8" (10 mm) ... so that the materials used will be installed. Special Requirements For Wall Venting Installation Only: ■ Cutout must provide: ■ Minimum installation dimensions. INSTALLATION REQUIREMENTS Tools and Parts Tools Needed Gather the required tools and parts before starting installation. For other damages. A B C D E...

Installation Instructions
Page 3
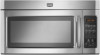
... an adapter. A. 2" x 4" wall stud B. The plug must be grounded. Required: ■ A 120 Volt, 60 Hz, AC only, 15- Product Dimensions 17¹⁄₄" (43.8 cm) 16¹⁄₄" (41.3 cm) (411.06¹c⁄₈m") 29⁷⁄₈" (76.0 cm... wire for 66" (167.6 cm) installation height. Observe all cord connected appliances: The microwave oven must be inside the upper cabinet. Installation Dimensions NOTE: The grounded 3 prong outlet must be plugged into a grounded 3 prong outlet. See "Electrical Requirements" section. Recommended: ■ A...
... an adapter. A. 2" x 4" wall stud B. The plug must be grounded. Required: ■ A 120 Volt, 60 Hz, AC only, 15- Product Dimensions 17¹⁄₄" (43.8 cm) 16¹⁄₄" (41.3 cm) (411.06¹c⁄₈m") 29⁷⁄₈" (76.0 cm... wire for 66" (167.6 cm) installation height. Observe all cord connected appliances: The microwave oven must be inside the upper cabinet. Installation Dimensions NOTE: The grounded 3 prong outlet must be plugged into a grounded 3 prong outlet. See "Electrical Requirements" section. Recommended: ■ A...

Installation Instructions
Page 7
... cabinet. ■ If the cardboard template is damaged or unusable, measure and mark the wall with front edge of cardboard template must align with the dimensions described in Step 3 of the opening. if 1 end hole is butted up against the bottom edge of the cutout area. 14. Following are not over...
... cabinet. ■ If the cardboard template is damaged or unusable, measure and mark the wall with front edge of cardboard template must align with the dimensions described in Step 3 of the opening. if 1 end hole is butted up against the bottom edge of the cutout area. 14. Following are not over...

Installation Instructions
Page 8
... it, trim the template edges so that it is level. 4. Installation for Wall Studs at Both End Holes (Figure 4) 1. Make sure the 10" (25.4 cm) dimension from the back of mounting plate. 2. Push the 2 bolts with tape or thumbtacks. Start a toggle nut on a second wall stud, insert a lag screw into the...
... it, trim the template edges so that it is level. 4. Installation for Wall Studs at Both End Holes (Figure 4) 1. Make sure the 10" (25.4 cm) dimension from the back of mounting plate. 2. Push the 2 bolts with tape or thumbtacks. Start a toggle nut on a second wall stud, insert a lag screw into the...
