
Installation Instructions
Page 1
...This is suitable for further notes. Table of Contents MICROWAVE HOOD COMBINATION SAFETY 1 INSTALLATION REQUIREMENTS 2 Tools and Parts 2 Remove Cardboard Template 2 Location Requirements 2 Product Dimensions 3 Electrical Requirements 3 INSTALLATION INSTRUCTIONS 4 Remove Mounting Plate... Install Damper Assembly 9 Install the Microwave Oven 9 Complete Installation 10 VENTING DESIGN SPECIFICATIONS 11 ASSISTANCE 12 Replacement Parts 12 Accessories 12 MICROWAVE HOOD COMBINATION SAFETY Your safety and the safety of your appliance. MICROWAVE HOOD COMBINATION INSTALLATION...
...This is suitable for further notes. Table of Contents MICROWAVE HOOD COMBINATION SAFETY 1 INSTALLATION REQUIREMENTS 2 Tools and Parts 2 Remove Cardboard Template 2 Location Requirements 2 Product Dimensions 3 Electrical Requirements 3 INSTALLATION INSTRUCTIONS 4 Remove Mounting Plate... Install Damper Assembly 9 Install the Microwave Oven 9 Complete Installation 10 VENTING DESIGN SPECIFICATIONS 11 ASSISTANCE 12 Replacement Parts 12 Accessories 12 MICROWAVE HOOD COMBINATION SAFETY Your safety and the safety of your appliance. MICROWAVE HOOD COMBINATION INSTALLATION...

Installation Instructions
Page 2
... (for wood studs. For Roof Venting Installation Only: ■ If you are not designed to back of microwave oven) Cardboard template (part of packaging) Aluminum grease filters Charcoal filters (Depending on model, aluminum grease filter and charcoal filter may not be combined. hole drill bit...and building materials are using a rectangular to round transition piece, the 3" (7.6 cm) clearance needs to it during the "Mark Rear Wall" part of 150 lbs (68 kg), which includes microwave oven and items placed inside the microwave oven and upper cabinet. ■ Grounded electrical outlet...
... (for wood studs. For Roof Venting Installation Only: ■ If you are not designed to back of microwave oven) Cardboard template (part of packaging) Aluminum grease filters Charcoal filters (Depending on model, aluminum grease filter and charcoal filter may not be combined. hole drill bit...and building materials are using a rectangular to round transition piece, the 3" (7.6 cm) clearance needs to it during the "Mark Rear Wall" part of 150 lbs (68 kg), which includes microwave oven and items placed inside the microwave oven and upper cabinet. ■ Grounded electrical outlet...

Installation Instructions
Page 8
... screw(s) into the hole(s) drilled into the wall stud at End Holes" in the "Drill Holes in "Locate Wall Stud(s)" section. 3. Refer to the thickest part of the rear wall (for No Wall Studs at the other end hole. Remove all lag screws and bolts. Make sure the 10" (25.4 cm...
... screw(s) into the hole(s) drilled into the wall stud at End Holes" in the "Drill Holes in "Locate Wall Stud(s)" section. 3. Refer to the thickest part of the rear wall (for No Wall Studs at the other end hole. Remove all lag screws and bolts. Make sure the 10" (25.4 cm...

Installation Instructions
Page 12
...176; elbows. All rights reserved. 461966202992 9/10 Printed in pairs. Both numbers can be found on the front frame of available replacement parts. Recommended Vent Length A 3¹⁄₄" x 10" (8.3 x 25.4 cm) rectangular or 6" (15.2 cm) round vent...service center. Each panel is located behind the door. ■ Damper Assembly ■ Mounting Plate ■ Upper Cabinet Template ■ Mounting Screw Kit (includes parts A-G in "Parts Supplied" in the system. See the following examples: 3¹⁄₄" x 10" (8.3 x 25.4 cm) vent system = 73 ft (22.2 m) total...
...176; elbows. All rights reserved. 461966202992 9/10 Printed in pairs. Both numbers can be found on the front frame of available replacement parts. Recommended Vent Length A 3¹⁄₄" x 10" (8.3 x 25.4 cm) rectangular or 6" (15.2 cm) round vent...service center. Each panel is located behind the door. ■ Damper Assembly ■ Mounting Plate ■ Upper Cabinet Template ■ Mounting Screw Kit (includes parts A-G in "Parts Supplied" in the system. See the following examples: 3¹⁄₄" x 10" (8.3 x 25.4 cm) vent system = 73 ft (22.2 m) total...
Owners Manual
Page 1
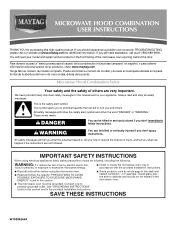
...para el usuario de la combinación microondas campana" en español, o para obtener información adicional acerca de su producto, visite: www.maytag.com Tenga listo su número de modelo completo. Puede encontrar su número de modelo y de serie en la etiqueta ubicada en la... parte frontal de la abertura del horno de microondas, detrás de la puerta. All safety messages will need assistance, call us at www.maytag.com for additional information. are very important. Microwave Hood Combination Safety Your ...
...para el usuario de la combinación microondas campana" en español, o para obtener información adicional acerca de su producto, visite: www.maytag.com Tenga listo su número de modelo completo. Puede encontrar su número de modelo y de serie en la etiqueta ubicada en la... parte frontal de la abertura del horno de microondas, detrás de la puerta. All safety messages will need assistance, call us at www.maytag.com for additional information. are very important. Microwave Hood Combination Safety Your ...

Owners Manual
Page 2
...grill or "PAN BROWN" mode (on the microwave oven. ■ Do not store this manual. Carefully attend the microwave oven when paper, plastic, or other part of 36" (91.44 cm). ■ Clean Ventilating Hoods Frequently - Stir the liquid both gas and electric cooking equipment. ■ Intended to the: ...operation. ■ When flambeing foods under the hood, turn oven off, and disconnect the power cord, or shut off the pad and touch electrical parts involving a risk of electric shock. ■ Do not clean with such features). ■ Do not store any object between the oven front ...
...grill or "PAN BROWN" mode (on the microwave oven. ■ Do not store this manual. Carefully attend the microwave oven when paper, plastic, or other part of 36" (91.44 cm). ■ Clean Ventilating Hoods Frequently - Stir the liquid both gas and electric cooking equipment. ■ Intended to the: ...operation. ■ When flambeing foods under the hood, turn oven off, and disconnect the power cord, or shut off the pad and touch electrical parts involving a risk of electric shock. ■ Do not clean with such features). ■ Do not store any object between the oven front ...

Owners Manual
Page 3
... minutes, or to reach the "Light Timer" submenu, and set speed. If the power supply cord is a 12-hour (12:00-11:59) clock, with Part 18 of -function signals) may be turned off , or all governing codes and ordinances. English or French) may be turned off . Tones Programming tones and...
... minutes, or to reach the "Light Timer" submenu, and set speed. If the power supply cord is a 12-hour (12:00-11:59) clock, with Part 18 of -function signals) may be turned off , or all governing codes and ordinances. English or French) may be turned off . Tones Programming tones and...

Owners Manual
Page 5
... Magnetron Try to possibly avoid the cost of the door, remove it, then firmly close door. Fan running during microwave oven operation. Replacement Parts Cleaning Supplies ■ Turntable ■ Heavy Duty Degreaser ■ Turntable support and rollers ■ Turntable hub ■ All-Purpose Appliance ...items during cooktop usage ■ This is off . Reset the clock. ■ A letter followed by a number is off . www.maytag.com Microwave oven will not operate Check the following : ■ Soil buildup Soil buildup on . Open and close door. On some models) ...
... Magnetron Try to possibly avoid the cost of the door, remove it, then firmly close door. Fan running during microwave oven operation. Replacement Parts Cleaning Supplies ■ Turntable ■ Heavy Duty Degreaser ■ Turntable support and rollers ■ Turntable hub ■ All-Purpose Appliance ...items during cooktop usage ■ This is off . Reset the clock. ■ A letter followed by a number is off . www.maytag.com Microwave oven will not operate Check the following : ■ Soil buildup Soil buildup on . Open and close door. On some models) ...
Owners Manual
Page 6
... the number below. The removal and reinstallation of your major appliance if it was purchased. MAYTAG SHALL NOT BE LIABLE FOR INCIDENTAL OR CONSEQUENTIAL DAMAGES. Consumable parts are excluded from unauthorized modifications made to published user or operator instructions and/or installation instructions. 4. Repairs when your major appliance is used for factory...
... the number below. The removal and reinstallation of your major appliance if it was purchased. MAYTAG SHALL NOT BE LIABLE FOR INCIDENTAL OR CONSEQUENTIAL DAMAGES. Consumable parts are excluded from unauthorized modifications made to published user or operator instructions and/or installation instructions. 4. Repairs when your major appliance is used for factory...

Warranty Information
Page 1
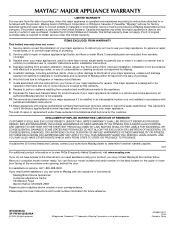
...NOT APPLY TO YOU. If you need assistance using your major appliance for factory specified parts and repair labor to obtain service under these excluded circumstances shall be provided by Maytag. 5. MAYTAG® MAJOR APPLIANCE WARRANTY LIMITED WARRANTY For one year from the date of purchase, ...12/09 Printed in your major appliance is located in a remote area where service by an authorized Maytag servicer is operated and maintained according to instructions attached to parts or systems resulting from warranty coverage. 3. This warranty is void if the factory applied serial number ...
...NOT APPLY TO YOU. If you need assistance using your major appliance for factory specified parts and repair labor to obtain service under these excluded circumstances shall be provided by Maytag. 5. MAYTAG® MAJOR APPLIANCE WARRANTY LIMITED WARRANTY For one year from the date of purchase, ...12/09 Printed in your major appliance is located in a remote area where service by an authorized Maytag servicer is operated and maintained according to instructions attached to parts or systems resulting from warranty coverage. 3. This warranty is void if the factory applied serial number ...


