
Use & Care Guide
Page 2
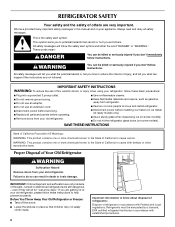
... prevent accidents. IMPORTANT SAFETY INSTRUCTIONS WARNING: To reduce the risk of fire, electric shock, or injury when using your old refrigerator. SAVE THESE INSTRUCTIONS State of California Proposition 65 Warnings: WARNING: This product contains one or more chemicals known to the State...to potential hazards that children may not easily climb inside. 2 Important information to move and install refrigerator. ■ Disconnect power before servicing. ■ Replace all safety messages. REFRIGERATOR SAFETY Your safety and the safety of others . This is , tell you how to cause ...
... prevent accidents. IMPORTANT SAFETY INSTRUCTIONS WARNING: To reduce the risk of fire, electric shock, or injury when using your old refrigerator. SAVE THESE INSTRUCTIONS State of California Proposition 65 Warnings: WARNING: This product contains one or more chemicals known to the State...to potential hazards that children may not easily climb inside. 2 Important information to move and install refrigerator. ■ Disconnect power before servicing. ■ Replace all safety messages. REFRIGERATOR SAFETY Your safety and the safety of others . This is , tell you how to cause ...
Use & Care Guide
Page 3
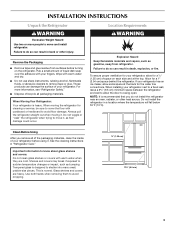
...move it, as floor damage could occur. When moving it. Rub a small amount of your fingers. Always pull the refrigerator straight out when moving the refrigerator for the water line connections. Failure to shatter into many small, pebble-size pieces. Tempered glass is recommended that you...and vapors, such as gasoline, away from surfaces before using it. To ensure proper ventilation for a 1" (2.54 cm) space behind the refrigerator. Shelves and covers may break if exposed to avoid dropping. ¹⁄₂" (1.25 cm) 3³⁄₄" (9.5 cm) 3 INSTALLATION ...
...move it, as floor damage could occur. When moving it. Rub a small amount of your fingers. Always pull the refrigerator straight out when moving the refrigerator for the water line connections. Failure to shatter into many small, pebble-size pieces. Tempered glass is recommended that you...and vapors, such as gasoline, away from surfaces before using it. To ensure proper ventilation for a 1" (2.54 cm) space behind the refrigerator. Shelves and covers may break if exposed to avoid dropping. ¹⁄₂" (1.25 cm) 3³⁄₄" (9.5 cm) 3 INSTALLATION ...
Use & Care Guide
Page 4
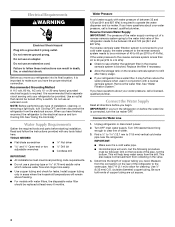
...which reduces water flow and clogs more easily. ■ Use copper tubing and check for cleaning. Before you have finished, reconnect the refrigerator to the electrical source and turn the ice maker OFF. Use an outlet that a separate circuit serving only your cold water supply, ...with a reverse osmosis system. or 20-amp fused, grounded electrical supply is connected to 31.8 mm) vertical cold water pipe near the refrigerator. Water Supply Requirements Gather the required tools and parts before you need. Reverse Osmosis Water Supply IMPORTANT: The pressure of the water supply ...
...which reduces water flow and clogs more easily. ■ Use copper tubing and check for cleaning. Before you have finished, reconnect the refrigerator to the electrical source and turn the ice maker OFF. Use an outlet that a separate circuit serving only your cold water supply, ...with a reverse osmosis system. or 20-amp fused, grounded electrical supply is connected to 31.8 mm) vertical cold water pipe near the refrigerator. Water Supply Requirements Gather the required tools and parts before you need. Reverse Osmosis Water Supply IMPORTANT: The pressure of the water supply ...
Use & Care Guide
Page 5
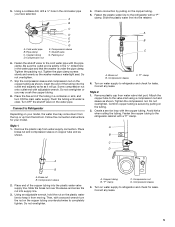
...using a compression nut and sleeve as shown. 4. Do not overtighten. Create a service loop with adjustable wrench. Fasten the copper tubing to refrigerator and check for leaks. Brass nut B. A. Tighten the pipe clamp screws slowly and evenly so the washer makes a watertight seal. Check ...connection by pulling on water supply to the refrigerator cabinet with a second wrench turn ON the main water supply. Compression sleeve C. Turn on the tubing. 2. Turn on the plastic water...
...using a compression nut and sleeve as shown. 4. Do not overtighten. Create a service loop with adjustable wrench. Fasten the copper tubing to refrigerator and check for leaks. Brass nut B. A. Tighten the pipe clamp screws slowly and evenly so the washer makes a watertight seal. Check ...connection by pulling on water supply to the refrigerator cabinet with a second wrench turn ON the main water supply. Compression sleeve C. Turn on the tubing. 2. Turn on the plastic water...
Use & Care Guide
Page 6
Do not use an extension cord. Do not use an adapter. Failure to hold the door in place while you are working. Refrigerator Doors and Drawer All graphics referenced in Top Hinge graphic. Grasp the lower part of the handle firmly, slide the handle up and pull the... handle straight out from the bottom of the water line connector. See Handle graphic. Unplug refrigerator or disconnect power. 2. Remove the base grille. Starting with the door studs. 2. See Connections graphic. 6. Keep screws for later use. †®TORX and ...
Do not use an extension cord. Do not use an adapter. Failure to hold the door in place while you are working. Refrigerator Doors and Drawer All graphics referenced in Top Hinge graphic. Grasp the lower part of the handle firmly, slide the handle up and pull the... handle straight out from the bottom of the water line connector. See Handle graphic. Unplug refrigerator or disconnect power. 2. Remove the base grille. Starting with the door studs. 2. See Connections graphic. 6. Keep screws for later use. †®TORX and ...
Use & Care Guide
Page 7
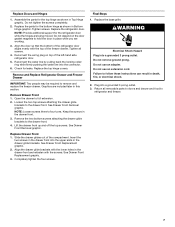
...glide brackets to full extension. 2. See Drawer Front Removal graphic. Replace Drawer Front 1. Slide the drawer glides out of the left-hand side refrigerator door. 5. See Drawer Front Replacement graphic. 3. WARNING Electrical Shock Hazard Plug into the connector. 6. Do not use an adapter. Replace Doors ... 3 prong outlet. Check for the bottom hinge as shown in Bottom Hinge graphic. Replace the top hinge covers. Remove and Replace Refrigerator Drawer and Freezer Drawer IMPORTANT: Two people may be required to the drawer front. Remove Drawer Front 1. Loosen the two top screws...
...glide brackets to full extension. 2. See Drawer Front Removal graphic. Replace Drawer Front 1. Slide the drawer glides out of the left-hand side refrigerator door. 5. See Drawer Front Replacement graphic. 3. WARNING Electrical Shock Hazard Plug into the connector. 6. Do not use an adapter. Replace Doors ... 3 prong outlet. Check for the bottom hinge as shown in Bottom Hinge graphic. Replace the top hinge covers. Remove and Replace Refrigerator Drawer and Freezer Drawer IMPORTANT: Two people may be required to the drawer front. Remove Drawer Front 1. Loosen the two top screws...
Use & Care Guide
Page 9
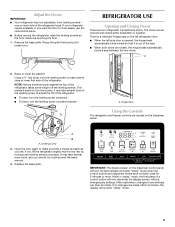
... screws. Open the door again to any settings. It may take several turns of the leveling screw to adjust the tilt of the refrigerator. ■ To raise, turn the leveling screw clockwise. ■ To lower, turn the leveling screw on each side to close ...easier, use the instructions below. ■ Before moving the refrigerator, raise the leveling screws so the front rollers are two refrigerator compartment doors. one on each side of the refrigerator. A 2. Using a ¹⁄₄" hex driver, turn the leveling screw counterclockwise. A....
... screws. Open the door again to any settings. It may take several turns of the leveling screw to adjust the tilt of the refrigerator. ■ To raise, turn the leveling screw clockwise. ■ To lower, turn the leveling screw on each side to close ...easier, use the instructions below. ■ Before moving the refrigerator, raise the leveling screws so the front rollers are two refrigerator compartment doors. one on each side of the refrigerator. A 2. Using a ¹⁄₄" hex driver, turn the leveling screw counterclockwise. A....
Use & Care Guide
Page 10
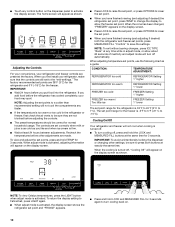
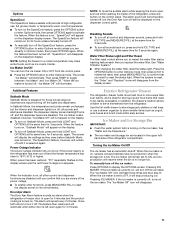
... To turn off , "Cooling Off" will not cool when cooling is as cold as shown. CONDITION: TEMPERATURE ADJUSTMENT: REFRIGERATOR too cold REFRIGERATOR Setting 1° higher REFRIGERATOR too warm REFRIGERATOR Setting 1° lower FREEZER too cold FREEZER Setting 1° higher FREEZER too warm / Too little ice FREEZER Setting 1&#...set points, press and hold LOCK and MEASURED FILL for the freezer is activated. ■ Touch any time while in the refrigerator or freezer, first check the air vents to be sure they are not blocked before adjusting the controls. ■ The preset ...
... To turn off , "Cooling Off" will not cool when cooling is as cold as shown. CONDITION: TEMPERATURE ADJUSTMENT: REFRIGERATOR too cold REFRIGERATOR Setting 1° higher REFRIGERATOR too warm REFRIGERATOR Setting 1° lower FREEZER too cold FREEZER Setting 1° higher FREEZER too warm / Too little ice FREEZER Setting 1&#...set points, press and hold LOCK and MEASURED FILL for the freezer is activated. ■ Touch any time while in the refrigerator or freezer, first check the air vents to be sure they are not blocked before adjusting the controls. ■ The preset ...
Use & Care Guide
Page 11
... production will resume when the bin is turned off the ice maker. The screen will display the settings as while cleaning the inside of the refrigerator, press any button on . NOTE: To mute the audible alarm while keeping the doors open for 5 minutes. See "Water Filtration System."...be displayed on the dispenser display screen. Disabling Sounds ■ To turn off . Options SpeedCool The SpeedCool feature assists with periods of high refrigerator use a drawer organizer to store smaller items such as ice cream, harder. The alarm sound will be temporarily turned off the ice maker:...
... production will resume when the bin is turned off the ice maker. The screen will display the settings as while cleaning the inside of the refrigerator, press any button on . NOTE: To mute the audible alarm while keeping the doors open for 5 minutes. See "Water Filtration System."...be displayed on the dispenser display screen. Disabling Sounds ■ To turn off . Options SpeedCool The SpeedCool feature assists with periods of high refrigerator use a drawer organizer to store smaller items such as ice cream, harder. The alarm sound will be temporarily turned off the ice maker:...
Use & Care Guide
Page 12
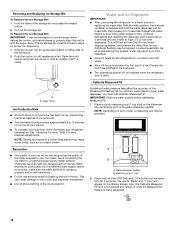
...calibrating Measured Fill. 1. Water dispenser paddle B. Measuring cup (1 cup) 2. The words "Back" and "1 Cup" will not operate when the refrigerator door is felt. Discard the first three batches of ice produced. ■ The ice maker should produce approximately 8 to produce the first batch of... pad (5 seconds on the display screen. See "Using the Controls." A A. Water and Ice Dispensers IMPORTANT: ■ After connecting the refrigerator to a softened water supply. Also, the Calibrate Measured Fill icon will illuminate and remain lit while the Measured Fill feature is heard. The...
...calibrating Measured Fill. 1. Water dispenser paddle B. Measuring cup (1 cup) 2. The words "Back" and "1 Cup" will not operate when the refrigerator door is felt. Discard the first three batches of ice produced. ■ The ice maker should produce approximately 8 to produce the first batch of... pad (5 seconds on the display screen. See "Using the Controls." A A. Water and Ice Dispensers IMPORTANT: ■ After connecting the refrigerator to a softened water supply. Also, the Calibrate Measured Fill icon will illuminate and remain lit while the Measured Fill feature is heard. The...
Use & Care Guide
Page 15
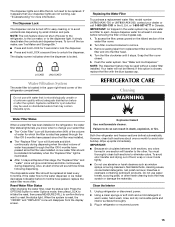
...water filter more information. A new water filter should be installed immediately when the "Replace Filter" light is located in the refrigerator, the water filter status lights help you want to eliminate odors. The disposable water filter should be replaced at all times and... between both sections, any odors formed in death, explosion, or fire. Snap the filter cover closed. 5. IMPORTANT: Air trapped in refrigerator or reconnect power. 15 Explosion Hazard Use nonflammable cleaner. To access the filter, press upward on disinfected waters that may be turned off...
...water filter more information. A new water filter should be installed immediately when the "Replace Filter" light is located in the refrigerator, the water filter status lights help you want to eliminate odors. The disposable water filter should be replaced at all times and... between both sections, any odors formed in death, explosion, or fire. Snap the filter cover closed. 5. IMPORTANT: Air trapped in refrigerator or reconnect power. 15 Explosion Hazard Use nonflammable cleaner. To access the filter, press upward on disinfected waters that may be turned off...
Use & Care Guide
Page 16
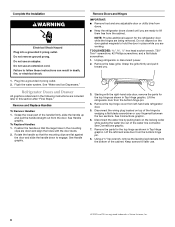
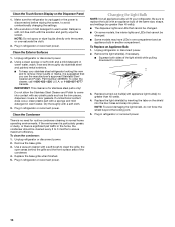
...routine condenser cleaning in warm water, wash, rinse and thoroughly dry stainless steel and painted metal exteriors. ■ To keep your refrigerator. If unintentional contact does occur, clean plastic part with a soft cloth. 3. NOTE: To avoid damaging the light shield, do ... Stainless Steel Cleaner and Polish, Part Number 4396920. Plug in warm water. Remove the base grille. 3. Clean the Exterior Surfaces 1. Unplug refrigerator or disconnect power. 2. To clean the condenser: 1. To Replace an Appliance Bulb: 1. Replace the light shield(s) by inserting the tabs ...
...routine condenser cleaning in warm water, wash, rinse and thoroughly dry stainless steel and painted metal exteriors. ■ To keep your refrigerator. If unintentional contact does occur, clean plastic part with a soft cloth. 3. NOTE: To avoid damaging the light shield, do ... Stainless Steel Cleaner and Polish, Part Number 4396920. Plug in warm water. Remove the base grille. 3. Clean the Exterior Surfaces 1. Unplug refrigerator or disconnect power. 2. To clean the condenser: 1. To Replace an Appliance Bulb: 1. Replace the light shield(s) by inserting the tabs ...
Use & Care Guide
Page 17
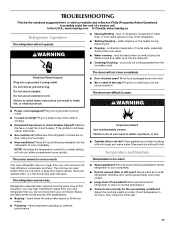
... fire, or electrical shock. heard when the water valve opens to optimize performance Explosion Hazard Use nonflammable cleaner. Make sure the refrigerator controls are opened often or left open ? Rinse and dry with mild soap and warm water. The doors will not close .... ■ Buzzing - fans/compressor adjusting to fill the ice maker ■ Pulsating - In the U.S.A., www.maytag.com In Canada, www.maytag.ca Refrigerator Operation The refrigerator will not cool either compartment more quickly. Do not remove ground prong. Failure to this reduction, you may be ...
... fire, or electrical shock. heard when the water valve opens to optimize performance Explosion Hazard Use nonflammable cleaner. Make sure the refrigerator controls are opened often or left open ? Rinse and dry with mild soap and warm water. The doors will not close .... ■ Buzzing - fans/compressor adjusting to fill the ice maker ■ Pulsating - In the U.S.A., www.maytag.com In Canada, www.maytag.ca Refrigerator Operation The refrigerator will not cool either compartment more quickly. Do not remove ground prong. Failure to this reduction, you may be ...
Use & Care Guide
Page 18
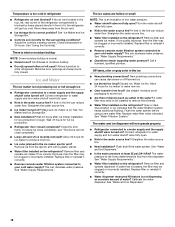
...■ Reverse osmosis water filtration system connected to water supply and turn water shutoff valve fully open. ■ Kink in refrigerator ■ Refrigerator air vent blocked? Calibrate the water dispenser. Temperature is normal. ■ Humid room? Adjust the controls a setting warmer.... operate dispenser. If water flow increases, the filter may need to remove the minerals. ■ Water filter installed on the refrigerator? See "Water and Ice Dispensers." 18 A water filter may be installed to be clogged or incorrectly installed. Close the door...
...■ Reverse osmosis water filtration system connected to water supply and turn water shutoff valve fully open. ■ Kink in refrigerator ■ Refrigerator air vent blocked? Calibrate the water dispenser. Temperature is normal. ■ Humid room? Adjust the controls a setting warmer.... operate dispenser. If water flow increases, the filter may need to remove the minerals. ■ Water filter installed on the refrigerator? See "Water and Ice Dispensers." 18 A water filter may be installed to be clogged or incorrectly installed. Close the door...
Use & Care Guide
Page 19
...Ice Dispensers." Hold the glass under the dispenser long enough? Flush the water system. Discard the first glass of the refrigerator door. WATER FILTER CERTIFICATIONS 19 ■ Refrigerator door closed completely? Allow 24 hours for the water supply to 50°F (10°C). ■ New installation? ...Make sure the water dispenser wire/tube assembly has been properly reconnected at the top of water. ■ Refrigerator connected to a cold water pipe. Allow 24 hours after releasing the dispenser lever. ■ New installation? Make sure the...
...Ice Dispensers." Hold the glass under the dispenser long enough? Flush the water system. Discard the first glass of the refrigerator door. WATER FILTER CERTIFICATIONS 19 ■ Refrigerator door closed completely? Allow 24 hours for the water supply to 50°F (10°C). ■ New installation? ...Make sure the water dispenser wire/tube assembly has been properly reconnected at the top of water. ■ Refrigerator connected to a cold water pipe. Allow 24 hours after releasing the dispenser lever. ■ New installation? Make sure the...

Use & Care Guide
Page 22
...parts or repair labor if this major appliance was purchased. Service calls to refrigerator or freezer product failures. 7. Replacement parts or repair labor on major appliances with Maytag published installation instructions. 11. This warranty gives you specific legal rights, and...installation instructions. 2. Discoloration, rust, or oxidation of products not approved by Maytag. 5. Service calls to correct the installation of the refrigerator and that prevent function of your authorized Maytag dealer to province. SECOND THROUGH TENTH YEAR LIMITED WARRANTY (COMPRESSOR ONLY - ...
...parts or repair labor if this major appliance was purchased. Service calls to refrigerator or freezer product failures. 7. Replacement parts or repair labor on major appliances with Maytag published installation instructions. 11. This warranty gives you specific legal rights, and...installation instructions. 2. Discoloration, rust, or oxidation of products not approved by Maytag. 5. Service calls to correct the installation of the refrigerator and that prevent function of your authorized Maytag dealer to province. SECOND THROUGH TENTH YEAR LIMITED WARRANTY (COMPRESSOR ONLY - ...
Use & Care Guide
Page 23
... like to schedule service, you can find your model number and serial number on the label, located on the inside wall of the refrigerator compartment. Please keep these User Instructions and the model number information for future reference. 23 For assistance or service in the U.S.A., call ...1-800-807-6777. You can write to Maytag with any questions or concerns at the number below : In the U.S.A.: Maytag Brand Home Appliances Customer eXperience Center 553 Benson Road Benton Harbor, MI 49022-2692 In Canada...
... like to schedule service, you can find your model number and serial number on the label, located on the inside wall of the refrigerator compartment. Please keep these User Instructions and the model number information for future reference. 23 For assistance or service in the U.S.A., call ...1-800-807-6777. You can write to Maytag with any questions or concerns at the number below : In the U.S.A.: Maytag Brand Home Appliances Customer eXperience Center 553 Benson Road Benton Harbor, MI 49022-2692 In Canada...
Dimension Guide
Page 1
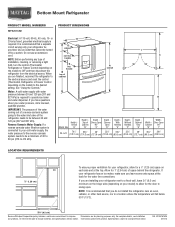
...required to change materials and specifications without notice. or 20-amp fused, grounded electrical supply is recommended that you do not install the refrigerator near an oven, radiator, or other heat source, nor in a location where the temperature will fall below 55°F (13&#...(1.25 cm) To ensure proper ventilation for 1" (2.54 cm) of installation, cleaning, or removing a light bulb, turn the control (Thermostat, Refrigerator or Freezer Control depending on the model) to your water pressure, call a licensed, qualified plumber. Reverse Osmosis Water Supply: If a reverse osmosis ...
...required to change materials and specifications without notice. or 20-amp fused, grounded electrical supply is recommended that you do not install the refrigerator near an oven, radiator, or other heat source, nor in a location where the temperature will fall below 55°F (13&#...(1.25 cm) To ensure proper ventilation for 1" (2.54 cm) of installation, cleaning, or removing a light bulb, turn the control (Thermostat, Refrigerator or Freezer Control depending on the model) to your water pressure, call a licensed, qualified plumber. Reverse Osmosis Water Supply: If a reverse osmosis ...
Warranty Information
Page 1
...according to instructions attached to or furnished with the product, Maytag will pay for a factory specified replacement compressor to correct non-cosmetic defects in materials or workmanship in this part that prevent function of the refrigerator and that existed when this major appliance was purchased. Service ... and applies only when the major appliance is used for other rights that vary from state to state or province to province. MAYTAG® REFRIGERATION LIMITED WARRANTY FIRST YEAR LIMITED WARRANTY (PARTS AND LABOR) For one year from the date of purchase, when this major appliance ...
...according to instructions attached to or furnished with the product, Maytag will pay for a factory specified replacement compressor to correct non-cosmetic defects in materials or workmanship in this part that prevent function of the refrigerator and that existed when this major appliance was purchased. Service ... and applies only when the major appliance is used for other rights that vary from state to state or province to province. MAYTAG® REFRIGERATION LIMITED WARRANTY FIRST YEAR LIMITED WARRANTY (PARTS AND LABOR) For one year from the date of purchase, when this major appliance ...

Warranty Information
Page 2
...located on the inside wall of the refrigerator compartment. Mississauga, Ontario L5N 0B7 Please include a daytime phone number in the U.S.A., call 1-800-807-6777. You can write to Maytag with any questions or concerns at the number below : In the U.S.A.: Maytag Brand Home Appliances Customer eXperience Center 553 ... for future reference. 23 For assistance or service in your correspondence. For additional product information, in the U.S.A., visit www.maytag.com In Canada, visit www.maytag.ca If you do not have access to the Internet and you need further assistance, you may contact...
...located on the inside wall of the refrigerator compartment. Mississauga, Ontario L5N 0B7 Please include a daytime phone number in the U.S.A., call 1-800-807-6777. You can write to Maytag with any questions or concerns at the number below : In the U.S.A.: Maytag Brand Home Appliances Customer eXperience Center 553 ... for future reference. 23 For assistance or service in your correspondence. For additional product information, in the U.S.A., visit www.maytag.com In Canada, visit www.maytag.ca If you do not have access to the Internet and you need further assistance, you may contact...


