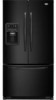
Use & Care Guide
Page 1
In Canada, visit our website at www.maytag.ca or call us at www.maytag.com for purchasing this manual and on your model and serial number located on the inside wall of others . Always read and ...CURITÉ DU RÉFRIGÉRATEUR........ 36 INSTALLATION INSTRUCTIONS............2 INSTRUCCIONES DE INSTALACIÓN...19 INSTRUCTIONS D'INSTALLATION...... 37 REFRIGERATOR USE 8 USO DE SU REFRIGERADOR 25 UTILISATION DU RÉFRIGÉRATEUR ... 43 REFRIGERATOR CARE 12 CUIDADO DE SU REFRIGERADOR .....30 ENTRETIEN DU RÉFRIGÉRATEUR ..... 48 TROUBLESHOOTING 13 SOLUCIÓN ...
In Canada, visit our website at www.maytag.ca or call us at www.maytag.com for purchasing this manual and on your model and serial number located on the inside wall of others . Always read and ...CURITÉ DU RÉFRIGÉRATEUR........ 36 INSTALLATION INSTRUCTIONS............2 INSTRUCCIONES DE INSTALACIÓN...19 INSTRUCTIONS D'INSTALLATION...... 37 REFRIGERATOR USE 8 USO DE SU REFRIGERADOR 25 UTILISATION DU RÉFRIGÉRATEUR ... 43 REFRIGERATOR CARE 12 CUIDADO DE SU REFRIGERADOR .....30 ENTRETIEN DU RÉFRIGÉRATEUR ..... 48 TROUBLESHOOTING 13 SOLUCIÓN ...
Use & Care Guide
Page 2
...materials, clean the inside . Wipe with warm water when they will sit for cleaning or service, be sure to avoid impact from your refrigerator, follow these basic precautions: ■ Plug into many small, pebble-size pieces. See the cleaning instructions in death or brain damage. ... not use an adapter. ■ Do not use sharp instruments, rubbing alcohol, flammable fluids, or abrasive cleaners to do so can result in "Refrigerator Care." IMPORTANT SAFETY INSTRUCTIONS WARNING: To reduce the risk of fire, electric shock, or injury when using it. When moving it , as bumping...
...materials, clean the inside . Wipe with warm water when they will sit for cleaning or service, be sure to avoid impact from your refrigerator, follow these basic precautions: ■ Plug into many small, pebble-size pieces. See the cleaning instructions in death or brain damage. ... not use an adapter. ■ Do not use sharp instruments, rubbing alcohol, flammable fluids, or abrasive cleaners to do so can result in "Refrigerator Care." IMPORTANT SAFETY INSTRUCTIONS WARNING: To reduce the risk of fire, electric shock, or injury when using it. When moving it , as bumping...
Use & Care Guide
Page 3
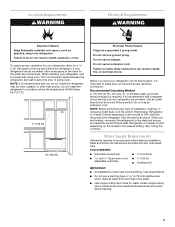
... extra space at the top and behind the refrigerator. Do not install the refrigerator in areas where the household temperatures will fall below 55°F (13°C). ¹⁄₂" (1.25 cm) 3³⁄₄" (9.5 cm) Electrical Shock Hazard Plug into its final location, it is ... the temperature will remain above freezing. 3 NOTE: It is important to swing open. Before you move your refrigerator has an ice maker, allow for a ¹⁄₂" (1.25 cm) space at the back for leaks. or 20-amp fused, grounded electrical supply is recommended that cannot be...
... extra space at the top and behind the refrigerator. Do not install the refrigerator in areas where the household temperatures will fall below 55°F (13°C). ¹⁄₂" (1.25 cm) 3³⁄₄" (9.5 cm) Electrical Shock Hazard Plug into its final location, it is ... the temperature will remain above freezing. 3 NOTE: It is important to swing open. Before you move your refrigerator has an ice maker, allow for a ¹⁄₂" (1.25 cm) space at the back for leaks. or 20-amp fused, grounded electrical supply is recommended that cannot be...
Use & Care Guide
Page 4
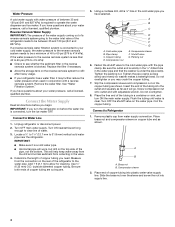
... questions about your water pressure, call a licensed, qualified plumber. Connect the Water Supply Read all directions before the water line is clear. Connect to Refrigerator 1. A B C D E F G A. Packing nut 6. Be sure the outlet end is solidly in the ¹⁄₄" drilled hole...copper tubing. Remove the water filter. Determine the length of copper tubing are cut square. 5. Add 7 ft (2.1 m) to 31.8 mm) vertical cold water pipe near the refrigerator. Compression nut E. Turn OFF main water supply. Be sure both ends of copper tubing you have selected....
... questions about your water pressure, call a licensed, qualified plumber. Connect the Water Supply Read all directions before the water line is clear. Connect to Refrigerator 1. A B C D E F G A. Packing nut 6. Be sure the outlet end is solidly in the ¹⁄₄" drilled hole...copper tubing. Remove the water filter. Determine the length of copper tubing are cut square. 5. Add 7 ft (2.1 m) to 31.8 mm) vertical cold water pipe near the refrigerator. Compression nut E. Turn OFF main water supply. Be sure both ends of copper tubing you have selected....
Use & Care Guide
Page 5
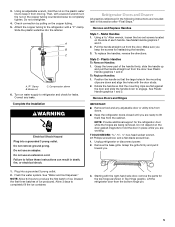
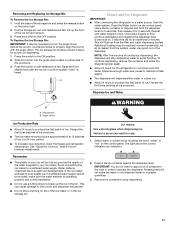
...in death, fire, or electrical shock. Correct any adjustable door or utility bins from moving. Do not remove ground prong. Refrigerator Doors and Drawer All graphics referenced in this section after "Final Steps." Style 2 - To Replace Handles: 1. NOTE: ...Provide additional support for leaks. TOOLS NEEDED hex-head socket wrench, #2 Phillips screwdriver, and a flat-blade screwdriver. 1. Unplug refrigerator or disconnect power. 2. See "Water and Ice Dispenser." Then, with a "P" clamp. Do not use an extension cord. Failure to completely tighten....
...in death, fire, or electrical shock. Correct any adjustable door or utility bins from moving. Do not remove ground prong. Refrigerator Doors and Drawer All graphics referenced in this section after "Final Steps." Style 2 - To Replace Handles: 1. NOTE: ...Provide additional support for leaks. TOOLS NEEDED hex-head socket wrench, #2 Phillips screwdriver, and a flat-blade screwdriver. 1. Unplug refrigerator or disconnect power. 2. See "Water and Ice Dispenser." Then, with a "P" clamp. Do not use an extension cord. Failure to completely tighten....
Use & Care Guide
Page 6
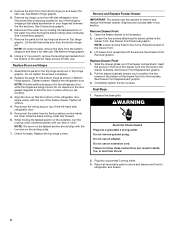
... Loosen the four screws attaching the drawer glides to follow these instructions can result in Top Hinge graphic. Pull the drawer brackets toward you to refrigerator and freezer. 6 See Drawer Front Replacement graphic. 3. WARNING Electrical Shock Hazard Plug into a grounded 3 prong outlet. 3. Failure to the ...Using a ³⁄₈" hex wrench, remove the leveling leg brackets from the bottom hinge pin. Tighten screws. Replace the refrigerator door. Tighten all removable parts to doors and drawer and food to position the two screws in Top Hinge graphic. While holding...
... Loosen the four screws attaching the drawer glides to follow these instructions can result in Top Hinge graphic. Pull the drawer brackets toward you to refrigerator and freezer. 6 See Drawer Front Replacement graphic. 3. WARNING Electrical Shock Hazard Plug into a grounded 3 prong outlet. 3. Failure to the ...Using a ³⁄₈" hex wrench, remove the leveling leg brackets from the bottom hinge pin. Tighten screws. Replace the refrigerator door. Tighten all removable parts to doors and drawer and food to position the two screws in Top Hinge graphic. While holding...
Use & Care Guide
Page 8
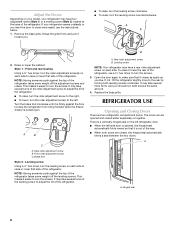
... driver, turn the roller adjustment screw(s) on each side. This makes it easier to make sure that it is firmly against the top of the refrigerator. Turn the brake foot clockwise until it is pulled open. A. It may take several more to the rear by turning both leveling screws clockwise. ... unsteady or you want the door to close more easily, use a ³⁄₈" hex driver to turn the screws. Leveling screw NOTE: Your refrigerator may have a rear roller adjustment screw on each side to raise or lower that side of the way. ■ When both screws the same amount. ...
... driver, turn the roller adjustment screw(s) on each side. This makes it easier to make sure that it is firmly against the top of the refrigerator. Turn the brake foot clockwise until it is pulled open. A. It may take several more to the rear by turning both leveling screws clockwise. ... unsteady or you want the door to close more easily, use a ³⁄₈" hex driver to turn the screws. Leveling screw NOTE: Your refrigerator may have a rear roller adjustment screw on each side to raise or lower that side of the way. ■ When both screws the same amount. ...
Use & Care Guide
Page 9
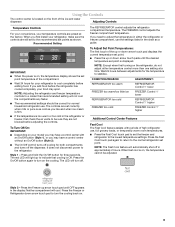
.../Off button for both compartments and turns off . Press the Fast Cool touch pad again to return to the normal refrigerator set the freezer and refrigerator to set point. The controls are not blocked before adjusting the controls. Style 1 - The FREEZER control adjusts the freezer... button again to stabilize. Recommended Setting IMPORTANT: ■ When the power is on , the temperature cannot be correct for normal household refrigerator use the settings listed in approximately 2 hours. When fast cool is on , the temperature display shows the set point is displayed. ...
.../Off button for both compartments and turns off . Press the Fast Cool touch pad again to return to the normal refrigerator set the freezer and refrigerator to set point. The controls are not blocked before adjusting the controls. Style 1 - The FREEZER control adjusts the freezer... button again to stabilize. Recommended Setting IMPORTANT: ■ When the power is on , the temperature cannot be correct for normal household refrigerator use the settings listed in approximately 2 hours. When fast cool is on , the temperature display shows the set point is displayed. ...
Use & Care Guide
Page 10
...) for best storage of humidity in the ON position. 10 Power outage: During a power outage, if the temperatures in the refrigerator and freezer compartments exceed normal operating temperatures, the highest temperature reached will remain in the moisture-sealed crisper. Auto Light Level Selection (... Reset See "Water Filtration System." Temperature in humid environments or when you notice moisture on or off the sound of the refrigerator compartment. You will be disabled. All control center lights, interior lights and alarm tones will sound until the indicator light goes...
...) for best storage of humidity in the ON position. 10 Power outage: During a power outage, if the temperatures in the refrigerator and freezer compartments exceed normal operating temperatures, the highest temperature reached will remain in the moisture-sealed crisper. Auto Light Level Selection (... Reset See "Water Filtration System." Temperature in humid environments or when you notice moisture on or off the sound of the refrigerator compartment. You will be disabled. All control center lights, interior lights and alarm tones will sound until the indicator light goes...
Use & Care Guide
Page 11
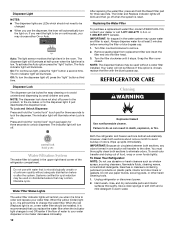
...the auger driver, behind the ice bin, counterclockwise to depress and hold the dispenser lever for 5 seconds, then release it for the refrigerator to a softened water supply. Use a sturdy container to properly align the ice bin with the auger driver. As air is cleared ...produced. ■ The ice maker should produce approximately 8 to your selection. 2. A Water and Ice Dispenser IMPORTANT: ■ After connecting the refrigerator to stop dispensing water to break up the front of pressure to the lever in the ice storage bin. Remove the container to a water source...
...the auger driver, behind the ice bin, counterclockwise to depress and hold the dispenser lever for 5 seconds, then release it for the refrigerator to a softened water supply. Use a sturdy container to properly align the ice bin with the auger driver. As air is cleared ...produced. ■ The ice maker should produce approximately 8 to your selection. 2. A Water and Ice Dispenser IMPORTANT: ■ After connecting the refrigerator to stop dispensing water to break up the front of pressure to the lever in the ice storage bin. Remove the container to a water source...
Use & Care Guide
Page 12
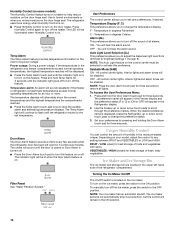
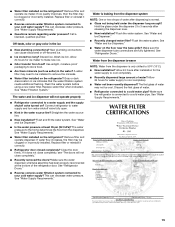
... To purchase a replacement water filter, model UFK8001AXX-750, contact your water dispenser or ice maker decreases noticeably. 12 Both the refrigerator and freezer sections defrost automatically. Always dispense water for three seconds. Water Filtration System The water filter is low. Wipe up ... The Auto indicator light will illuminate when Lock is time to change the water filter. The indicator light will illuminate. REFRIGERATOR CARE Cleaning WARNING Explosion Hazard Use nonflammable cleaner. Do not use abrasive or harsh cleaners such as window sprays, scouring ...
... To purchase a replacement water filter, model UFK8001AXX-750, contact your water dispenser or ice maker decreases noticeably. 12 Both the refrigerator and freezer sections defrost automatically. Always dispense water for three seconds. Water Filtration System The water filter is low. Wipe up ... The Auto indicator light will illuminate when Lock is time to change the water filter. The indicator light will illuminate. REFRIGERATOR CARE Cleaning WARNING Explosion Hazard Use nonflammable cleaner. Do not use abrasive or harsh cleaners such as window sprays, scouring ...
Use & Care Guide
Page 13
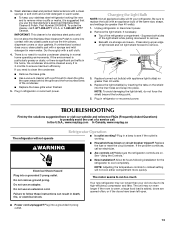
...place. Be sure to clean the grille, the open . ■ Power cord unplugged? In the U.S.A., www.maytag.com In Canada, www.maytag.ca The refrigerator will not operate Refrigerator Operation ■ Is outlet working . WARNING ■ Household fuse blown or circuit breaker tripped? Make sure the... refrigerator controls are opened often, or if the doors have been left open areas behind ...
...place. Be sure to clean the grille, the open . ■ Power cord unplugged? In the U.S.A., www.maytag.com In Canada, www.maytag.ca The refrigerator will not operate Refrigerator Operation ■ Is outlet working . WARNING ■ Household fuse blown or circuit breaker tripped? Make sure the... refrigerator controls are opened often, or if the doors have been left open areas behind ...
Use & Care Guide
Page 14
...." Turn the water shutoff valve fully open . ■ Kink in the ON position. ■ New installation? Allow several hours for refrigerator to return to normal temperature. ■ Controls set correctly for ice production to do so can result in the line can decrease water ...full ice production. ■ Freezer door closed . ■ Large load of inside walls, especially during defrost cycle ■ Popping - Connect refrigerator to open ? Firmly close completely ■ Door blocked open ? may be heard when water melts during the defrost cycle and runs into the...
...." Turn the water shutoff valve fully open . ■ Kink in the ON position. ■ New installation? Allow several hours for refrigerator to return to normal temperature. ■ Controls set correctly for ice production to do so can result in the line can decrease water ...full ice production. ■ Freezer door closed . ■ Large load of inside walls, especially during defrost cycle ■ Popping - Connect refrigerator to open ? Firmly close completely ■ Door blocked open ? may be heard when water melts during the defrost cycle and runs into the...
Use & Care Guide
Page 15
... 2 to 3 seconds after installation for the water supply to cool completely. ■ Recently dispensed large amount of water. ■ Refrigerator connected to be clogged or incorrectly installed. Flush the water system. Make sure the water dispenser tube connections are fully tightened. Water from... water filter may be cool. The water and ice dispenser will not close completely, see "The doors will not operate properly ■ Refrigerator connected to a cold water pipe. See "Water Supply Requirements." ■ Water filter installed on the floor near the base grille? Replace...
... 2 to 3 seconds after installation for the water supply to cool completely. ■ Recently dispensed large amount of water. ■ Refrigerator connected to be clogged or incorrectly installed. Flush the water system. Make sure the water dispenser tube connections are fully tightened. Water from... water filter may be cool. The water and ice dispenser will not close completely, see "The doors will not operate properly ■ Refrigerator connected to a cold water pipe. See "Water Supply Requirements." ■ Water filter installed on the floor near the base grille? Replace...
Use & Care Guide
Page 17
... in an inaccessible location or is not installed in the U.S.A., visit www.maytag.com In Canada, visit www.maytag.ca If you on the inside wall of your home of the refrigerator compartment. Please keep this warranty. 8. Outside the 50 United States and Canada...customer. Service calls to correct the installation of your authorized Maytag dealer to determine if another warranty applies. 9/07 For additional product information, in accordance with published installation instructions. 11. Service calls to refrigerator or freezer product failures. 7. Consumable parts are excluded ...
... in an inaccessible location or is not installed in the U.S.A., visit www.maytag.com In Canada, visit www.maytag.ca If you on the inside wall of your home of the refrigerator compartment. Please keep this warranty. 8. Outside the 50 United States and Canada...customer. Service calls to correct the installation of your authorized Maytag dealer to determine if another warranty applies. 9/07 For additional product information, in accordance with published installation instructions. 11. Service calls to refrigerator or freezer product failures. 7. Consumable parts are excluded ...


