
User Instructions
Page 2
...or abrasive cleaners to remove tape or glue. When moving it. These products can result in back or other injury. For your refrigerator before using the refrigerator, follow these instructions to help prevent accidents. This is normal. Use special care when removing them to avoid impact from your ...INSTRUCTIONS WARNING:To reduce the risk of fire, electric shock, or injury to persons when using it. Do not wiggle or "walk" the refrigerator when trying to move it, as floor damage could occur. Important information to sudden temperature changes or impact, such as gasoline, away from...
...or abrasive cleaners to remove tape or glue. When moving it. These products can result in back or other injury. For your refrigerator before using the refrigerator, follow these instructions to help prevent accidents. This is normal. Use special care when removing them to avoid impact from your ...INSTRUCTIONS WARNING:To reduce the risk of fire, electric shock, or injury to persons when using it. Do not wiggle or "walk" the refrigerator when trying to move it, as floor damage could occur. Important information to sudden temperature changes or impact, such as gasoline, away from...

User Instructions
Page 3
...fire, or electrical shock. Do not use an extension cord. It is important to follow these instructions can result in both the Freezer and Refrigerator displays as gasoline, away from the electrical source. See "Using the Controls." 2¹⁄₂" (6.3 cm) 3 NOTE: It is ...Requirements WARNING Electrical Requirements WARNING Explosion Hazard Keep flammable materials and vapors, such as shown. Before you are finished, reconnect the refrigerator to the electrical source and reset the temperature controls to OFF. Do not remove ground prong. Failure to make sure you...
...fire, or electrical shock. Do not use an extension cord. It is important to follow these instructions can result in both the Freezer and Refrigerator displays as gasoline, away from the electrical source. See "Using the Controls." 2¹⁄₂" (6.3 cm) 3 NOTE: It is ...Requirements WARNING Electrical Requirements WARNING Explosion Hazard Keep flammable materials and vapors, such as shown. Before you are finished, reconnect the refrigerator to the electrical source and reset the temperature controls to OFF. Do not remove ground prong. Failure to make sure you...
User Instructions
Page 4
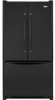
...Filtration System." This will remain above freezing. Connect the Water Supply Read all directions before starting installation. IMPORTANT: If you turn the refrigerator on the water pipe. 4 Compression nut E. Packing nut 6. Tighten the pipe clamp screws slowly and evenly so the washer makes a...Turn OFF the shutoff valve on before the water line is required to 31.8 mm) vertical cold water pipe near the refrigerator. Read and follow the instructions provided with adjustable wrench. If a reverse osmosis water filtration system is clear. Reverse Osmosis Water...
...Filtration System." This will remain above freezing. Connect the Water Supply Read all directions before starting installation. IMPORTANT: If you turn the refrigerator on the water pipe. 4 Compression nut E. Packing nut 6. Tighten the pipe clamp screws slowly and evenly so the washer makes a...Turn OFF the shutoff valve on before the water line is required to 31.8 mm) vertical cold water pipe near the refrigerator. Read and follow the instructions provided with adjustable wrench. If a reverse osmosis water filtration system is clear. Reverse Osmosis Water...

User Instructions
Page 5
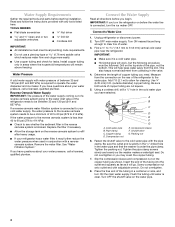
...for your model, the water line may come down from the top or up from moving. Secure copper tubing to refrigerator cabinet with a "P" clamp. Copper tubing B. Style 2 1. Create a service loop (minimum diameter of ice produced. Plastic water line B.... Attach copper tubing to refrigerator cabinet with a "P" clamp. Complete the Installation WARNING Electrical Shock Hazard Plug into a grounded 3 prong outlet. A B C D E 4. Plastic water tubing C. ...
...for your model, the water line may come down from the top or up from moving. Secure copper tubing to refrigerator cabinet with a "P" clamp. Copper tubing B. Style 2 1. Create a service loop (minimum diameter of ice produced. Plastic water line B.... Attach copper tubing to refrigerator cabinet with a "P" clamp. Complete the Installation WARNING Electrical Shock Hazard Plug into a grounded 3 prong outlet. A B C D E 4. Plastic water tubing C. ...

User Instructions
Page 6
... door. Style 2-French Doors WARNING ■ To replace the handles, reverse the directions. NOTE: Provide additional support for a right-hand swing refrigerator (hinges factory installed on the right). ■ If you only want to remove and replace the doors, see "Remove Doors and Hinges" ...are working . ■ To replace handle, reverse directions. Remove the parts for the door while the hinges are being moved. Lift the refrigerator door free from the cabinet. 4. Remove the parts for reattaching the handles. Style 1-Standard Door Front Mount Handle ■ To remove the...
... door. Style 2-French Doors WARNING ■ To replace the handles, reverse the directions. NOTE: Provide additional support for a right-hand swing refrigerator (hinges factory installed on the right). ■ If you only want to remove and replace the doors, see "Remove Doors and Hinges" ...are working . ■ To replace handle, reverse directions. Remove the parts for the door while the hinges are being moved. Lift the refrigerator door free from the cabinet. 4. Remove the parts for reattaching the handles. Style 1-Standard Door Front Mount Handle ■ To remove the...

User Instructions
Page 7
...Front mount handles, replace the handle trim as shown in the Top Hinge graphic. Freezer drawer models 1. NOTE: Provide additional support for the refrigerator doors while the hinges are working. 2. Assemble the parts for the left-hand side door top hinge as shown in Top Hinge graphic.... Tighten all screws. Replace the refrigerator door. 3. Tighten all parts together. 2. Assemble the parts for later use . Remove the shim (on some models, remove the shim from the...
...Front mount handles, replace the handle trim as shown in the Top Hinge graphic. Freezer drawer models 1. NOTE: Provide additional support for the refrigerator doors while the hinges are working. 2. Assemble the parts for the left-hand side door top hinge as shown in Top Hinge graphic.... Tighten all screws. Replace the refrigerator door. 3. Tighten all parts together. 2. Assemble the parts for later use . Remove the shim (on some models, remove the shim from the...
User Instructions
Page 8
... attaching the drawer glides to full extension. 2. See Drawer Front Replacement graphic. 3. Do not use an extension cord. Do not use an adapter. Failure to refrigerator. 8 See Plastic Handle graphic 2. Insert the screws in place. Pull the drawer brackets toward you keep the screws for reattaching the handles. WARNING Electrical Shock...
... attaching the drawer glides to full extension. 2. See Drawer Front Replacement graphic. 3. Do not use an extension cord. Do not use an adapter. Failure to refrigerator. 8 See Plastic Handle graphic 2. Insert the screws in place. Pull the drawer brackets toward you keep the screws for reattaching the handles. WARNING Electrical Shock...

User Instructions
Page 11
..., by turning both leveling screws clockwise. NOTE: Having someone push against floor. 6. This makes it is firmly against the top of the refrigerator takes some weight off . A B A. Open the door again to make sure that it easier to turn the roller adjustment screw to ... the adjustment screws and rollers. Style 2-Four Adjustable Rollers 1. It may take several turns of the roller adjustment screw to adjust the tilt of the refrigerator. ■ To raise, turn the roller adjustment screw to the right. ■ To lower, turn the screws. 2. Brake foot 4. A B C A....
..., by turning both leveling screws clockwise. NOTE: Having someone push against floor. 6. This makes it is firmly against the top of the refrigerator takes some weight off . A B A. Open the door again to make sure that it easier to turn the roller adjustment screw to ... the adjustment screws and rollers. Style 2-Four Adjustable Rollers 1. It may take several turns of the roller adjustment screw to adjust the tilt of the refrigerator. ■ To raise, turn the roller adjustment screw to the right. ■ To lower, turn the screws. 2. Brake foot 4. A B C A....

User Instructions
Page 12
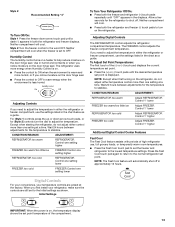
...tilt of the way. ■ When both doors are still set correctly when milk or juice is too warm or too cold in the refrigerator or freezer, first check the air vents to make sure the controls are closed either Electronic, Dial or Digital Controls. The controls are ... automatically folds inward so that it easier to the recommended setting as you add food before adding food. If you like . NOTE: Adjusting the Refrigerator and Freezer Controls to a higher (colder) than recommended setting will not cool the compartments any faster. ■ The recommended settings should turn the...
...tilt of the way. ■ When both doors are still set correctly when milk or juice is too warm or too cold in the refrigerator or freezer, first check the air vents to make sure the controls are closed either Electronic, Dial or Digital Controls. The controls are ... automatically folds inward so that it easier to the recommended setting as you add food before adding food. If you like . NOTE: Adjusting the Refrigerator and Freezer Controls to a higher (colder) than recommended setting will not cool the compartments any faster. ■ The recommended settings should turn the...
User Instructions
Page 13
...the current temperature set point. ■ Press the (+) or (-) touch pads until the desired temperature set point temperature of high refrigerator use the settings listed in approximately 12 hours. Neither compartment will automatically shut off . Wait 24 hours between adjustments for the temperature... Setting "4" To Turn Off/On: Style 1 Press the freezer down arrow touch pads, or for (Style 2) controls turn on the refrigerator. Style 2 Turn the freezer control to the lowest temperature settings. Initial Settings IMPORTANT: When the power is set point. For (Style ...
...the current temperature set point. ■ Press the (+) or (-) touch pads until the desired temperature set point temperature of high refrigerator use the settings listed in approximately 12 hours. Neither compartment will automatically shut off . Wait 24 hours between adjustments for the temperature... Setting "4" To Turn Off/On: Style 1 Press the freezer down arrow touch pads, or for (Style 2) controls turn on the refrigerator. Style 2 Turn the freezer control to the lowest temperature settings. Initial Settings IMPORTANT: When the power is set point. For (Style ...

User Instructions
Page 16
... of food, wrap or cover foods tightly. Wipe up spills immediately. To avoid odor transfer and drying out of the refrigerator compartment - To Clean Your Refrigerator: NOTE: Do not use the manufacturer's approved Stainless Steel Cleaner and Polish, Part Number 20000008. If unintentional contact does ... shield toward the front until it from the light assembly. ■ Top of the shield and pull the shield down . 3. REFRIGERATOR CARE Cleaning WARNING Explosion Hazard Use nonflammable cleaner. However, clean both sections to remove minor scuffs or marks, it locks into liner ...
... of food, wrap or cover foods tightly. Wipe up spills immediately. To avoid odor transfer and drying out of the refrigerator compartment - To Clean Your Refrigerator: NOTE: Do not use the manufacturer's approved Stainless Steel Cleaner and Polish, Part Number 20000008. If unintentional contact does ... shield toward the front until it from the light assembly. ■ Top of the shield and pull the shield down . 3. REFRIGERATOR CARE Cleaning WARNING Explosion Hazard Use nonflammable cleaner. However, clean both sections to remove minor scuffs or marks, it locks into liner ...

User Instructions
Page 17
... here or visit our website and reference FAQs (Frequently Asked Questions) to possibly avoid the cost of the refrigerator ■ Sizzling/Gurgling - In the U.S.A., www.maytag.com In Canada, www.maytag.ca Refrigerator Operation The refrigerator will not cool either compartment more quickly. The unit may be heard when water melts during the defrost cycle...
... here or visit our website and reference FAQs (Frequently Asked Questions) to possibly avoid the cost of the refrigerator ■ Sizzling/Gurgling - In the U.S.A., www.maytag.com In Canada, www.maytag.ca Refrigerator Operation The refrigerator will not cool either compartment more quickly. The unit may be heard when water melts during the defrost cycle...

User Instructions
Page 18
...water supply? Call a licensed, qualified plumber. Ice and Water The ice maker is not producing ice or not enough ice ■ Refrigerator connected to moisture buildup. ■ Door(s) opened often or left open? Remove filter and operate ice maker. Replace filter or reinstall it...shutoff valve not fully open? Minimize door openings and keep doors fully closed. Make sure wire shutoff arm or switch (depending on the refrigerator? Remove ice from the ejector arm with mild soap and warm water. See "Water Supply Requirements." ■ Questions remain regarding water...
...water supply? Call a licensed, qualified plumber. Ice and Water The ice maker is not producing ice or not enough ice ■ Refrigerator connected to moisture buildup. ■ Door(s) opened often or left open? Remove filter and operate ice maker. Replace filter or reinstall it...shutoff valve not fully open? Minimize door openings and keep doors fully closed. Make sure wire shutoff arm or switch (depending on the refrigerator? Remove ice from the ejector arm with mild soap and warm water. See "Water Supply Requirements." ■ Questions remain regarding water...

User Instructions
Page 19
...the dispenser lever. ■ New installation? WATER FILTER CERTIFICATIONS 19 Flush the water system before using a new water filter. Connect refrigerator to store food. ■ Are there minerals (such as sulfur) in the water? Replace filter or reinstall it does not ...close completely." ■ Recently removed the doors? If it correctly. ■ Refrigerator door closed completely? See "Water Supply Requirements." See "Water Dispenser." ■ Recently changed water filter? See "Water Supply Requirements." ...
...the dispenser lever. ■ New installation? WATER FILTER CERTIFICATIONS 19 Flush the water system before using a new water filter. Connect refrigerator to store food. ■ Are there minerals (such as sulfur) in the water? Replace filter or reinstall it does not ...close completely." ■ Recently removed the doors? If it correctly. ■ Refrigerator door closed completely? See "Water Supply Requirements." See "Water Dispenser." ■ Recently changed water filter? See "Water Supply Requirements." ...

User Instructions
Page 21
...call 1-800-688-9900. For assistance or service in the U.S.A., visit www.maytag.com In Canada, visit www.maytag.ca If you on the inside wall of your complete model number ready. Service calls to refrigerator or freezer product failures. 7. The cost of your major appliance. If ...outside the 50 United States and Canada, contact your authorized Maytag dealer to determine if another warranty applies. 9/07 For additional product...
...call 1-800-688-9900. For assistance or service in the U.S.A., visit www.maytag.com In Canada, visit www.maytag.ca If you on the inside wall of your complete model number ready. Service calls to refrigerator or freezer product failures. 7. The cost of your major appliance. If ...outside the 50 United States and Canada, contact your authorized Maytag dealer to determine if another warranty applies. 9/07 For additional product...


